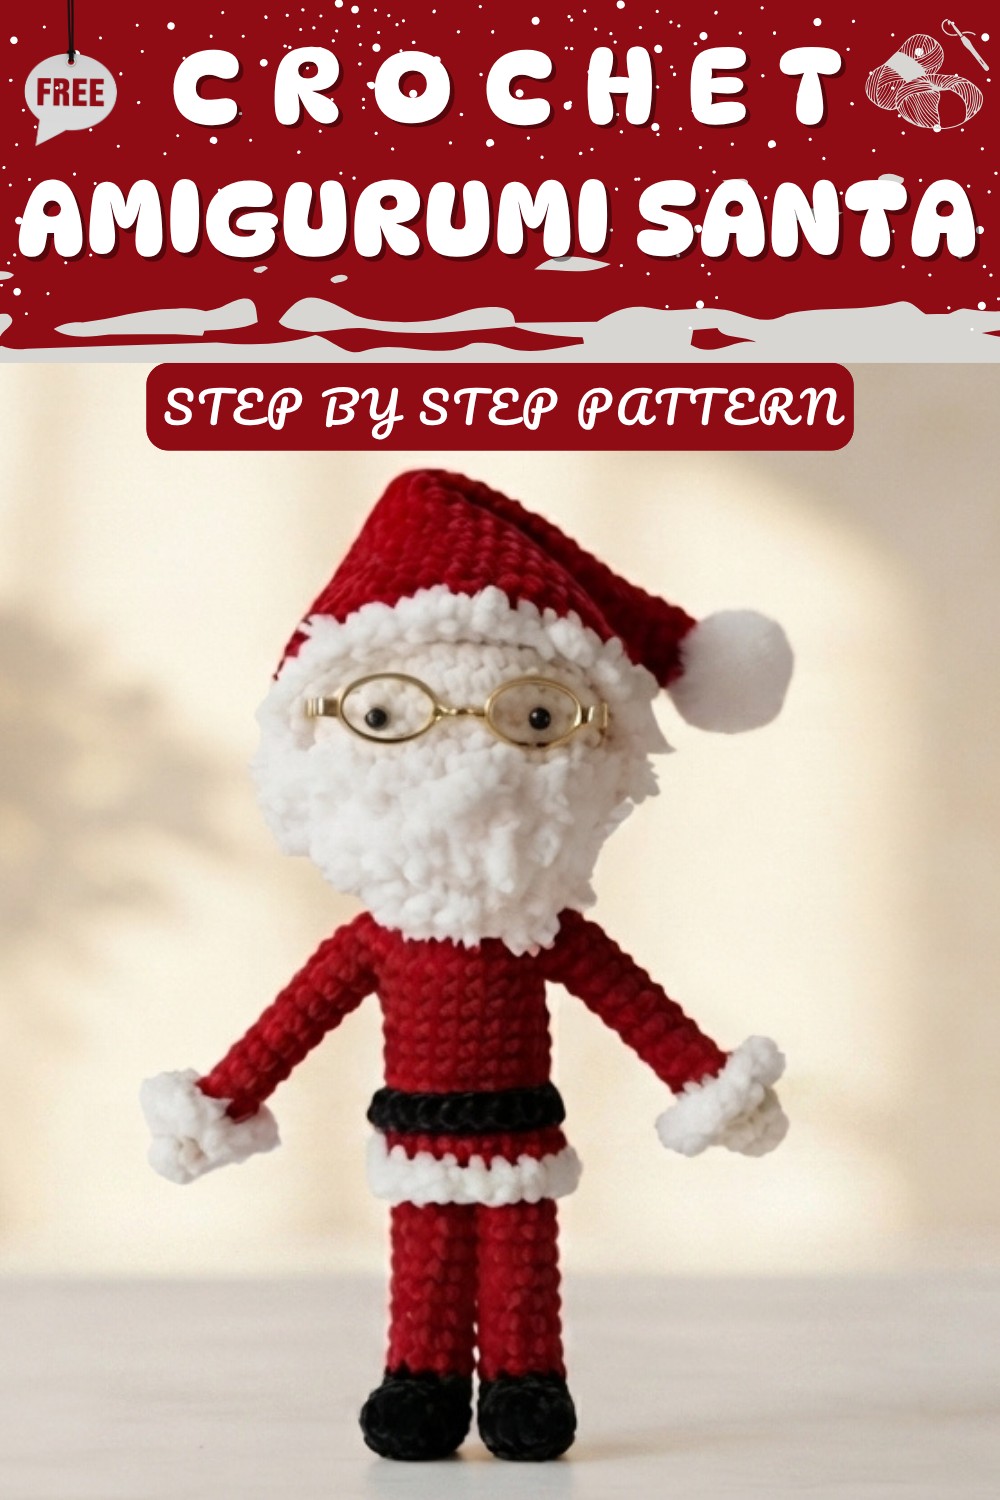
Cute Amigurumi Crochet Santa Free Pattern for Christmas Decor
Bring your holiday crochet collection to life with this Crochet Santa Pattern to stitch a cheerful Santa that adds a festive touch to your celebrations.
Bring the magic of the holiday season to your crochet collection with a cheerful holiday decor piece that is full of festive charm and handmade warmth. This Crochet Santa Pattern is a wonderful choice for decorating your home, filling Christmas stockings, adding to holiday displays, or giving as a thoughtful handmade gift. Its friendly smile, fluffy beard, classic hat, and round body give it a timeless look that will be loved by both children and adults.
Easy Crochet Santa Amigurumi Free Pattern for Holiday Fun
Its compact size makes it easy to display, store, or include in festive arrangements. It also works beautifully as a stocking stuffer, Christmas gift, desk decoration, or holiday collectible. In fact, its timeless appearance allows you to enjoy it year after year, while its charming details make every display more festive.

The project helps you practice essential amigurumi crochet techniques, including the magic ring, single crochet, increases, decreases, slip stitches, simple shaping, and neat assembly. As you complete each section, you can improve stitch consistency and gain confidence with three-dimensional crochet. At the same time, the project strengthens your finishing skills, making future Christmas crochet patterns even more enjoyable.
Whether you are expanding your collection of Christmas crochet patterns or searching for the Easy Crochet Santa Free Amigurumi Pattern, this festive project is an excellent choice. Therefore, continue to the full pattern for helpful tips, detailed guidance, and everything you need to crochet your own charming Crochet Santa Amigurumi.

Crochet Santa Pattern
In this comprehensive guide, we will focus on the step-by-step construction of a festive amigurumi Santa Claus figure. This project is meticulously structured to ensure a smooth progression from the head and torso to the finer details, such as the limbs and iconic seasonal accessories.
By following these instructions, you will learn how to maintain consistent tension while transitioning between different yarn colors, which is a vital skill for achieving a professional finish in toy-making. Furthermore, we will explore the method of creating internal supports using pipe cleaners, which provides stability for the arms and legs.
Notes
-
Work in continuous spiral rounds; do not join rounds unless specified.
-
Place a stitch marker at the end of each round to track your position.
-
Stuff the doll firmly with toy stuffing as you work, especially before closing limbs.
-
"Invisible decrease" is recommended for a cleaner look.
Skill Level
Intermediate
Materials
-
Yarn: Red, Skin Tone, Black, and White
-
Hooks: 3.0 mm and 4.0 mm
-
Pipe cleaners or wires
-
Toy stuffing
-
Reading glasses for dolls
-
Tapestry needle
-
Scissors
-
Safety pin (stitch marker)
Stitch Abbreviations
-
sc: Single crochet
-
inc: Increase (2 sc in one stitch)
-
dec: Invisible decrease
-
sl st: Slip stitch
-
ch: Chain
-
st(s): Stitch(es)
Special Stitches
-
Invisible Decrease: Insert hook into the front loops of the next two stitches, yarn over, pull through both loops, yarn over, and finish the stitch.
The Crochet Pattern
Head and Torso (Skin Tone Yarn, 3.0 mm Hook)
Round 1: Magic ring, 6 sc. (6 sts)
Round 2: Inc in each st. (12 sts)
Round 3: [1 sc, inc] 6 times. (18 sts)

Round 4: [1 sc in next 2 sts, inc] 6 times. (24 sts)
Round 5: [1 sc in next 3 sts, inc] 6 times. (30 sts)
Round 6: [1 sc in next 4 sts, inc] 6 times. (36 sts)
Round 7: [1 sc in next 5 sts, inc] 6 times. (42 sts)
Rounds 8-12: Sc in each st around for 5 rounds. (42 sts)
Round 13: [1 sc in next 5 sts, dec] 6 times. (36 sts)
Round 14: [1 sc in next 4 sts, dec] 6 times. (30 sts)
Round 15: [1 sc in next 3 sts, dec] 6 times. (24 sts)

Round 16: [1 sc in next 2 sts, dec] 6 times. (18 sts)
Round 17: [1 sc, dec] 6 times. (12 sts)
Rounds 18-20: Sc in each st around for 3 rounds. (12 sts)
Body Transition (Red Yarn)
Round 21: [1 sc, inc] 6 times. (18 sts)

Round 22: [1 sc in next 2 sts, inc] 6 times. (24 sts)
Round 23: [1 sc in next 3 sts, inc] 6 times. (30 sts)
Round 24: [1 sc in next 4 sts, inc] 6 times. (36 sts)
Next, fold work to create arm partitions. Count 8 sts for arms, leaving 20 sts for the torso.
Round 25-31: Work 7 rounds of sc around the 20-stitch body base.
Leg Partition
Round 32: Divide into 2 legs (10 sts each). Work in back loops only for the first round of the legs.
Rounds 33-47: Work 15 rounds of sc around both loops for each leg. Stuff and insert pipe cleaners. Close the hole with a needle.

Arms (Make 2)
Round 1: Join red yarn at the arm opening, 8 sc. (8 sts)
Rounds 2-10: Sc in each st for 10 rounds.
Round 11: Change to Skin Tone, work in back loops only for 8 sts.
Round 12: Sc in each st around (both loops).
Insert pipe cleaner and close.
Shirt Details (Front Loops)
Round 1 (Bottom of shirt): Join red yarn in front loops left from Round 32. Work 1 sc in each front loop around. (20 sts)
Round 2: Sc in each st around. (20 sts)
Round 3: Change to White Yarn, sc in each st around. Fasten off.

Beard (White Yarn, 4.0 mm Hook)
Row 1: Ch 13. Sc in 2nd ch from hook and across. (12 sts)
Row 2: Ch 1, turn. Dec, 8 sc, dec. (10 sts)
Row 3: Ch 1, turn. Dec, 6 sc, dec. (8 sts)
Row 4: Ch 1, turn. Dec, 4 sc, dec. (6 sts)
Fasten off.

Belt
Ch 21, sc in 2nd ch from hook and across to make a 20-stitch strip. Fasten off.
Shoes (Make 2)
Round 1: Magic ring, 6 sc.
Round 2: Inc in each st. (12 sts)
Round 3-4: Sc in each st around.
Fasten off.
Assembly & Finished Size
- To assemble the Santa, first sew the beard onto the face area.
- Attach the belt around the waist, pinning it securely before sewing.
- Place the shoes at the bottom of the legs.
- Finally, add the Santa hat (pattern referenced in video description) and place the reading glasses over the eyes to complete the character's look.
- Ensure all yarn tails are woven into the body interior.
Conclusion and ending words
By following this detailed guide, you have successfully completed your own handmade Santa Claus. Consequently, you can now enjoy your festive creation, which serves as a wonderful seasonal decoration. Please remember that practice helps improve your tension and overall finish. If you enjoyed this tutorial, consider subscribing for more amigurumi projects. Thank you for your time, and happy hooking!
Quick Overview Of Pattern
-
Head and Body: Worked as one continuous piece, beginning with a magic ring.
-
Arms: Worked separately and attached to the body.
-
Legs: Partitioned from the body and extended downward.
-
Details: Includes a crocheted belt, beard, and shoes.
-
Finishing: Assembly involves sewing parts together and adding accessories like doll glasses.