
Crochet Kitty Ice Cream Amigurumi Free Pattern with Sweet Details
Bring cuteness to your crochet projects with this Free Crochet Kitty Ice Cream Amigurumi Pattern, helping you create a fun and unique design everyone will adore.
If you’re anything like me, you can’t resist cute and quirky little crochet projects that brighten up your day. That’s why I absolutely loved making the Free Crochet Kitty Ice Cream Amigurumi pattern! Imagine a tiny, purr-fect kitty snuggled right on top of an ice cream cone, that’s exactly what this fun amigurumi is. It’s a playful combo of two favorites adorable cats and yummy ice cream rolled into one sweet crochet toy that’s sure to make you smile.
Easy Free Crochet Kitty Ice Cream Amigurumi Pattern for Cute Decor
This little kitty ice cream is nothing short of adorable, with its soft, smooth texture and perfectly round shape. The “ice cream” swirl sits on a classic cone, topped with a kitty face featuring cute ears, little whiskers, and big eyes full of personality. You can choose bright, fun colors or soft pastels to really make it pop. It’s small and squeezable, making it a perfect desk buddy, keychain charm, or just a happy decoration for your favorite spot. Trust me, it’s hard not to grin every time you see it!

Don’t worry if you’re new to crochet—this pattern is beginner-friendly and just uses simple single crochet stitches worked in rounds. It’s straightforward, fun, and quick enough to keep you hooked (pun intended!). If you know the basics of amigurumi or are ready for a cute challenge, this project will be a blast.
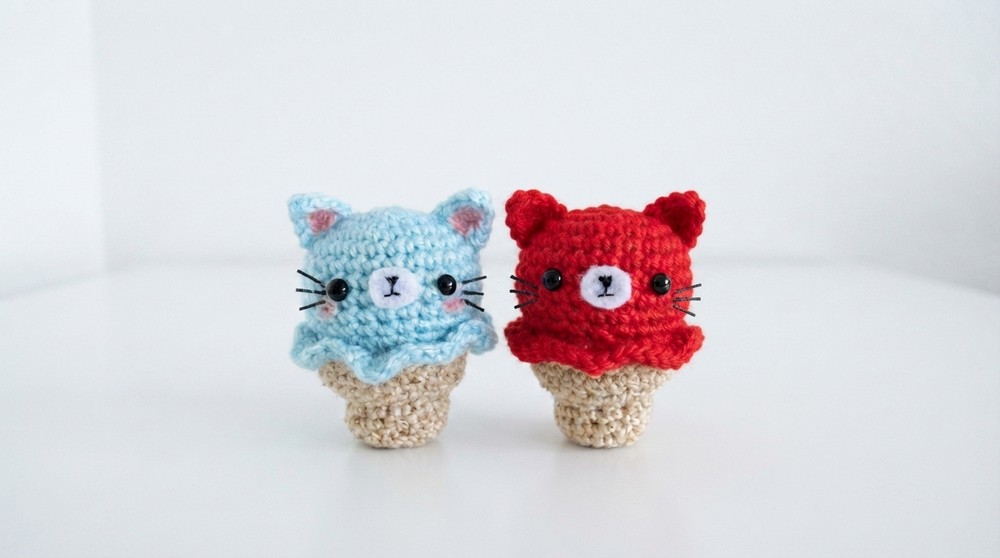
This free crochet Kitty Ice Cream Amigurumi makes a fantastic gift that’s cute, unique, and full of personality. Whether you’re gifting it to a friend, saving it as a collectible, or just making yourself smile, this project is sure to bring some joy and fun to your crochet world. So, grab your yarn and hook, and get ready to whip up this sweet treat that’s too cute to resist.
Crochet Kitty Ice Cream Pattern
This pattern walks you through creating an adorable tiny crochet kitty ice cream. Designed to be small and charming, this cute item combines simple crochet techniques to form a soft serve ice cream shape with a kitty cat twist. The process covers making the spherical ice cream top, the cone base, adding texture, and the final touches like ears and face details. Grab your yarn and hook, and let’s make this sweet project step by step.
Quick Overview of Pattern
- Create a basic crochet ball for the ice cream scoop.
- Work rounds expanding and decreasing to shape the ball.
- Crochet the cone base with a cylinder shape using a 90° angle technique.
- Add a textured rim for the ice cream cone using layered knots.
- Attach tiny crochet ears to the top.
- Add a small felt face with sewn or painted features.
- Attach plastic eyes and add blush using eyeshadow for a cute effect.
- Use hot glue for assembly and attaching small pieces.
Notes
- The pattern primarily uses simple single crochet-style knots and chains.
- Expansion and skipping stitches control the shaping of the ball.
- Different parts require stitches in the front or back loops to achieve angles and shapes.
- Hot glue is used for easy and quick assembly, but sewing is an alternative for more durability.
- Feel free to customize yarn colors according to your preference.
Skill Level
Beginner to Intermediate: basic crochet knowledge including chains, single crochet knots, working in rounds, increasing, and decreasing stitches. Experience handling simple shaping and assembly is helpful.
Measurements / Sizing
- The finished kitty ice cream is a small decorative item.
- Ice cream ball roughly the size of a small toy ball.
- Cone base approx. cylindrical and stubby, about 4 rows high before adding details.
- Overall height about 3–4 inches (depending on yarn thickness and tension).
Gauge
Gauge is flexible for this project as shaping depends on stitch counts and expansion/skipping rather than strict measurements. The stitch is a basic crochet knot similar to single crochet.
Stitch Abbreviations
- ch = chain
- sc knot = single crochet knot (basic knot made by pulling yarn through loops)
- sl st = slip stitch (may be used during assembly)
- inc = increase (two knots in the same stitch/hole)
- skip = skip a knot or stitch
Special Stitches
- 90° angle rounding: Achieved by crocheting through the back braid part to form cylindrical shape.
- Knot fan-out: Making two knots in the same hole increases circle diameter.
- Front/back loop crochet for shaping and textured edging.
Materials:
- 2.75 mm crochet hook (or similar)
- Yarn in ice cream color (ex. red), cone color (ex. light brown), and ear accent color (optional)
- Small amount of fiberfill stuffing
- Tapestry needle or yarn needle
- Scissors
- (Optional) Felt, embroidery thread/yarn, animal/plastic safety eyes, hot glue gun, makeup (for blush)
Abbreviations
- MR - Magic Ring
- ch - Chain
- sl st - Slip stitch
- sc - Single crochet
- inc - Increase (2 sc in same st)
- dec - Decrease (single crochet two together)
- st - Stitch
- yo - Yarn over
Ice Cream Scoop (Head)
With ice cream color yarn:
- Start with a Magic Ring (or chain 2 and work into the first chain).
- Round 1: Work 6 sc into MR. (6 sts)
- Round 2: [inc] in each st around (12)
- Round 3: [sc in next st, inc] 6x (18)
- Round 4: [sc in next 2 sts, inc] 6x (24)
- Round 5–7: sc in each st around (24)
- Round 8: [sc in next 2 sts, dec] 6x (18)
- Stuff the ball.
- Round 9: [sc in next st, dec] 6x (12)
- Round 10: [dec] around (6)
Do not close the ball completely. This is the opening to attach to the cone. Fasten off and leave a tail. Set aside.

Ice Cream Cone
With cone color yarn:
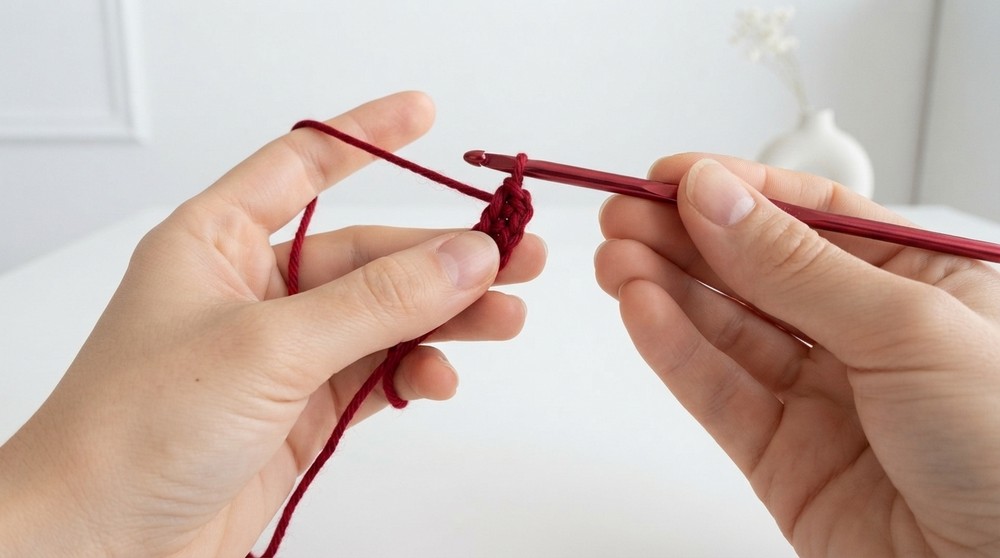
- Start with 6 sc in MR. (6)
- Round 1: [inc] around (12)
- Round 2: [sc in next st, inc] 6x (18)
- Round 3: Working in the back loops only, sc in each st around. (This creates the 90° angle for the bottom rim.)
- Round 4–7: sc in each st around (18) — or desired cone height
- Round 8: To create the cone rim, work 2 sc in each st around (this is an increase round to flare the rim).
- Round 9: (Optional: For extra ruffles, work 3 sc in each st around.)


Fasten off. Weave in end.
Assembly
- Attach/Sew or Hot Glue the ice cream scoop to the cone. The opening of the ice cream scoop should fit over the top of the cone.
Decorative Ruffle (Ice Cream Swirl)
With ice cream color yarn:
- Attach yarn around the top edge of the cone, where cone meets scoop.
- Work 2–3 sc in each st around to create a ruffled edge.
- Fasten off and weave in the ends.
Ears (Make 2)
- Ch 2,
- Work 3 sc into first ch, ch 1, turn.
- Row 2: sc in first st, sc2tog over next 2 sts, ch 1, turn.
- Row 3: sc2tog over 2 sts. Fasten off, leave tail.
Attach (glue or sew) ears to top of scoop.
Face
- Eyes: Attach plastic animal eyes or embroider/sew black thread for eyes.
- Nose/Mouth: Cut small piece of white felt. Embroider nose/mouth (pink/black thread) and glue on, or simply embroider directly onto the scoop.
- Blush: Dab a little makeup blush or pink eyeshadow under eyes.
- Whiskers: Glue thin black threads, bits of plastic, or polymer clay pieces to the cheeks.
Assembly & Finished Size
- Close the ball bottom around the cone base to join securely.
- Attach ears on top.
- Adhere face and eyes to front of ball.
- Add whiskers and blush for finishing touches.

Conclusion
This charming crochet kitty ice cream combines basic stitches with shaping techniques to make a uniquely adorable project. Perfect for crocheters wanting to practice amigurumi shaping, it allows personalization in colors and face details. Assembly is simple with hot glue, making it quick to finish. Enjoy creating and sharing this cute mini ice cream kitty!