
Easy Crochet Ice-Cream Cone Amigurumi Free Pattern
Make your own playful crochet ice cream cone with this free pattern, a fun and easy way to create sweet decorations or unique handmade gifts for everyone.
Making a tiny, colorful treat with yarn instantly brings a smile and a bit of fun to my day. The Free Crochet Ice Cream Cone Pattern guides you to create an adorable amigurumi dessert that’s perfect for anyone who enjoys cute and simple crochet projects. This lively little item adds charm and personality to your handmade collection.
Free Crochet Ice-Cream Cone Plush Pattern with Step by Step
The finished piece features a soft, rounded scoop that sits atop a textured cone base. You can choose any colors you like to represent flavors such as vanilla, chocolate, or strawberry. The smooth, cuddly yarn makes it pleasant to hold, while the ridged cone adds a touch of realism and visual interest. Its small size makes it useful as a shelf decoration, a playful keychain, or even a tiny toy.

This project is beginner-friendly and focuses mainly on single crochet stitches, which are easy to learn and quick to work. The clear, step-by-step instructions make creating this fun, colorful treat a relaxing and satisfying experience, even if you’re new to crochet.
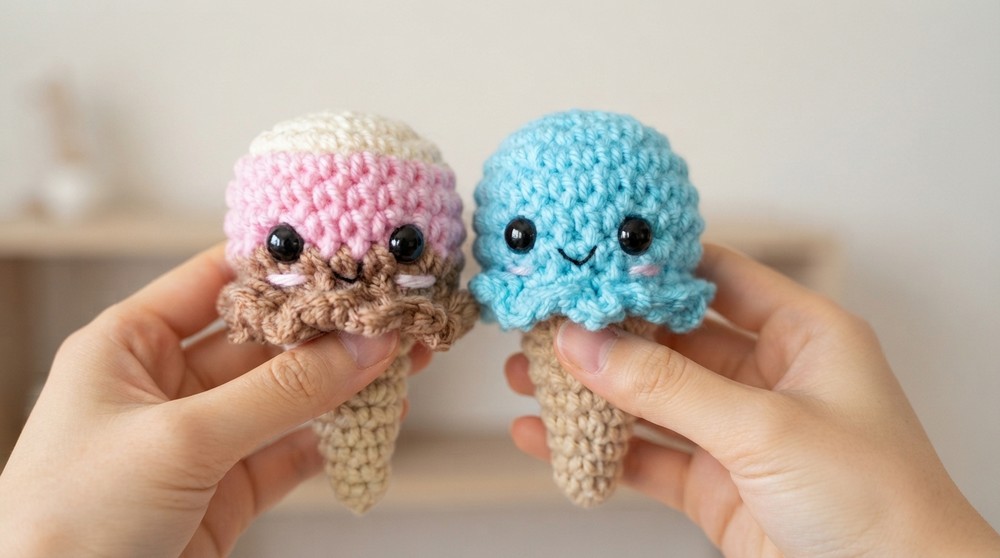
The Free Crochet Ice Cream Cone Pattern makes a sweet handmade gift, a cute decorative piece, or a lovely collectible for any crocheter. If you enjoy making cheerful projects that are simple but eye-catching, this is a great choice. Give it a go and enjoy bringing this charming little yarn treat to life, stitch by stitch.

Amigurumi Ice Cream Cone Crochet Pattern
In today’s pattern, you’ll learn how to crochet a cute ice cream cone, perfect for gifts, keychains, or your amigurumi collection. The cone and ice cream scoop feature simple, beginner-friendly techniques, and you can personalize the scoop with your favorite flavor colors, fun ruffles, and a cute face.
Quick Overview Of Pattern
- Worked in two main pieces: the cone and the ice cream scoop, which are sewn together.
- Simple shaping: Magic ring, single crochet rounds, increases, and decreases.
- Customizable colors and embellishments: Easily add sprinkles, a cherry, or change flavors!
- Front loop only (FLO) round for pretty ruffled effect.
- Optional embroidery for face and blush.
- Uses minimal yarn and basic tools.
Notes
- Pattern uses US terminology.
- Feel free to choose your own yarn colors for the ice cream scoop and cone.
- Make sure to stuff firmly for shape, but not so much that stitches are stretched.
- Use a stitch marker to keep track of your rounds.
- Add facial details and ruffles before final assembly for easiest handling.
- The ruffle is worked with slip stitches and multiple single crochets in each stitch for a frilly effect.
Skill Level
Beginner – Lower Intermediate
If you can make a magic ring, single crochet, increase, decrease, change colors, and sew closed, you can make this ice cream!
Materials
- Yarn in worsted weight or similar:
- Cone: brown/tan (e.g., Impeccable Heather)
- Ice cream scoop: ivory, pink, and brown (or any “flavor” you choose)
- Blush: light pink (optional)
- Face: thin black lace or embroidery thread
- 3.5 mm crochet hook
- 10 mm safety eyes (or similar)
- Yarn/tapestry needle
- Scissors
- Stitch marker
- Polyfill or stuffing
- Optional: colored yarn for sprinkles, small pompom for cherry
Measurements / Sizing
- Finished size approx. 3.5–4 inches (9–10 cm) tall when worked with worsted yarn and 3.5 mm hook.
- Size varies with gauge and yarn.
Gauge
- Gauge not crucial, but stitches should be tight so stuffing does not show.
Stitch Abbreviations
- MR = magic ring
- sc = single crochet
- inc = increase (2 sc in same stitch)
- dec = decrease (preferably invisible)
- sl st = slip stitch
- FLO = front loop only
- st(s) = stitch(es)
Special Stitches
- Invisible decrease: Insert hook into front loop of next two stitches, yarn over, pull through, yarn over and pull through both loops.
- Ruffle repeat: (FLO) 3 sc and 1 sl st in the same stitch, repeated around.
The Crochet Pattern
Cone
Cone – Color: Heather or Brown
- Round 1: MR, 5 sc in ring. (5)
- Round 2: sc around. (5)
- Round 3: [2 sc in next st, 1 sc in next st, 2 sc in next, 1 sc in next 2 sts] (7)
- Round 4: sc around. (7)
- Round 5: [2 sc in next st, 1 sc in next, 1 sc in next, 2 sc in next, 1 sc in next, 2 sc in next, 1 sc in last] (10)
- Round 6: sc around. (10)
- Round 7: [1 sc, inc] repeat around. (15)
- Round 8: sc around. (15)
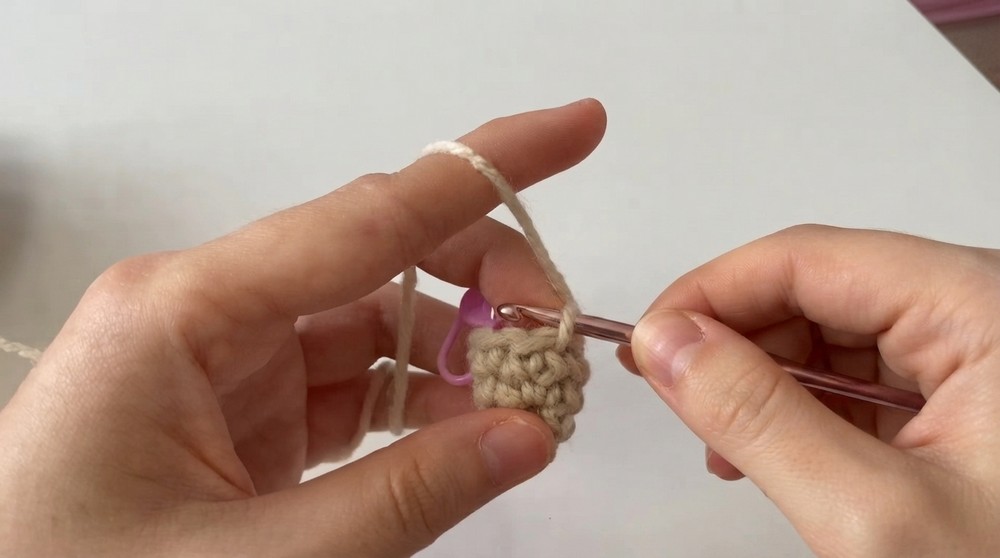

Fasten off, stuff firmly, and set aside.
Ice Cream Scoop
Scoop – Choose your flavors: Ivory, Pink, Brown, etc.
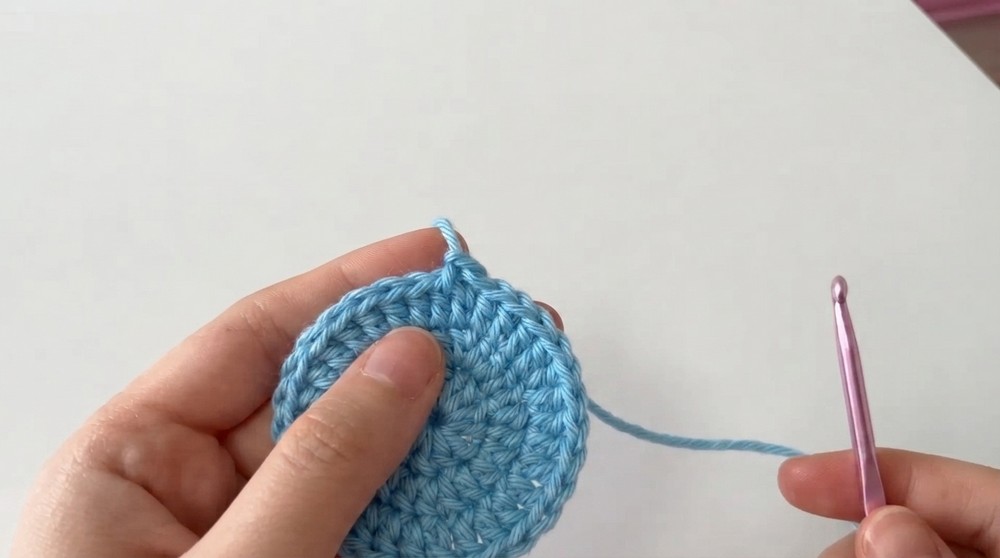
- Round 1: MR, 6 sc into ring. (6)
- Round 2: inc in each st around. (12)
- Round 3: [1 sc, inc] repeat around. (18)
- Round 4: [2 sc, inc] repeat around. (24)
- Change color, if desired (e.g., pink for strawberry).
- Rounds 5–8: sc in each st around. (24)
- Example for Neapolitan: Ivory (vanilla) rounds 1–4, pink (strawberry) rounds 5–8, brown (chocolate) for frill and/or bottom.
- Insert safety eyes between Rounds 7 and 8, spaced about 3 stitches apart.
- Round 9: [2 sc, dec (inv dec)] repeat around (18)
- Begin stuffing.
- Round 10: (FLO): [4 sc, dec] repeat around (15)
- After this round, leave a long tail for sewing scoop to cone, and finish stuffing.

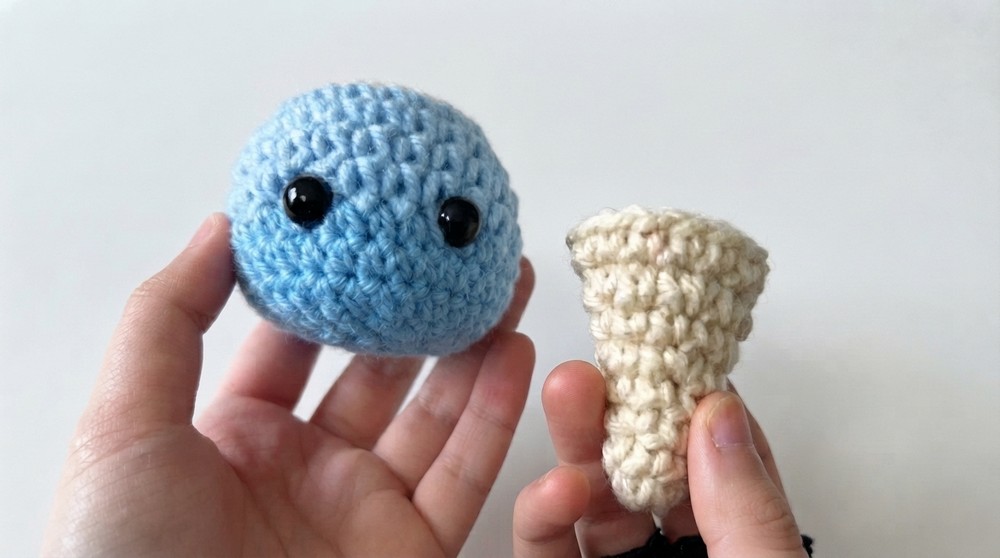
Assembly
Sewing Ice Cream to Cone
- Line up the opening of the scoop (15 sts) with the cone opening.
- Using the long tail and a tapestry needle, sew through each corresponding stitch on both pieces for a secure finish.
- Before closing completely, add a little more stuffing to the middle if needed.
- Weave in and trim any ends.
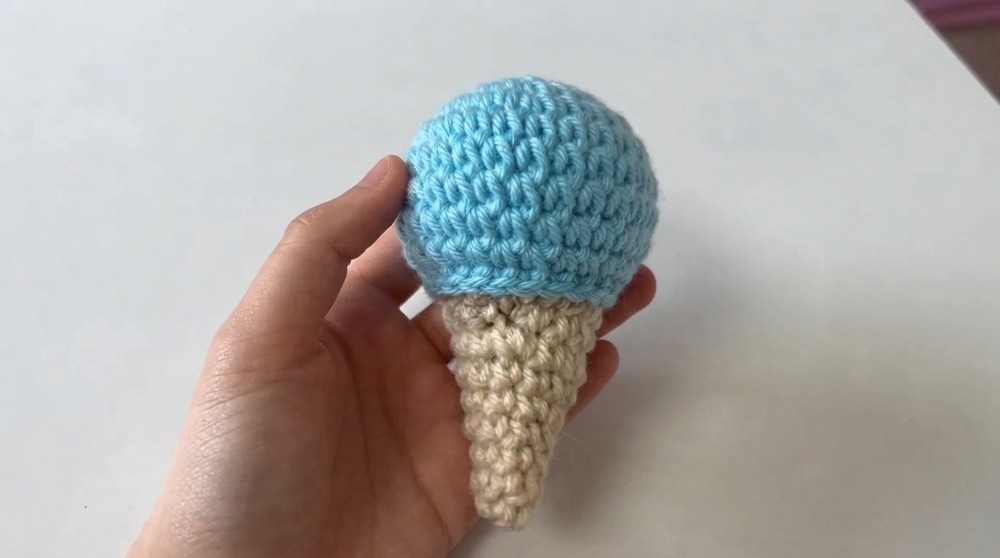
Ruffle (Frill)
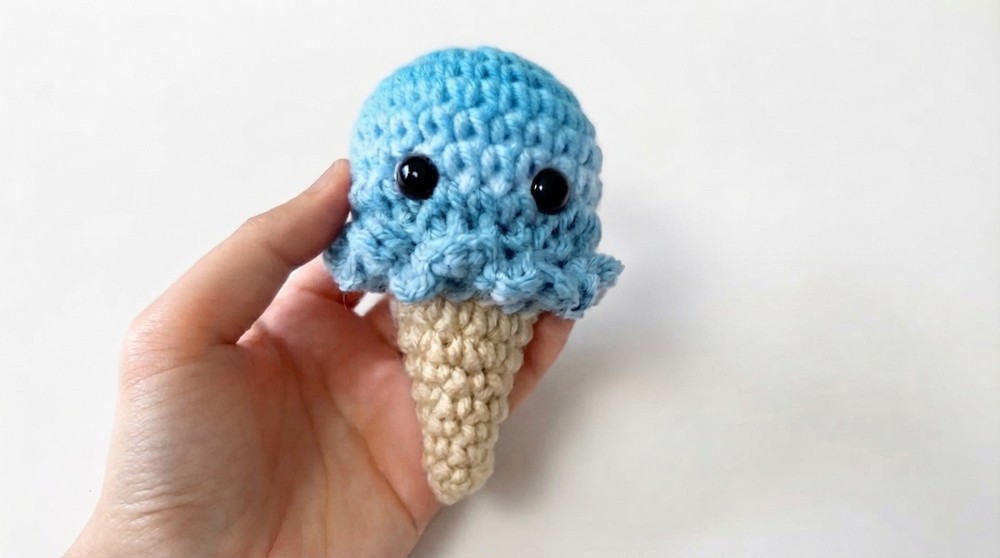
- Attach brown (or ruffle color) yarn to a front loop on the bottom edge of the scoop (where you worked FLO).
- Ch 1.
- In the next st: work [3 sc, 1 sl st] into the same st.
- Repeat in all FLO stitches around to form ruffles.
- Fasten off and weave in the end.
Face & Details
- Embroider a small "V" smile with black lace yarn/embroidery floss between the eyes, around round 8 (brown round, center front).
- Add blush below the eyes with light pink yarn or blush powder, securing with a yarn needle or a dab of glue.
- Add sprinkles, a cherry, or any other decorations as desired.
Assembly & Finished Size
- Your finished cone should stand about 3.5 to 4 inches tall.
- Add a keychain ring at the top if desired for a functional accessory.
- Stuffed firmly, stitches should be neat and facial features secured.
Conclusion and Ending Words
Congratulations, your amigurumi ice cream cone is finished! This sweet treat is a delightful project for beginners and experienced crocheters alike. You can easily personalize it with colors, toppings, and facial expressions for endless variety. Thank you for following along! If you enjoyed this pattern, share your creations and let your creativity inspire others.