
Easy Free Crochet Egg Holder Hen Pattern For Your Kitchen
Keep your eggs safe and stylish with a charming hen-inspired holder that combines practical protection and rustic kitchen appeal in every stitch.
In kitchens where tradition meets charm, even the simplest items can become treasures. This crochet hen egg holder transforms ordinary egg storage into an elegant statement of warmth and care. Soft yet structured, its delicate stitches capture the gentle curves and feathered details of a hen, bringing a subtle touch of artistry to the breakfast table.
Sweet Free Crochet Egg Holder Hen Pattern To Shine Breakfast Time
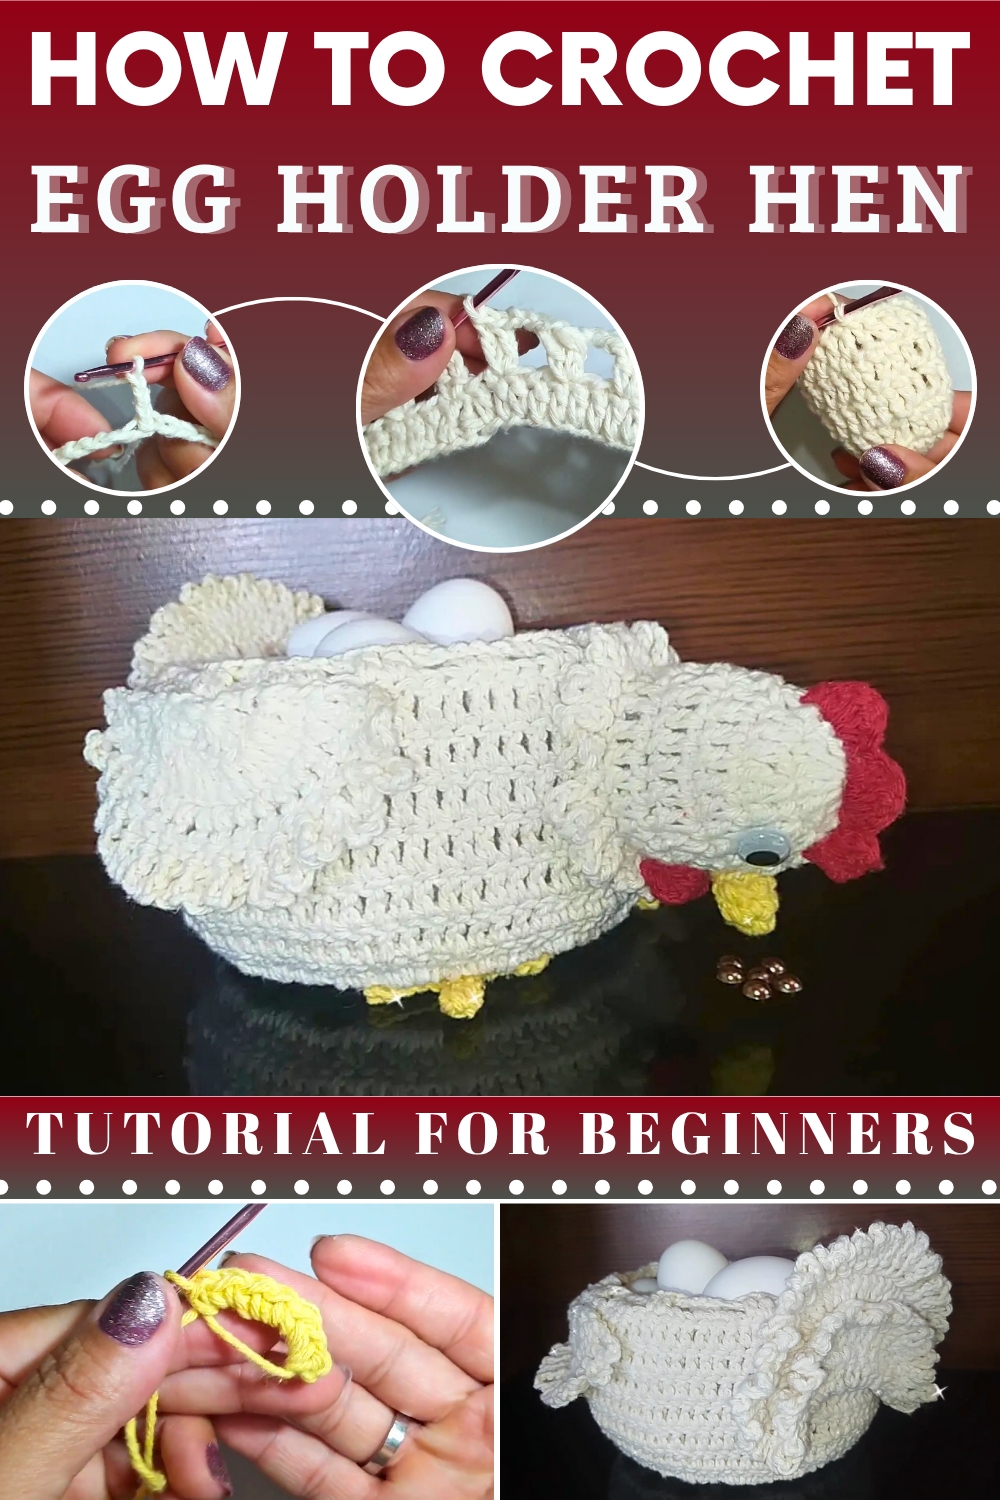
More than just a holder, it cradles each egg with thoughtful protection, ensuring they remain safe while adding a refined rustic elegance to your space. Ideal for organizing and presenting eggs with grace, this piece blends practicality with timeless beauty. Its lightweight, durable form makes it easy to handle and store, while the handcrafted texture offers a tactile delight that elevates everyday routines.
Beyond function, it serves as a sophisticated accent that complements country-inspired or modern farmhouse décor effortlessly. The reusable, easy-care nature of this holder celebrates sustainability without sacrificing style. With its quiet charm and purposeful design, this crochet hen egg holder redefines simple kitchen essentials into an artful expression of hospitality and homely elegance.
Materials:
- String:
- Raw String (No. 6).
- Yellow-Gold String (No. 6 and No. 4).
- Red String (No. 4).
- Crochet Hooks:
- 3.5 mm for No. 6 string.
- 2.5 mm for No. 4 string.
- Additional Supplies:
- Tapestry needle.
- Scissors.
- Hot glue (Techbond recommended).
- Sewing thread (optional, for those who prefer sewing to glue).
- 1 cm plastic eyes.
- 5 liters gallon bottle for the base (cut to 8 cm height).

Cozy Free Crochet Egg Holder Hen Pattern
Finished Size
This chicken is designed to hold up to 20 eggs and measures approximately 25 x 20 cm (9.8 x 7.9 inches), depending on your yarn tension and hook size.
Materials Needed
- Yarn:
- Number 6 cotton yarn: Raw/white (main body) and golden yellow (chicken's wings and base).
- Number 4 cotton yarn: Red for the comb, beak details, and tail.
- Crochet Hooks:
- 3.5 mm hook: For the yarn size 6.
- 2.5 mm hook: For the yarn size 4.
- Plastic Gallon:
- Use a 5-liter plastic gallon as the base, cut to 8 cm in height.
- Accessories:
- 1 cm safety eyes or black beads (for the eyes).
- Stuffing for the beak and head (optional).
- Tapestry needle for finishing and threading yarn.
- Scissors for cutting.
- Hot Glue Gun with Techbond Glue: For attaching parts securely.
Special Techniques
- Magic Circle (MR):
Create a loop, insert the hook into the loop, yarn over, pull through, and work stitches into this loop. Tighten the loop by pulling the yarn tail. - Half Double Crochet (HDC):
Yarn over, insert the hook into the stitch, yarn over again, and pull through all loops on the hook. - Invisible Seaming:
Use the tapestry needle to invisibly join the starting and ending stitches of a round for seamless joins. - Joining Plastic Gallon Base:
Use chain stitches gathered around the cut gallon for a snug fit.
Pattern Instructions
Step 1: Preparing the Plastic Base
- Use a 5-liter plastic gallon and cut it horizontally at exactly 8 cm (3.15 inches) from the bottom.
- Smooth any sharp edges with sandpaper or cover them with masking tape to ensure safety.
- Set the base aside for later use.
Step 2: Chicken's Body
Base Rounds
- Foundation:
- Beginning with raw/white yarn (size 6) and a 3.5 mm hook, chain 56.
- Join the first and the last chain using a slip stitch to form a circle. Ensure the chain is not twisted.
- Chain 3 (counts as 1 dc for the first round).
- Round 1:
- Work 1 dc (double crochet) into each chain around.
- Join with a slip stitch to the top of the chain 3. (56 dc)
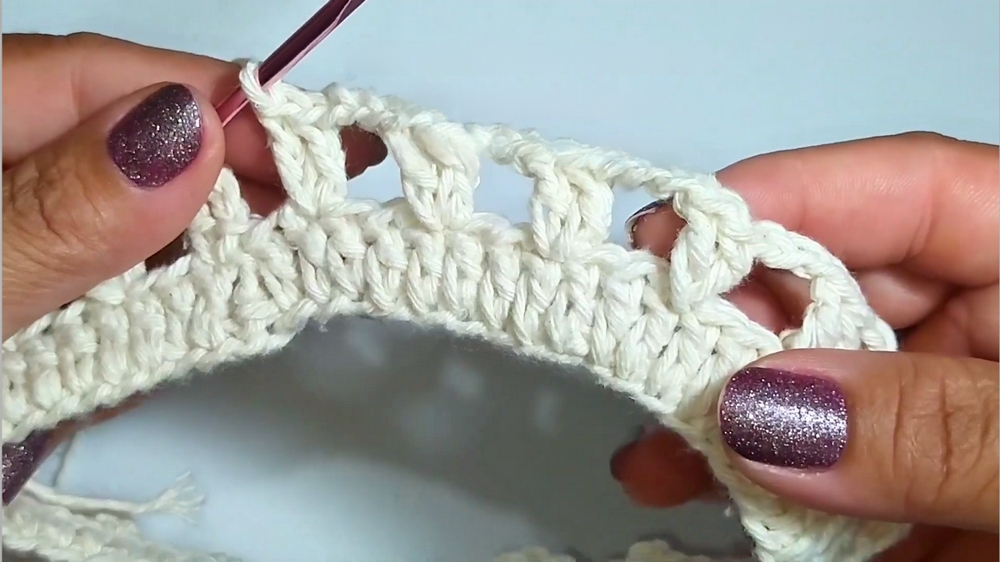
- Round 2:
- Chain 3, dc in the base of the chain-3 (1 increase).
- Chain 3, skip 2 dc, and work 2 dc into the third stitch.
- Repeat the sequence: [dc, chain 3, skip 2 stitches, 2 dc in the next stitch] around.
- At the end of the round, join with a slip stitch to the top of the first dc.
- Round 3:
- Chain 3; for each chain-3 space: Work 3 dc into it.
- Dc into every dc from the previous round.
- Continue this pattern all around and join with a slip stitch.

Building Up
- Rounds 4–9:
- Continue working alternating dc spaces (1 increase) in the chain spaces and evenly spaced dc stitches along the previous dc stitches.
- Total stitch count will eventually come up to at least 10 rounds for the chicken’s height.
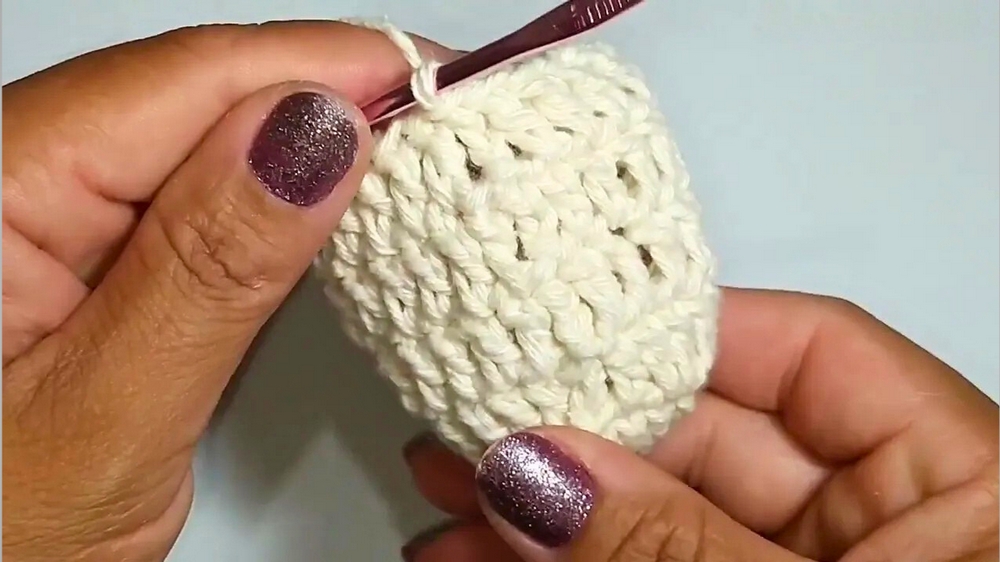
- Finish with a row of HDCs (half double crochets) for the final row, ensuring a clean and polished edge.
Step 3: Cord and Plastic Base Attachment
- Cord:
- Chain 63 cm and secure.
- Use a tapestry needle, and weave it around the spaces created by the final row of HDC stitches. Pass the cord in and out of the spaces, leaving the ends neatly loose for tying.
- Attach Plastic Base:
- Place the bottom part of your crocheted chicken around the plastic gallon. Make sure the edges fit snugly for stability.
- Pull the cord to secure the crochet around the gallon.
Step 4: Chicken’s Head
- Head:
- Start with a magic ring, chaining 2 (won’t count as a stitch).
- Work 14 dc into the ring, tighten, and join with a slip stitch to the first dc.
- Round 2: Work [1 dc, 1 increase]* all around (21 total dc).
- Increase Height:
- For Rounds 3–5, work dc in each stitch (no increases).
- Optional: Add stuffing for a firmer head.
- Comb:
- Using red yarn (size 4) and a 2.5 mm hook, chain 6, and slip stitch along the head evenly.
- Work 6 chains, sc stitch to create the chicken comb’s ridges.
Step 5: Wings (Make 2)
Steps for Each Wing
- Begin with a magic circle, chaining 3 to start.
- Work 8 dc into the magic ring, and tighten.
- Chain 3, turn, and make 2 dc (increase) at the base of every stitch (creating 16 dc).
- Make 6 chain loops for finishing (same as the head's border).
- Fasten off, leaving a tail for sewing.
Step 6: Tail
- Start with a magic ring, work 14 dc into the ring, and join with a slip stitch.
- Work 2 rows of increases:
- Round 2: Work 2 dc in each stitch (28 dc).
- Round 3: Work again 1 dc, 1 increase (42 dc).
- Work a final loop row similar to the wings and head.
- Finish off and sew to the back of the body at Row 3.
Step 7: Feet and Beak
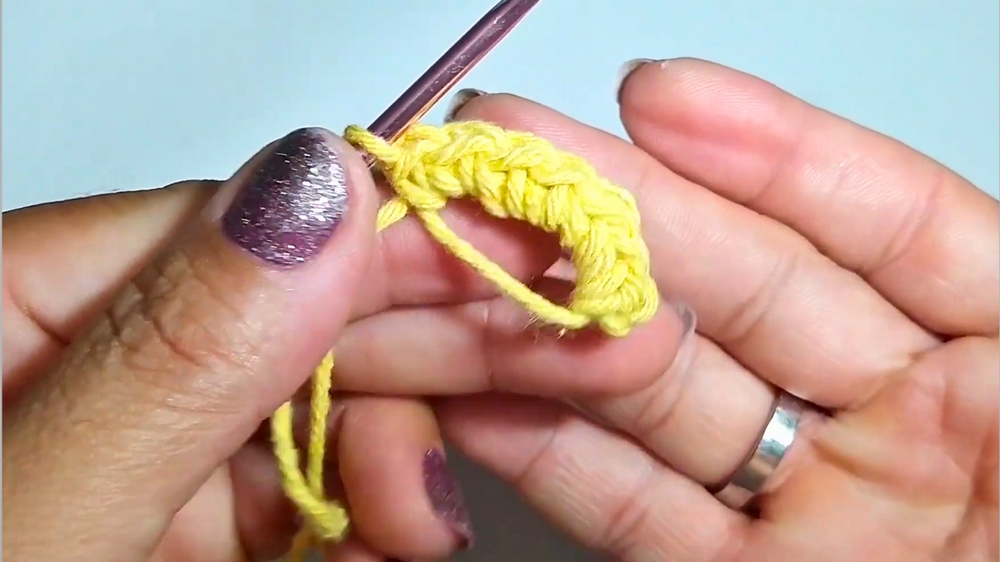
- Feet:
- With red yarn (size 4), chain 11, and sc along the chain.
- Make 2 extensions on both sides by chaining 6 stitches and working sc back into the chain.
- Repeat this process for the 3 toes of the foot.
- Make 2 feet in total.
- Beak:
- Start with a magic ring and work 6 sc into it.
- Add 2 additional rows of sc to give the beak some height.
- Stuff lightly if needed.
Step 8: Assembly and Final Touches
- Eyes: Add the safety eyes (1 cm size).
- Position between Rounds 9–10 of the head, leaving about 6 stitches apart. Alternatively, sew beads or embroider with black thread.
- Attach Parts:
- Use hot glue or a needle to attach the comb, wings, beak, and feet.
- Center the tail properly at the back, ensuring it aligns symmetrically.
- Store Eggs Inside: Once the chicken is assembled, gently place eggs inside through the open-top section.

Final Words
Your beautiful crochet chicken egg holder is now complete! This practical and whimsical creation not only adds charm to your kitchen but also helps organize your eggs efficiently. With simple stitches and smart assembly techniques, it’s a joy to crochet for any skill level.
Tips to Maintain Your Chicken
- Washing: Use gentle hand washing with cold water and mild detergent. Reshape while damp to maintain its structure.
- Storing: Keep it dry to avoid yarn damage.
- Customizing: Experiment with colors for a fun and unique look, or embellish with small accessories like a bow or buttons.