
Cozy Crochet Amigurumi Teddy Bear Free Pattern For Gifts
Give your little one a cute new friend with this Crochet Amigurumi Teddy Bear Free Pattern and make a lovely bear for playtime and nursery decor.
A small, soft bear that feels like a friendly hug can brighten anyone’s day. The Crochet Amigurumi Teddy Bear Design By Radhe krishna crochet is just such a toy—made with yarn and simple stitches to become a lovable companion for all ages. Its charm lies in a round body, tiny ears, and little paws that make it look sweet and gentle.
Enjoy This Crochet Amigurumi Teddy Bear Free Pattern At Home
Using the single crochet stitch, this bear is solid enough to hold but soft enough to cuddle. The stitch is key to giving the bear a smooth and even shape. Colors can be changed easily, from natural browns and creams to bright, playful tones, giving each bear its own style.
Size can also be changed by increasing or decreasing the number of stitches per row. This way, the teddy can be a small keychain or a larger companion on a bed. Small touches like eyes made with yarn or buttons add character and a friendly face.
This teddy bear fits well as a gift, a decoration, or a bedtime friend. Many beginners find it a good way to practice basic stitches because it keeps things simple while offering rewarding results. Its soft texture and adorable shape make it something children especially love to hold.
Overall, Crochet Amigurumi Teddy Bear offers a lovely, soft friend that presents a fun project for those ready to work with yarn and hook. It comes with options to customize in color and size for a unique little buddy anyone can enjoy.
About the Pattern
This crochet teddy bear pattern features a seamless design for the main body, beginning at the top of the head and working downward to the base. The thoughtful construction produces a cuddly, symmetrical teddy, with separate crocheted pieces for the ears, limbs, face patch, and bow tie. The process maximizes shape and stability, minimizing assembly difficulty and resulting in a classic bear with a charming handmade finish.

Key Pattern Details
- Construction: The main body (head, neck, and torso) is made in one continuous piece for seamless appearance and durability.
- Additional Pieces: Arms, legs, ears, and face patch are made separately and attached.
- Embellishments: The completed teddy is adorned with a bow tie and features a white face patch for added character.
- Assembly: Careful placement and secure attachment of all details ensure a timeless, finished look.
Important Notes
- Always begin each major piece with a magic ring for neat, tight starts.
- Stuff the head and body parts as you work to maintain shape and prevent gaps.
- Use stitch markers for accurate round counting and precise symmetry, especially during assembly.
- Secure all attachments thoroughly, whether by sewing or gluing, for durability and aesthetics.
- Insert safety eyes or sew beaded eyes after the face patch is attached for correct placement.
Difficulty Level
This pattern is suited for adventurous beginners to intermediate crocheters. It uses only basic techniques—single crochet, increases, decreases, and double crochet for the bow tie—yet its seamless, well-shaped appearance is achieved through attentive round increases and decreases.
Supplies Needed
- Worsted-weight or aran yarn in brown/beige (body), white (face patch), and preferred color for bow tie
- 3.5–4.0 mm crochet hook
- Fiberfill/cotton stuffing
- Yarn or tapestry needle for joining and finishing
- Black beads or safety eyes
- Stitch markers
- Scissors
- (Optional) Hot glue gun for attaching details
Size & Measurements
Typical finished size is 8–10 inches tall, depending on yarn selection, hook size, and individual tension. Proportional results will be achieved by working parts as described and assembling as directed.
Gauge & Stitch Details
- Gauge: Not essential. Aim for a dense, even stitch to prevent stuffing from escaping.
- Stitch: Single crochet throughout except for bow tie (double crochet used there).
- Work in continuous rounds for a seamless result.
Crochet Abbreviations
- MR: Magic Ring
- sc: Single crochet
- inc: Increase (2 single crochet in same stitch)
- dec: Decrease (single crochet two stitches together)
- sl st: Slip stitch
- dc: Double crochet
- ch: Chain
- st(s): Stitch(es)
- FO: Fasten off
Special Stitch Guide
- Magic Ring (MR): Loop yarn to form a ring, work the designated number of stitches into the ring, pull tight.
- Increase (inc): Work two single crochet stitches into one stitch from the previous round.
- Decrease (dec): Single crochet two stitches together to reduce stitch count by one.
Complete Crochet Pattern
Main Body Pattern (Head to Base)
Magic Ring & Head
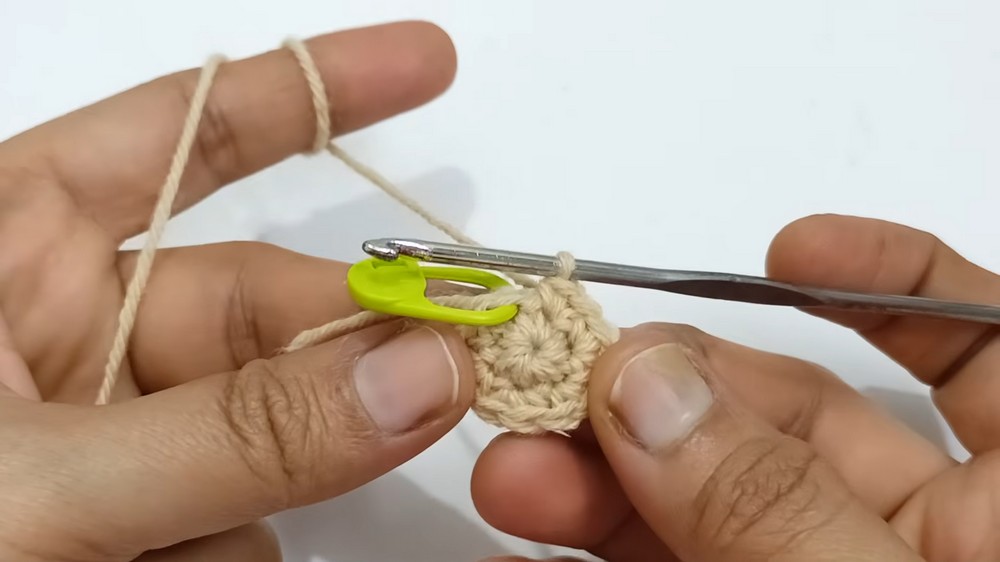
- Round 1: Begin with a magic ring, make 6 sc in the ring.
- Round 2: Increase in each stitch around (12 sc).
- Round 3: (1 sc, inc) around (18 sc).
- Round 4: (2 sc, inc) around (24 sc).
- Round 5: (3 sc, inc) around (30 sc).
- Round 6: (4 sc, inc) around (36 sc).
- Rounds 7–10: Work 36 sc per round evenly.
- Round 11: Continue even, 36 sc.
- Round 12: Continue even, 36 sc.
- Round 13: (5 sc, inc) around (42 sc).
- Round 14: Work 42 sc evenly.
- Round 15: (5 sc, dec) around (36 sc).
- Round 16: (3 sc, dec) around (27 sc).
- Round 17: (1 sc, dec) around (18 sc).
Stuff the head firmly with cotton.

Neck & Body
- Round 18: (1 sc, dec) around (9 sc).
Stuff the neck snugly for support. - Round 19: (1 sc, inc) around (18 sc).
- Round 20: (2 sc, inc) around (27 sc).
- Rounds 21–29: Work 27 sc evenly in each round.
- Round 30: (1 sc, dec) around (18 sc).
- Round 31: (1 sc, dec) around (9 sc).
Stuff the body firmly before closing. - Finishing: Fasten off and use a needle to weave closed the remaining hole at the base.

Additional Parts
Ears (make 2)
- Round 1: Magic ring, 6 sc.
- Round 2: 2 sc in each stitch around (12 sc).
- Rounds 3–5: Work 12 sc evenly per round.
- Finishing: Fasten off, leaving a tail for sewing.
White Face Patch
- Round 1: Magic ring, 6 sc.
- Round 2: 2 sc in each stitch around (12 sc).
- Finishing: Fasten off, leaving a tail for sewing to face.
Arms (make 2)
- Round 1: Magic ring, 6 sc.
- Round 2: (1 sc, inc) around (9 sc).
- Rounds 3–9: Work 9 sc evenly for each round.
- Finishing: Fasten off, leaving a long tail for assembly.
Legs (make 2)
- Round 1: Magic ring, 6 sc.
- Round 2: 2 sc in each stitch (12 sc).
- Round 3: (1 sc, inc) around (18 sc).
- Rounds 4–5: Work 18 sc evenly (2 rounds).
- Round 6: (2 sc, dec) around to get to fewer than 18 sc, adjusting rate over rounds 6–8 until you have 11 sc.
- Rounds 9–10: Work 11 sc each round.
Lightly stuff the legs before finishing last rounds for a slight bend. - Finishing: Fasten off, leaving a tail for attaching.
Bow Tie
- Begin: Magic ring.
- Step 1: Ch 3, 2 dc, ch 3, sl st into ring.
- Step 2: Repeat Step 1 twice more for a total of three petals/lobes.
- Finishing: Pull tight, fasten off with a tail for sewing.
Assembly
- Position the face patch 7 rows down from the top of the head and sew securely.
- Use stitch markers to mark and align arm and leg placement before fastening.
- Attach arms and legs symmetrically with needle and yarn or glue for a secure grip.
- Attach ears evenly spaced on each side of the head.
- Fasten bow tie securely beneath face.
- Sew on black beaded or safety eyes above face patch.

Joining & Final Size
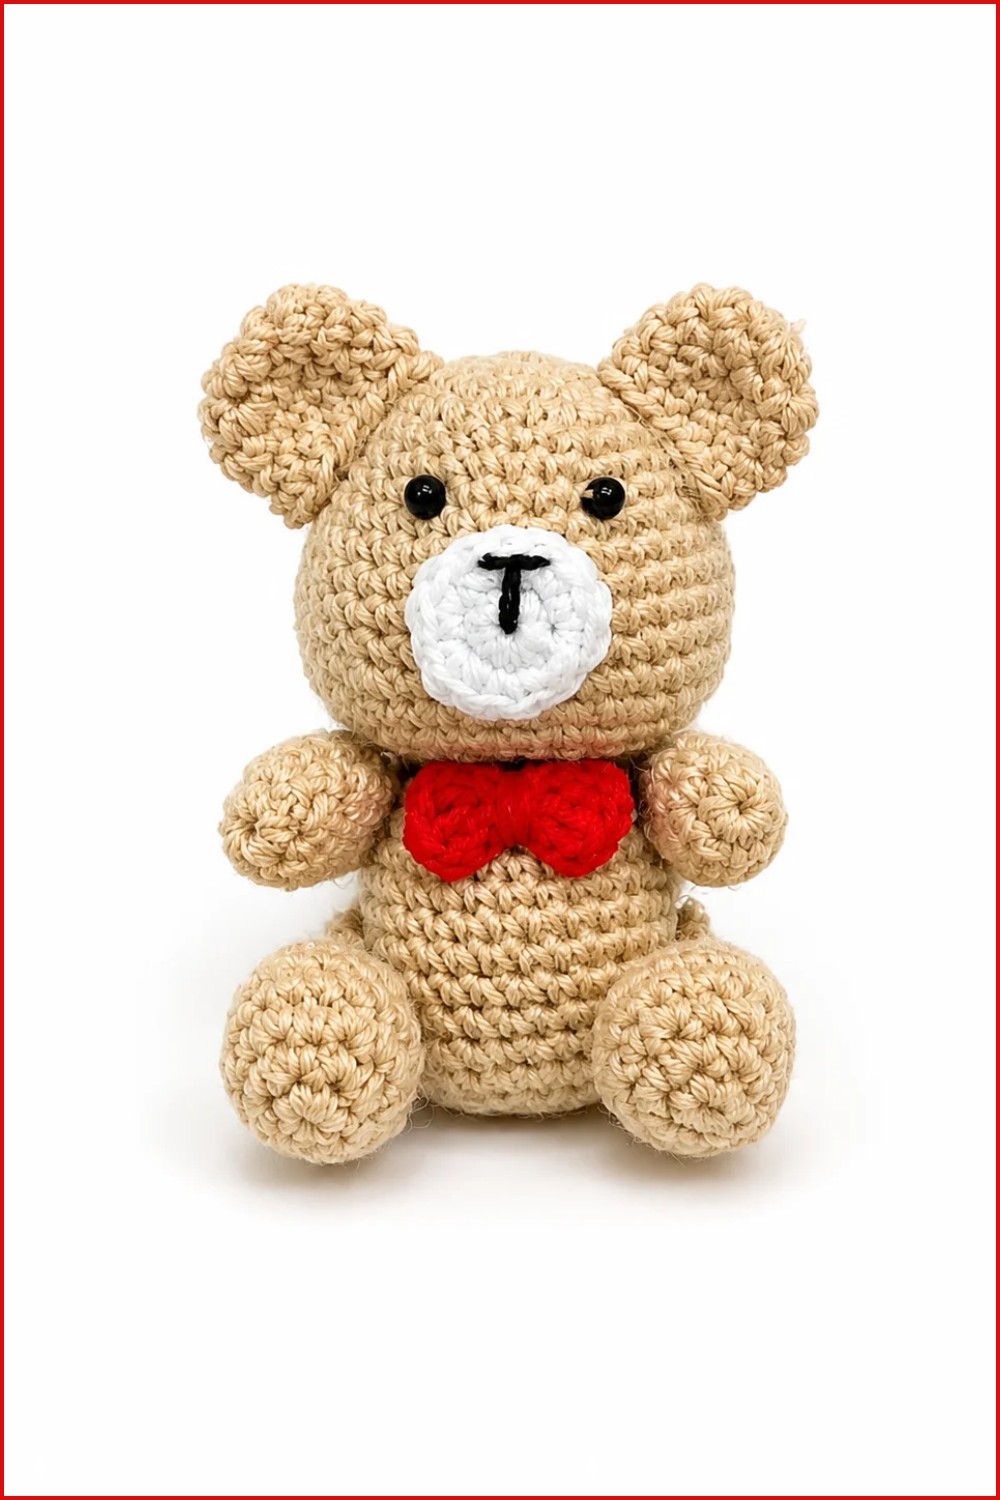
Assemble the bear in the following order: face patch, ears, arms, legs, and bow tie, making small adjustments for precise alignment. Stuff final parts before closing as needed. The result should stand between 8–10 inches tall, with rounded limbs and balanced proportions that create a traditional teddy bear silhouette.
Final Words
This seamless crochet teddy bear pattern is crafted with thoughtful construction, straightforward shaping, and classic accessories. Special attention to symmetric assembly and dense stitching make for a sturdy bear ideal as a keepsake or handmade gift. The pattern leverages basic skills, enabling crocheters to focus on even rounds, secure finishing, and creative embellishments for a timeless result.