
Bright Free Crochet Spongebob Squarepants Pattern That Feels Cute
Celebrate nautical fun with this playful Crochet SpongeBob SquarePants Pattern, perfect for fans, gifts, or bright handmade décor.
Bringing a bright and beloved icon to life, this delightful pattern shows you how to make a plush homage to the popular character. The Free Crochet SpongeBob SquarePants Pattern offers a stylish and approachable way to work on a recognizable figure while refining your amigurumi techniques. With its bold colors and engaging personality, this project stands out as both fun and refined.
Free Crochet SpongeBob SquarePants Pattern That Feels Fresh

This little figure becomes so much more than just a toy, it fits perfectly as a shelf accent, a thoughtful handmade gift, or even a quirky desk companion. In the process of working through the pattern, you’ll practice important skills such as shaping bodies, applying facial details, and securing finishing touches. That means you’ll gain both a stylish piece and improved technique.

Crochet Patrick Star Amigurumi
Materials List
- Yarn:
- Cotton yarn is highly recommended for durability and neat texture (e.g., Gazal Bebiko, Gazzal Baby Cotton, or any smooth yarn with suitable colors: pink, green, white, black, yellow for shorts/flowers; colors may be adjusted as desired).
- Hook:
- 2.0–2.75 mm crochet hook (or suitable size for your yarn; pattern originally used “something like 75”, which is likely a fine steel hook—adjust as needed for your yarn and tension).
- Other Supplies (Optional/Recommended):
- Polyester fiberfill/stuffing
- Stitch markers
- Safety eyes (optional) or black yarn for embroidery
- Tapestry needle (for sewing/seaming and facial embroidery)
- Scissors
Key Abbreviations (US Terminology)
- mr – magic ring
- ch – chain
- sc – single crochet
- inc – increase (2 sc in same st)
- dec – decrease (invisible or sc2tog as preferred)
- sl st – slip stitch
- dc – double crochet
- BLO – back loop only
- st(s) – stitch(es)
Special Notes
- Work in continuous rounds; use a stitch marker to track your round starts.
- Stuff as you go for better shape, especially in limbs.
- Adjust hook size if needed to prevent stuffing showing through.
- Pattern designed in US crochet terminology.
Step-by-Step Pattern
Legs (Make 2)
- Row 1: In pink, make a mr, 6 sc into mr. (6)
- Row 2: Inc in each of the next 3 sts (6→9), then 3 sc. (9)
- Row 3: Sc around. (9)
- Row 4: 1 sc, inc in next 3 sts (add one sc, inc, inc, inc), 5 sc. (12)
- Row 5: Sc around. (12)
- Row 6: 12 sc, inc in next 3 sts, 7 sc. (15)
- Row 7–8: Sc around. (15 each row)
- Row 9: Change to green (shorts); on the last pull-through of the last st, switch to green.
- 3–4 sc, inc in next st, 1 sc, repeat 3 times, 4–6 sc to complete round (check stitch count). (18)
- Row 10: Sc around in green. (18)
- Row 11: (Sc 2, inc), repeat 6 times. (24)
- Finish first leg; break yarn; make second leg the same way but DO NOT break yarn.


Body
- Join Legs:
- On the second leg, ch 2, join to first leg with sc.
- Sc around the first leg (24 sts), sc in each of 2 ch, then around the second leg (24 sts), then sc in the opposite side of the 2 ch. (52 sc total)
- Row 12–14/16: Sc around. (52 each row, number of rows here is flexible for body length; pattern implies 3 rows)
- Row 17: (Start in pink) Inc by pattern: Sc 5, inc, sc 9, inc, ... (Add up so you inc 6 times, spacing increases, ending with sc to end of round.) (60)
- Row 18–21: Sc around in pink. (60 each row)
- Row 22: Switch to pink BLO, sc around. (60)
- Row 23–27: Sc around in pink. (60 each row, 5 rounds)
Taper Body to Head
- Row 28: (Sc 8, dec), repeat 6 times (54)
- Row 29: Sc around. (54)
- Row 30: (Sc 7, dec), repeat 6 times (48)
- Row 31: Sc around. (48)
- Row 32: (Sc 6, dec), repeat 6 times (42)
- Row 33: Sc around. (42)
- Row 34: (Sc 5, dec), repeat 6 times (36)
- Row 35–37: Sc around. (36 each row)
- Row 38: (Sc 4, dec), repeat 6 times (30)
- Row 39–40: Sc around. (30)
- Row 41: (Sc 3, dec), repeat 6 times (24)
- Row 42–44: Sc around. (24)
- Row 45: (Sc 6, dec), repeat 3 times (21)
- Row 46: (Sc 5, dec), repeat 3 times (18)
- Row 47: (Sc 4, dec), repeat 3 times (15)
- Row 48: Sc around. (15)
- Row 49: (Sc 3, dec), repeat 3 times (12)
- Row 50: Sc around. (12)
- Row 51: 6 dec (6)
- Fasten off and neatly close remaining hole. Weave end inside.
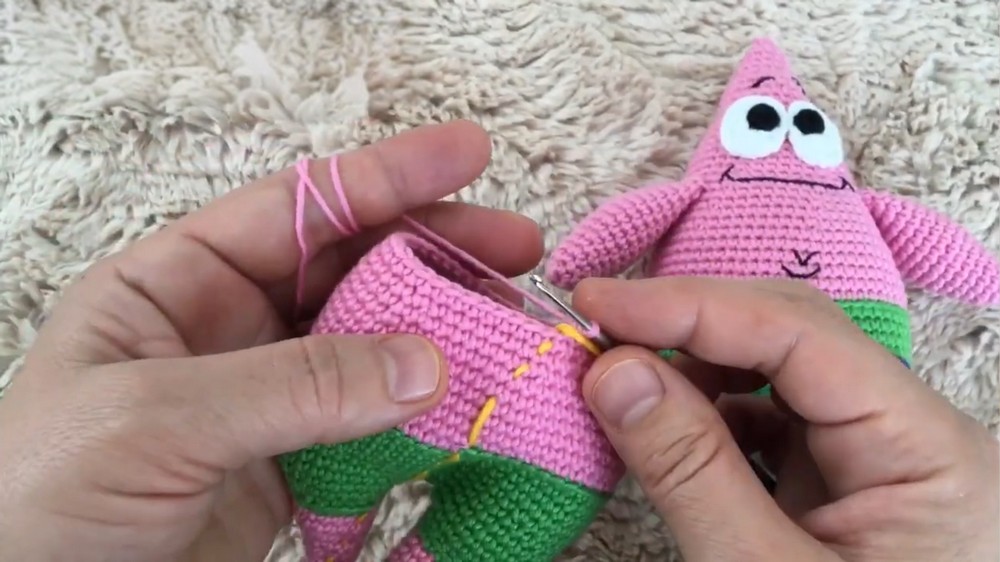
Stuff body firmly before openings get too small.

Arms (Make 2 in Pink)
- Row 1: MR, 1 sc (1)
- Row 2: (Inc, sc) repeat 3x (6)
- Row 3: (2 sc, inc) repeat 3x (9)
- Row 4: Sc around (9)
- Row 5: (3 sc, inc), 6 sc (increase across evenly, 12–15 sts, adjust for shape and symmetry)
- Row 6–7: Sc around (maintain st count)
- Row 8: (4 sc, inc) repeat 3x (18 or as fits)
- Row 9–15: Sc around (8 rows, 18 sts per row)
- Stuff lightly, flatten, seam across with 8 sc to close. Fasten off, leaving long tail for sewing.
Eyes (Make 2 Whites, 2 Black Centers)
White:
- MR, 6 sc.
- (Inc in next st) around (12)
- Slip stitch in each st around for neat finish.
- Fasten off, leaving tail to sew onto head.
Pupil (Black):
- MR, 6 sc.
- Fasten off; use tail to sew or use safety eyes as an option.
Flowers on Shorts (Make 4 in Yellow)
- MR.
- Ch 3, 2 dc in MR, ch 3, sl st in MR (repeat 4 times for 4 petals).
- Fasten off, leave tail for sewing.
Assembly
- Sew eyes to head, refer to pattern directions for spacing.
- Sew arms symmetrically to body.
- Embroider smile/mouth with thin black yarn or embroidery thread.
- Sew flower appliqués to shorts.
- Weave in all ends.
- Stuff as needed for shape.

Pattern Correction
- Adjust increases/decreases if stitch counts do not match—double-check after each round.
- Adjust color changes, tail lengths, and flower details to suit your style.
Tips
- Use stitch markers to keep track of each round, especially for amigurumi.
- For color changes, always complete the last yarn-over of the last stitch in the old color with the new color for a clean transition.
- Stuff firmly but do not over-fill, especially the extremities and head, to avoid holes.
- Weave ends securely for durability, especially for toys meant for children.
Conclusion
This pattern allows you to create a charming amigurumi Patrick Star using simple crochet techniques, including the magic ring, single crochet, increases, decreases, and color changes for shaping. Suitable for intermediate beginners, this project can be completed in a day and serves as a delightful gift or personal collectible.