
Adorable Free Crochet Amigurumi Frog Pattern to Try
Follow this Free Crochet Amigurumi Frog Pattern to crochet a charming frog easily, adding a fun handmade touch to your collection or gifting ideas.
When I was working on my latest project, I came across a Free Crochet amigurumi frog pattern that instantly caught my heart. This adorable little frog is a wonderful example of amigurumi, a style of crocheting small, stuffed creatures that are both playful and charming. The frog features a smooth, rounded shape with softly textured stitches that give it a cuddly, handmade feel. Its standout features include big, friendly eyes and tiny limbs that really bring its character to life.
Cute Free Crochet Amigurumi Frog Pattern with Simple Steps

This pattern suits crocheters of all skill levels, especially those who enjoy creating cute toys or gifts. You can tweak the size by using different yarn weights and hook sizes, so the frog can be a petite keychain or a larger plush companion. The construction mainly involves working in continuous rounds with single crochet stitches, focusing on shaping with simple increases and decreases. A useful tip is to keep your stitches tight to prevent stuffing from showing through, especially when using lighter yarns.
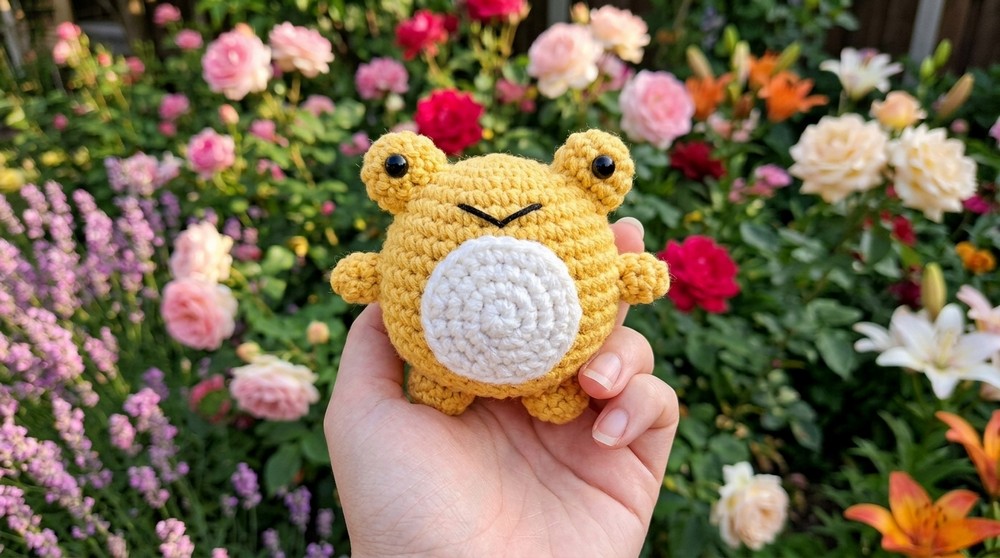
The inspiration behind this design comes from childhood memories of frogs in ponds and my love for crafting nature-inspired toys. Choosing a soft, washable yarn such as acrylic or cotton blends helps highlight the smooth stitch texture while making the frog durable and easy to care for. This amigurumi frog makes a perfect gift for birthdays, baby showers, or even as a cheerful desk buddy. Feel free to play with color variations and add personal touches, allowing your creativity to hop freely with each stitch.

Amigurumi Little Frog Pattern
This charming amigurumi frog stands about 10 cm tall and is worked almost entirely in single crochet, making it accessible to all skill levels. Composed of a main body, feet, hands, eyes, and a round belly patch, this little frog is ideal as a gift, keychain, or simply as a cute desk companion. The pattern guides you through seamless color changes, tight rounding for perfect shaping, and neat sewing for professional assembly. Optional features include pink or white bellies and simple facial embroidery for extra cuteness.
Pattern Notes
- The frog is worked in continuous rounds (spirals). Use a stitch marker to keep track of the first stitch.
- All parts are made separately and sewn onto the main body.
- Each piece starts with a magic ring for a tight, invisible circle.
- The safety eyes are inserted between rounds; secure well to prevent detachment.
- Use firm stuffing to maintain shape.
- Embroider the mouth with black thread, and consider adding “blush” with embroidery thread or pastel.
Skill Level
Beginner to intermediate: perfect as a first or second amigurumi project.
Materials
- Worsted weight/#4 acrylic yarn in yellow (main), white (belly), black (eyes)
- Small amount of black embroidery thread or thin yarn (for mouth)
- 3 mm crochet hook
- 6 mm safety eyes (pair)
- Polyester stuffing
- Scissors
- Tapestry/yarn needle
- Stitch marker
- Pins (for placing facial features and limbs)
Measurements / Sizing
- Finished frog: approx. 10 cm tall (4 inches)
- Belly patch diameter: approx. 2.5–3 cm
- Eye cap diameter: approx. 1.5–2 cm
Gauge
Gauge is not crucial, but make sure your stitches are tight enough to keep stuffing from showing through.
Stitch Abbreviations
- MR = Magic Ring
- ch = chain
- sc = single crochet
- inc = increase (2 sc in one stitch)
- dec = decrease (sc 2 together)
- sl st = slip stitch
- st(s) = stitch(es)
Special Stitches
Invisible decrease (dec):
Insert hook into front loop only of the next 2 sts, yarn over, pull through both loops, yarn over again, pull through both remaining loops on the hook.
The Crochet Pattern
At the very start of this amigurumi frog design, basic stitches and careful counting establish a strong foundation for the adorable character ahead. The pattern begins with the magic ring technique, which creates a neat and seamless base for the frog’s body. Consistent increases in each round shape the plump form, while tight single crochet stitches ensure durability and a firm structure. Precision at this stage guarantees an even, symmetrical body—an essential starting point that supports the toy’s plush, huggable appeal.
BODY
With yellow yarn:
- Round 1: MR, 6 sc into ring. Pull tight, sl st to first sc. (6)
- Round 2: 6 inc (2 sc in each stitch around). (12)
- Round 3: [1 sc, inc] x6. (18)
- Round 4: [2 sc, inc] x6. (24)
- Round 5: [3 sc, inc] x6. (30)
- Round 6: [4 sc, inc] x6. (36)
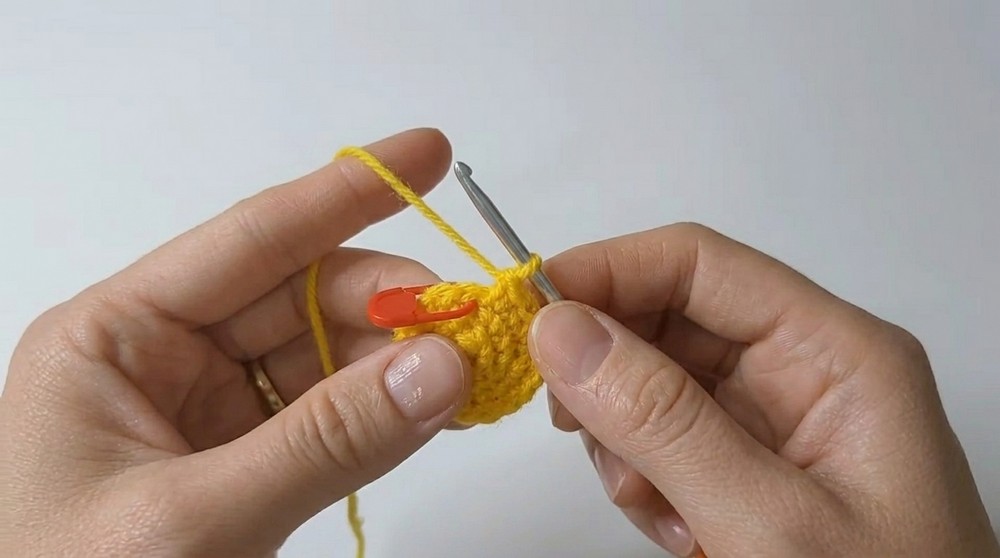
Rounds 7–14: sc in each stitch around (36 sts per round, 8 rounds total).
- Round 15: [4 sc, dec] x5. (30)
- Round 16: [3 sc, dec] x6. (24)
- Round 17: [2 sc, dec] x6. (18)
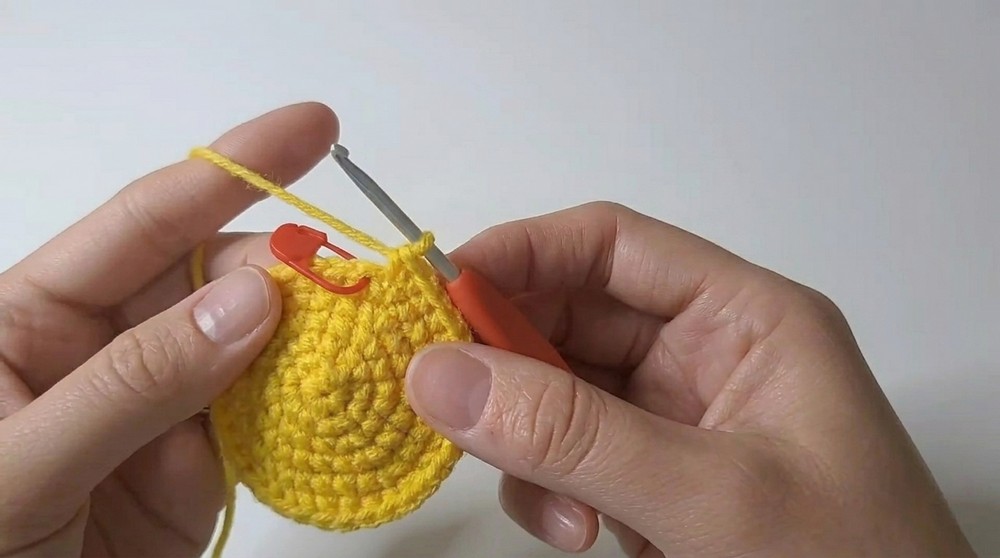
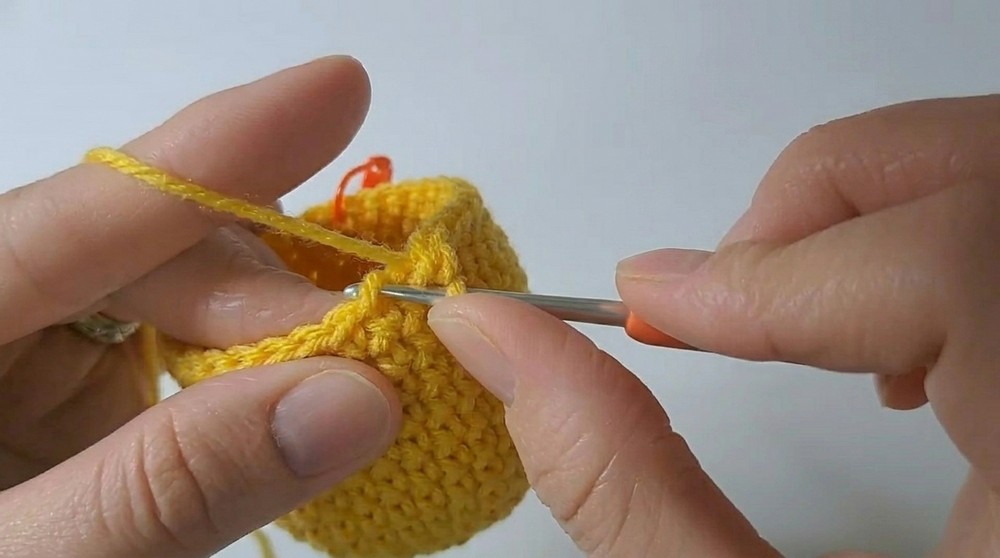
Lightly stuff as you go, maintaining a nice round shape.
- Round 18: [1 sc, dec] x6. (12)
- Round 19: 6 dec. (6)
Finish stuffing, fasten off, leave a long tail for sewing.
Use needle to weave tail through the front loops of the final 6 sts and pull tight to close.

LEGS (Make 2)
With yellow yarn:
- Round 1: MR, 6 sc. (6)
- Round 2: 6 inc. (12)
- Rounds 3–4: sc in each st around (12)
Fasten off, leave long tail for sewing. Stuff lightly.
ARMS (Make 2)
With yellow yarn:
- Round 1: MR, 6 sc (6)
- Rounds 2–3: sc in each st around (6)
Fasten off, leave long tail for sewing. No stuffing or minimal stuffing.
Moving to the middle section, the creation truly takes on its cheerful personality. Each separate part—legs, arms, belly patch, and eye caps—comes together through methodical rows and accurate assembly. Placement of the safety eyes and shaping of the limbs allow the unique face and expressive features to shine through. Adding these elements not only builds the character’s identity, but also gives a sense of progress as the frog becomes instantly recognizable, brimming with charm and little details.
EYE CAPS (Make 2)
With yellow yarn:
- Round 1: MR, 6 sc (6)
- Round 2: [1 sc, inc] x3 (9)
- Rounds 3–4: sc in each st around (9)
Fasten off, leave long tail for sewing.
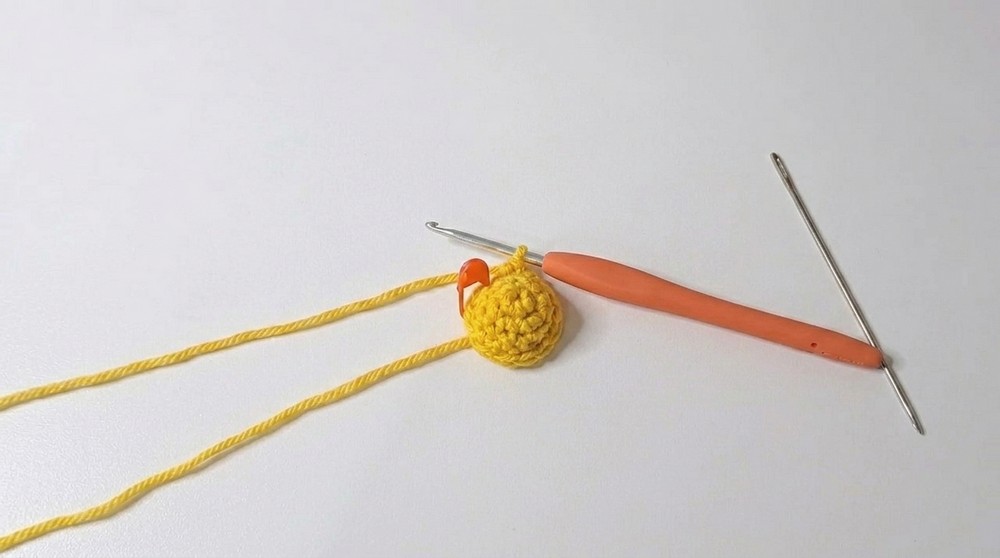
Insert 6 mm safety eye between rounds 2 and 3, align cap. Secure with washer and a dab of glue for extra safety if desired.
BELLY PATCH (White)
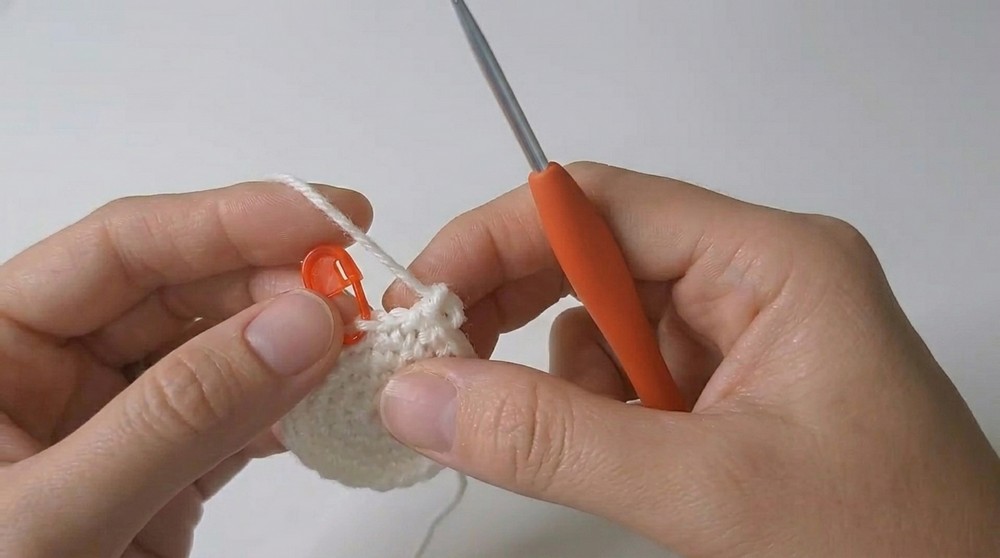
- Round 1: MR, 6 sc (6)
- Round 2: 6 inc (12)
- Round 3: [sc, inc] x6 (18)
- Round 4: [2 sc, inc] x6 (24)
Fasten off, leave a long tail for sewing.

Assembly & Finished Size
- Using pins, place eye caps between rounds 4 and 6 of the head, spaced evenly. Sew around each with the long tail.
- Center and pin the belly patch to lower half of the body. Sew with matching yarn.
- Attach arms between rounds 4 and 5, evenly spaced below eyes, and sew in place.
- Attach legs to bottom, about 2 rounds up from the lower opening, stuffing as you go for firmness.
- Embroider a small smile with black thread/yarn below eyes, spanning approx. 4 stitches.
- (Optional) Add blush to cheeks for extra cuteness.
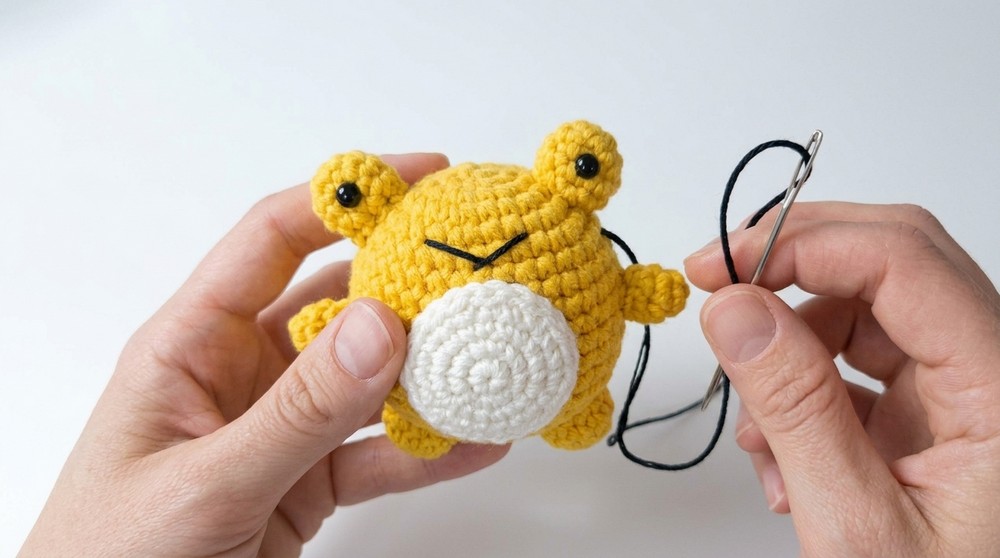
Bringing everything to a close, attention centers on fine details and assembly. Careful sewing of limbs and features anchors each component securely, ensuring years of play or display. Embroidering the mouth and optional blush marks adds warmth and individuality to the finished piece. This final process is as meaningful as the first stitch, providing satisfaction and pride in seeing the completed frog take shape—ready to be gifted or enjoyed as a delightful keepsake.
Quick Pattern Overview for Beginners
- Body: Work in a spiral, increasing to 36 sts, then even rounds, then decrease.
- Legs: Increase to 12 sts, a few rounds; stuff and sew to bottom.
- Arms: 6 sts, two short rounds; attach near face (no stuffing).
- Eyes: 6–9 sts, sew on white caps, insert safety eyes.
- Belly: Round patch, attach to tummy.
- Assembly: Sew all parts on, embroider the mouth.
Tips for Success
- Always use a stitch marker to keep track of rounds.
- Stuff parts firmly for durability and plumpness.
- If gifting to small children, ensure all pieces are sewn on very securely and eyes are glued as well as locked.
- Use pins for placing limbs and facial features to ensure symmetry.
- Add little details like embroidery or blush for personality.