
Free Crochet Spongebob Amigurumi Pattern Everyone Will Love
Brighten any space with this cheerful Crochet SpongeBob Amigurumi Pattern, fun for all skill levels and full of personality.
Soft, textured, and brimming with personality, this little figure brings a beloved underwater star into the handmade world. The Free Crochet SpongeBob Amigurumi Pattern in the second sentence offers a polished yet playful way to replicate a familiar face, blending bold details with subtle craftsmanship. With it, you’ll be able to shape his square form, stitch his bright smile, and anchor his nautical charm—all within a compact and friendly design.
Fun Free Crochet Spongebob Amigurumi Pattern That Sparks Joy

Whether it’s perched on a shelf, nestled next to a laptop, or serving as a cheerful gift, this finished piece adds character to any space. The pattern also helps hone essential techniques: sculpting three‑dimensional features, working with finer yarn for detail, and achieving neat joining's—so you’re not only ending up with an eye‑catching result but also enhancing your skills.
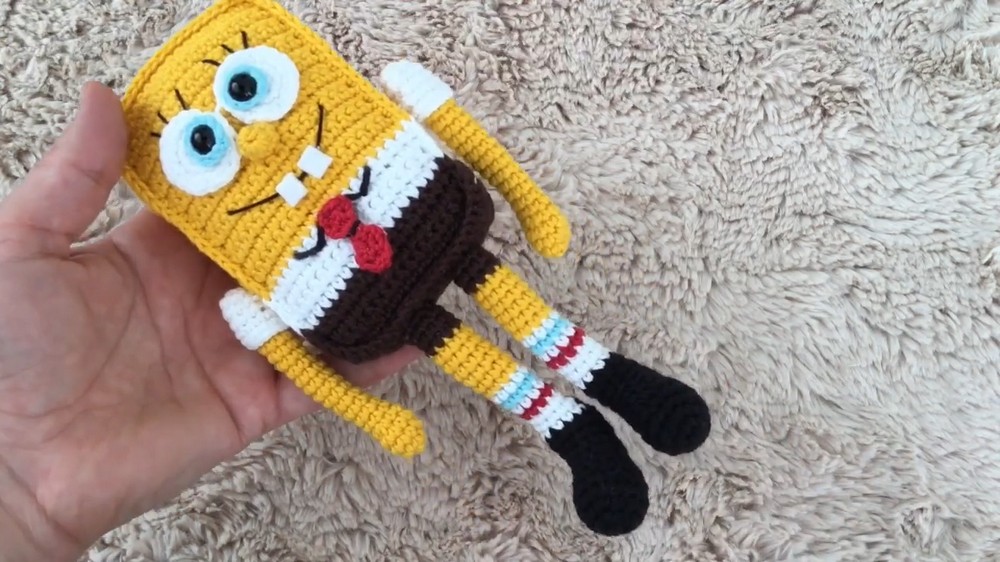
Finished in classic yellow, crisp white, and rich brown tones, the amigurumi captures the essence of its source while maintaining a handmade refinement. The contrast of smooth stitching with snug fabric gives the model a plush appeal that looks right at home in contemporary living rooms, study corners, or even children’s nurseries. Its compact size ensures it fits easily into your setting without losing visual impact.
Crochet Amigurumi SpongeBob Pattern
Materials List
- Yarn:
- Cotton or cotton-blend, anti-pilling, lint-free yarn in the following colors: yellow (body), brown (pants), white (shirt, socks, and eyes), black (shoes, mouth, pupils, lashes), blue (socks, eye irises), red (tie, sock stripes),
- Hook:
- 2.0–2.75 mm crochet hook (pattern recommends “75,” suggesting a small steel hook). Choose a size for a tight, amigurumi-style fabric.
- Other Supplies:
- Polyester fiberfill
- Yarn needle/tapestry needle
- Stitch markers
- Scissors
- Small amount of felt (for teeth, recommend white)
- Liquid silicone glue or fabric glue (for felt pieces)
- Sewing pins (optional, for assembly)
- Tweezers (optional, for felt placement)
- Safety eyes (optional) or black yarn for pupils/eyelashes
Key Abbreviations (US Terms)
- ch – chain
- sc – single crochet
- inc – increase (2 sc in same st)
- dec – decrease (sc2tog)
- sl st – slip stitch
- mr – magic ring
- BLO – back loop only
- st(s) – stitch(es)
- dc – double crochet
Special Notes
- The main body is made by joining flat pieces and seaming/crocheting around the perimeter.
- Work in back-and-forth rows for the main body; other pieces are made in the round (unless otherwise stated).
- Changing colors: Complete the last pull-through of the last stitch before a color change with the new color.
- Use a stitch marker to note your round/row begins and ends.
- Stuff as you go for better shaping.
Step-by-Step Crochet Pattern
Main Body (Make 2 Panels: Front & Back)
Panel Base
Each panel is identical.
- With brown yarn (pants):
- Ch 19.
- Row 1: Starting from 2nd ch from hook, sc in each ch (18).
- Rows 2–4: Ch 1, turn. Sc in each st. (18) (4 rows total in brown)
- Switch to white (shirt):
- Rows 5–8: Ch 1, turn. Sc across. (18)
- Switch to yellow (body):
- Rows 9–26: Ch 1, turn. Sc across. (18)

Fasten off. Make a second, identical panel.
Side Strip (Forms Depth/Sides)
- With white yarn:
- Ch 6.
- Row 1: Starting from 2nd ch from hook, sc 5.
- Rows 2–5: Ch 1, turn, sc 5. (4 rows in white)
- Switch to brown:
- Rows 6–31: Ch 1, turn. Sc 5. (26 rows)
- Switch to white:
- Rows 32–35: Ch 1, turn. Sc 5. (4 rows)
- Switch to yellow:
- Rows 36–89: Ch 1, turn. Sc 5. (54 rows)
Fasten off.

Assembly: Main Body
- Pin or hold the side strip (long edge) between the two panel pieces, matching color changes.
- Using yellow, white or brown as appropriate for each section, sc evenly around, joining edges of side strip to front and back panels.
- At corners, work 2 sc in a single stitch to keep corners flat and neat.
- Stuff body before closing final side.
- Weave in ends.

Arms (Make 2, Yellow)
- Round 1: MR, 6 sc. (6)
- Round 2: [inc] x 6 (12)
- Rounds 3–4: Sc around (12 each round)
- Round 5: (Sc 1, dec) x 4 (8)
- Rounds 6–20: Sc around (8 per round, 15 rounds)
- Round 21: (dec) x 2 (6)
- Sl st to close, fasten off, and leave a tail for sewing.
- Stuff lightly.
Hands (Make 2, Yellow)
- MR, 6 sc (6)
- Round 2: [inc] x 6 (12)
- Rounds 3–6: sc around (12 each round)
- Sl st to close, fasten off and leave a tail.
Do not stuff hands.
Legs and Feet (Make 2 of Each Segment; Work Continuously)
Start with Black (Shoes):
- MR, 6 sc (6)
- Round 2: [inc] x 6 (12)
- Round 3: (sc 1, inc) x 6 (18)
- Rounds 4–8: sc around (18)
- Round 9: (sc 1, dec) x 6 (12)
- Round 10: sc around (12)
- Next 8 rows: sc around (8 each round)
- Do not cut yarn. Change colors per below.
Change to blue (socks):
Work 2 rows, sc around (8).
Change to white:
2 rows, sc around (8).
Change to red:
1 row, sc around (8).
Change to white:
2 rows, sc around (8).
Change to yellow (legs):
Continue for 13 rows, sc around (8).
Sl st to close, fasten off, and leave a tail for sewing.
Stuff as you go.

Eyes (Make 2: White and Blue centers)
Whites:
- MR, 7 sc
- Round 2: [inc] x 7 (14)
- Round 3: (sc 1, inc) x 7 (21)
- Join with 2–3 sl st for smoother edge, fasten off, leaving a long tail for sewing.
Blue Center (Iris):
- MR, 9 sc, join with sl st, fasten off (leave a tail).
Pupil:
Use black yarn to embroider or attach a small safety eye.
Nose (Yellow)
- MR, 6 sc (6)
- Round 2: sc around (6)
- Do 3 sl sts to finish, fasten off with long tail.
Mouth & Eyelashes
- Use black thread or yarn to embroider a mouth shape and lashes above eyes.
- For the collar, embroider with black yarn just below head section.
Tie (Red)
- Ch 2, 3 sc into the second ch from hook, turn.
- Row 2: Ch 1, 3 sc, turn.
- Row 3: Ch 1, 1 sc, dec (2 sc)
- Row 4: Ch 1, dec (1 sc), finish off.
- Weave in a piece of black yarn at the center to imitate knot and attach.
Teeth
- Cut two identical little rectangles from white felt.
- Attach carefully under the mouth area using fabric glue or silicone. Use tweezers for accuracy.
Final Assembly
- Sew hands to ends of arms.
- Sew arms and legs to body at the sides.
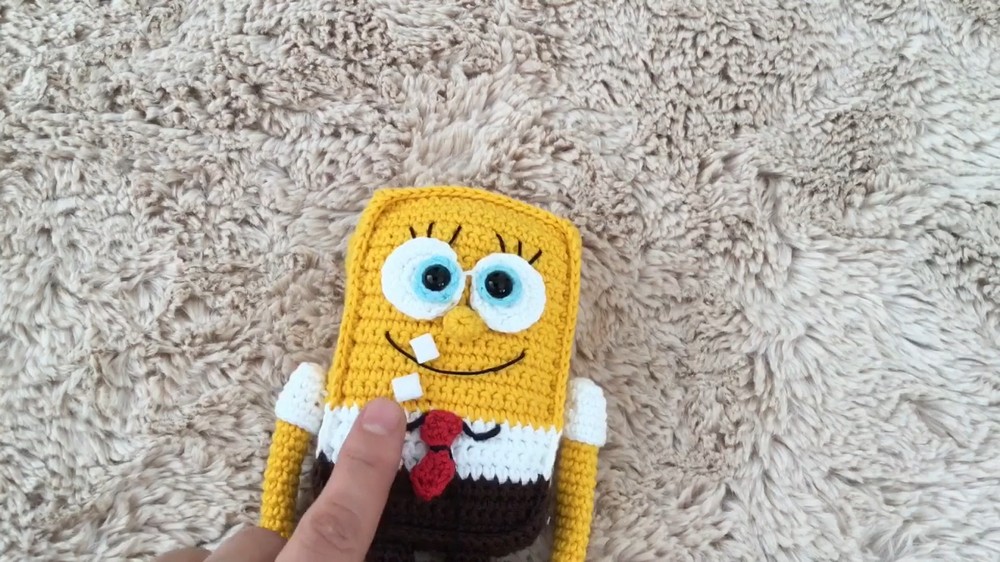
- Sew or glue on eyes, then iris and pupil/black safety eye/embroider as desired.
- Attach nose between and slightly below eyes.
- Embroider mouth, lashes, and collar details.
- Attach tie below the collar.
- Glue or sew felt teeth under the mouth.
- Take time to arrange and sew all features symmetrically.
Pattern Correction
- Double check stitch counts for each panel/limb; always maintain even edges and proportional sides.
- Corners may need 2 sc in the same st; keep piece flat.
- Felt teeth must be securely glued and trimmed for safety, especially for child use.
- Stuff well but do not overstuff, especially narrow limbs.
Tips
- Use cotton or anti-pill yarn for a durable, fuzz-free plush.
- Secure all yarn tails inside with knots and weaving to prevent unraveling.
- Light stuffing gives a better shape to eyes, nose, and hands.
- Embroider facial details before attaching panels, if easier.
Conclusion
This SpongeBob amigurumi is a fun and engaging project suitable for confident beginners to intermediate crafters. The details (colorwork, assembly, facial embroidery) build practical amigurumi skills while producing a charming 20 cm character—perfect as a gift! Personalize as desired and enjoy your cheerful creation.