
Crochet Rabbit Amigurumi Pattern for Creative Gift Ideas
Cuddle up with the best crochet creation—an adorable Rabbit Amigurumi! With our easy-to-follow pattern, craft your dream bunny today.
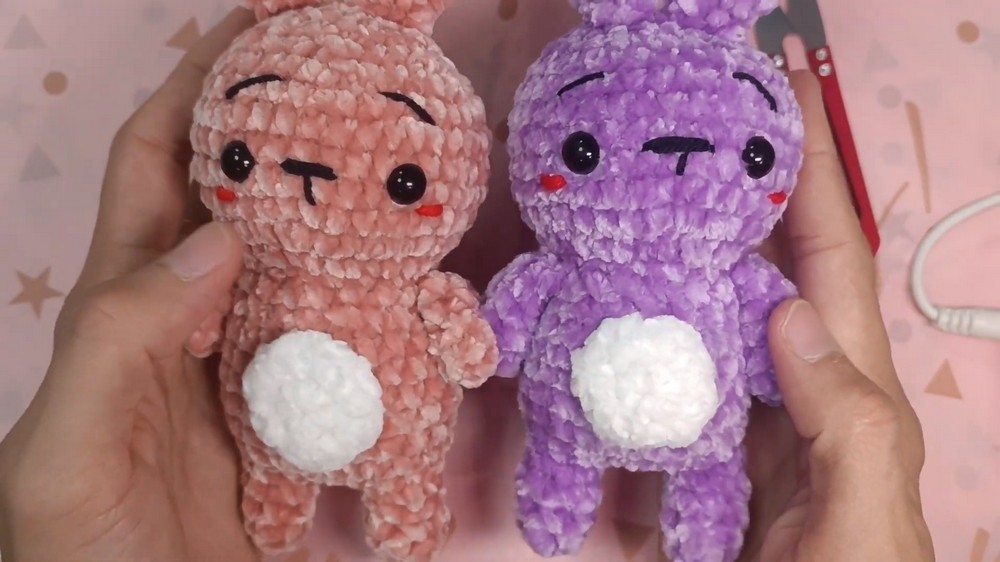
Starting with small legs that connect seamlessly into a soft, plush body, this adorable bunny design adds charm to any handmade collection. Using plush yarn to create a cuddly texture, the finished rabbit stands out with symmetrical safety eyes, a cute nose, and tiny blush stitches that bring its face to life. Lightweight yet durable, it makes for a heartwarming gift or a delightful addition to children’s toys. Its soft, fluffy design ensures it’s great for decorative purposes or comforting hugs.
Crochet Plush Rabbit
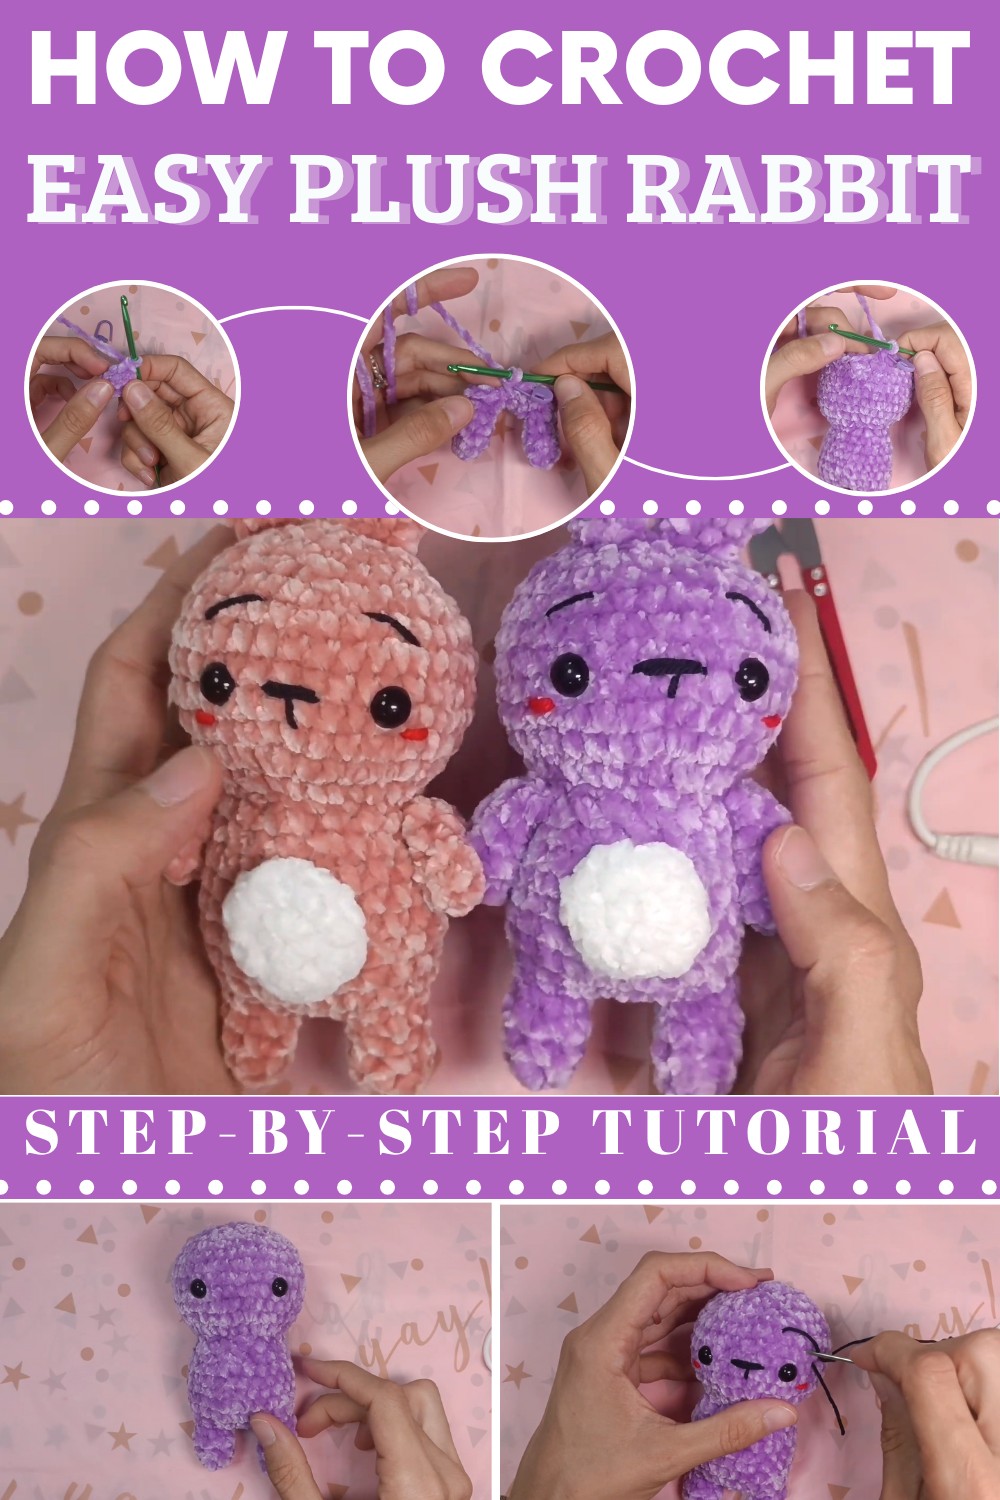
Cute Crochet Bunny Tutorial
In this tutorial, you’ll learn step-by-step instructions to create a super adorable crocheted bunny. This project is beginner-friendly and involves basic crochet stitches. Follow along to craft your own cute, plush bunny!
Materials Required
To make this bunny, you’ll need the following materials:
- Yarn: Plush yarn (e.g., Chanelia) – white and purple/pink or any other desired color.
- Crochet Hook: 4mm crochet hook.
- Additional Supplies:
- Stitch marker
- Pair of scissors
- Needle
- 8mm safety eyes (or any preferred size)
- Black and red thin yarn for facial details
- Stuffing
Abbreviations (Stitches Used)
- MR = Magic Ring
- SC = Single Crochet
- INC = Increase (2 SC into the same stitch)
- DEC = Decrease (crochet 2 stitches together) – invisible decrease method is preferred
- SLST = Slip Stitch
- CH = Chain
Step-by-Step Instructions
Part 1: Bunny Legs
- Start with magic ring (MR): Make 4 SC into the ring (Round 1). Pull the yarn end to tighten the loop.
- Insert the stitch marker into the last stitch of the round. (Ensure the marker stays in the last stitch after completing each round).
- Round 2:
- SC into the first stitch.
- INC (2 SC in the next stitch) – repeat until row is complete. You should now have 6 stitches.
- Round 3 to Round 5: Continue working 6 SC per round (1 SC in each stitch for all three rounds).
- Rounds 6 and 7: Do another 2 rounds of 6 SC each. After completing the first leg, tie off using SLST, Chain 1, and cut yarn.
- Make the second leg WITHOUT tying off, as you’ll start forming the body by attaching the two legs together.
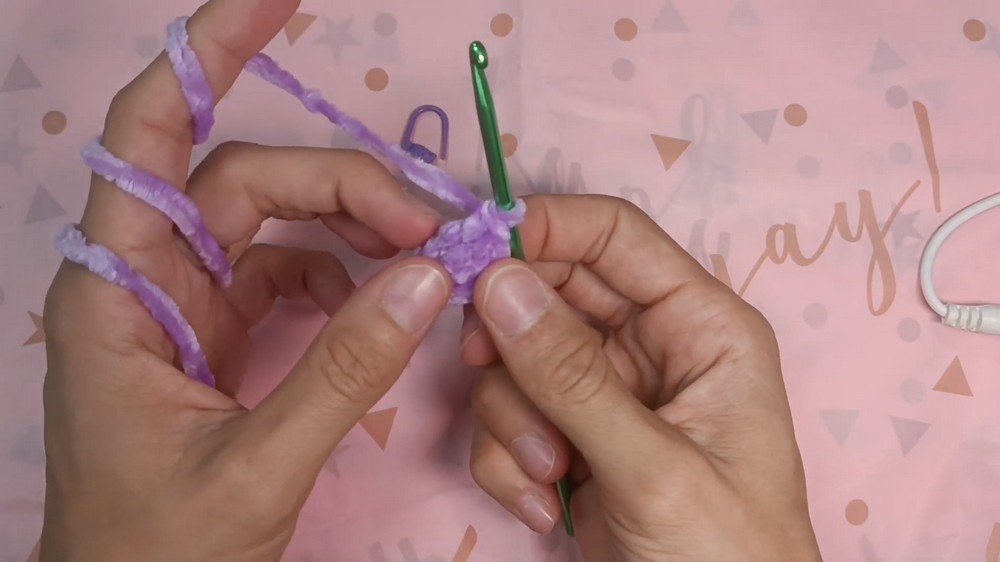
Part 2: Joining Legs and Forming the Body
- Attach the legs using chains: Chain 3 from the second leg, and join them to the first leg with a SC.
- Work 6 SC on the first leg. Then work 3 SC across the chains and 6 SC across the second leg before working 3 SC along the chain backside (18 total stitches).
- Insert the stitch marker in the last stitch and keep track of rows!
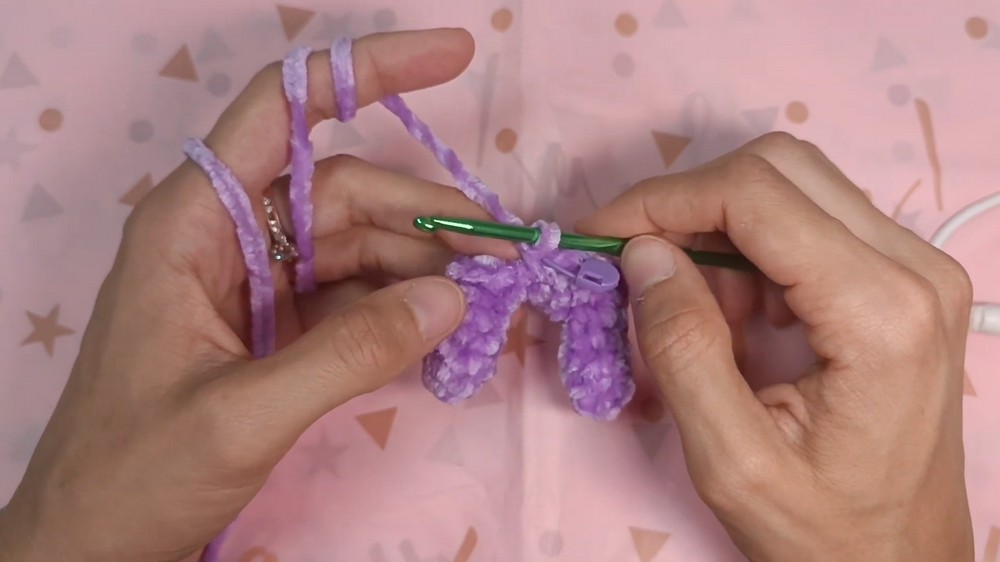
Body
- Round 7: SC into the first two stitches, then INC into the third stitch. Repeat this pattern (2 SC, INC) for 6 repetitions (24 stitches total).
- Rounds 8 to 12: Continue working 1 SC in each stitch for 5 rounds (24 stitches per round).
- Stuff the legs slightly using the stuffing material. Push evenly with a crochet hook to fill the small spaces.
- Round 13: Start decreasing with the following pattern: SC in the first two stitches, then DEC. Repeat this pattern for 6 repetitions (18 stitches total).
- Round 14: Work 18 SC (one SC in each stitch, no increases or decreases).
Part 3: Creating the Head
- Round 15: Start with increasing stitches to shape the bunny's head. Use the pattern: SC in the first four stitches, INC in the fifth stitch. Repeat 6 times (30 stitches total).
- Round 16: SC in the first three stitches, then INC (2 SC in the next stitch). Repeat 6 times (36 stitches total).
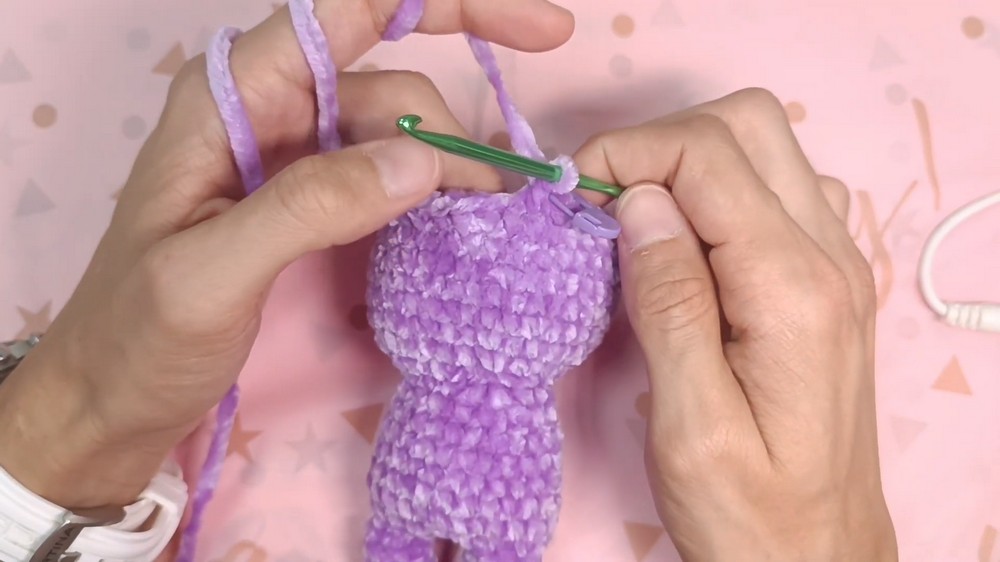
Top of the Head
- Rounds 17 to 21: Work 36 SC (1 SC in each stitch for 5 rounds).
- Round 22: Begin decreasing. Use the pattern: SC in the first four stitches, then DEC in the next stitch. Repeat for six iterations (30 stitches total).
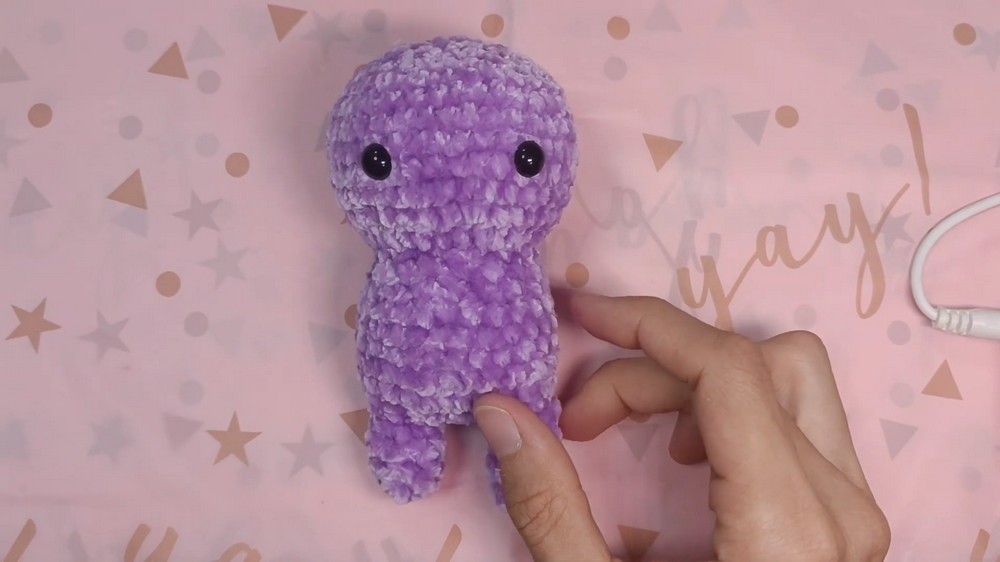
- Insert the safety eyes: Position them between rows 4 and 5 of the head and leave 5 stitches between the eyes for symmetry. Push washers into the back to secure the safety eyes.
- Round 23: SC in the first three stitches, then DEC in the next stitch. Repeat this pattern for 6 repetitions (24 stitches total).
- Stuff the head generously but avoid overstuffing to prevent holes.
- Round 24: SC in the first two stitches, then DEC. Repeat this pattern 6 times (18 stitches total).
- Round 25: SC in the first stitch, then DEC. Repeat this pattern 6 times (12 stitches total).
- Round 26 and Final Head Round: Work 6 decreasements for 6 consecutive stitches to close the top.
- SLST in the next stitch and CH1. Cut the yarn, leaving a long tail. Use the tail and needle to sew the gap shut by sewing through the loops of the last remaining stitches. Knot tightly and pull the yarn inside the head to hide it.
Part 4: Arms
- Start with an MR: Work 6 SC into the ring (Round 1).
- Insert the stitch marker into the last stitch.
- Rounds 2 to 5: Work 6 SC per round (1 SC in each stitch for 4 rounds).
- SLST into the next stitch and CH1. Cut your yarn, leaving a tail for sewing, and complete a second arm.
Part 5: Ears
- Round 1: Create an MR, then 4 SC into the ring.
- Pull yarn tail to close the ring and insert the stitch marker in the last stitch.
- Round 2: Work 4 SC (1 SC in each stitch).
- Round 3: SC in the first stitch, then INC in the second stitch. Repeat this pattern 2 times, for a total of 6 stitches.
- Round 4: SC, then INC in the next stitch. Repeat this pattern 3 times (9 stitches).
- Rounds 5 to 7: Work continuously in 9 stitches.
- Final rounds: Begin decreasing: SC in the first stitch, then DEC in the second stitch. Repeat 3 times (6 stitches total). On the final row, work one SC into every stitch, then finish off with a SLST and CH1. Leave a long tail for sewing.
- Repeat step 7 to make the second ear.
Part 6: Tail
- Round 1: MR, then work 6 SC into the ring.
- Round 2: Make 6 INC (12 stitches total).
- Round 3: Work 6 decreases to close the tail.
- SLST into the next stitch, then CH1 and cut the yarn. Leave a long tail for sewing.
Final Assembly
- Sew the ears at the top of the bunny’s head. Position them symmetrically.
- Attach the arms near the body’s top side.
- Sew the belly with white yarn at the center of the body. Ensure it's even and aligns well.
- Add the tail between the bunny’s legs. Stitch carefully for durability.
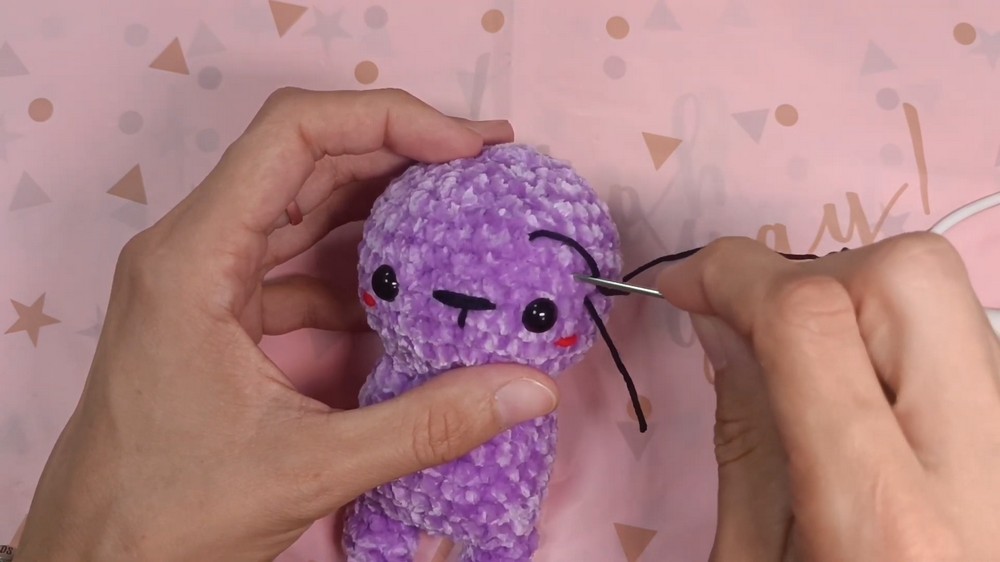
- Facial Embroidery:
- Use blush yarn for the cheeks and black yarn for eyebrows and muzzle. You will create a triangular nose and small eyebrows above the eyes. Secure everything with knots and hide tails within the body.
Conclusion
You’ve completed your crochet bunny! This adorable plush toy is perfect for gifting, décor, or simply a joyful project to work on. If you’re a beginner, this pattern allows you to explore key crochet stitches, and for seasoned crafters, this whimsical bunny is a quick and satisfying creation.