
Crochet Amigurumi Dog Pattern Easy Amigurumi & Free Tutorial
Try the Free Crochet Amigurumi Dog Pattern and enjoy making a cute handmade pup that adds warmth to gifts displays and cozy spaces for everyone to love.
Cute handmade animals can bring a warm and playful feeling to any space. Small crochet dogs are especially charming because they capture the friendly look of a favorite pet in a tiny, lovable form. The Free crochet Amigurumi Dog pattern, featuring the creative work of AmigurumisKellyJimenez, shows how crochet can turn a simple idea into a sweet little character with personality and charm.
Free Crochet Amigurumi Dog Pattern for Beginners
Her work with crochet amigurumi helps bring out the small details that make an animal design look lively and recognizable. This dog has a compact shape, playful proportions, and a friendly appearance that gives it the look of a tiny crochet companion. The balanced design makes the finished piece appealing from different angles while keeping its overall style cute and simple.

This project can also become a thoughtful handmade gift. A little crochet dog is a sweet choice for dog lovers, children, friends, or family members. It can be given for birthdays, holidays, celebrations, or simply as a cheerful surprise.
The design also works well as a decorative accent in a bedroom, nursery, workspace, or cozy corner. Its handmade appearance adds warmth and personality while its cute dog shape makes it easy to notice and enjoy.

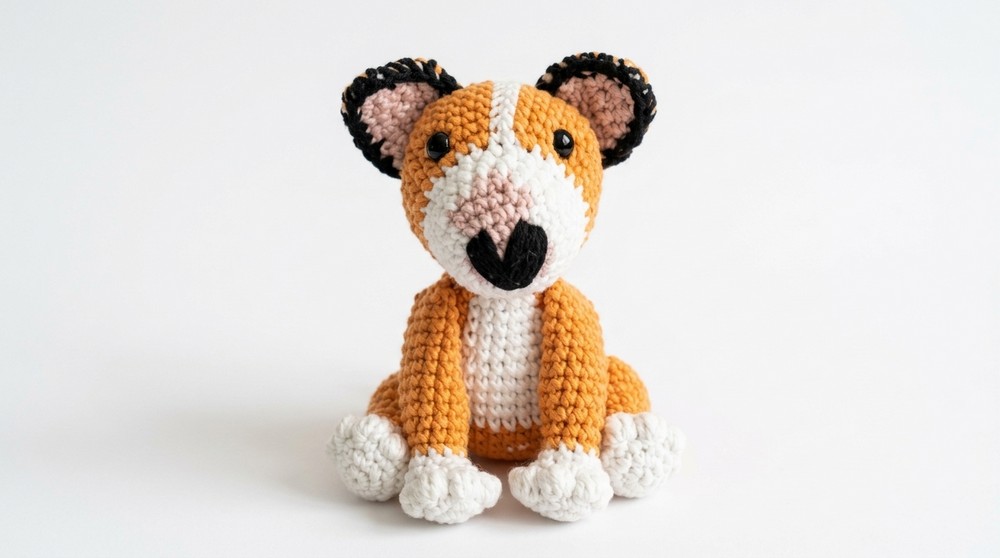
Cute Dog Amigurumi Pattern (Approx. 11 cm)
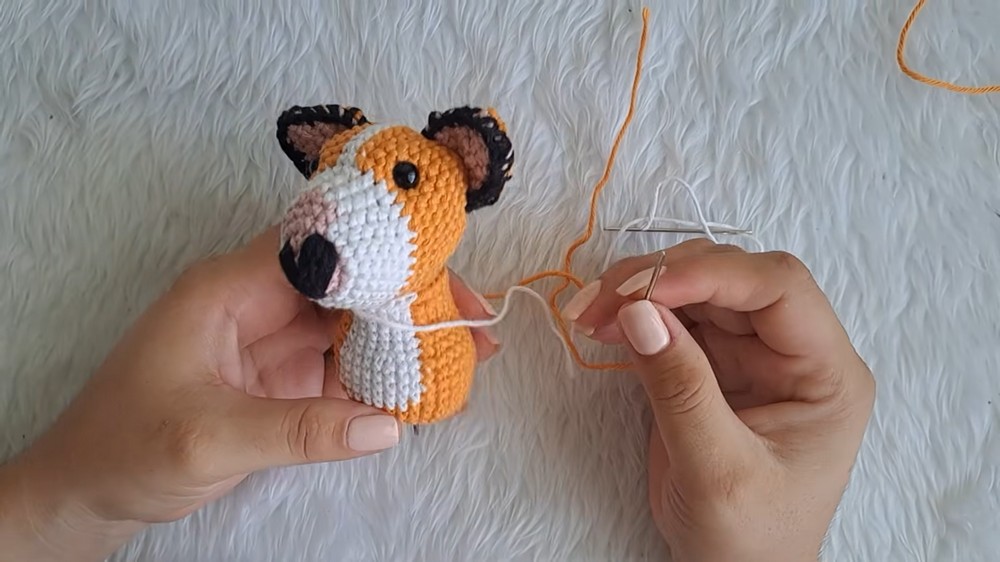
This Bu Terrier amigurumi is a charming and adaptable project designed for both play and display. With the option to customize color placement and spots, this small dog is equally at home in neutrals or bright shades. Its construction uses classic amigurumi techniques, basic colorwork, and a bit of embroidery, making it engaging without being overly complicated.
Skill Level
Intermediate
You’ll need foundational experience in amigurumi (working in the round, changing colors, and basic shaping), as well as comfort joining small parts and embroidering facial features. The pattern involves color changes, simple increases and decreases, as well as a decorative pineapple (bobble) stitch.
Materials
- Cotton yarn in 3–4 shades (e.g., white, color for spots or patches, color for body and ears, and pink for ears/spot)
- Hook: 2.5–3 mm crochet hook (to fit yarn weight; adjust as needed for tight stitches)
- Fiberfill stuffing
- Safety eyes: 7–8 mm colored safety eyes
- Scissors
- Yarn needle
- Stitch marker
Special Stitches
- Magic Ring (MR): Adjustable ring used to start amigurumi.
- Pineapple Stitch (Bobble): Work 4 hdc into same stitch, then yarn over and pull through all five loops on hook.
- Increase (inc): Two stitches in the same base stitch.
- Decrease (dec): Single crochet two stitches together.
Stitch Abbreviations
| Abbreviation | Stitch Name |
|---|---|
| ch | chain |
| sc | single crochet |
| hdc | half double crochet |
| sl st | slip stitch |
| inc | increase |
| dec | decrease |
Useful Tips
- Change colors by completing the last yarn over of the stitch before the color switch with the new color.
- Use a stitch marker to keep track of the beginning of each round.
- Always stuff as you go, especially before closing rounds.
- Keep tension firm for a neat amigurumi and ensure stuffing doesn’t show through the stitches.
- Embroider the nose and sew on pieces carefully for symmetry and expression.
Pattern Instructions
1. HIND LEGS (Make 2)
Round 1:
- 6 sc in magic ring (MR). (6)
Round 2:
- 6 inc (12)
Round 3:
- (1 sc, 1 inc) x6 (18)
Round 4:
- 6 sc, then [pineapple stitch (bobble) (work 4 hdc in one stitch, yarn over, pull through all five loops), 1 sc] x4, then 4 sc (18)
- Bobble stitch: see special stitches; always followed by a sc in the next stitch.
Round 5:
- (1 sc, 1 dec) x6 (12)
- Work decreases by inserting the hook in front loops only for a neater finish. Before the last decrease, change color (if desired).
Round 6:
- 12 sc evenly around.
Round 7:
- 12 sc.
Round 8:
- (3 sc, 1 inc) x3 (15)
Round 9:
- (4 sc, 1 inc) x3 (18)
Rounds 10–13:
- 18 sc per round (4 rnds total)
Round 14:
- (1 sc, 1 dec) x6 (12)
Finish with a sl st in the front loop only. Fasten off, leaving long tail. Stuff firmly and close by weaving through each front loop of the last round; pull tight to close. Make a second hind leg in the same way.
2. FRONT LEGS (Make 2)
Work Rounds 1–6 as for hind legs.
Round 7–8:
- 9 sc (in new color)
Round 9:
- (2 sc, 1 inc) x3 (12)
Rounds 10–18:
- 12 sc per round (9 rnds total)
End at the midpoint of the back of this leg. Finish with a sl st, leave a long tail, stuff up to about round 9, and close as with hind legs. Make a second one the same way.
3. EARS (Make 2 sets of 2 pieces each)
Each ear is layered: one piece in body color, the other in pink (for the inner ear).
Using pink yarn:
- Ch 8, skip last ch, 7 sc back along the chain.
- Ch 1, turn, 7 sc. Repeat one more time (3 rows total).
- On the next row, skip first st, sc across next 4 sc, then dec across last two (5).
- Ch 1, turn, 5 sc.
- Ch 1, turn, skip first st, 2 sc, dec (4).
- Ch 1, turn, 3 sc.
- Ch 1, turn, skip first st, 1 sc in next st (2).
- Fasten off.
Repeat for second pink piece and twice more for the outer ear in body color.
Joining the ear pieces: Layer a pink piece on a body color piece (pink to front), attach black yarn or matching body color yarn at the right side, sc around the ear (securing the two layers together). When reaching the wide end (base), add an inc for shaping. Hide yarn tails inside ear after joining. Repeat for second ear.
With a yarn tail of body color, close the ear opening as desired for assembly.
4. HEAD
Pink Nose Spot:
- MR, 8 sc.
- 8 inc = 16
- (1 sc, 1 inc) x8 = 24.
- Switch to white near end of round for colorwork.
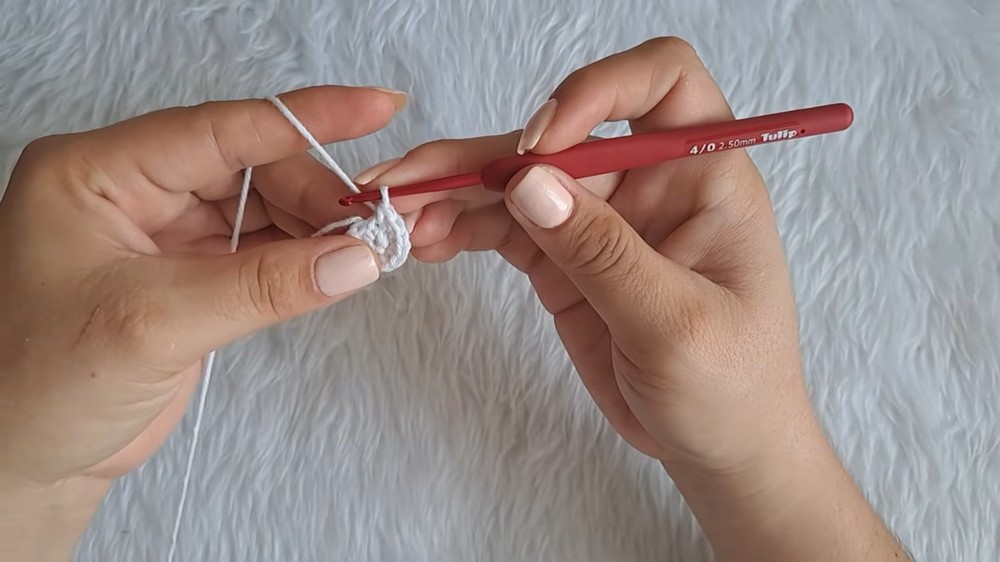
Continue working the head:
Round 1 (after spot):
- (3 sc, 1 inc) x3 in white, then (2 sc, 1 inc) x2 in pink. Repeat alternating colorwork as indicated for your unique spot placement or follow the video for classic patch location. Total at the end: 24.
Round 2:
- In white: 9 sc; in pink: 6 sc; in white: 9 sc (24)
Round 3:
- In white: 8 sc; in pink: 3 hdc; color change, 2 hdc; switch back, 3 hdc; continue with 8 white. (24)
Round 4:
- 9 white sc, 6 pink hdc, 9 white sc
Round 5:
- 10 sc, 4 hdc, 10 sc. Continue colorwork to fit the desired patch configuration.
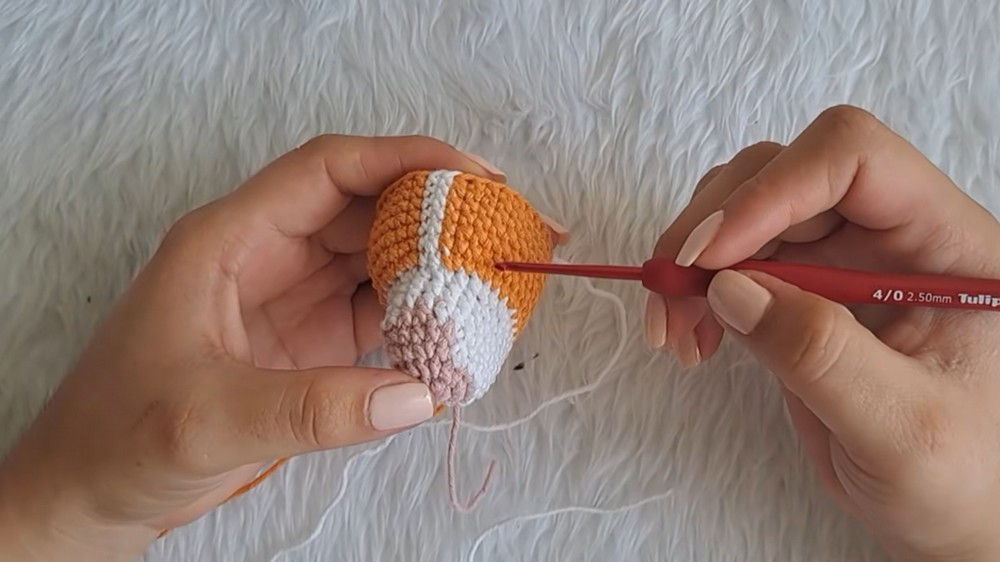
Round 6:
- 6 sc, (1 sc, 1 inc) x6, 6 sc (30)
Round 7:
- 6 sc, (2 sc, 1 inc) x6, 6 sc (36)
Rounds 8–15:
- 36 sc, continue colorwork as desired for eye/ear patch. Refer to video for spot placement; main rounds in white with a patch and/or ear color as desired.
Insert safety eyes between rounds 10 and 11, spaced 10 stitches apart (find center, count 4 right/4 left from middle).
Embroider nose between rounds 2 and 3, centered, forming small heart or bar shape as preferred.
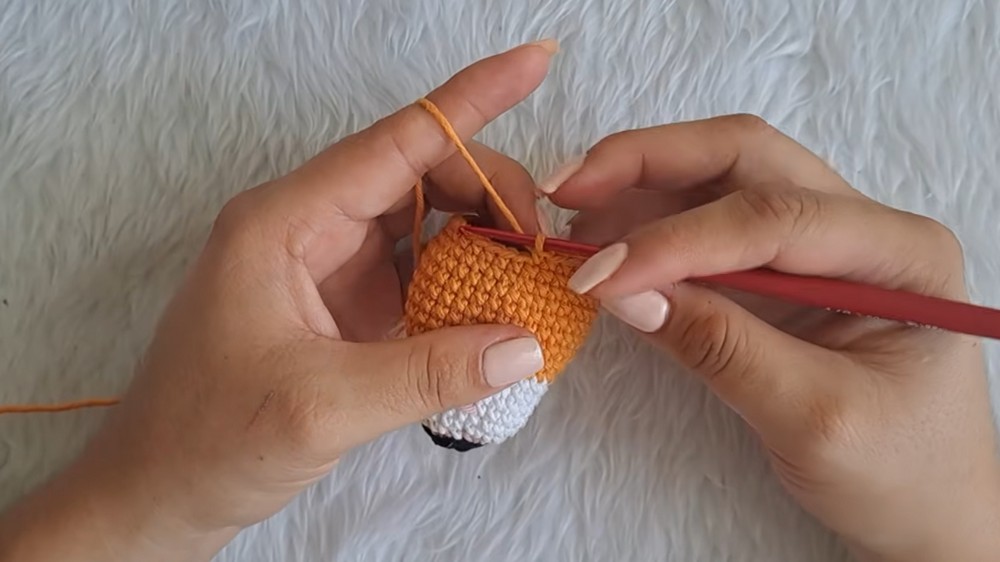
Shaping: Begin decreasing:
- (4 sc, 1 dec) x6 (30)
- (3 sc, 1 dec) x6 (24)
- (2 sc, 1 dec) x6 (18)
- (1 sc, 1 dec) x6 (12)
- Fasten off with sl st in the front loop only.
- Stuff and close head as for limbs.
5. BODY
Round 1:
- MR, 8 sc
Round 2:
- 8 inc (16)
Round 3:
- (1 sc, 1 inc) x8 (24)
Round 4:
- (2 sc, 1 inc) x8 (32)
Round 5:
- 32 sc
Round 6:
- 13 sc in base color, 6 white sc, 13 in base color (32). Work color changes as needed (refer to the spot layout).
Rounds 7–10:
- 12 sc in main color, 8 white, 12 main (32)
- Continue 4 rounds total
Round 11:
- (2 sc, 1 dec) x3, color change, (2 sc, 1 dec) x2, color change, (2 sc, 1 dec) x3 (24)
Rounds 12–16:
- 9 sc, 6 white sc, 9 sc (24)
- Complete 5 rounds total
Finish with a sl st, leave tail, stuff, and close as the other pieces.
6. TAIL
Make a small tube by chaining 6 and working sc around for 5–6 rounds. Fasten off, leaving tail for sewing.
Assembly and Sizing
- Size: Approximately 11 cm tall (using DK cotton and 2.5–3 mm hook, even tension, and firm stuffing).
- Sew head on body: Align evenly, using yarn tails to sew all the way around.
- Attach tail between body rounds 16 and 17 (centered on back).
- Attach ears to sides of head between rounds 16 and 17, spaced about 5 stitches apart. Secure firmly, shaping as desired.
- Embroider nose (between rounds 2–3) in chosen style (bar, triangle, heart).
- Attach hind legs to base of body, front legs diagonally for sitting posture. Sew one stitch between legs to fix front posture if desired.
- Ensure all sewing is secure, conceal and weave in ends neatly.
Conclusion
The Bu Terrier amigurumi is a highly adaptable, expressive small dog pattern suitable for a variety of color choices. Shaping, unique bobble stitch details, and colorwork allow for creative expression. Use this design as a base for further customization—experiment with spot layouts, yarn textures, or accessories. This project rewards careful work with an engaging, characterful companion in your amigurumi collection.