
Cute Crochet Bouquet Doll Free Pattern with Simple Stitch Details
Add a warm and special touch to any gift or home decoration with a Crochet Bouquet Doll made using simple steps that anyone can follow easily.
Have you ever seen a gift that looks like a bunch of beautiful flowers but feels soft and cozy? That’s what the Crochet Bouquet Doll is all about. Designed by Shelen Crochet, this charming creation looks like a small bouquet made with yarn, full of color and sweet details. It’s a lovely decoration for any room or a thoughtful present that can make someone’s day brighter.
Free Crochet Bouquet Doll Pattern with a Soft Amigurumi
The Crochet Bouquet Doll has a warm and friendly style that fits well in many places. Whether it sits on a shelf, decorates a desk, or becomes part of a special gift, it brings joy with its cheerful look. Its design is simple yet full of character, showing the care and art that went into making it. Seeing this doll can make you smile because it looks like a hug made from yarn.
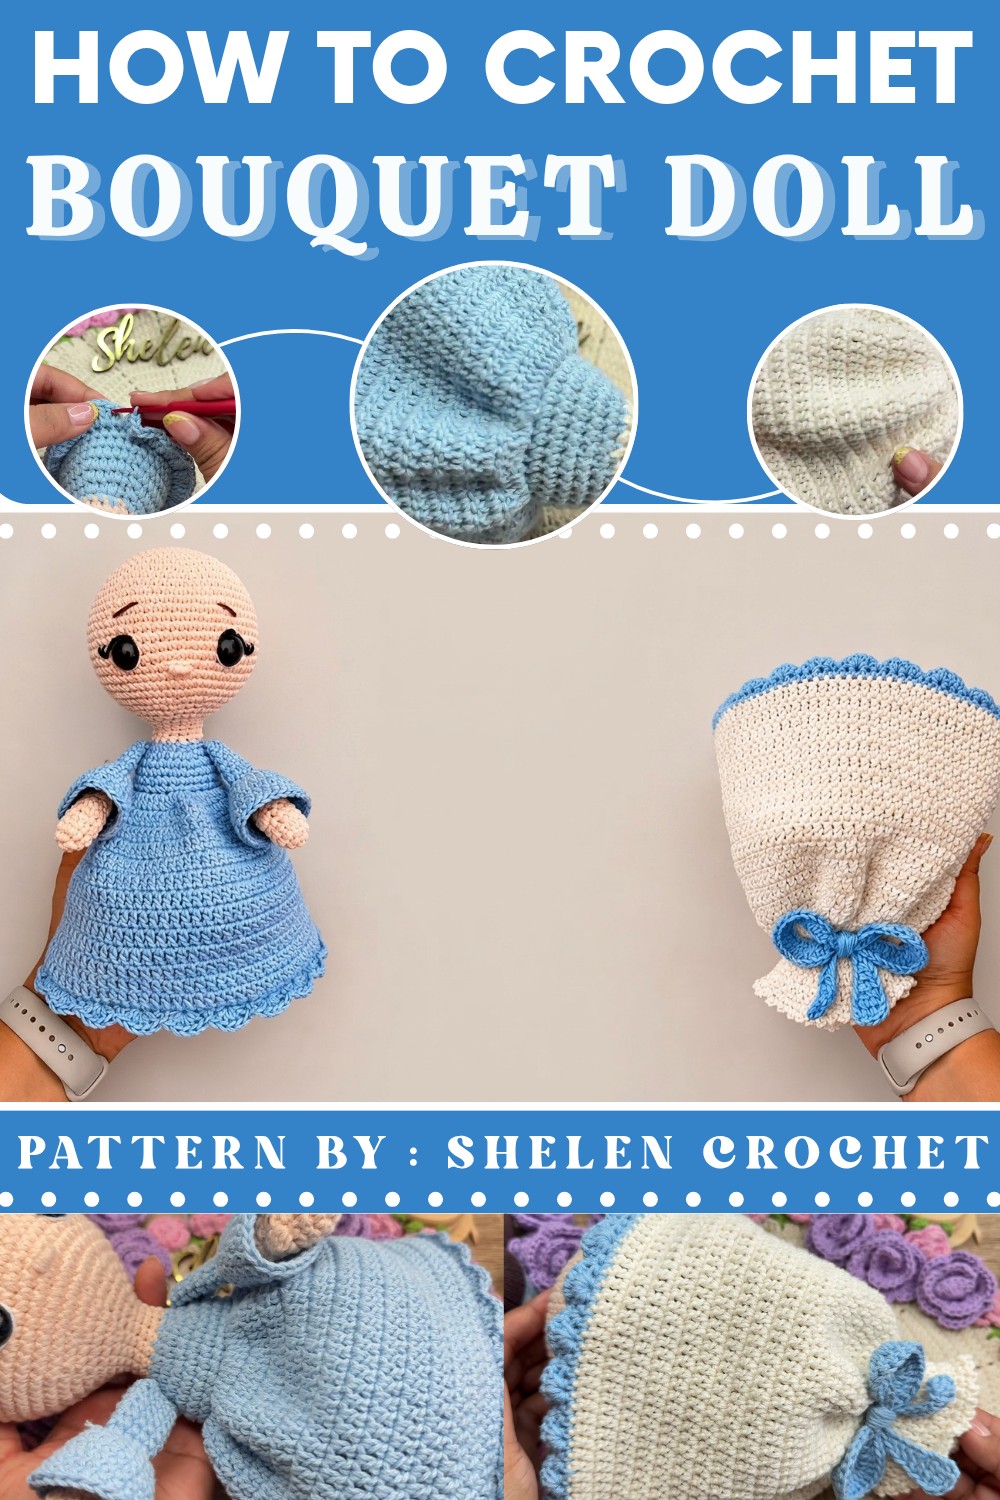
Shelen Crochet’s idea behind this doll is to bring happiness using easy-to-love shapes and colors. It’s a unique way to add something handmade and special to your favorite spaces. Plus, it’s great for anyone who likes small, cute things that feel like a little piece of sunshine.
If you want to add some handmade charm to your home or surprise a friend with a sweet and colorful present, the Crochet Bouquet Doll is a nice choice. You can find the free pattern online, so it’s easy to start. Take a look and enjoy making your own little bouquet doll to brighten up your day!
Before Making Watch Part 1:
Reversible Bouquet Doll (Part 2: Dress, Bow & Hands)
Today in this second part, we will make the little bow, the main part of the bouquets—which is the dress—and join the little hands. Let’s begin.
Pattern Highlights
Dress
- Dense, full skirt: Created with rapid increases and worked in the round from the base.
- Ruffled hem: Layered construction and a scalloped, decorative edge.
- Double-layer effect: Features a contrast color lower tier.
Bow
- Decorative statement piece: Shaped central bow and long legs.
- Bilateral symmetry: Bow is worked flat and in the round.
Hands & Sleeves
- Amigurumi style hands: Well-shaped palm and thumb with stuffing.
- Long, puffed sleeves: Securely joined to the dress.
- Seamless attachment: Hands are joined with neat stitching for strength.
Notes
- Always work the skirt in continuous rounds unless directed otherwise.
- Use the specified hook size and cotton yarn for best structure.
- Stuff hands lightly before finishing them.
- Bow may be sewn or glued with silicone as shown in the video.
- Weave in all ends securely for a tidy appearance.
- Color changes are essential for visual clarity and matching the original.
Skill Level
Confident Beginner to Intermediate
- Basic crochet stitches and increasing/decreasing, working in the round, amigurumi, joining pieces, and some simple decorative work.
Materials
- 50g bluish cotton yarn
- 50g raw cotton yarn
- Flesh-colored cotton yarn (small amount for hands)
- Polyester pillow stuffing
- Size 2.5 mm crochet hook
- Medium embroidery needle
- Scissors
- Silicone (hot glue or craft glue for bow & finishing)
Measurements / Sizing
- Dress circumference at hem: About 88 stitches around
- Dress length: Approx. 13 rounds for the first layer; 16 rounds for the under-skirt (length to suit a 20 cm bouquet doll)
- Bow length: Approx. 41 chains before ruffling
- Hands: Palm about 3 cm in diameter
- Sleeves: About 25 stitches around at widest point
Gauge (and Stitch Pattern)
- Gauge is not critical; counts and rounds matter more for correct shaping and assembly.
- Stitch pattern: US double crochet (dc) for most of the dress, single crochet (sc), half double crochet (hdc), and slip stitch (sl st).
- Amigurumi in single crochet for hands and sleeves.
Stitch Abbreviations
| Abbreviation | Stitch Name |
|---|---|
| ch | Chain |
| sl st | Slip stitch |
| sc | Single crochet |
| hdc | Half double crochet |
| dc | Double crochet |
| tr | Treble (triple) crochet |
| inc | Increase (2 sts in one) |
| dec | Decrease (amigurumi) |
| MR | Magic ring |
Special Stitches
- Puff Stitch: Yarn over, insert hook, yarn over and pull up a loop, yarn over and pull through two loops; repeat 3 more times in same stitch (leave all loops on hook), yarn over and pull through all loops to close.
- Joining Skirt Layers: Insert hook into one front and one back skirt stitch, then work sc to join.
Dress Pattern
Upper Main Skirt
- Foundation Attach:
Attach raw yarn to the original base, looping into the back of the chain space, ch 1 using double strand, drop short, ch 2 more (3 ch total). - Increase Round:
In each base chain: 2 dc (increase in every st) for 36 increases (72 dc in total, not counting initial ch).
Close with sl st. - Second Round:
Ch 2, dc in next 4, inc in next; repeat for a full round (5 dc, inc) x 12 = 84 dc.
Sl st to close. - Third Round:
Ch 2, dc in 19, inc; then 20 dc, inc (repeat 3x) to 88 dc.
Sl st to close. - Rounds 4-13:
Ch 2, dc in each st around (88 dc per round).
Crochet up to round 13, fasten off.

Contrast Layer (Lower Skirt)
- Attach Raw Yarn:
Count to the next lower chain round from the base and attach new yarn, ch 3 (1st double strand, drop short, then 2 more). - Three-DC Increases:
In each base stitch, work 3 dc in same space (54 dc at end). Close round with sl st. - Next Round:
Ch 2, dc in next, inc in next, then 2 dc, inc throughout = 72 dc.
Sl st to close. - Increase and Count:
Ch 2, dc in next, inc, then 3 dc, inc x 15, then 8 dc to end (should result in 88 dc).
Sl st to close. - Rounds 4–16:
Ch 2, dc in each st around (88 dc per round).
At round 16, fasten off.
Joining Dress Layers
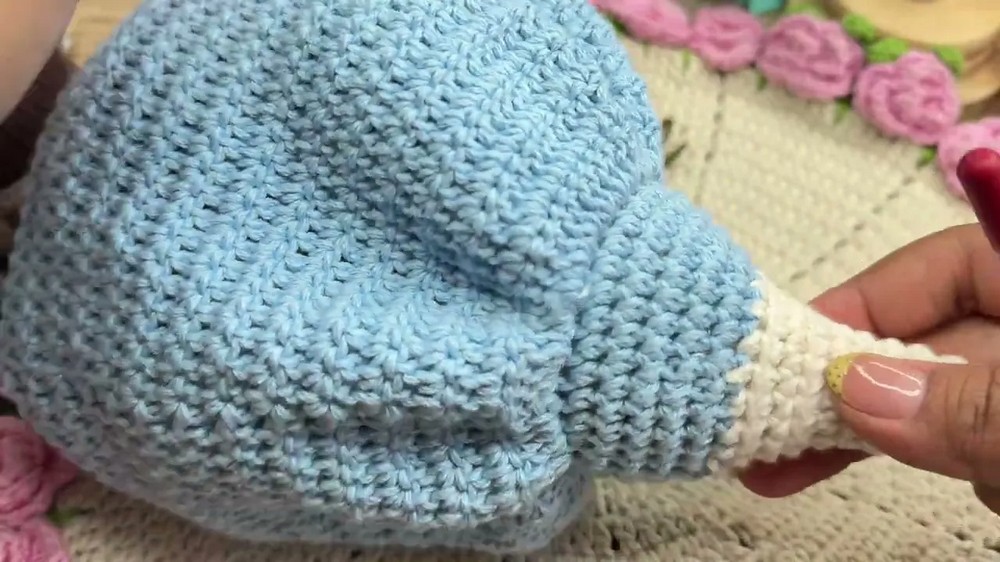
- Place both skirts right side out.
- With blue yarn, insert hook into one st from each skirt and work sc around (88 sc).
- Close with sl st.
Ruffled Edge
- [Skip 1 st, 5 dc in next st, skip 1 st, sc in next st] repeat all around for a ruffled hem.
- Finish off, weave in ends.

Base Cover Under the Bouquet
- With raw yarn, ch 3 (double strand, drop one, then two more ch), then in next st: 2 dc in each st for 17 increases (total 36 dc).
- Rounds 2-3: ch 2, dc in each st around.
- Edging: [ch 2, sc in next st] repeat all around; finish off, weave in ends.
Bow Pattern
- With blue, ch 41.
Join with sl st to form a ring. - Work as follows in round:
*sc in first st, 2 hdc in next 2, 3 dc in next 3, 3 dc in same st (repeat for fullness), 5 dc, 3 dc in next st (repeat for other bow side), 3 dc, 2 hdc, sc, repeat entire sequence for a symmetric oval bow.
Complete with sl st, cut yarn but leave a long tail for attaching. - For bow “legs”, ch 22; turn, work as follows: skip 3, tr in 4th ch, 2 dc, 2 hdc, 2 sc, 2 sl st, 2 sc, 2 hdc, 2 dc, 2 tr, ch 2 and sl st to last chain.
Make two legs, attach securely to bow. - Shape and sew or glue bow to dress as preferred.

Hands and Sleeves
Hands (Make 2)
- With flesh color, MR, ch 1, 6 sc in ring; close with sl st.
- Round 2: ch 1, inc in each st (12 sc), sl st.
- Round 3–4: ch 1, sc in each (12 sc), sl st.
- Round 5: ch 1, dec, 10 sc, sl st.
- Round 6: ch 1, puff st (see Special Stitches) in next st, 10 sc, sl st.
- Round 7: ch 1, dec, 9 sc, sl st.
- Rounds 8–10: ch 1, sc in each st (10 sc), sl st. Lightly stuff before final round.
- Change to blue (dress) yarn.
Sleeve
- Rounds 11–12: ch 1, sc in each (10 sc through back loop only), sl st.
- Rounds 13–18: sc in each st (10 sc per round).
- Fold top, close with 4 sc through front and back to close opening.
- Fasten off, seam and sew edge neatly inside the sleeve.
Puff Sleeve Edge
- Ch 10, join with sl st.
- Rounds 1–2: sc and increase in each st to form a gentle ruffle.
- Rounds 3–5: Sc in each st for volume; seam the sleeve to the hand.
- At the end, sew hand to dress using embroidery needle.
Assembly & Finished Size
- Attach finished hands to the sides of the dress using needle and matching yarn.
- Secure bow to the front/side of the dress with silicone or sew it in place.
- Hide all ends.
- Your finished reversible bouquet doll measures about 20 cm tall with all dress and decorative details.

Conclusion and Ending Words
Your 20 cm reversible bouquet doll is now complete with her elaborate dress, voluminous bow, and expressive hands. Each piece reflects careful craftsmanship and thoughtful assembly, resulting in a delightful, detailed creation that’s as charming as it is unique. Thank you for following along in this process. May your finished bouquet doll bring delight and inspiration to your home or make a cherished gift. Don’t forget to subscribe for more creative patterns. Happy crocheting!