
Whimsical Crochet Carrot Amigurumi Pattern Fun Food Aesthetic
Fresh garden style surrounds this Crochet Carrot Amigurumi Pattern, offering a bright accent for gifts, kitchens, and playful decor spaces.
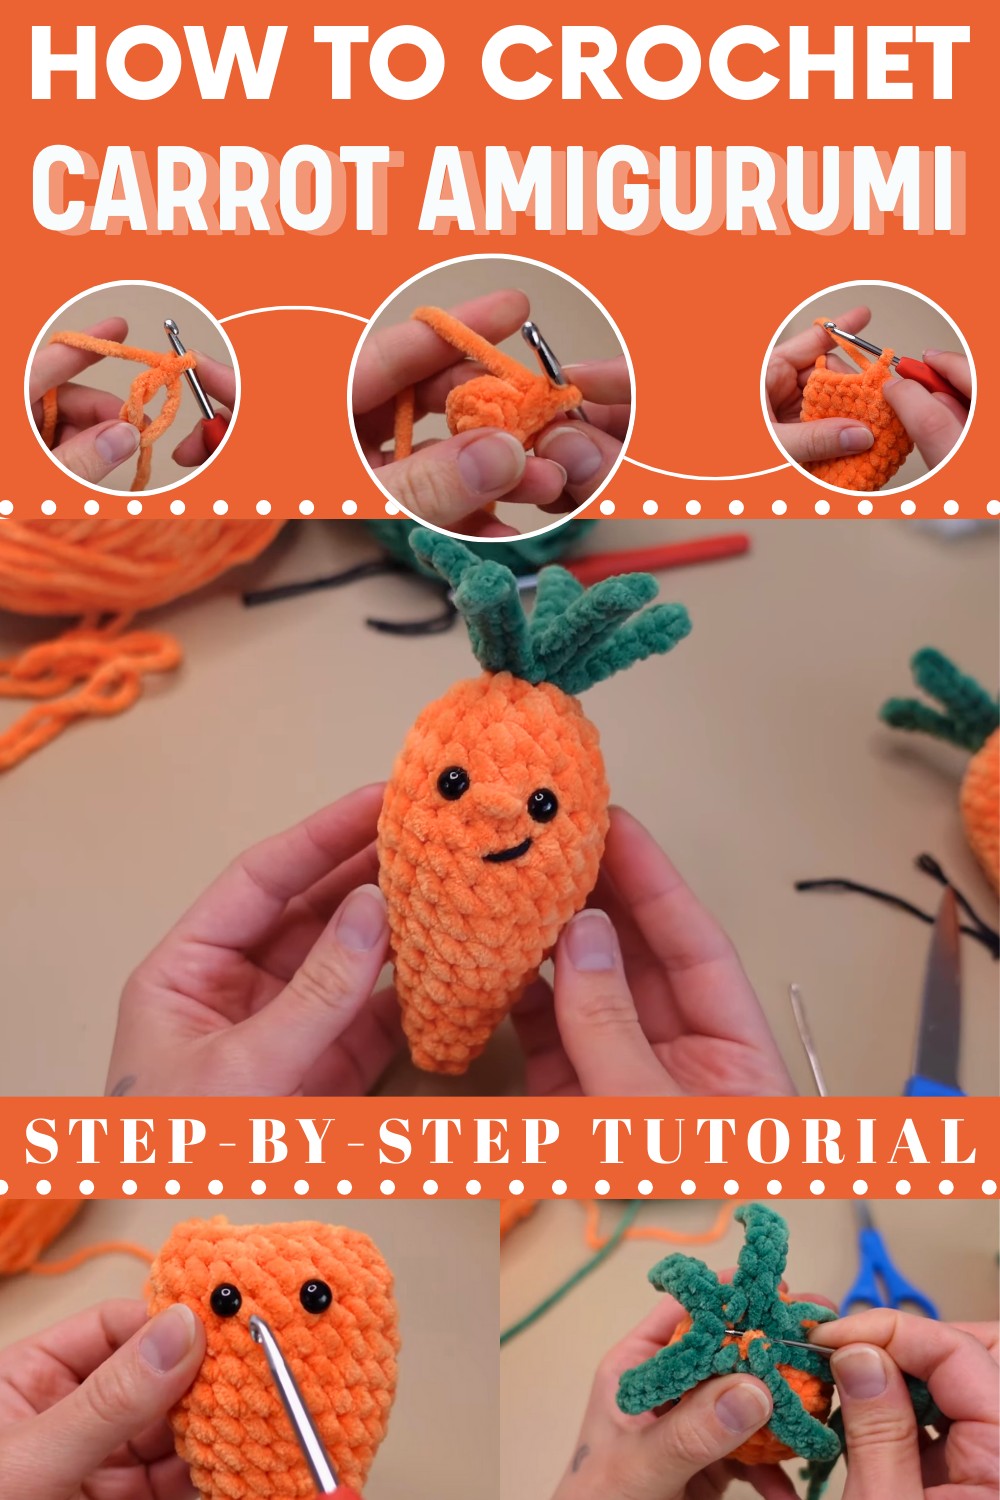
Farm fresh Crochet Carrot Amigurumi Pattern Cozy Garden Vibes
This glowing orange fiber piece adds a splash of life to your surroundings through a Crochet Carrot Amigurumi Pattern that highlights a realistic and whimsical style. By pulling soft yarn through small loops, you form a marvelous plush treasure that boasts a ribbed surface and lively green sprouts. This specific design meets various goals, acting as a cuddly friend for a toddler or a stylish accent for a kitchen nook. Because the structure is uncomplicated, it offers a soothing journey for hobbyists to explore smooth curves and vivid tones.
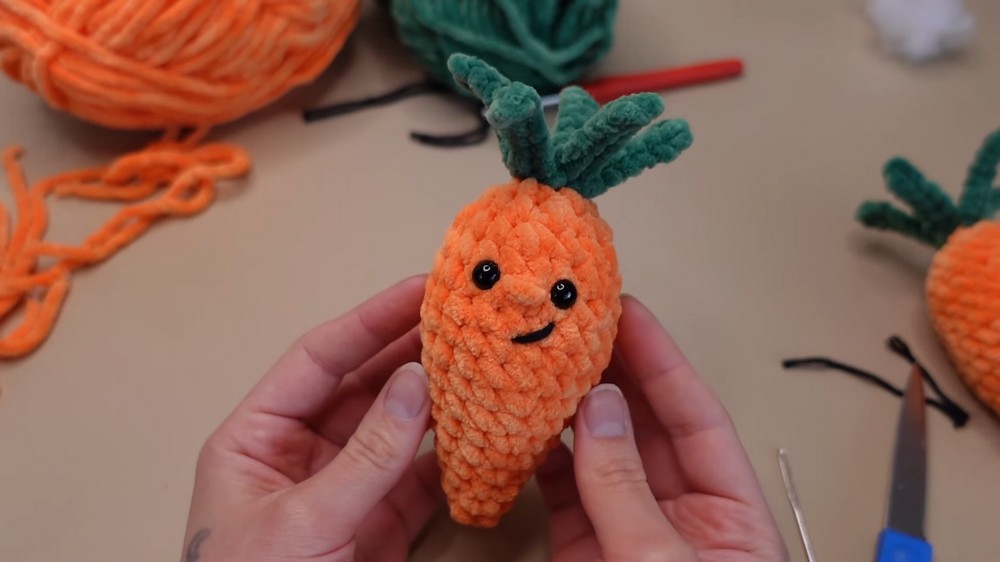
Outside of its visual charm, this Crochet Carrot Amigurumi Pattern functions as a wonderful tool for sensory play and early learning. The completed work feels solid yet pillowy, ensuring it stays a favorite for tiny hands to grasp. Since the process moves swiftly, you see your progress almost immediately. This tiny vegetable brings a constant wave of cheer and injects a slice of garden magic into your daily life.
Materials Needed
To create the crochet carrot, you will need the following items:
- Yarn: Orange for the carrot body and green for the carrot top.
- Crochet Hook: Appropriate size for your chosen yarn.
- Stuffing: For the carrot plushie (e.g., polyester fiberfill).
- Safety Eyes (optional): For adding eyes to the carrot.
- Darning Needle: To sew details and close holes.
- Stitch Marker: To keep track of your rounds.
- Scissors: For cutting your yarn.
Optional materials include thread for embroidering details (like a face) and higher-quality safety eyes if you plan to gift or sell the plushie.
Step-by-Step Instructions
Step 1: Start with the Magic Ring
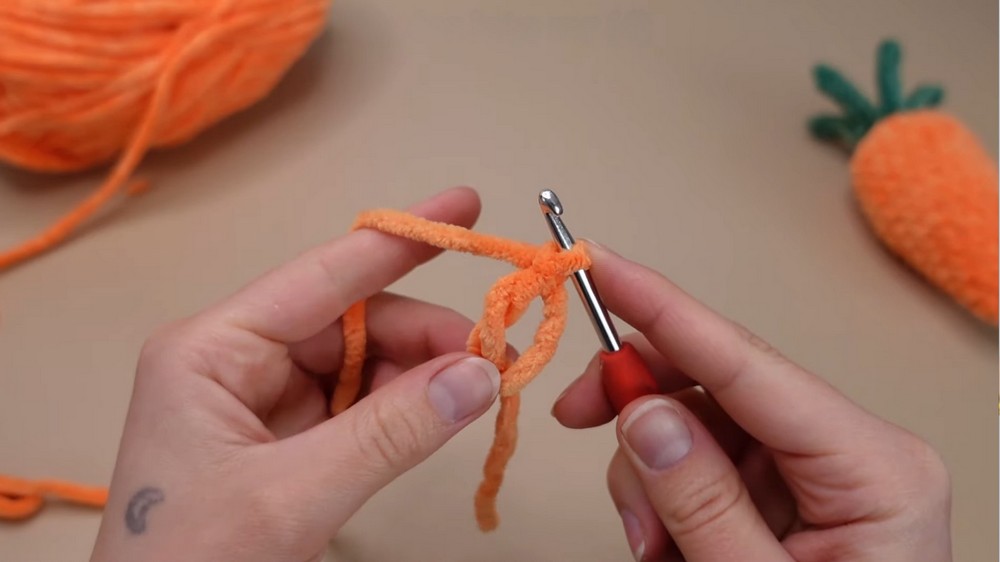
- Begin by creating a magic ring with the orange yarn.
- Use your fingers to form an "X" with the yarn on your fingers and insert your crochet hook under the loops. Twist your hook and pull the yarn through to create the loop.
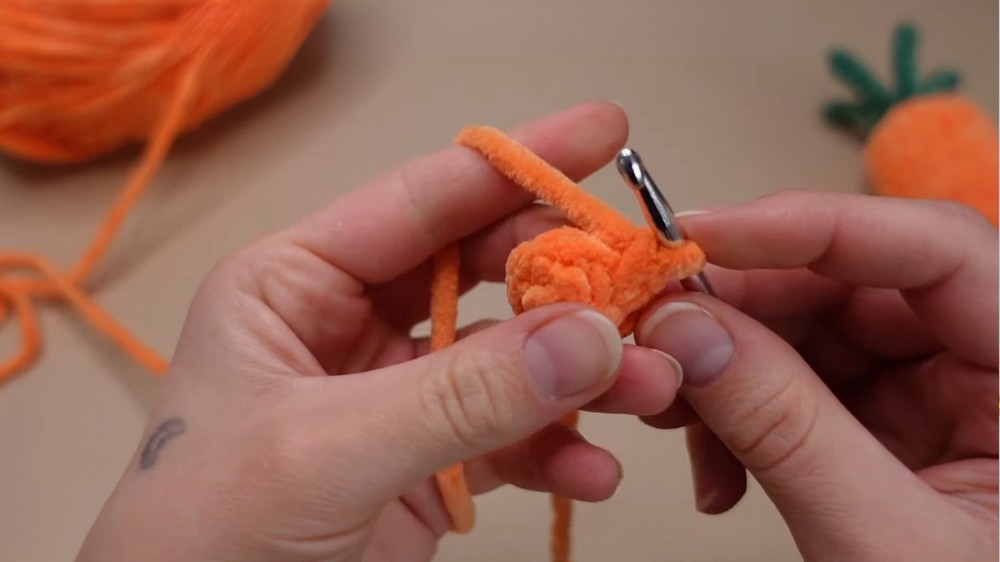
- Secure the loop and crochet 4 single crochets into the magic ring. Pull the yarn tail to close the hole.
Step 2: Crochet the Base
- Round 1: Make a magic ring and crochet 4 single crochets into the circle. Pull the yarn tail to close the circle.
- Round 2: Crochet 4 increase stitches, which means 2 single crochets into each stitch, resulting in 8 stitches by the end of the round. Use the stitch marker to track the first stitch of every round.
- Round 3: Crochet 1 single crochet stitch into each stitch, keeping the stitch count at 8.
- Round 4: Alternate 1 single crochet, 1 increase until the round is complete. This will result in 12 stitches.
- Round 5: Crochet 1 single crochet into each stitch for 12 total stitches.
3: Shape the Carrot Body
- Round 6–8: Continue increasing in a steady pattern, gradually increasing to 20 stitches per round. For example:
- Round 6: 2 single crochets, 1 increase, repeated 4 times.
- Round 8: 3 single crochets, 1 increase, repeated 4 times.
- Rounds 9–13: Crochet 1 single crochet into each stitch, continuing with 20 stitches for these rounds.
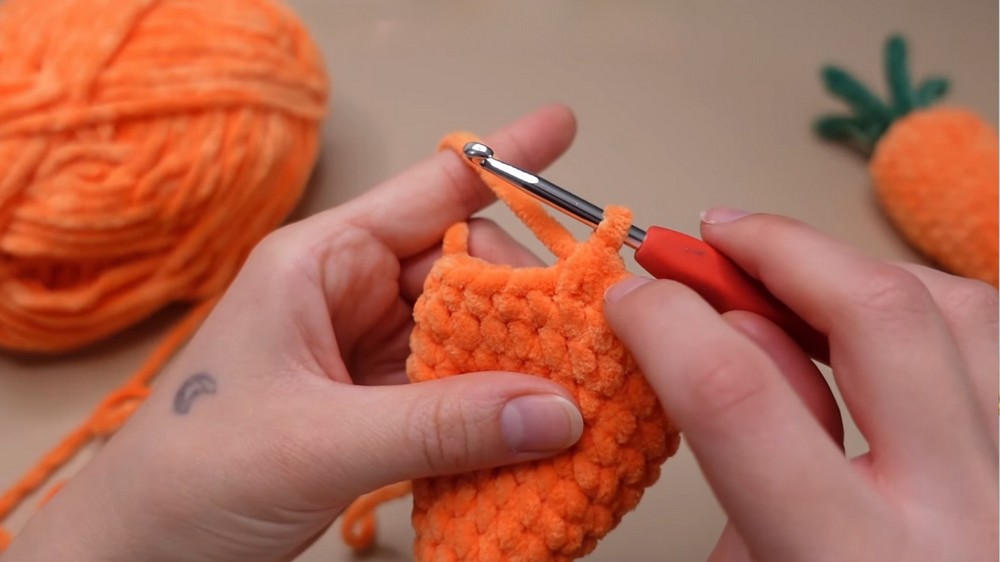
4: Add Decreases and Shape the Top
- Round 14: Start decreasing by crocheting 2 single crochets, 1 decrease, repeated 5 times, reducing the stitch count to 15. This is a great time to add safety eyes (between Rounds 12 and 13). Place eyes 3 stitches apart for symmetry and attach backings securely.
- Round 15: Crochet 1 single crochet, 1 decrease, repeated 5 times. This will reduce the stitch count to 10 stitches. Add stuffing before the hole becomes too small. Make sure the carrot is firm but not overfilled.
- Round 16: Crochet 5 decreases in a row, reducing the stitch count to 5 and leaving a small hole.
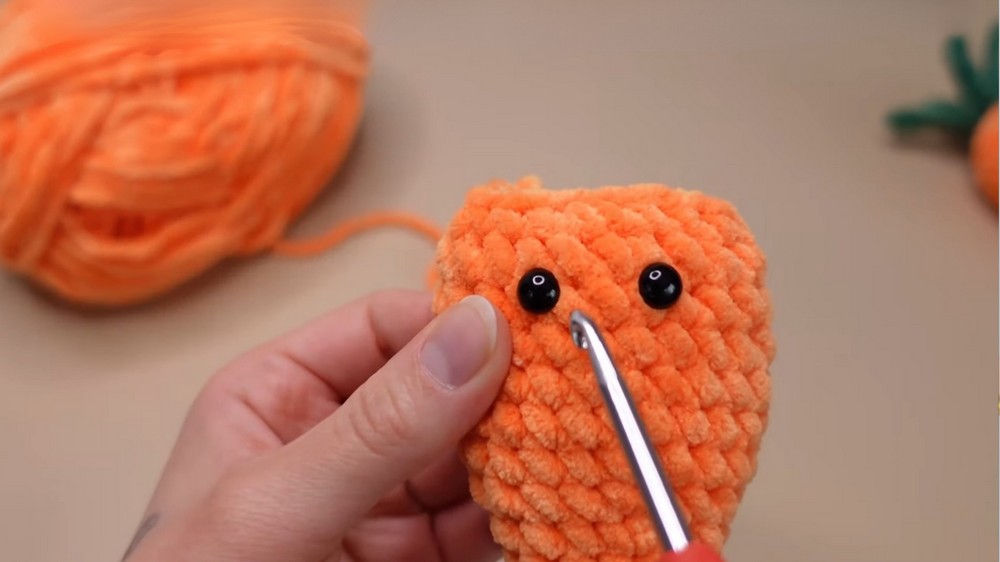
5: Add the Carrot Top
- Switch to green yarn halfway through the last stitch of Round 16 to seamlessly transition colors. Cut the orange yarn and secure the tail with a knot.
- Round 17: Work in the front loops only of the stitches from Round 16. Begin each leaf with a slip stitch into a front loop, followed by chaining 7 loops. Then, work your way back down with 6 slip stitches into each chain. Repeat this process 5 times to create 5 "leaves."
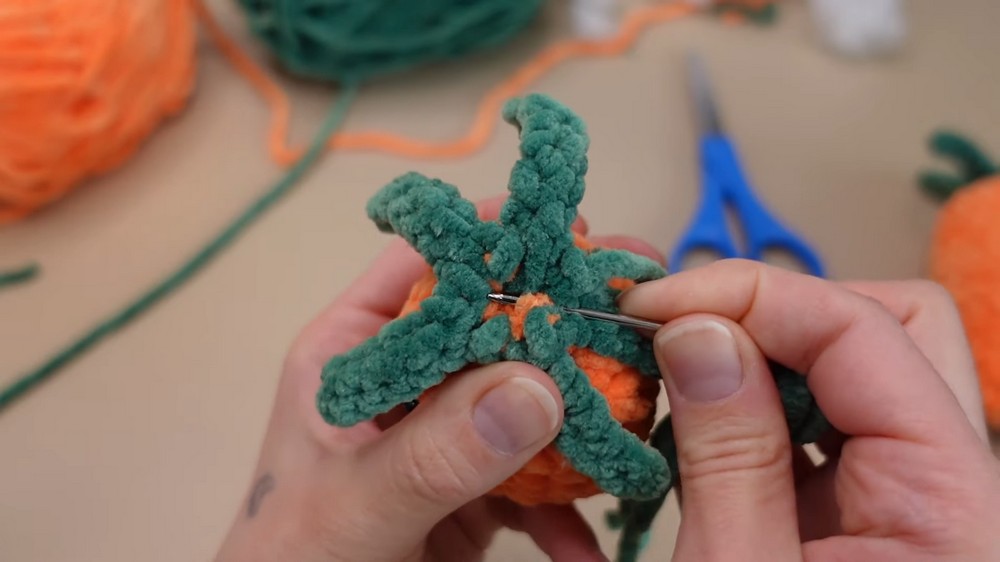
6: Closing the Hole
- After completing the 5 leaves, use the remaining yarn tail and your darning needle to sew the tiny hole closed. Work through the back loops of the remaining stitches for a secure finish.
7: Optional Embroidery (Face Details)
- You can add a cute face to your carrot using embroidery techniques. For the nose, embroider 3–4 loops of yarn over 1 stitch. Use the same technique to create a small smile or eyebrows. Avoid pulling embroidery too tightly to maintain a soft, plush look.
Special Features
- Beginner-Friendly Design: The pattern incorporates simple techniques like single crochet, magic ring, slip stitches, and increases/decreases, making it accessible to beginners.
- No-Sew Body: The carrot body and top are crocheted as one piece, reducing the need for stitching parts together.
- Customizable: You can add safety eyes, experiment with facial expressions, or adjust the size by changing hook and yarn thickness.
- Quick Craft: This project is small and relatively quick, perfect for practice or creating multiple items.
Level of Difficulty
This project is rated beginner-friendly. The steps are simple and repetitive, and the tutor provides clear instructions for making the magic ring, single crochet, increases, and decreases. The most challenging part might be the carrot top's leaves due to slip stitches and chains, but with guidance, even beginners should be able to master it.
Tutor’s Suggestions
- Use a Stitch Marker: Always place a stitch marker in the first stitch of each round to avoid losing your place.
- Add Stuffing Gradually: Fill the carrot as you decrease, ensuring a firm shape without overstuffing.
- Safety Eyes: If using safety eyes, add them before the hole becomes too small at the top. Place them symmetrically for the best aesthetic.
- Secure Color Changes: Tie a knot when switching colors to prevent unraveling and tuck in yarn ends neatly.
- Experiment with Details: The tutor suggests embroidering fun expressions or leaving the carrot plain—it looks great either way.
Uses
- Decorations: Perfect for spring or Easter-themed displays.
- Toys: Safe for children if tightly stitched and safety eyes are securely attached.
- Gifts: Ideal for handmade gift-giving.
- Practice Piece: Great for refining skills like using the magic ring, creating decreases, and working in front loops.
Pro Tip
When working in rounds, always count your stitches at the end of each row to ensure accuracy. This prevents mistakes from compounding and keeps your carrot’s shape consistent.
Conclusion
This crochet carrot tutorial walks you through every step of creating an adorable, no-sew plushie. With simple techniques and clear instructions, it’s an excellent project for beginners looking to build confidence or experienced crocheters seeking a fun and quick craft. From the seamless body to the detailed carrot top, every part is thoughtfully explained.