
Fun Free Crochet Amigurumi Bunny Pattern Full of Charm
Build a lovable friend with this Crochet Amigurumi Bunny Pattern that's offering simple steps for a soft, beautiful, and quite huggable toy.
Soft, cuddly companions bring a sense of warmth and comfort to any room, serving as the perfect gift for a newborn or a charming decorative piece. These tiny long-eared friends are not just toys; they act as soothing stress-relievers and personalized treasures that carry a heartfelt touch. Embracing a crochet Amigurumi Bunny pattern allows you to move away from mass-produced plastic and enjoy a sustainable, soft-textured alternative that is safe for all ages and built to last.
Crochet Amigurumi Bunny Pattern for Cute Lovers

What makes this crochet Amigurumi Bunny pattern truly stand out is how easily it adapts to your personal style. Because it uses small amounts of yarn and basic loops, you can finish a durable, high-quality mascot quickly.
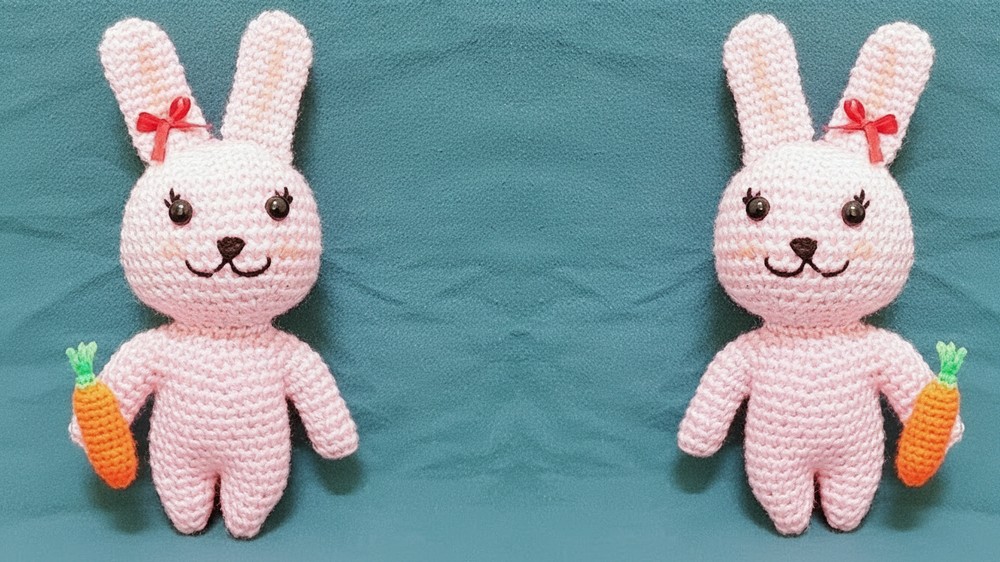
Materials
- Yarn:
- Pink yarn: 70% Olefin and 30% Acrylic (can substitute with cotton or acrylic yarn).
- Black yarn: Acrylic yarn for facial details.
- Crochet Hook: 5mm crochet hook.
- Toy Stuffing: Polyfill for the body, arms, and legs.
- Safety Eyes: Size not specified in the transcription (likely 6-8mm); use a size proportional to the bunny's head.
- Scissors
- Tapestry Needle: For sewing pieces and embroidery.
- Stitch Marker: Safety pins or scrap yarn to mark stitches.
- Fabric Glue: Optional, for securing safety eyes.
- Pins: For positioning.
Gauge
Gauge is not critical for this project, but use tight, even stitches to prevent stuffing from showing through.
Special Techniques
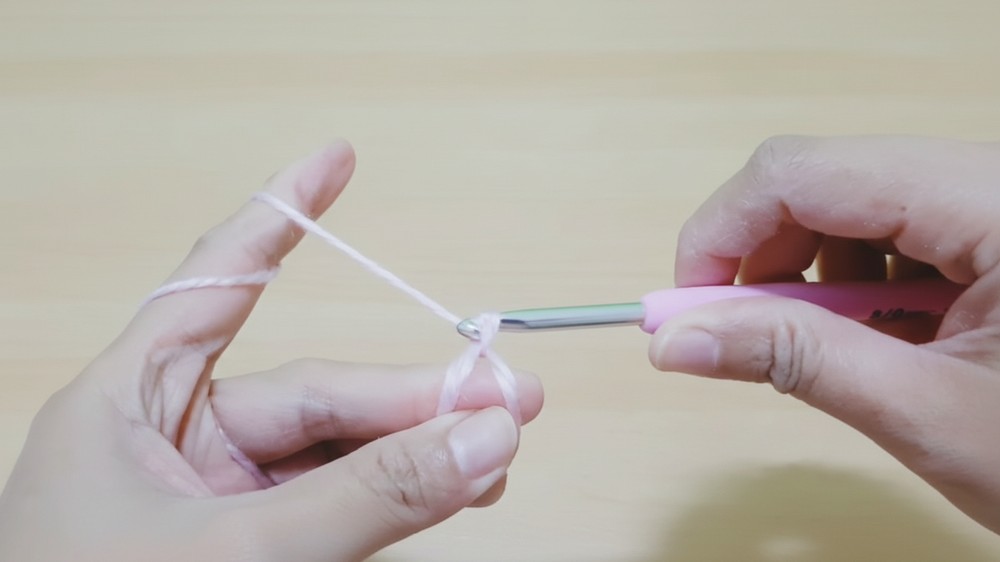
- Magic Ring: A foundation technique for starting pieces tightly.
- Single Crochet (sc): Base stitch for amigurumi.
- Increase: Two single crochets in one stitch to expand the diameter.
- Invisible Decrease: A technique to reduce stitches without noticeable gaps.
- Fabric Glue: Secures safety eyes firmly.
- Embroidery: Used for sewing the face features (nose and mouth).
Finished Size
The bunny amigurumi will be approximately 6-8 inches tall, depending on yarn, hook size, and tension.
Step-by-Step Instructions
Step 1: Head
- Round 1: Create a magic ring. Chain one and work 6 sc into the ring.
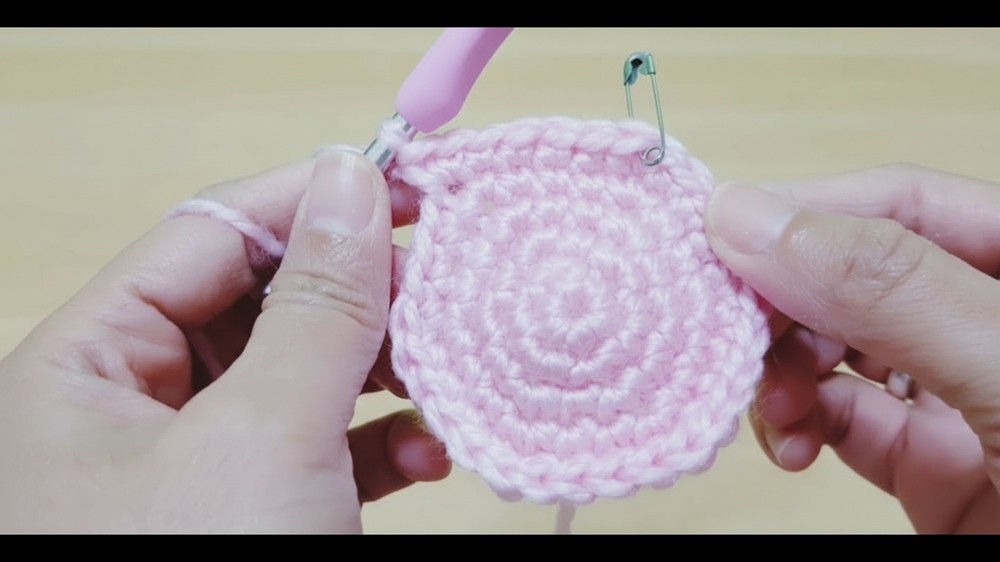
- Round 2: Work 2 sc into each stitch (increase) around. At the end of the round, you will have 12 stitches.
- Round 3: Work [1 sc, 1 increase] around. At the end, you will have 18 stitches.
- Round 4: Work [2 sc, 1 increase] around. At the end, you will have 24 stitches.
- Round 5: Work [3 sc, 1 increase] around. At the end, you will have 30 stitches.
- Round 6: Work [4 sc, 1 increase] around. At the end, you will have 36 stitches.
- Round 7: Work [5 sc, 1 increase] around. At the end, you will have 42 stitches.
- Rounds 8-14: Work 1 sc into each stitch (continuous rounds). Total of 7 rounds with 42 stitches.
- Round 15: Work [5 sc, 1 invisible decrease] around. At the end, you will have 36 stitches.
- Round 16: Work [4 sc, 1 invisible decrease] around. At the end, you will have 30 stitches.
- Round 17: Work [3 sc, 1 invisible decrease] around. At the end, you will have 24 stitches.

Step 2: Body
- Round 18: Work [2 sc, 1 invisible decrease] around. At the end, you will have 18 stitches.
- Rounds 19-20: Work 1 sc into each stitch for 2 rounds. Total of 18 stitches.
Return to Increases
- Round 21: Work [2 sc, 1 increase] around. At the end, you will have 24 stitches.
- Round 22: Work [3 sc, 1 increase] around. At the end, you will have 30 stitches.
- Round 23: Work [4 sc, 1 increase] around. At the end, you will have 36 stitches.
- Round 24: Work [5 sc, 1 increase] around. At the end, you will have 42 stitches.
- Round 25: Work [6 sc, 1 increase] around. At the end, you will have 48 stitches.

Create Arm Partition
- Fold your work and count 10 stitches for each arm area. Place stitch markers accordingly. Ensure there is symmetry on both sides.
Step 3: Body Extension
- Rounds 26-32: Work 1 sc into each stitch for 7 rounds to form the body. Total of 28 stitches at the end.
Step 4: Legs (Make 2)
- Divide the body into 14 stitches per leg using stitch markers.
- Rounds 1-5: Work 14 sc in each leg partition for 5 rounds.
- Stuff the legs as you close the last stitch of each leg. Use a tapestry needle to sew the final openings securely.
Step 5: Arms (Make 2)
- Round 1: Create a magic ring with 6 sc.
- Round 2: Increase to create 12 stitches.
- Rounds 3-9: Work 1 sc into each stitch for 7 rounds (steady rows). Total of 12 stitches per round.
- Add toy stuffing and sew the arms to the sides symmetrically using pins for precise placement.
Step 6: Ears (Make 2)
- Round 1: Magic ring with 6 sc.
- Round 2: Increase to make 12 stitches.
- Rounds 3-12: Work 1 sc into each stitch for 10 rounds (steady rows).
- Flatten ears and leave a long tail for sewing.
- Sew ears symmetrically onto the head with precise positioning using pins.

Step 7: Face Details
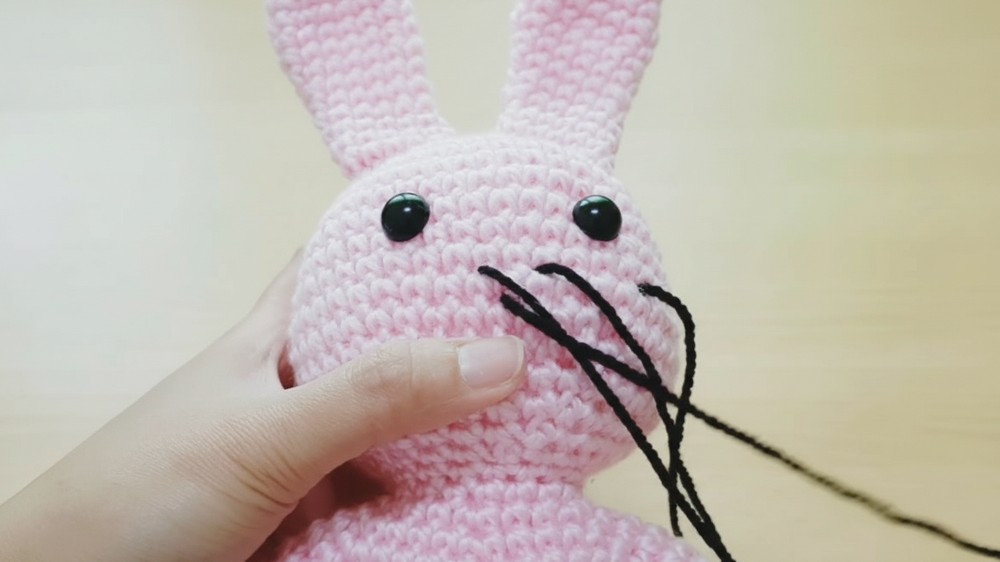
- Eyes: Place safety eyes between rows 9-10 of the head. Use fabric glue to secure the eyes. Ensure eyes are set symmetrically.
- Nose and Mouth:
- Using black yarn, embroider a triangle nose (around rows 6–7 of the face).
- From the bottom of the triangle, embroider a line for the mouth extending down slightly.
- Use a tapestry needle for embroidery, and ensure all loose threads are tucked securely inside the head.
Step 8: Stuffing and Final Assembly
- Stuff the body, head, and limbs firmly to give the bunny its shape. Avoid overstuffing limbs as it may distort the shape.
- Attach the arms and legs securely to ensure the bunny sits upright.
- For a keychain attachment, sew a chain or ring at the top of the bunny’s head.
Final Words
Congratulations on completing the amigurumi bunny! This project offers versatility in colors, personalization, and placement of details, making it a fun and rewarding craft. Whether you gift it as a cute keychain or keep it as a delightful decoration, this bunny is sure to bring joy.
Tips to Maintain the Pattern
- Stitch Tracking: Use a stitch marker to keep track of rounds and avoid losing count.
- Stuffing: Distribute stuffing evenly. For limbs, use minimal stuffing to maintain flexibility.
- Symmetry: Use pins to test positions of features before sewing.
- Customization: Experiment with color for unique bunny designs or add accessories like bows or scarves.