
Sweet Free Crochet Lion Pacifier Clip Pattern For Baby Essentials
Keep your little one’s pacifier secure and stylish with this charming Crochet Lion Pacifier Clip Pattern, adding a cute, safe, and functional touch.
Keeping pacifiers within reach while adding a playful touch, this charming lion pacifier clip offers both convenience and style. It prevents pacifiers from getting lost or dirty, making it a practical accessory for parents and a soothing, engaging item for babies. The lion motif adds personality and texture, perfect for everyday use or gifting.
How to Crochet Lion Pacifier Clip Pattern Your Baby
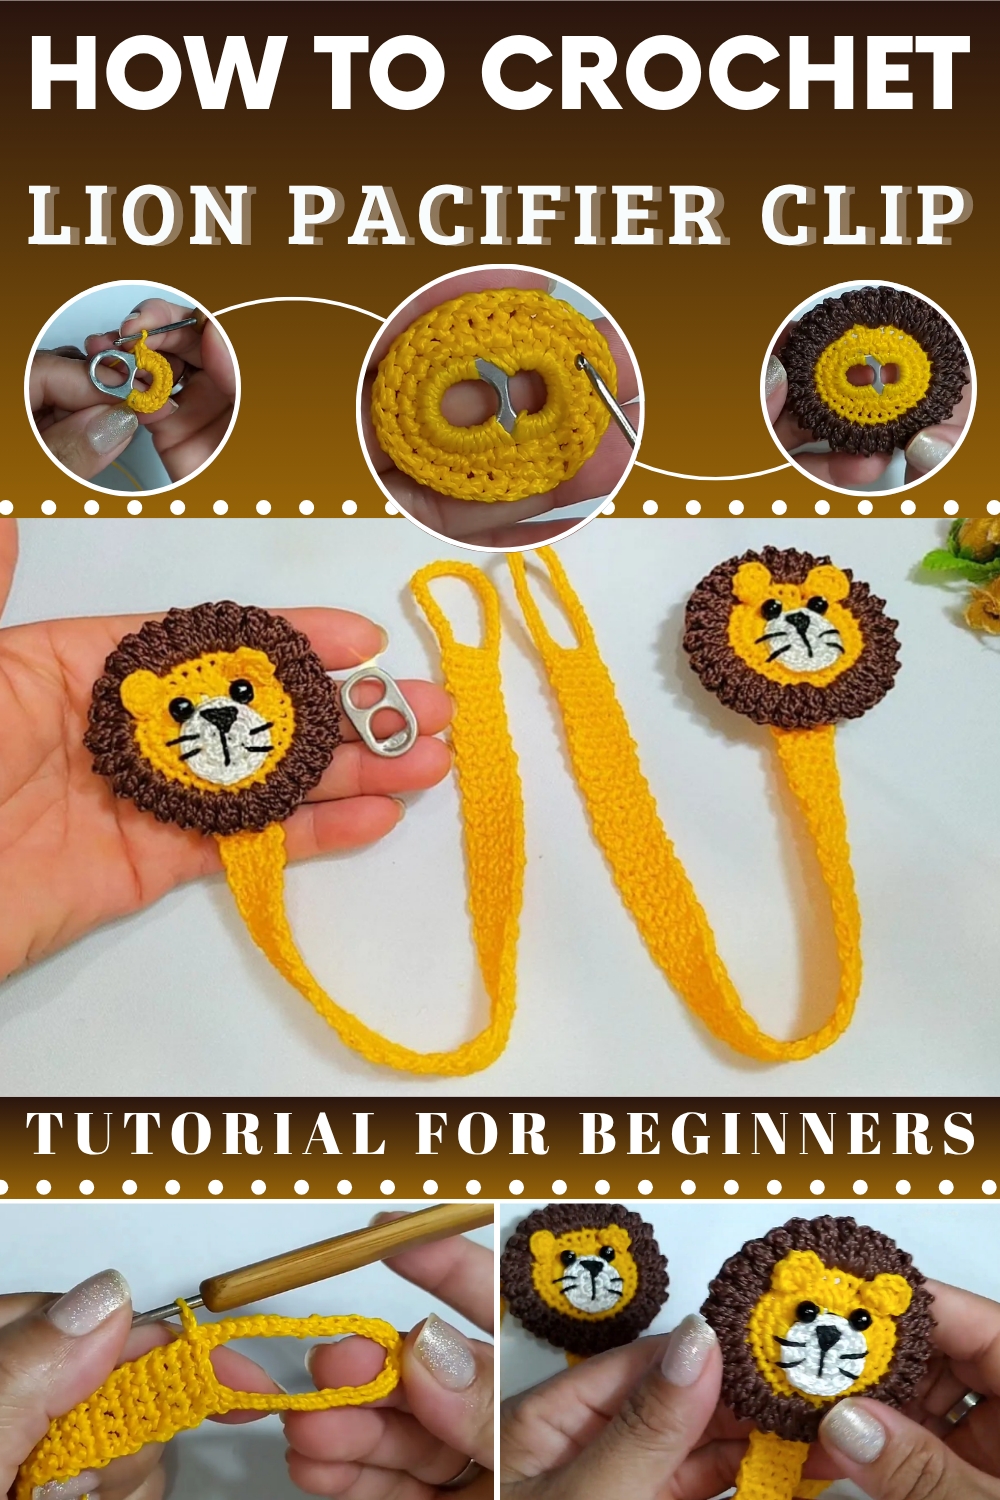
Beyond its practicality, this pacifier clip is lightweight and comfortable for babies. Handmade details make it a unique gift, and its durable, washable construction ensures long-lasting use. The friendly lion design encourages sensory development through touch and sight. Easily customizable with colors and yarns, this accessory blends function and charm perfectly for both caregivers and little ones.
Fun Free Crochet Lion Pacifier Clip Pattern
Finished Size
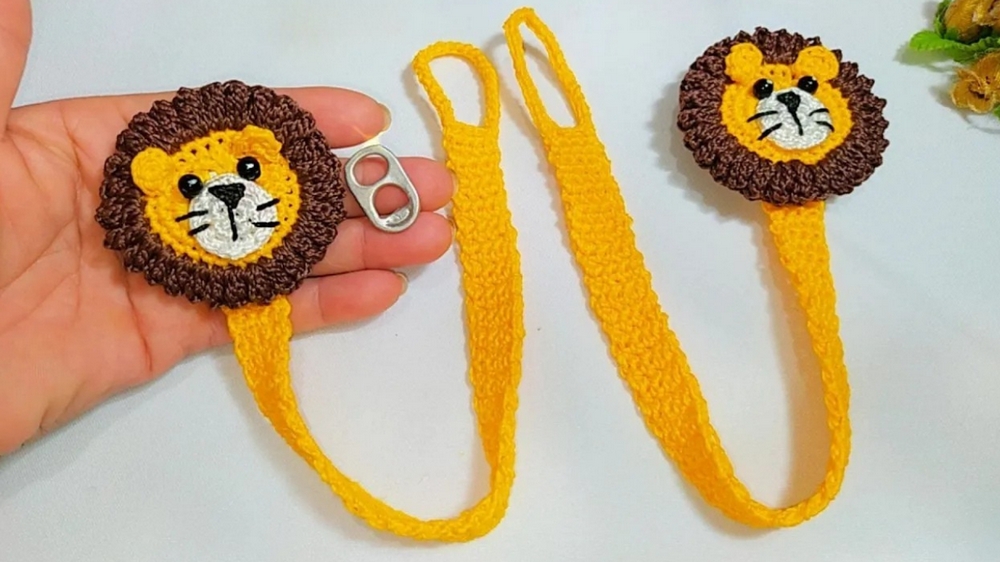
The completed pacifier clip measures approximately 28 cm (11 inches) for the strap with an attached lion decorative element approximately 6-7 cm (2.5–3 inches) in diameter.
Materials Needed
Yarn
- Thick Silk Thread (Tex 288, 100% Polypropylene).
- Lion Mane: Brown.
- Lion Face, Tail, and Ears: Beige or Light Yellow.
- Pacifier Clip Strap: White yarn or matching color of your choice.
- Embroidery Thread: Black or dark brown for facial details.
Tools
- Soda Can Tab: 1 tab (cleaned and burrs removed).
- Crochet Hook: 1.75 mm.
- Tapestry Needle: For sewing and embroidery.
- Scissors: For cutting yarn.
Optional Materials
- Pacifier Clip: To attach the strap to clothing.
- Silicone Glue: For secure finishing of loose threads or optional decorations.
Skill Level
Intermediate – Familiarity with working in rounds, popcorn stitches, magic rings, and assembling a project is required.
Key Abbreviations (US Terms)
- ch: Chain
- sc: Single crochet
- hdc: Half double crochet
- dc: Double crochet
- sl st: Slip stitch
- popcorn st: Popcorn stitch (5 dc, remove loop, insert hook into first dc, pull loop through to close).
- yo: Yarn over
- inc: Increase (2 sc in one stitch)
- dec: Decrease (crochet two stitches together)
- […]: Repeat instructions within brackets as specified
Pattern Instructions
Step 1: Preparing the Soda Can Tab
- Clean the Tab:
- Ensure the soda can tab is free of any residue or sharp edges.
- Use pliers to remove any burrs from the tab to avoid injuries.
- Crochet Foundation:
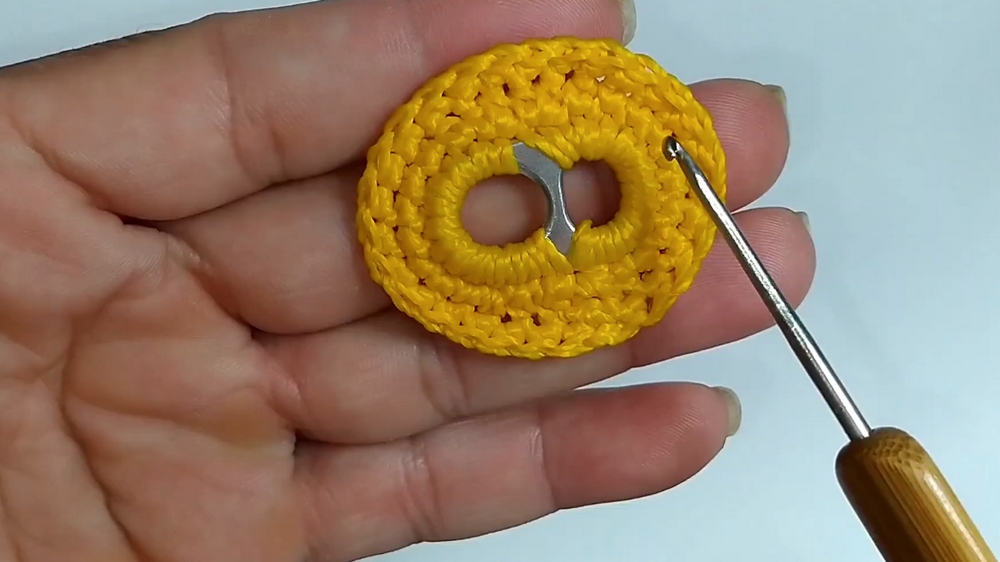
- Hold the can tab flat. Attach white yarn to the edge of the smaller circular hole with a slip stitch to secure.
- Round 1:
- Work 12 sc into the smaller hole of the tab.
- Continue directly to the larger hole of the tab and work 12 sc into the larger hole.
- You should now have 24 stitches total.
- Join to the first sc with a sl st.
- Round 2:
- Ch 2, work 1 hdc into the same stitch (increase).
- [1 hdc in the next stitch, 2 hdc in the next stitch]. Repeat this sequence all around.
- Join with a sl st, then fasten off and weave in ends.
Step 2: Lion Mane
- Attach Yarn:
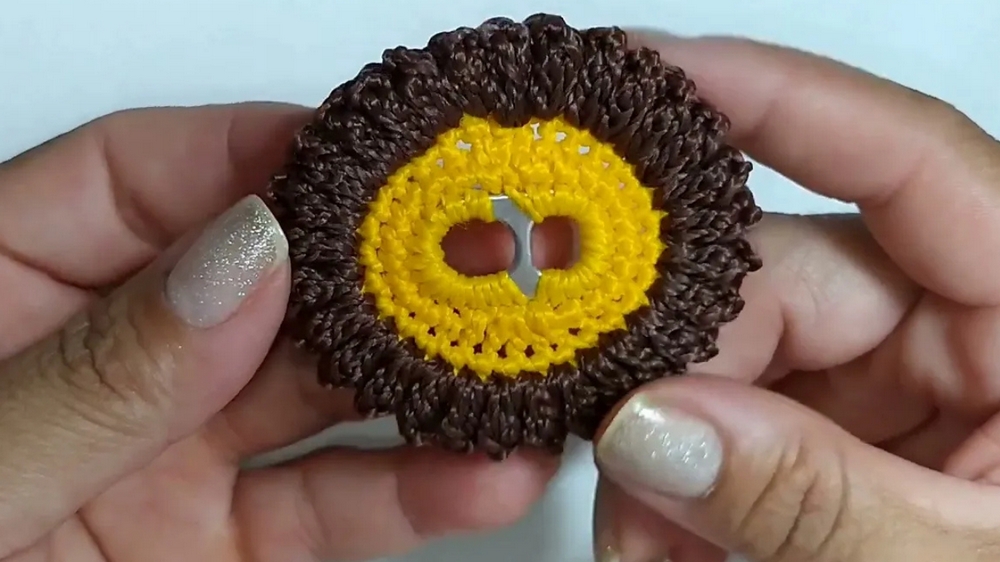
- Attach brown yarn to any stitch on the outer edge of the soda can tab with a slip stitch.
- Round 1: Popcorn Stitches
- Work 5 dc into the same stitch, remove the loop from the 5th dc, insert the hook into the top of the first dc, and pull the loop through — this creates the popcorn stitch.
- Ch 1 to close and create separation.
- Skip the next stitch and repeat the popcorn stitch in every other stitch around the tab's edge.
- Join with a sl st into the first popcorn stitch.
Step 3: Lion Face
- Magic Ring Foundation:
- In beige or light yellow yarn, create a magic ring. Work 6 sc into the ring. Tighten the ring and join with a sl st.
- Round 2:
- Ch 1, work 2 sc in each stitch around. (12 sc)
- Round 3:
- Ch 1, [1 sc in the next stitch, 2 sc in the next stitch]. Repeat around. (18 sc)
- Round 4:
- Work 1 sc in each stitch around, no increases. (18 sc)
- Finish the face by fastening off and weaving in the ends.
Step 4: Lion Ears (Make 2)
- Magic Ring Foundation:
- Make a magic ring using beige/light yellow yarn.
- Round 1:
- Work 6 sc into the ring. Tighten and join with a sl st.
- Round 2:
- Ch 1, [1 sc, 2 sc in the next stitch]. Repeat around. (9 sc)
- Fasten off, leaving a long tail for sewing.
Step 5: Pacifier Strap
- Foundation Row:
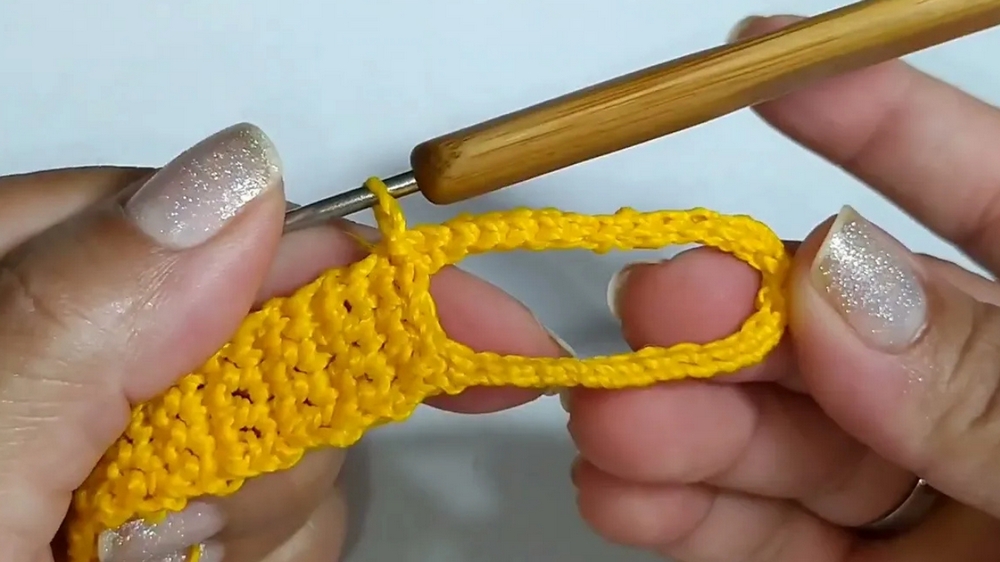
- Using white yarn, ch 5.
- Rows 1-110:
- Work 5 sc across, then ch 1 and turn at the end of each row.
- Continue back and forth until the band reaches 28 cm (11 inches) in length.
- Finishing Loop:
- At the end of the strap, ch 30 to form a loop for attaching the pacifier.
- Join the chain loop to the other side of the strap with a sl st.
Step 6: Embroidery and Assembly
- Facial Details:
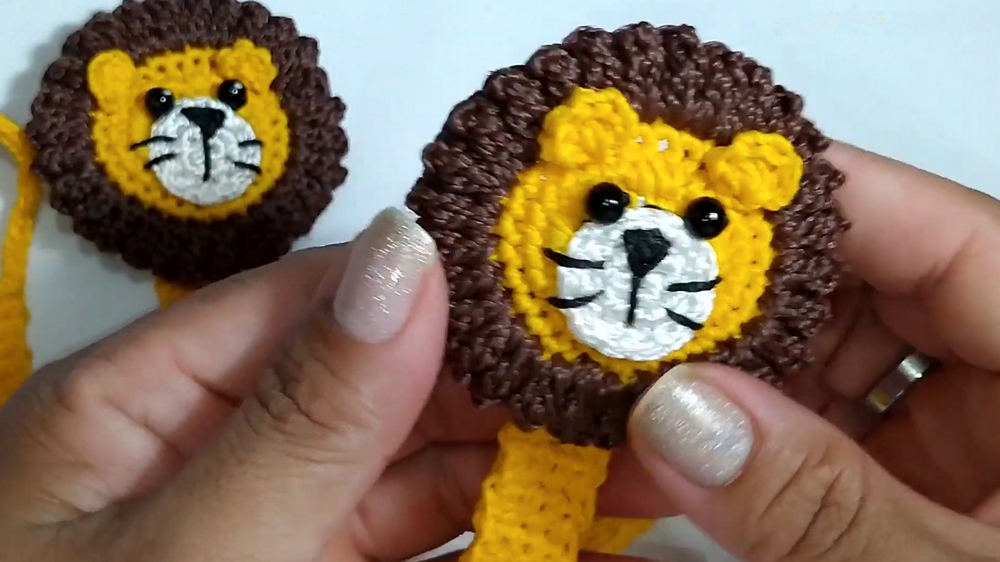
- Using black embroidery thread, embroider the eyes, nose, and mouth onto the lion face.
- Assembling the Lion:
- Attach the ears to the top of the lion’s face using a tapestry needle.
- Sew the lion’s face securely onto the popcorn stitch mane.
- Final Attachment:
- Sew the lion decoration to the base of the strap.
- Optionally attach a clip to the opposite end of the strap for clothing.
Finishing and Tips
- Seal Loose Threads: Use silicone glue to seal and prevent unraveling.
- Adjust Mane Colors: For creative variation, alternate brown and orange popcorn stitches to make a playful mane.
- Supervision Reminder: Always check that the pacifier clip and decoration are securely fastened before use.
Final Words
Congratulations! You have successfully created a soda can tab lion pacifier clip. This functional and decorative design is sustainable, practical, and perfect for gifting or selling. The attention to detail, including the lion motif and customizable strap, ensures this project is both unique and versatile.