
Simple Crochet Amigurumi Monkey Free Pattern For Beginners
Stitch a playful jungle friend with this Crochet Amigurumi Monkey Free Pattern, featuring a cute face and long tail for kids and animal lovers.
Looking for a fun and cute project? The Crochet Amigurumi Monkey is just the thing to try! This adorable little toy brings a playful character to life with its sweet face and friendly expression. It’s small enough to hold in your hands, usually about 6 to 8 inches tall when finished, making it perfect as a gift or a cozy companion.
Tiny Crochet Amigurumi Monkey Free Pattern For Birthday Gifts
The monkey has a round head with big eyes and a smiling mouth that gives it a warm, inviting look. Its body is plump and soft, with little arms and legs that add to its charm. The tail curls just right, making the design feel lively and fun. Plus, you can choose different colors to give your monkey a unique personality.
This project suits beginner to intermediate crocheters. You will mostly use basic stitches like single crochet, increases, and decreases. Along the way, you’ll learn how to work in spirals and how to sew pieces together, which makes the final toy neat and durable.
Also, it’s a great way to practice your skills without feeling overwhelmed. Moreover, putting the monkey’s parts together helps you understand how shapes come together in amigurumi. It’s friendly, relaxing, and truly rewarding.
So, why not pick up your hook and yarn? Give this Crochet Amigurumi Monkey a try and enjoy making a little friend stitch by stitch!
Featured By :
About the Pattern
The car hanging monkey amigurumi is a vibrant and playful piece of crochet, meticulously worked in modular segments for appealing contours and durability. The project centers around sculpted rounds for the head, helmet, limbs, feet, ears, tail, scarf, and lanyard—each executed separately and then assembled for a seamless finish. With precise placement, color changes, and soft wire integration for flexible posing, this pattern delivers a whimsical monkey perfect for hanging in vehicles or as a cheerful keychain.

Pattern at a Glance
This design utilizes:
- Detailed shaping of head, helmet, hands, feet, ears, and tail by rounds of single and decorative stitches.
- Color changes and transitions for distinct monkey features, including helmet and limb accents.
- Crochet techniques for flat work (scarf and lanyard) and tubular work (body, limbs, tail).
- Structural wiring for poseable arms and tail.
- Fine finishing and assembly, including embroidery for facial expression and adherence for features.
Important Notes
- Use tight and consistent tension throughout to prevent gaps and ensure dense, plush texture.
- Each round should be marked to track the continuous spiral construction.
- Wire is used in arms and tail for flexibility; ensure it is safely secured and:
- Ends are bent to avoid sharpness.
- Inserted before sewing on parts.
- Yarn color changes and ends must be hidden thoroughly for a clean finish.
- All measurements and stitch counts follow the transcription strictly.
Difficulty Level
This monkey is best suited for intermediate crocheters. Required skills:
- Ability to work in rounds, both increases and decreases.
- Confident color changes and decorative stitch insertion.
- Basic wire integration for poseable components.
- Competence with needlework for assembly and facial embroidery.
Supplies Needed
- 2.0–2.5mm crochet hook
- Yarn: Two contrasting colors (skin color and brown)
- Polyester fiberfill
- Soft wire for arms and tail
- Tapestry needle
- Scissors
- Stitch markers
- Glue for eyes and ears (optional)
- Ring/clasp for hanging or keychain use
Size & Measurements
- Finished monkey: approx. 12–15 cm (not including lanyard)
- Lanyard: adjustable length—approx. 30 cm for car hanging
- Scarf: 81 chains, approx. 25 cm in length
Gauge & Stitch Details
- Dense single crochet is critical for a firm and stuffed result.
- Gauge: 10 SC x 10 rows = 3 cm x 3 cm (approximate).
- Helmet, ears, hands, feet, and tail use standard increases/decreases for shape.
Crochet Abbreviations
- SC: Single Crochet
- INC: Increase (2 SC in one stitch)
- DEC: Decrease (crochet two stitches together)
- CH: Chain
- SL: Slip Stitch
- HDC: Half Double Crochet
- DC: Double Crochet
- TR: Treble Crochet
Special Stitch Guide
- Ring cast-on (Magic Ring): Circle yarn, draw up loop, work SC into ring. Pull tail to tighten.
- Color change: Work last yarn-over in stitch with new color, carry or cut as appropriate.
- Standing stitch: Begin round with CH; marks start of round.
Complete Crochet Pattern
Head
- Round 1:
- Ring cast-on, 6 SC. Mark first and last stitch.
- Round 2:
- CH, 6 INC (2 SC in each stitch) (12 SC). Mark last stitch.
- Round 3:
- CH, (1 SC, 1 INC) x6 (18 SC). Mark last stitch.
- Round 4:
- CH, (2 SC, 1 INC) x6 (24 SC). Mark last stitch.
- Round 5:
- CH, (3 SC, 1 INC) x6 (30 SC). Mark last stitch.
- Round 6:
- CH, (4 SC, 1 INC) x6 (36 SC). Mark last stitch.
- Round 7:
- CH, (5 SC, 1 INC) x6 (42 SC). Mark last stitch.
- Round 8:
- CH, (6 SC, 1 INC) x6 (48 SC). Mark last stitch.
- Round 9–17:
- CH, 54 SC per round. Mark last stitch.
- Round 18:
- CH, (7 SC, 1 DEC) x3 (8 SC/set, 3 sets). Mark last stitch.
- Round 19:
- CH, (6 SC, 1 DEC) x3 (7 SC/set, 3 sets). Mark last stitch.
- Round 20:
- CH, (5 SC, 1 DEC) x3 (6 SC/set, 3 sets). Mark last stitch.
- Round 21:
- CH, (4 SC, 1 DEC) x3 (5 SC/set, 3 sets). Mark last stitch.
- Stuff head firmly.
- Round 22:
- CH, (3 SC, 1 DEC) x3 (4 SC/set, 3 sets). Mark last stitch.
- Round 23:
- CH, (2 SC, 1 DEC) x3 (3 SC/set, 3 sets). Mark last stitch.
- Leave 50cm tail for sewing.
- Second filling for head.
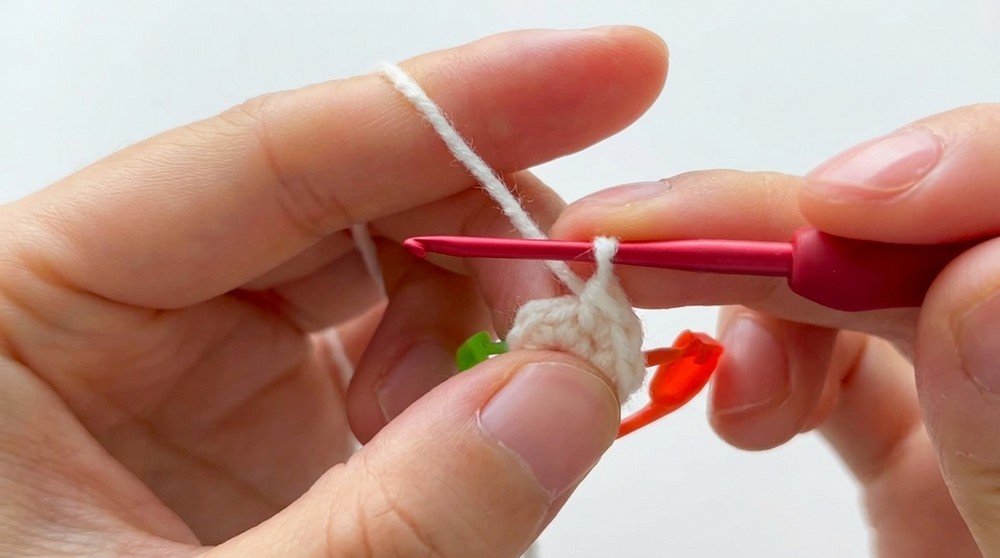

Helmet
- Rounds 1–15:
- Repeat head rounds—start with ring cast-on, increase to 54 SC, and work even.
- Round 16:
- CH, 13 SC, 2 HDC, 3 DC in next stitch, 2 HDC, 7 SC, 2 HDC, 3 DC in next stitch, 2 HDC, 7 SC, 2 HDC, 3 DC in next stitch, 2 HDC, 12 SC.
- Round 17:
- CH, 13 SC, 3 HDC, (DC, TR, DC) in next stitch, 3 HDC, 7 SC, 3 HDC, (DC, TR, DC) in next stitch, 3 HDC, 7 SC, 3 HDC, (DC, TR, DC) in next stitch, 3 HDC, 12 SC.
- Leave 40cm tail for sewing.
Hands (Make 2)
- Round 1:
- Ring cast-on, 7 SC. Mark last stitch.
- Round 2:
- CH, 7 SC. Change to brown yarn. Mark last stitch.
- Round 3:
- CH, 7 SC. Mark last stitch.
- Round 4:
- CH, 7 SC. Mark last stitch.
- Rounds 5–9:
- 7 SC each. Mark last stitch.
- Leave 20cm tail for sewing.
Feet
Left Foot
- Round 1:
- Ring cast-on, 6 SC. Mark last stitch.
- Round 2:
- CH, 6 INC (12 SC). Mark last stitch.
- Round 3:
- CH, 12 SC.
- Round 4:
- CH, (1 SC, 1 INC) x6 (18 SC). Change to brown yarn. Mark last stitch.
- Round 5:
- CH, 18 SC.
- Leave 15cm tail.
Right Foot
- Repeat left foot rounds, but do not break yarn after round 5.
- Round 6:
- CH, 36 SC (18 SC per foot; join left and right feet).
- Round 7:
- CH, 36 SC. Mark last stitch.
- Rounds 8–10:
- 36 SC each round. Mark last stitch.
Body
- Round 11:
- CH, (4 SC, 1 DEC) x6 (5 SC/set, 6 sets). Mark last stitch.
- Round 12–13:
- CH, 30 SC each round.
- Round 14:
- CH, (3 SC, 1 DEC) x6 (4 SC/set, 6 sets).
- Round 15–16:
- CH, 24 SC each round.
- Round 17:
- CH, (2 SC, 1 DEC) x6 (3 SC/set, 6 sets).
- Leave 15cm tail.
- Stuff body firmly.

Ears
Small Ears (Make 2)
- Ring cast-on, 6 SC.
- Round 2:
- CH, 6 INC (12 SC). Mark last stitch.
Big Ears (Make 2)
- Ring cast-on, 6 SC.
- Round 2:
- CH, 6 INC (12 SC). Mark last stitch.
- Round 3:
- CH, (1 SC, 1 INC) x6 (18 SC).
- Round 4:
- CH, 18 SC.
- Round 5:
- CH, (1 SC, 1 DEC) x6 (12 SC).
Scarf
- CH 81.
- Turn, work 80 SC in back loop. Leave 15cm tail.
Tail
- Ring cast-on, 6 SC.
- Rounds 2–20:
- CH, 6 SC.
Lanyard
- CH 30 cm (adjust length as needed). Attach ring for hanging/keychain.
Assembly & Finished Size
- Glue or sew small ears to big ears.
- Insert wire in tail and arms for poseability, bend ends.
- Sew head and body together, aligning slip stitch lines.
- Attach helmet to head.
- Sew ears to head in symmetrical positions.
- Embroider mouth and eyebrows with brown yarn (T shape, arc for eyebrows).
- Attach eyes with glue or sew as preferred.
- Sew arms to sides of body, integrating wire.
- Wrap scarf around neck, tie securely.
- Attach lanyard and hanging ring for finishing.
- Stuff all parts firmly before final closure.


Conclusion and Ending Words
The car hanging monkey pattern is constructed through repetitive and precise rounds, color transitions, and decorative stitches. The use of soft wire combined with dense yarn fabric allows for poseable arms and tail, while modular assembly provides durability. Embroidered features and sewn accents bring personality and charm. With careful tension and attention to detail in joining and stuffing, this monkey transforms into a charming, functional accessory for a car or as a lively keychain. The steps ensure correct proportions and highlight handcraft quality in every detail.