
Quirky Crochet OCTOPUS LIGHTER COVER for Colorful Accessories
Style your lighter with this Free Crochet OCTOPUS LIGHTER COVER Pattern, a fun and protective accessory that adds charm and personality to daily use
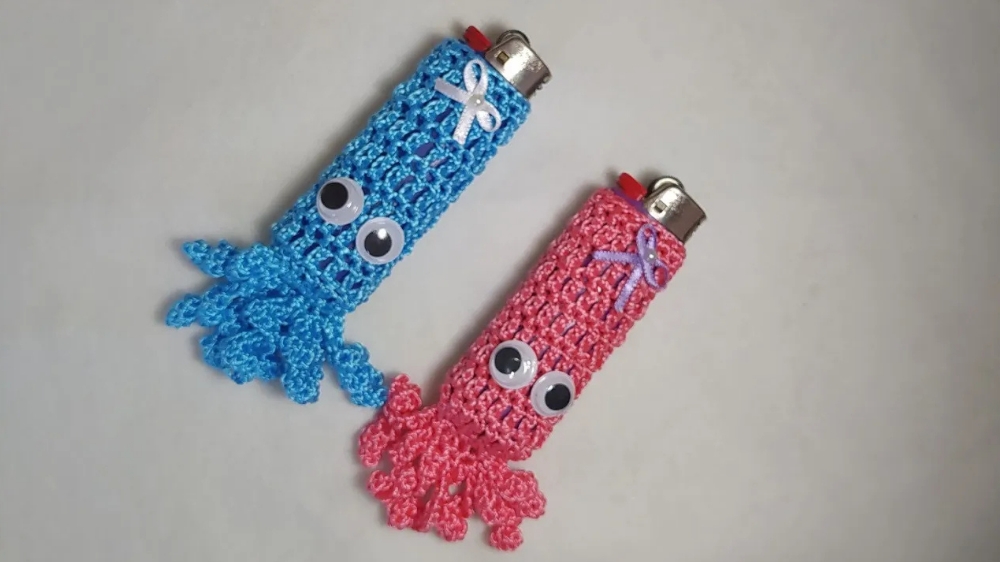
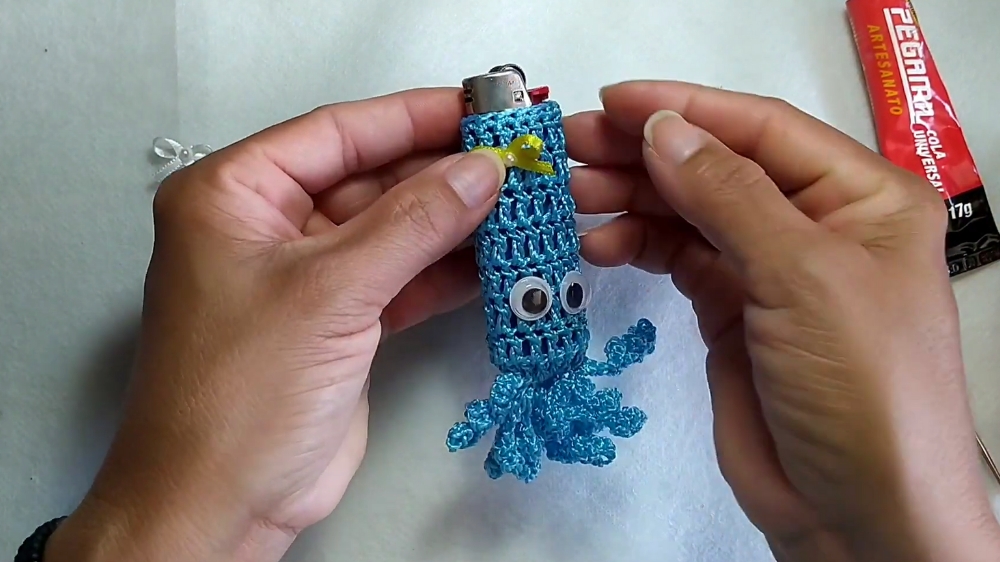
In everyday life, small accessories often carry both charm and practicality, making ordinary objects more enjoyable to use. A lighter, while functional, is usually plain and uninspiring, yet with a thoughtful touch it can be turned into something unique and eye-catching. The Free Crochet Octopus Lighter Cover Pattern brings character and personality to a simple lighter, transforming it into a playful piece that sparks smiles each time it’s used.
Free Crochet OCTOPUS LIGHTER COVER Pattern with Tentacle Charm

This pattern works its way up from the base, ensuring a snug fit around the lighter while offering a comfortable grip. The body is carefully shaped to wrap securely, and as the project progresses, the tentacles take form, flowing outward to give it the signature octopus appeal. Midway through, details like the rounded head and subtle shaping begin to highlight the character of the piece. In the final steps, small accents such as embroidered or stitched eyes complete the lively expression, making it not only functional but also decorative.
More than a cover, this piece becomes a fun accessory that can protect the lighter from scratches, make it easier to spot, and serve as a quirky conversation starter. Its playful design adds personality to an everyday tool, combining usefulness with delightful charm.
Special Features
- Unique Octopus Design: The project is crafted to resemble an adorable octopus with detailed tentacles, making it perfect as a gift or decorative item.
- Customizable Details: You can use different thread colors and bow styles to personalize the final design.
- Beginner to Intermediate-Friendly: The tutorial uses standard crochet techniques, ensuring even beginners can follow along.
Level of Difficulty
The project is designed for beginners and intermediate-level crocheters. Basic knowledge of foundation stitches like chains, single crochet, and double crochet is helpful, but the tutor provides clear, step-by-step guidance to simplify the process. The addition of decorative elements like the bow and eyes brings some creative freedom, but the instructions remain straightforward enough for all skill levels.
Step-by-Step Instructions
1: Gather Materials
The materials used in the project include:
- Silk Thread: Specifically in royal blue, but other colors can be substituted based on preference.
- Crochet Hook: Size 1.75 mm.
- Felt or Plastic Eyes: To create the octopus's eyes.
- Bow Decoration: A small bow in any color of choice.
- Black Glue or Hot Glue: For attaching decorative details.
- Scissors: To cut the threads.
- Needle: For sewing tentacles to the base.
- Lighter: To seal thread ends and prevent fraying.
2: Make the Base
- Start by making four chains using the royal blue thread.
- Add three more chains to create the height for a double stitch.
- Begin working double crochets into the base stitches, placing one stitch in each base loop.
- At the curve, work four double crochets together to create the rounded shape.
- Continue adding double crochet stitches to complete the base, and finish the round with a slip stitch. Cut and seal the thread.

3: Build the Body
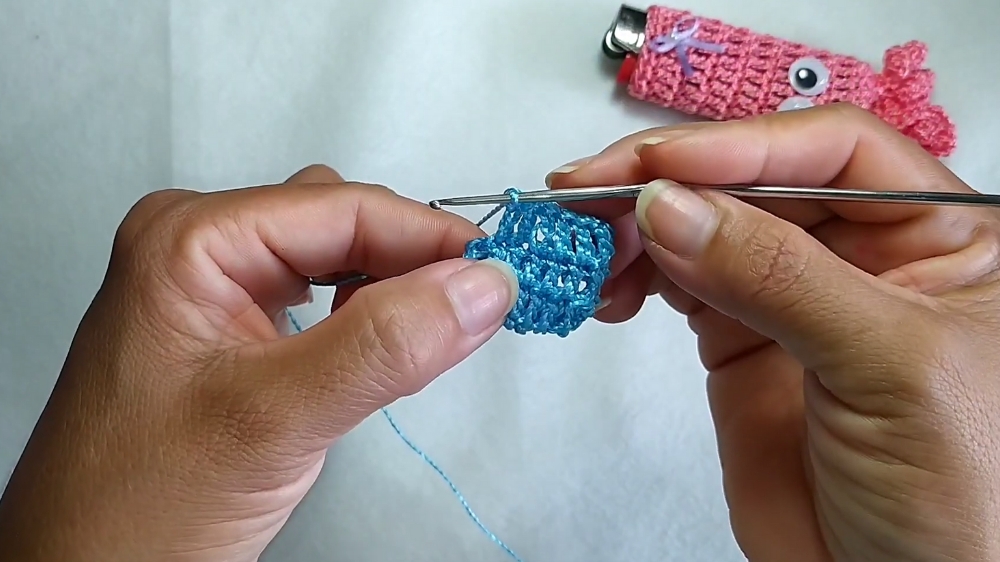
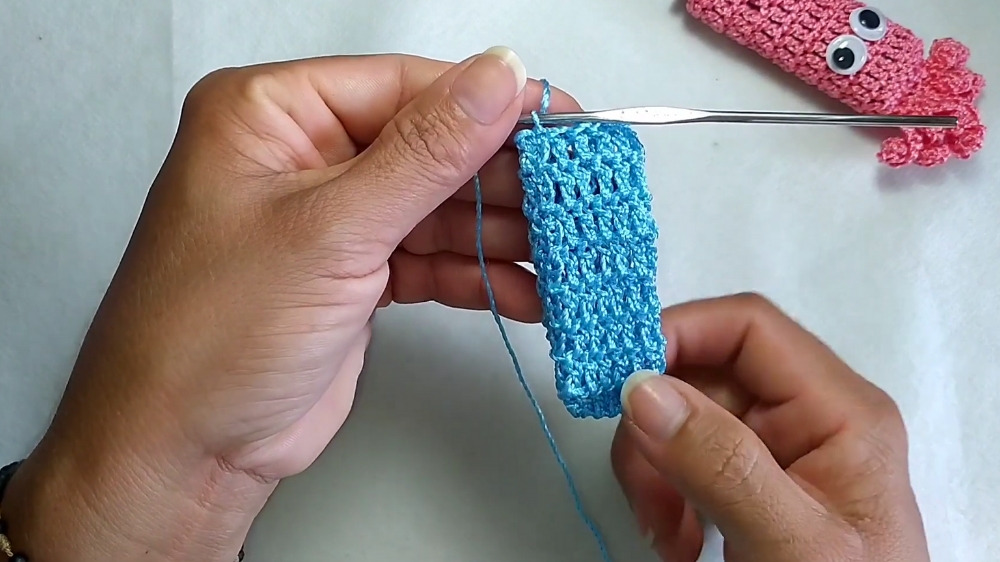
- Add three chains to create height for another row of double crochet stitches.
- Work one double crochet into each base stitch, without increasing this time.
- Repeat this row eight times to build the body of the octopus cover.
- In the final row, finish with a neat border by working one single crochet into each base stitch. Complete with a slip stitch.
4: Create the Tentacles
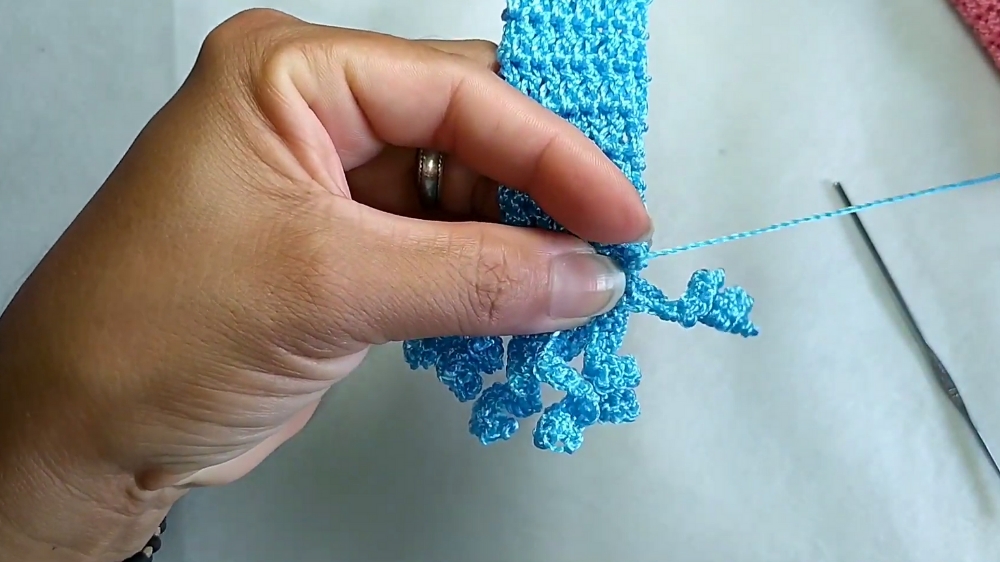
- For each tentacle, start by making eight chains (or more for variation).
- Mark the chain base using a line or marker for reference.
- Work back along the chains with single crochet stitches.
- For added texture, add two single crochets into the same space periodically.
- Repeat this process for a total of eight tentacles, cutting the thread slightly longer for attaching.
5: Assemble the Octopus
- Use a needle and thread to securely sew each tentacle to the base of the octopus cover.
- Ensure the tentacles are evenly spaced to give the octopus a balanced appearance.
- Cut and seal all thread ends to keep the design tidy and secure.
6: Add Decorative Details
- Attach the eyes to the octopus’s face with hot glue or black glue (if hot glue is unavailable).
- Position a bow at the top of the octopus cover. The color of the bow can be personalized; white, blue, and yellow are all good options.
- Make any last adjustments to the tentacles and decorative details to ensure the final design is neat and polished.
Tutor's Suggestions
- Sealing Threads: The instructor emphasizes the importance of sealing threads using a lighter to prevent fraying and maintain durability.
- Adjustable Sizes: You can increase or decrease the number of chains or rows to adjust the size of the octopus cover.
- Experiment with Colors: Feel free to use different thread colors to create a personalized octopus.
- Glue Options: While hot glue is recommended, black glue can be used as an alternative.
Uses
- Decorative Item: Adds a playful touch to shelves, desks, or other interior spaces.
- Gift Idea: A thoughtful handmade gift for children, friends, or family members.
- Practice for Crocheters: A great project to hone your crochet techniques and explore fun designs.
Tip
Pro Tip: When attaching the bow, try positioning it slightly asymmetrically to give your octopus a quirky and unique personality!
Conclusion
This crochet octopus cover is an enjoyable and creative project that combines essential crochet skills with a touch of artistry. The detailed instructions and simple materials make it suitable for crocheters of all levels, while the final result is both functional and adorable. Whether you’re making it for fun, as a gift, or as a decorative piece, this project is sure to inspire and delight.