
How to Crochet a Cute Penguin With A Free Pattern
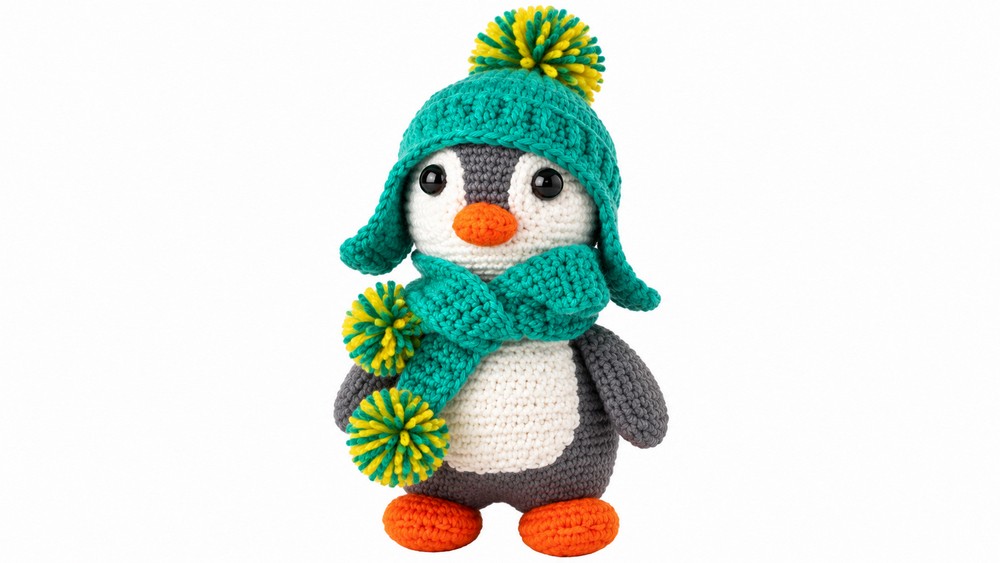
Dress up your winter shelves with this Crochet Amigurumi Penguin Free Pattern and finish a sweet little bird for Christmas gifts and home decor.
Making a cozy winter friend is always enjoyable. Crochet Penguin projects are friendly to make and perfect for crocheters of all skill levels. This charming figure has a soft, round body with classic black and white coloring that resembles a real penguin but feels warm and huggable. Its large, expressive eyes and bright orange beak and feet give it a humanized and lively appearance that makes it truly endearing.
Winter Crochet Penguin Free Pattern For Holiday Displays
The color contrast between the black, white, and orange yarns adds visual appeal. Using quality yarn ensures the penguin is soft to touch and durable, perfect for cuddling or displaying. Moreover, the tactile softness invites hugs, making the finished creation a lovely companion for children or a delightful decorative piece.
Besides being fun, crocheting this penguin helps improve crochet skills by practicing shaping and changing colors. It also encourages patience and creativity, rewarding you with a unique handmade toy or gift. In addition, the project is manageable even for beginners, providing a satisfying sense of achievement upon completion.
Overall, the Crochet Penguin design by Cotton Candy Crafts combines warmth, charm, and creativity. Its humanized features and inviting colors bring joy into any space. Try making your own, and enjoy the fulfilling experience of creating a little friend by hand
About the Pattern
This crochet penguin pattern combines classic amigurumi techniques with creative color and structural shaping to form an expressive penguin plush. The design uses joined legs and a rounded body as a foundation. The head incorporates color changes for the facial area, and additional features such as wings, feet, beak, eye patches, pupils, and a belly patch are constructed separately and then attached during assembly. The orderly progression of rounds and seamless colorwork result in a charismatic penguin suitable for display or gifting.
Pattern at a Glance
- Construction: Tubular body and head built from joined legs, with separate limbs and facial features coordinated and sewn for realistic, dimensional effect.
- Colorwork: Changes in yarn color for facial area, body patch, and details highlight key penguin characteristics.
- Seaming: Pieces are sewn together with precise positioning, giving distinct placement for eyes, beak, and wings.
Important Notes
- Use a stitch marker during spiral rounds to keep accurate count and alignment.
- Apply tight tension to avoid gaps between stitches.
- Stuff evenly as you work; under-stuffing can lead to weak structure, while over-stuffing can distort the dimensions.
- All embroidery (eye pupils, facial features) should be completed with a sharp needle and sturdy thread or yarn to ensure neatness.
- Position decorative patches such as the eye patches and belly for optimal character and symmetry.
- Secure each piece during assembly for child-safe durability and longevity.
Difficulty Level
Intermediate
Experience with magic ring, increasing and decreasing in the round, color changing, sewing amigurumi components, and working ovals and rows is essential. Some attention to accurate placement and seaming is needed.
Supplies Needed
- Yarn: Black, off-white, white, and orange (or yellow) in worsted weight.
- Crochet hook: 3 mm or suitable to yarn weight.
- Stuffing: Polyester fiberfill.
- Yarn needle: For sewing parts and embroidery.
- Stitch marker: To track beginning of rounds.
- Scissors
- Embroidery floss or fine yarn: In black for eye pupils.
Size & Measurements
- Finished penguin: 15–18 cm tall, depending on yarn, hook, and tension.
- Eye patches and body patch sized to the head and torso, ensuring balanced proportions.
- Wings and feet are sized for cartoonish expression and play value.
Gauge & Stitch Details
- Gauge is not critical for amigurumi; aim for stitches tight enough to keep stuffing enclosed.
- Continuous spiral rounds are advised, especially for body, head, and limbs.
- Use invisible decrease for best shaping, especially at neck and tapering points.
- Rows are used for belly patch shaping.
Crochet Abbreviations
| Abbr | Stitch Name |
|---|---|
| ch | chain |
| sc | single crochet |
| inc | increase (2 sc in 1 st) |
| dec | decrease (sc 2 together) |
| sl st | slip stitch |
| st | stitch |
| rnd | round |
Special Stitch Guide
- Magic Ring: Form an adjustable circle and work the first round of stitches into it.
- Increase (inc): Work 2 single crochets in the same stitch.
- Decrease (dec): Single crochet two stitches together, ideally with the invisible technique for best results.
- Working in Rows: For body patch, always ch 1 at turn unless otherwise noted.
Complete Crochet Pattern
Legs/Base (Black Yarn)
- Rnd 1: Magic ring, 8 sc
- Rnd 2: inc in each st (16 sc)
- Rnd 3: (1 sc, inc) repeat (24 sc)
- Rnd 4: (2 sc, inc) repeat (32 sc)
- Make two separate legs.
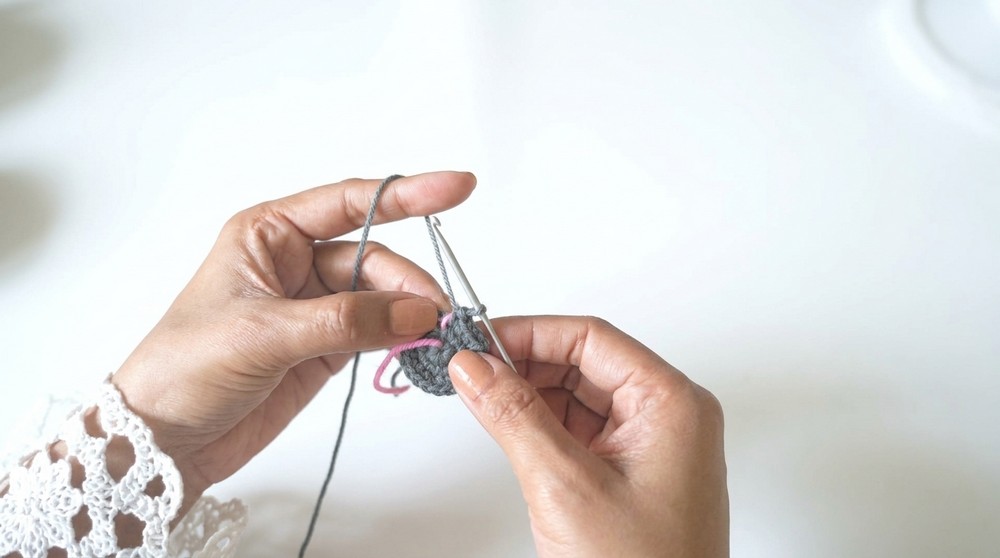
- At (2:53), join legs: Place together and work 64 sc (32 sc from each leg) in one round to begin body.
Body (Black Yarn)
- Starting from 64 sc (joined legs)
- Rnd 5–14: Work 64 sc per round for 10 rounds.
- Rnd 15: (6 sc, dec) repeat (56 sc)
- Rnd 16: (5 sc, dec) repeat (48 sc)
- Rnd 17: (4 sc, dec) repeat (40 sc)
- Rnd 18: (3 sc, dec) repeat (32 sc)
- Rnd 19: (2 sc, dec) repeat (24 sc)
- Rnd 20: (1 sc, dec) repeat (16 sc)
- Rnd 21: (dec) around (10 sc)
- Fasten off, leaving a tail for sewing.


Head (Black and Off-White Yarn)
- Rnd 1: Magic ring, 8 sc
- Rnd 2: inc in each st (16 sc)
- Rnd 3: (1 sc, inc) repeat (24 sc)
- Rnd 4: (2 sc, inc) repeat (32 sc)
- Rnd 5: (3 sc, inc) repeat (40 sc)
- Rnd 6: (4 sc, inc) repeat (48 sc)
- Rnd 7: (5 sc, inc) repeat (56 sc)
- Color Change: At (12:14), join off-white yarn and work even.
- Rnd 8–12: 56 sc per round in off-white (face area)
- Rnd 13: (6 sc, dec) repeat (48 sc)
- Rnd 14: (5 sc, dec) repeat (40 sc)
- Rnd 15: (4 sc, dec) repeat (32 sc)
- Rnd 16: (3 sc, dec) repeat (24 sc)
- Rnd 17: (1 sc, dec) repeat (16 sc)
- Rnd 18: (dec), closing at 8 sc
- Stuff, fasten off.
Wings (Black Yarn)
- Rnd 1: Magic ring, 6 sc
- Rnd 2: inc in each st (12 sc)
- Rnd 3: (1 sc, inc) repeat (18 sc)
- Rnd 4: (2 sc, inc) repeat (24 sc)
- Continue increasing until 54 sc (approx. Rnds 5–9: 3 sc, inc to 8 sc, inc)
- Final Rnd: 54 sc
- Fold piece in half, whipstitch or crochet edges to seal, leaving rounded ends.
- Make two wings.
Feet (Orange or Yellow Yarn)
- Ch 9
- Rnd 1: Work 8 sc along chain, continue around to form oval (work into bottom of chain), 14 sc total.
- Rnd 2: Inc evenly where oval curves, ending with 15 sc
- Fasten off, leave tail for sewing.
- Make two feet.
Beak (Orange or Yellow Yarn)
- Ch 6
- Rnd 1: Work 5 sc along chain, continue around, working into bottom to form oval, 10 sc
- Rnd 2: Add increases evenly to reach 14 sc
- Fasten off, leave tail.
Eye Patches (White Yarn)
- Rnd 1: Magic ring, 6 sc
- Rnd 2: inc in each st (12 sc)
- Rnd 3: (1 sc, inc) repeat (18 sc)
- Rnd 4: (2 sc, inc) repeat (24 sc)
- Rnd 5: (3 sc, inc) repeat (30 sc)
- Fasten off, leave tail for sewing.
- Make two eye patches.
Eye Pupils (Black Yarn or Embroidery Floss)
- Rnd 1: Magic ring, 6 sc
- Fasten off, leave tail.
Body Patch (Off-White Yarn)
- Ch 15
- Row 1–17: 14 sc per row, turn.
- After 17 rows, decrease one st per row for tapering (approx. 4–5 rows).
- Fasten off, leave tail.
Assembly & Finished Size
- Stuff and sew the legs/base to the body, aligning flat bottoms.
- Attach the wings: Sew each securely to sides, slightly toward the back for natural placement.
- Sew the head to the body, matching color changes and stuffing firmly for stability.
- Position and sew the feet at the bottom, evenly spaced for balance.
- Sew the beak to the center of the face area, slightly above midline.
- Attach eye patches: Place them three rows above the color change line on the head, with a 5-stitch gap between. Sew neatly.
- Sew pupils to the centers of eye patches.
- Sew the body patch on the front, centered and vertical, matching top to neck and bottom to lower belly.


Conclusion
The amigurumi penguin pattern achieves a distinctive character through careful shaping, seamless color transitions, and precise accessory construction. Each component is thoughtfully placed and expertly seamed for a finished plush with playful charm and durability. Combining classic forms and lively details, the design allows for creative variation while maintaining the recognizable penguin profile. The finished toy makes for a delightful decorative item or companion, offering joyful appeal and enduring craftsmanship.