
Fun Little Strawberry Crochet for Cozy Decor
Whip up a delightful treat with this Fun little Strawberry Crochet Guide and make a vibrant berry that adds a sweet handmade accent at home.

A splash of bright red with a crown of fresh green can instantly catch the eye and lift the mood of any space. CROCHET STRAWBERRY is a soft handmade piece that looks just like the sweet fruit from the garden, but it stays fresh and beautiful forever. Its round shape, and leafy top give it a cute and realistic look while still feeling warm and cozy in the hand. The smooth yarn texture makes it safe for babies and gentle for small hands to hold and play with. It can be used as a toy, a keychain, a bag charm, a nursery decoration, or a sweet little gift for someone special. Small in size yet full of charm, it adds color, happiness, and a handmade touch to homes, making simple places feel more lively and cheerful without much effort at all.
How to Crochet a Strawberry So Cute You’ll Want Dozens
The steps are easy to follow, using basic stitches worked in rounds with light stuffing inside for shape. It is a good choice for beginners who want a fun and relaxing activity. This sweet handmade strawberry brings color, warmth, and a happy touch to any space.
Beginner-Friendly Crochet Strawberry Pattern
Materials Needed:
- Red and green yarn: Medium worsted weight (Size #4). Cotton yarn is recommended, but acrylic yarn also works.
- Hook: Size E (3.5mm).
- Stuffing: Polyfill or any available options (The tutor suggests using the inside of a pillow from Target).
- Scissors
- Yarn needle
- Stitch marker
Step-by-Step Pattern
Start with the Red Yarn (Base of the Strawberry):
- Magic Circle (Round 1):
- Create a magic circle (wrap yarn around fingers to form a loop, slip hook through the loop, pull up a loop, and secure with a chain).
- Crochet 6 single crochets (SC) into the magic circle. (Do not tighten it fully yet; leave it slightly open to work comfortably in subsequent rounds.)

- Round 2: Increase.
- Crochet 2 SC into the first stitch (mark the first stitch with a stitch marker).
- Crochet 1 SC into the next stitch. Repeat this pattern 3 times.
- At the end of Round 2, you will have 9 stitches (6 + 3 increases).
- Tighten the Magic Circle:
- Hold the end tail, twist it slightly, and gently pull to close the center hole.
- Round 3: Increase more.
- Make 1 SC into the first stitch, 1 SC into the second stitch, and 2 SC into the third stitch (increase).
- Repeat this pattern around 3 times. (Total stitches = 12).
- Round 4:
- Crochet 2 SC into the first stitch, followed by 1 SC each into the next 3 stitches. Repeat 3 times. (Total stitches = 15).

- Round 5: Stagger increases.
- Crochet 1 SC into each of the first 3 stitches, 2 SC into the next stitch, followed by 1 SC into the next stitch.
- Repeat this pattern 3 times. (Total stitches = 18).
- Round 6:
- Increase into the first stitch, then crochet 1 SC into the next 5 stitches.
- Repeat the pattern 3 times. (Total stitches = 21).
- Round 7:
- Crochet 1 SC into the next 4 stitches, followed by an increase in the fifth stitch, then crochet 1 SC into the next 2 stitches.
- Repeat this pattern 3 times. (Total stitches = 24).
- Round 8: No increases.
- Simply crochet 1 SC into each stitch around. (Total stitches = 24 stitches).
- Color Change (From Red to Green):
- Work the last stitch of Round 8 as an incomplete single crochet, then switch to green yarn.
- Use an adjustable double knot:
- Make your first knot (right over left), then make your second knot (left over right).
- Slide the knot down to the base of the red yarn, tighten, and pull the green yarn through to complete the last stitch. This creates a clean color change with a green loop on your hook.
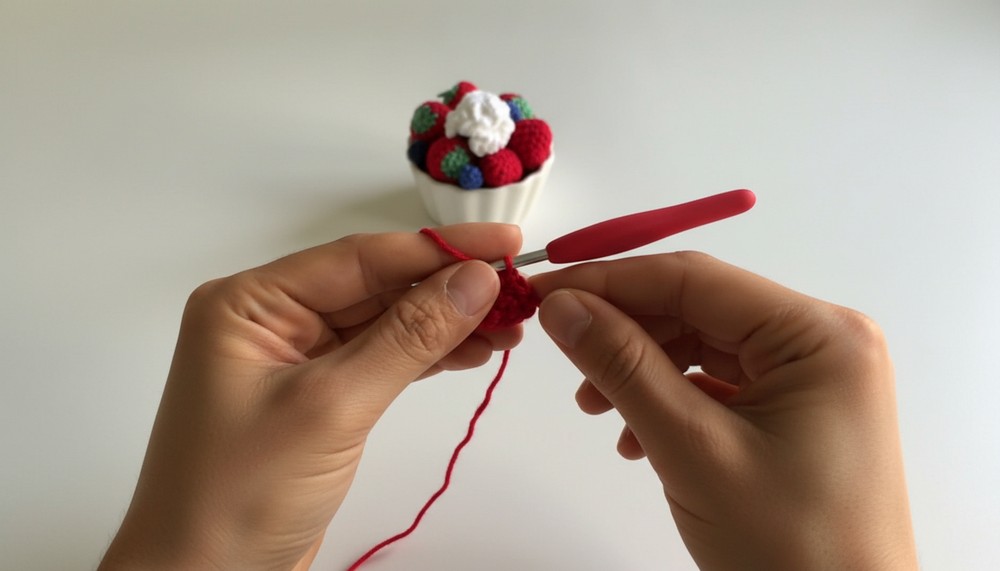
Begin the Green Calyx (Cap and Stem):
- Round 9:
- Make an invisible decrease: Insert the hook into the front loops of the next 2 stitches and crochet them together.
- Follow with 1 SC into the next 2 stitches.
- Repeat this pattern 6 times. (Total stitches = 18).
- Pause here and start stuffing the strawberry. Begin with the tip and then fill the rest.
- Round 10:
- Again, use invisible decrease in the next 2 front loops and crochet 1 SC into the next stitch.
- Repeat this 6 times. (Total stitches = 12).

- Round 11: Final decreases.
- Use invisible decrease in all of the next 6 pairs of stitches. (Total stitches = 6).
- Closing the Calyx:
- Cut the green yarn, leaving about 5 inches for the tail. Thread the tail through a yarn needle and weave it through the remaining 6 stitches. Pull it tight to close the hole at the top of the strawberry.
- Making the Stem:
- Twist the tail tightly at the center where the calyx is closed. Hold the twisted tail, shape it into a stem, and tuck it into the hole to secure the shape.
- Insert the needle into the center hole, pushing it into the body, and come out near the tip of the strawberry. This prevents the stem from untwisting and hides the tail.

Special Features:
- No Sew Pattern: This crochet strawberry requires no sewing or attaching, making it a cleaner and faster project.
- Adjustable Color Change: The adjustable double knot provides a neat transition between the red and green yarns.
- Invisible Decreases: These ensure a smooth, neat finish for your strawberry, with invisible shaping.
- Twisted Stem: A playful finishing touch that adds a touch of realism.
Difficulty Level
This pattern is beginner-friendly. It uses basic stitches (single crochet, magic circle, and slip stitches) and introduces slightly advanced techniques like invisible decreases and adjustable double knots, which the tutor explains thoroughly.
Tutor's Suggestions:
- Be careful about tightening the magic circle too early; it’s easier to work on it when left loose until you finish the first few rounds.
- Always mark the first stitch of each round to avoid losing track. The stitch marker helps keep the rounds even.
- Stuff the strawberry gradually for better shape and to ensure the tip is properly filled.
Uses of Crochet Strawberries:
- Use them as keychains, bag charms, or accessories.
- Sew them onto hats, scarves, or other handmade items for added cuteness.
- Add multiple strawberries to create a playful garland or a fun decoration piece.
- Perfect as gifts for loved ones or party favors!
Pro Tip:
Practice the magic circle and invisible decrease techniques before starting the project if you’re a beginner. These two skills are key to creating professional-looking amigurumi projects. Additionally, use contrasting yarn colors for an extra dose of cuteness and vibrancy.
Conclusion
In this tutorial, you learned how to create an adorable crochet strawberry with no sewing involved, making it accessible for beginners. It’s perfect for those looking to enhance their amigurumi skills or create sweet decorative items. The ability to personalize the colors and use the strawberries in various creative ways makes this pattern versatile and fun. Have fun crocheting, and don’t forget to explore more and share your finished strawberries with loved ones!