
Fun Crochet Graduation Accessories Free Pattern For Big Day
Celebrate a special achievement with this Crochet Graduation Accessories Pattern that add handmade charm to gifts parties or the big day.
Graduation day is always such a memorable day, filled with excitement, pride, and celebration. As someone who loves making things by hand, I wanted to create something special that would look nice and mean a lot to the graduate. That’s when I found a perfect project: crochet accessories made just for graduation. The Crochet Graduation Accessories Free Pattern is a simple and fun way to make pretty items that are both useful and special. These accessories can be things like hats, sashes, flower pins, or small gifts that show how proud you are.
Simple Crochet Graduation Accessories Free Pattern To Celebrate Success

The video from Shelen Crochet shows you how to make these accessories step by step. The design is soft and pretty, with yarn made into nice shapes that add a handmade touch to any graduation outfit or gift. You can pick colors that match your school or the graduate’s favorite colors to make each piece special. These accessories can be worn at the graduation, used as party decorations, or kept as sweet reminders of the day.

This project is important because it mixes creativity with meaning. Handmade graduation accessories feel more special than store-bought gifts because they show care and effort. They look delicate and beautiful, making them perfect gifts for graduates, teachers, or even for decorating a classroom. If you want to add a warm and personal touch to your graduation day, the Crochet Graduation Accessories Free Pattern is a great place to start.
Crochet Graduation Accessories Pattern
This easy-to-follow guide explains how to build a full graduation accessory set for a 20 cm doll. Each part, from the mortarboard cap with its tassel to the simple sash-style stole and rolled diploma, is broken down step by step. Familiar stitches keep everything simple, and each detail is explained without complicated terms. These accessories suit any school colors since you can choose your yarn shades. Even first-timers can use this clear set of instructions. By the end, you’ll have small graduation items to dress up your doll, give as a present, or use for a cheerful decoration.
Quick Pattern Overview
- Cap Top (Mortarboard): Flat oval rounds joined over cardboard.
- Cap Base (Hat): Continuous rounds from a magic ring, shaped with BLO.
- Tassel: Wrapped yarn strands with a chained stem for attachment.
- Stole (Sash): Flat hdc rows edged with sc, finished with gold sl st details.
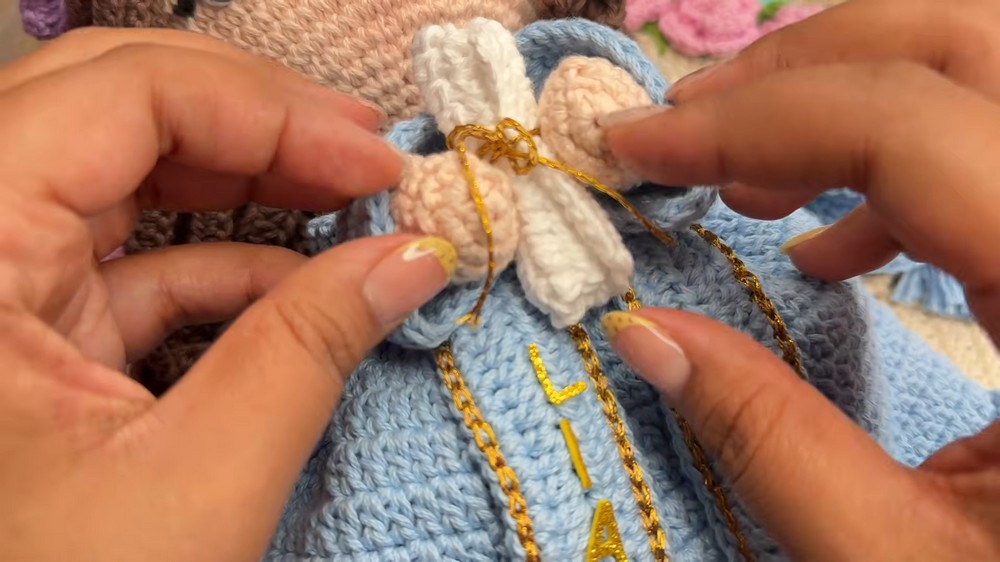
- Diploma: Flat hdc rows, rolled up, tied with gold yarn.
Notes
- Read all steps before starting.
- Turning chains at the start of each row/round are not stitches unless noted.
- Hot glue or silicone secures accessories and decorations.
- Cut and fit cardboard carefully for the square cap.
- Gauge is not critical, but consistent tension is best for a proper fit.
Skill Level
Intermediate
Materials
- Yarn: Cotton in blue, gold, white
- Crochet Hook: 2.5 mm
- Cardboard: 7 cm x 7 cm square
- Stuffing: Small amount
- Embellishments: Foam letters, numbers
- Adhesive: Hot glue/silicone
Measurements
- Fits 20 cm tall doll.
- Cap: Uses 7x7 cm cardboard.
Stitch Abbreviations
| Term | Meaning |
|---|---|
| ch | chain |
| sc | single crochet |
| hdc | half double crochet |
| inc | increase (2 sc in one stitch) |
| sl st | slip stitch |
| BLO | back loop only |
| st(s) | stitch(es) |
Special Stitches
- Joined Oval Edge: Insert hook through the front and back layer at once, then work a standard sc to close the piece.
Crochet Steps
Part 1: Mortarboard Top (Blue Yarn)
Flat Cap Piece
- Round 1: Slip knot, ch 14, inc in 2nd ch from hook, sc in next 12 ch, 3 sc in last ch. Work along the opposite side: sc in next 11 ch, inc in last ch; sl st to join. (30 sts)

- Round 2: Ch 1, sc in each st around; sl st to join. (30 sts)
- Rounds 3–14: Ch 1, sc in each st around. Sl st to join. (30 sts per round)
Assembly
Insert 7 cm x 7 cm piece of cardboard inside.
To join flat: Ch 1, insert hook through one stitch front and back, sc across to join both layers. Fasten off, weave in ends.

Part 2: Mortarboard Cap Base (Blue Yarn)
- Round 1: Form a magic ring, ch 1, 6 sc in ring. Pull tight, sl st to join. (6 sts)
- Round 2: Ch 1, inc in each st around. Sl st to join. (12 sts)
- Round 3: Ch 1, repeat [sc, inc] 6 times around. Sl st to join. (18 sts)
- Round 4: Ch 1, repeat [2 sc, inc] 6 times. Sl st to join. (24 sts)
- Round 5: Ch 1, BLO, sc in each st around. Sl st to join. (24 sts)
- Rounds 6–10: Ch 1, sc in each st around (both loops). Sl st to join. (24 sts per round)

- Fasten off, leave tail.
Part 3: Cap Tassel (Blue Yarn)
- Wrap blue yarn around 7 cm cardboard 18 times.
- Slide a long blue strand under top loops, knot tight.
- Cut bottom loops to make fringe.
- Tie a blue strand 1 cm from top to shape the tassel’s “head.” Knot, trim.
- Attach yarn to top, ch 15 for chain stem. Fasten off, leave tail to attach.

Part 4: Stole / Sash (Blue & Gold Yarn)
- Row 1: With blue yarn, ch 80. In 2nd ch from hook, hdc in each ch across. Turn. (79 sts)
- Row 2: Ch 1, turn. hdc in each st across. (79 sts) Turn.
Outer Border (Blue Yarn):
- Ch 1, sc evenly along edges. At corners, 2 sc in corner to keep it flat.
- Sl st to join, fasten off, weave ends.
Decorative Edge (Gold Yarn):
- Join gold at edge, sl st in each st around the stole. Fasten off, hide ends.
Part 5: Diploma (White & Gold Yarn)
- Row 1: With white, ch 12. In 2nd ch, hdc in each ch. Turn. (11 sts)
- Rows 2–6: Ch 1, turn, hdc in each st. (11 sts) Fasten off after Row 6, weave ends.
- Assembly: Roll tightly into a cylinder, glue seam. Tie a gold strand in bow shape around the roll. Trim and gently burn the ends.

Assembly & Finishing Steps
- Mortarboard: Add stuffing to cap base. Glue cap base to bottom of the flat top. Thread tassel’s chain through top and secure inside.
- Dressing Doll: Lay stole evenly around neck. Glue stole ends to doll’s clothes.
- Lettering: Place foam letters and numbers (names/year) on stole using small glue dots.
- Diploma & Cap Placement: Glue diploma to doll’s hands. Place glue around inside rim of cap and fit on head.
Conclusion:
Your doll now has a cap that fits well, a sash that sits neatly on the shoulders, and a tiny diploma tied with a gold bow. Following the steps leads to bright, neat accessories that look just right for a graduation. Personal touches, like adding names or year numbers, turn each set into something special. These pieces are great for gifts, display, or making a graduation event feel a little more fun and personal. Look back at your finished work and see how simple shapes, clear instructions, and your effort came together for a happy result.
