
Fun Free Crochet Fruit Green Apple Pattern That Captures Attention
Bite into freshness with the Free Crochet Fruit Green Apple Pattern, a cute handmade design perfect for décor, gifts, or adding fruity charm anywhere.
Brighten your handmade collection with a delightful fruit piece that turns heads and sparks conversation. The Free Crochet Fruit Green Apple Pattern guides you through every stage of the project in a clear, methodical way while enabling you to finish a charming apple shaped piece.
Free Crochet Fruit Green Apple Pattern Perfect for Tiny Décor

Once complete, this little green apple serves beautifully as a decorative accent or a playful keychain, it offers a compact way to use leftover yarn while sharpening your crochet skills, it becomes a customizable gift for friends or children that stands out because of its handmade charm. The beauty lies in its shape and colour whether a soft mint green or a bright Granny Smith hue, the round form with a tiny brown stalk and leaf makes this piece visually appealing and fun.

This pattern illustrates how to choose your yarn weight and hook size, begin with a magic ring, work rounds with increases and decreases, form the body of the green apple, add a stalk and a leaf, and stitch the final seams for a neat finish. Offering both form and function, rather than just being ornamental, it invites you to showcase your handiwork in a little shelf display or as a sweet accessory.
Free Crochet Amigurumi Apple Pattern
Materials List
- Yarn: Fingering or sport weight cotton or cotton blend in green (apple), brown (stem), and light/dark green (leaf)
- Recommended brands: Gazal, Peria, but any smooth cotton yarn is fine
- Hook: 1.75 mm (US steel) or size needed to obtain tight, neat stitches
- Fiberfill: Stuffing for amigurumi
- Embroidery Thread/Yarn: Brown (for face/eyes/eyebrows/mouth), pink for cheeks
- Tapestry Needle: For embroidery and sewing
- Scissors
- Optional: Plastic safety eyes
Key Abbreviations (US Terms)
- mr: magic ring
- ch: chain
- sc: single crochet
- inc: increase (2 sc in same stitch)
- dec: decrease (single crochet two together)
- sl st: slip stitch
- st(s): stitch(es)
- rep: repeat
- FO: fasten off
Special Notes
- All rounds are worked in a spiral unless otherwise stated.
- Use stitch markers to keep track of the first stitch of each round.
- Stuff the apple firmly but do not overstretch the stitches.
Pattern Instructions
1. Apple Body
With green yarn:
- R1: Start with a magic ring, 6 sc in ring. (6)
- R2: Inc in each st around. (12)
- R3: (Sc in next st, inc in next st) rep 6 times. (18)
- R4: (Sc in next 2 sts, inc in next st) rep 6 times. (24)
- R5: (Sc in next 3 sts, inc in next st) rep 6 times. (30)
- R6: (Sc in next 4 sts, inc in next st) rep 6 times. (36)
- R7: (Sc in next 5 sts, inc in next st) rep 6 times. (42)
- R8–11: Sc in each st around. (42 sts for 4 rounds)
- R12: (Sc in next 20 sts, inc in next st) rep 2 times. (44)
- R13: Sc in each st around. (44)
- R14: Sc 11, inc, sc 21, inc, sc 10. (46)
- R15: Sc in each st (46)
- R16: (Sc in 22 sts, inc in next st) rep 2 times. (48)
- R17: Sc in each st (48)
- R18: (Sc in 11 sts, inc in next st) rep 4 times. (52)
- R19: Sc in each st (52)
- R20: (Sc in 25 sts, inc in next st) rep 2 times. (54)
- R21: (Sc in 8 sts, inc in next st) rep 6 times. (60)
- R22: Sc in each st (60)
- R23: (Sc in 8 sts, dec) rep 6 times. (54)
- R24: (Sc in 7 sts, dec) rep 6 times. (48)
- R25: Sc 3, dec, (sc 6, dec) rep 5 times, sc 3. (42)
- R26: (Sc in 5 sts, dec) rep 6 times. (36)
- R27: Sc 2, dec, (sc 4, dec) rep 5 times, sc 2. (30)
- R28: (Sc in 3 sts, dec) rep 6 times. (24)
—Stuff apple firmly as you go. - R29: (Sc in 2 sts, dec) rep 6 times. (18)
- R30: (Sc in next st, dec) rep 6 times. (12)
- R31: Dec in every st around. (6)
—FO, leaving tail for closing.


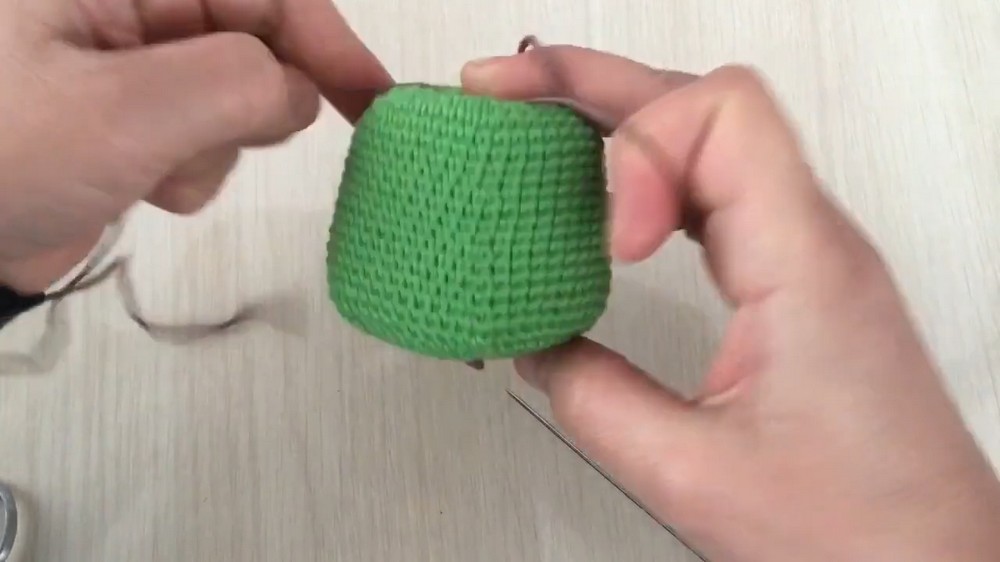
Finishing body:
- Weave tapestry needle through the front loops of the final 6 sts and pull tight to close.
- Secure and weave in end.
2. Apple Indentations
After closing, for realistic apple shape:
- Pull a long green strand through center bottom of apple to the top and back again, lightly compressing the apple so it forms the classic 'dip' top and bottom. Knot firmly and weave in ends.
3. Stem
With brown yarn:
- Fold yarn in half, use crochet hook to pull a loop up through the center top of apple.
- Ch 6–8.
- FO leaving two tails.
- Thread tails on needle, plunge down through center and out base. Knot and hide.
4. Calyx (Bottom Brown Part—Optional)
- With brown yarn attached at apple’s bottom, ch 3 or 4.
- Sl st to nearby base st. Repeat for 3-4 small lines. FO and weave in ends.
5. Leaf
With desired green shade:
- Ch 9.
- Work back along chain:
- Sc in 2nd ch from hook,
- hdc in next ch,
- dc in next 4 ch,
- hdc in next ch,
- sc in last ch,
- Ch 1, work along the other side of foundation ch:
- Sc in first ch,
- hdc in next ch,
- dc in next 4 ch,
- hdc in next ch,
- sc in last ch.
- Sl st to starting point. FO leaving a tail.
- Sew leaf to apple next to stem. Weave in ends.
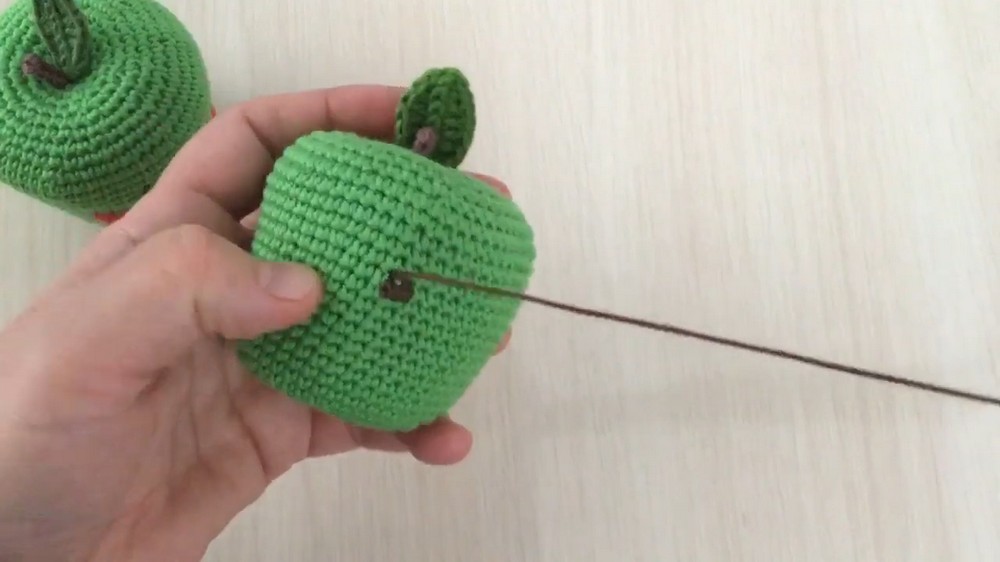
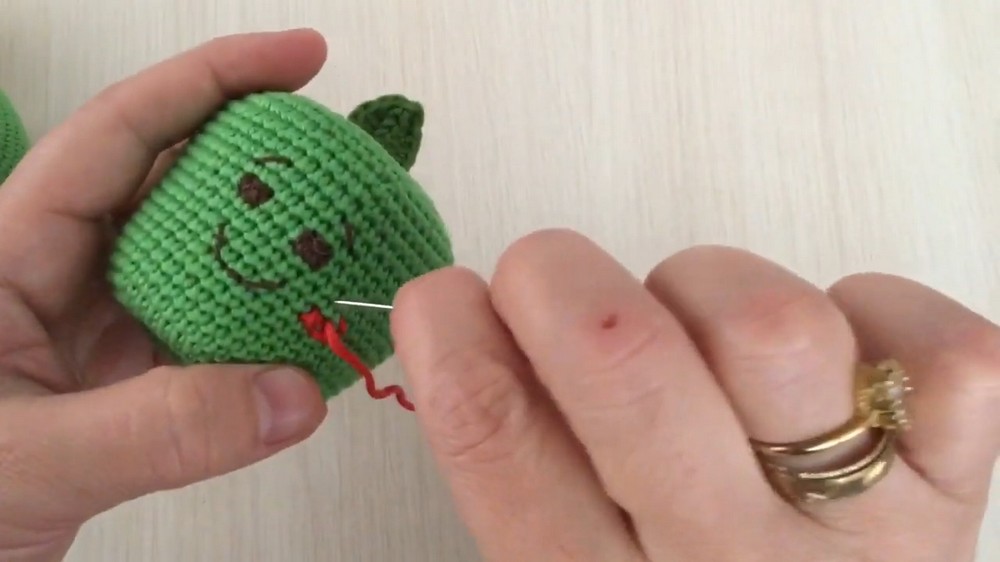
6. Embroidering Face
- Eyes: With brown/black embroidery thread/yarn, make a cross, then fill around cross (like a square). Repeat for other eye.
- Eyebrows: Stitch thin curved line above each eye.
- Mouth: Stitch small curve below eyes.
- Cheeks: With pink (optional), embroider or surface stitch below eyes for blush.
Conclusion
This apple amigurumi is a soft, educational, and decorative project ideal for children. It can be further personalized with different shades, faces, or even left with plain features for a more realistic look. The construction is adaptable and designed to help hone basic shaping and embroidery skills.
Pattern Corrections & Tips
- Increase/Decrease Placement: Always use a marker to track the start of rounds and count stitches carefully, especially with increases/decreases.
- Stuffing: Do not overstuff; apple should hold shape but not stretch stitches.
- Yarn Amounts: Thin cotton yarn and small hooks achieve a neat, compact look.
- Face Details: Embroidered features are safer for children than safety eyes.
- Leaf and Stem: Adjust number of chains to your size preference.
- Apple Shape: Use a needle to cinch top/bottom if a touch more shaping is needed.