
Adorable Free Crochet Kit Penguin Pattern
Turn yarn into charm with the Crochet Kit Penguin Pattern, a free and beginner-friendly project perfect for creating adorable handmade decor or gifts!
Imagine holding a bundle of yarn and turning it into something extraordinary—a charming penguin that’s both stylish and functional. The Free Crochet Kit Penguin Pattern is a chance to enjoy the art of crochet by making a delightful piece of handmade decor or a heartfelt gift. This kit provides everything needed, including pre-made magic rings, yarn in vibrant colors, and safety eyes, making it accessible even for beginners. With detailed instructions and guidance, the process feels smooth and rewarding, helping you master techniques like increasing, decreasing, and assembling amigurumi.
Free Crochet Pattern to Style Your Handmade Penguin Design

Beyond being cute, this penguin is versatile. Place it on a shelf for a unique touch to your home decor or gift it to someone special, knowing it carries the thought and effort of a personal creation. Crocheting the penguin is calming, giving you a moment of relaxation while sharpening focus and enhancing hand-eye coordination. The compact, lightweight design ensures it fits practically anywhere, adding a charming vibe wherever it’s placed. Ideal for any skill level, the pattern also allows room for personalization, encouraging creativity in every stitch. Whether it’s for fun, gifting, or skill development, this crochet penguin delivers joy and satisfaction in its simplest form.
FREE Crochet Kit Penguin Pattern
Materials
- Yarn:
- Main Color (Body): Gray or Black.
- Accent Color (Tummy): White.
- Beak and Feet: Yellow or Orange.
- Hook Size:
- 3.0 mm crochet hook.
- Stuffing:
- Polyester fiberfill (toy stuffing).
- Safety Eyes:
- 6 mm safety eyes (or embroider eyes if making the toy for young children).
- Accessories:
- Stitch markers to track rounds.
- Scissors and yarn needle for sewing.
- Optional: Glue for additional secure attachment of eyes.
Gauge
- Gauge is not critical, but stitches should be tight to prevent stuffing from showing. Use a smaller hook size if your stitches are too loose.
Finished Size
- Approximate Measurements:
- Height: 8–10 cm (3.5–4 inches).
- Width: 6–7 cm (2.5–2.75 inches), depending on yarn and tension.
Special Techniques
- Magic Ring:
- A foundation technique for crocheting seamless rounds with no gaps. Alternatively, a chain-2 method can be used.
- Increase (inc):
- Crochet two single crochet stitches into the same stitch to expand the round.
- Invisible Decrease (dec):
- A smooth method for reducing stitch count. Work through the front loops only of the next two stitches, yarn over, and finish as a single crochet.
- Attaching Safety Eyes:
- Insert safety eyes securely and align properly before fixing the backing. For young children, embroider the eyes to ensure safety.
Pattern Instructions
Body (Main Color Yarn)
R1:
- Create a magic ring (MR). Work 6 single crochet (SC) into the MR. (6 stitches total)

R2:
- Work 2 SC in each stitch (inc) around. (12 stitches total)
R3:
- SC 1, inc in the next stitch. Repeat 6 times. (18 stitches total)
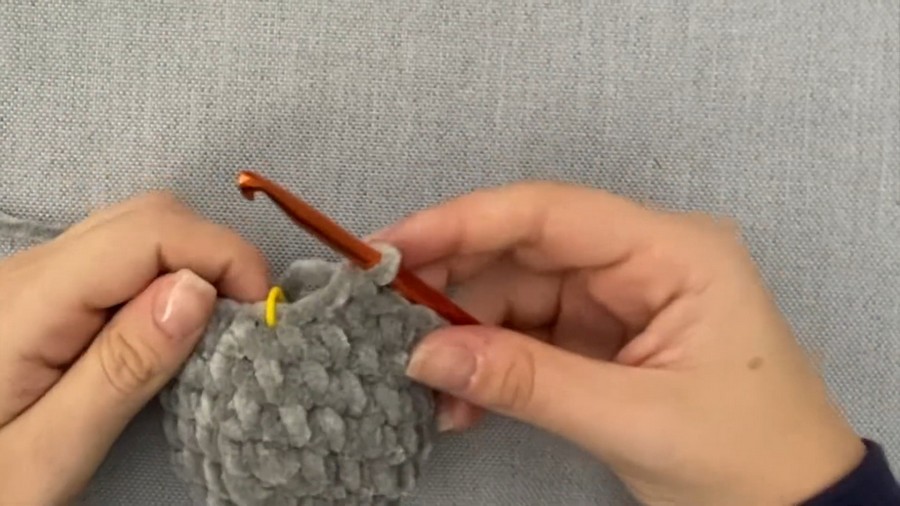
R4–8:
- Work SC in each stitch around. (18 stitches per round, 5 total rounds)
- Tip: Mark the first stitch of each round using a stitch marker. Count stitches at the end of each round to ensure accuracy.
Adding the Safety Eyes
- Eye Placement:
- Place the safety eyes between rounds 5 and 6, with 2 stitches between them.
- Insert the posts of the safety eyes. Position the flat side of the safety eye backing facing the yarn and push until secured.
R9:
- SC 1, dec. Repeat 6 times. (12 stitches total)

R10:
- Work dec in each stitch. (6 stitches total)
Final Step for the Body:
- Stuff the body firmly with stuffing.
- Closing the Hole: Thread a yarn needle with the remaining tail. Sew through the front loops only of the last 6 stitches, pull tight to close the hole, and weave in the ends.
Wings (Make 2, Main Color Yarn)
R1:
- Create a magic ring. Work 4 SC into the ring. (4 stitches total)
R2:
- Work 2 SC in each stitch (inc) around. (8 stitches total)
R3:
- Flatten the circle and SC across both sides to close the top. (3 SC total)
Final Step for the Wings:
- Cut the yarn, leaving a long tail for sewing. Weave in any excess yarn from the magic ring into the inside of the wing.
Tummy Patch (Accent Color Yarn)
R1:
- Create a magic ring. Work 7 SC into the ring. (7 stitches total)
Closing the Tummy Patch:
- Slip stitch into the first stitch to join the circle.
- Cut the yarn, leaving a long tail. Use this tail to sew the tummy onto the penguin.

Beak (Yellow or Orange Yarn)
R1:
- Create a magic ring. Work 2 SC into the ring. (2 stitches total)
R2:
- Work 2 SC in each stitch (inc). (4 stitches total)
Shaping the Beak:
- Push the beak outward while sewing for a pointed, triangular shape.

Final Assembly
- Adding the Wings:
- Position the wings on either side of the body, in line with the eyes. Use the long tail from the wing to carefully sew each one onto the body.
- Attaching the Tummy Patch:
- Place the tummy evenly below the eyes and center it on the front of the penguin. Sew it securely into place, working in even, small stitches.
- Adding the Beak:
- The beak should be placed between the eyes, slightly below the midpoint between the eyes. Adjust for symmetry and attach with neat stitches.
- Finishing Touches:
- Push any excess yarn into the body of the penguin to keep it neat.

Tips & Customization Ideas
- Color Variations:
- Personalize your penguin by experimenting with different body and tummy colors (e.g., pastel shades for a baby penguin).
- Hat or Scarf:
- Add accessories such as a miniature scarf, hat, or earmuffs for a seasonal touch.
- Blush Cheeks:
- Use blush or pink yarn to add subtle rosy cheeks below the eyes for extra cuteness.
- Larger Size:
- Use bulkier yarn and a larger hook to make a bigger penguin. Adjust the safety eye size for proportion.
Special Notes
- If you're struggling with the magic ring, you can replace it with the chain-2 method: chain 2 and work your initial stitches into the second chain from the hook.
- Use a stitch marker to keep track of the start of each round, as the project is worked in continuous rounds.
- Make sure to stuff evenly before closing the body or any parts to achieve a smooth and firm shape.
Conclusion
Congratulations! You’ve now completed your adorable crocheted penguin plushie! With its round tummy, tiny wings, and beak, this charming creation is perfect as a keychain, festive ornament, or a thoughtful handmade gift.