
Free Crochet Strawberry Amigurumi Pattern for Stylish Accessories
Sweeten your day with the Free Crochet Strawberry Amigurumi Pattern and create a cute handmade strawberry perfect for gifts, keychains, or décor.
Bright red curves and tiny green seeds instantly capture attention with this adorable mini strawberry amigurumi. The Free Crochet Strawberry Amigurumi Pattern invites you to turn simple yarn into a charming fruit-shaped companion using easy stitches and compact shaping.
How to Crochet Strawberry Amigurumi Pattern Quickly and Easily

The most delightful part is how quickly it comes together, whether you’re new to amigurumi or an experienced crocheter looking for a fun side project, you’ll enjoy the smooth build and cute outcome. With consistent rounds and clean finish, you’ll have a finished piece that holds its shape and charm. Make one, or a bunch, and you’ll be gifting or decorating with personality and handmade warmth.
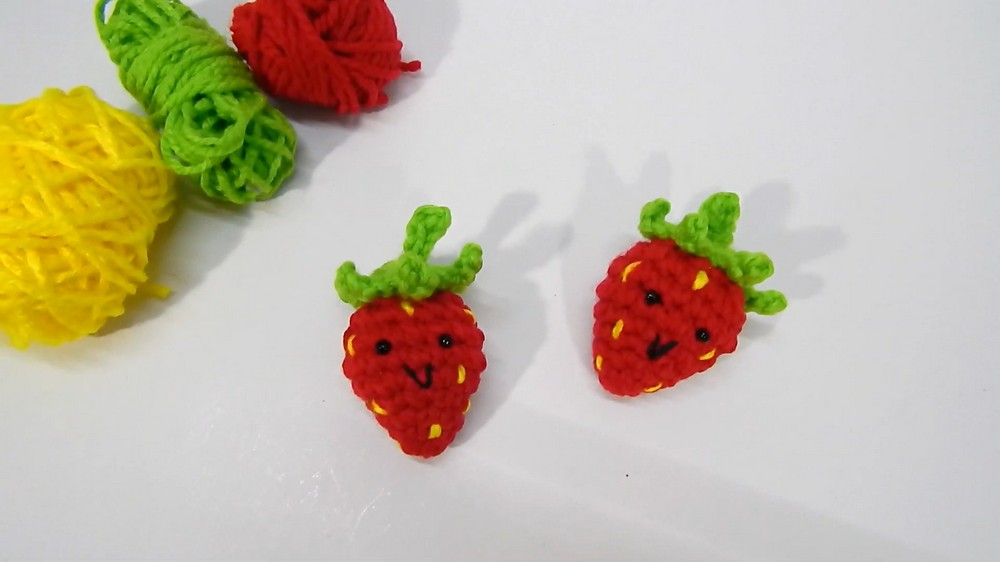
Free Crochet Amigurumi Strawberry Pattern
Materials
- Yarn:
- Worsted weight (3–4 mm): Red (berry), Green (leaves & stem), Yellow (seeds)
- Hook:
- 3.5 mm crochet hook
- Stuffing:
- Polyester fiberfill
- Eyes:
- Small black beads, buttons, or safety eyes, OR use black embroidery/floss/yarn
- Tapestry/yarn needle:
- For sewing/embroidery
- Stitch marker:
- Or a short scrap of contrasting yarn
- Scissors
- (Optional) Keychain ring or small magnet (if desired)
Abbreviations (US Terms)
- mr – magic ring
- ch – chain
- sl st – slip stitch
- sc – single crochet
- hdc – half double crochet
- inc – increase (2 sts in same st)
- dec – decrease (sc 2 together)
- rep – repeat
- st(s) – stitch(es)
Special Notes
- Amigurumi is worked in continuous rounds unless otherwise noted; always use a stitch marker.
- Embroider or bead eyes and "V" shaped mouth after crocheting but before closing the top.
- Attach seeds and embroider details before sewing leaves on top.
- Keychain or magnet can be attached at the end, through the stem or fabric.
Pattern
Strawberry Body (Red Yarn)
Round 1:
- Make a magic ring, ch 1 (does not count as a st), work 6 hdc in ring. (6)
Round 2:
- 1 hdc, inc, rep around. (9)

Round 3:
- 3 hdc, inc, rep around. (11) (Use a stitch marker in first st.)
Round 4:
- 3 hdc, inc, rep around. (13)
Round 5:
- 1 hdc, inc, rep around. (20)
Round 6:
- 1 hdc in each st around. (20)

Round 7:
- 2 hdc, dec, rep around. (15)
(If your stitch count varies, simply ensure the overall strawberry shape stays even.)
Round 8:
- 1 hdc, dec, rep around. (10-11)
- Stuff firmly.
Round 9:
- Dec around until nearly closed (about 5–7 decreases).
- Fasten off, leaving a long tail.
Close:
- Use needle to weave tail through front loops of remaining sts, pull to close, knot, weave in.

Leaves (Green Yarn)
Round 1:
- Make a magic ring, ch 1, work 5 hdc in ring. (5)
- Close ring tightly, sl st to first st. (5)
Leaves: (Repeat all steps to make a total of 6 leaves, evenly spaced)
- Ch 4, skip the first ch, sl st in next ch, hdc in next 2 chs.
- Sl st back into ring to join leaf.
- Repeat from * for each leaf, making a total of 6.
- Fasten off, leaving long tail for sewing.

Stem (Green Yarn)
- Attach green yarn at base of leaves, ch 4.
- Skip the first ch, sc in next ch, sl st in next 2 chs.
- Fasten off, tie ends together to secure, weave ends into leaves.
- Pull stem through center of leaves to top of strawberry.
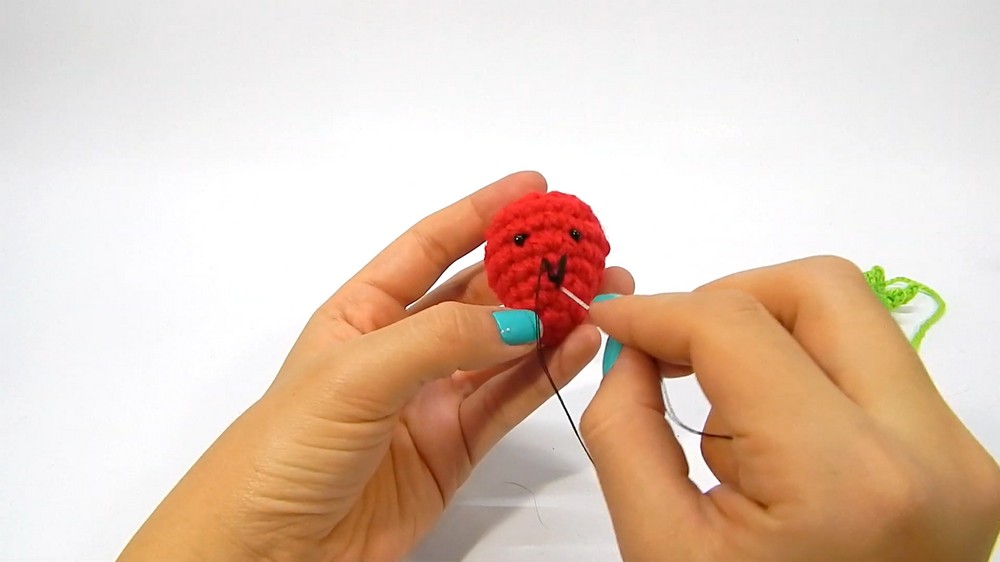
Face Embroidery (Black Yarn/Thread/Beads)
- Eyes:
- Sew small black beads, eyes or French knots evenly between rounds 6 & 7, about 3–4 sts apart.
- Mouth:
- Embroider a small “V” between/just below the eyes (~rounds ⅞).
Seeds (Yellow Yarn)
- With yellow, sew small vertical stitches randomly over the berry.
- Pull needle from inside to outside, make a small straight stitch on surface, pass back inside, repeat for each seed.
- Weave in end at top.
Finishing
- Position and sew leaves securely to top.
- Hide all ends.
- Add a keyring or magnet:
- For a keychain: insert through stem or working through leafy crown.
- For a magnet: hot glue a magnet to the back.
Conclusion
You have created a mini amigurumi strawberry, ready as a keychain, refrigerator magnet, or charming decoration. This versatile pattern can be customized by varying bead placement, seed color, and facial features.
Pattern Corrections & Tips
- Correction: Adjust stitch count as needed to ensure a smooth, natural strawberry shape.
- Tip: Make facial details before top closure for easier embroidery.
- Tip: For child safety, embroider face and seeds instead of using small parts/beads.
- Tip: Pull leaves slightly to shape and fan for a lifelike look.
- Tip: Use bright yellow for seeds for best contrast.