
Free Crochet Stacking Caterpillar Pattern
Transform yarn into playful learning with the Crochet Caterpillar Stacking Toy Pattern that's for sparking creativity and fun in little minds and hands!
In a quiet corner of a cozy living room, little hands eagerly reach for a colorful crochet caterpillar, its vibrant segments stacked meticulously. This delightful toy, born from the magic of yarn and a free pattern, is not just a visual treat but a tool for developmental play. Each segment varies in hue and size, inviting children to engage in a tactile learning experience. Stacking these segments helps improve fine motor skills, while the bright colors stimulate visual awareness and cognitive recognition of patterns.

Parents and caregivers will find that this caterpillar is more than a charming plaything. Its dual purpose as a developmental tool makes it a cherished addition to any child’s collection. Light in weight yet sturdy, the toy can be easily carried around, making it an ideal companion for car rides or quiet moments at home. Its washable material ensures easy maintenance, promising lasting durability.
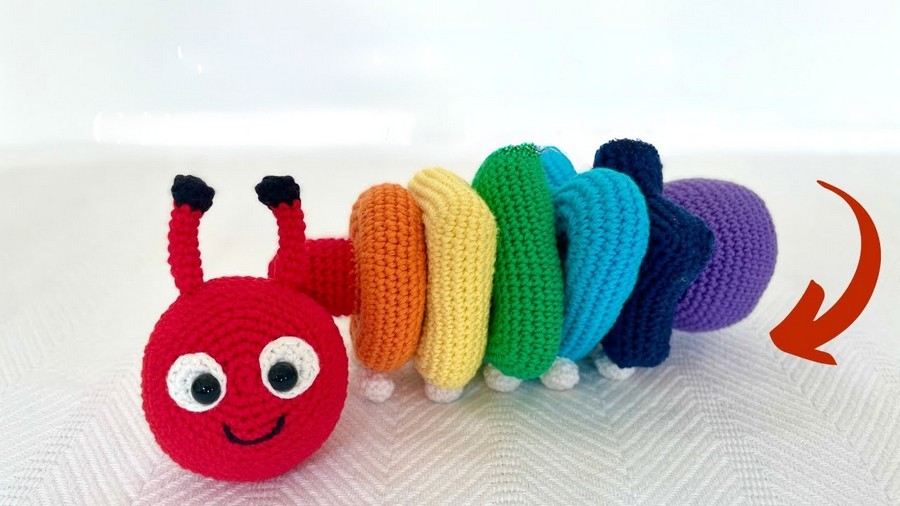
This crochet caterpillar isn’t merely a project; it's a lovingly crafted gift, encouraging hours of creative interaction and endless smiles. Whether you're introducing colors, shapes, or simply enjoying an afternoon of play, this toy promises to bring joy and learning into any child's world, enriching their everyday explorations.
Crochet Caterpillar Stacking Toy Pattern Step-by-Step
Necessary Materials:
- Yarn:
- DK-weight yarn (recommend Paintbox Yarns Cotton DK for consistency).
- Various colors: choose colors to make each donut section unique. Recommended colors from the video include Daffodil Yellow, Red, Orange, and other bright or pastel hues.
- Hook Size:
- 3.0 mm crochet hook.
- Stuffing:
- Polyester fiberfill or preferred soft stuffing material.
- Dowel (or Pencil):
- A standard pencil or dowel for internal structure in the pole section.
- Accessories:
- 5 Stitch Markers: 4 for marking corner points for the donut shapes and 1 to mark the start of rounds.
- Scissors.
- Tapestry needle for sewing pieces together.
- Optional Embellishments:
- Black embroidery floss/yarn for facial features (mouth).
- Safety eyes or buttons for the face — if making the toy for young children, embroider eyes instead to avoid choking hazards.
Gauge:
- Gauge is not critical for this project. However:
- Tight stitches will ensure a firm shape with no visible gaps in the fabric to contain the stuffing.
Finished Size:
- Caterpillar Dimensions:
- Height: Approx. 12-15 inches (30-38 cm), depending on yarn thickness, tension, and number of segments used.
- Diameter of Donuts: Approx. 4-5 inches (10-12 cm).
Special Techniques:
- Magic Circle:
- Work the initial stitches inside the adjustable loop to eliminate gaps in the center. Alternatively, you can chain 2 and make the first round into the second chain.
- Continuous Rounds:
- Work in spiral rounds without joining (seamless). Use a stitch marker to track the start of each round.
- Invisible Decrease:
- Decrease stitches in a clean manner by crocheting only through the front loops of adjacent stitches and pulling them together.
- Corner Increases/Decreases:
- Add or reduce stitches in corner areas while marking the middle stitch of increases for accurate placement in subsequent rounds.
- Shaping with Stuffing:
- Evenly distribute stuffing during seaming using small amounts at a time, pushing it into corners for a more polished look.
Pattern Instructions:
Donut Body Segments (Star, Square, Heart, Regular Circle)
Each donut shape uses the same basic technique with slight variations as noted below. All donuts are designed with a hole in the center, allowing the dowel to pass through for stacking.
Donut Body Base Pattern:
- Begin with 24 foundation chain (for all donuts except the star):
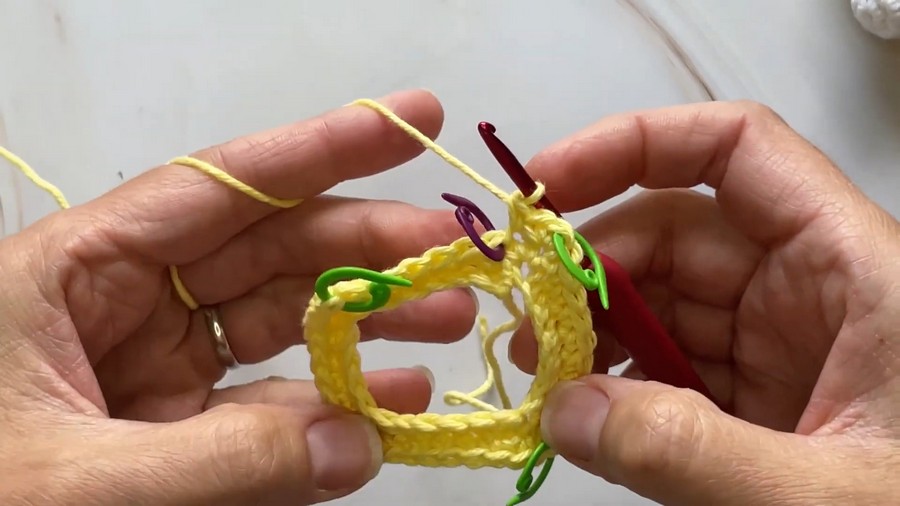
- Chain 24 and join to form a circle. Ensure the chain isn't twisted before joining.
- Work into the back bumps to keep the edges clean.
- Row 1 (Establish Base):
- Single crochet (SC) around into the chain. (24 stitches total)
- Row 2 (Increase for Shape):
- Work increases to shape the donut depending on the chosen shape (use the guidelines below for specifics). For instance:
- Regular Circle: Maintain evenly spaced increases around the entire round.
- Square: Increase with 3 SC in 4 corners, marking the middle stitch of the 3 SC in each corner for subsequent rows.
- Star: Work in turning rows starting from a chain of 25, segmenting it into 5 peaks.
- Work increases to shape the donut depending on the chosen shape (use the guidelines below for specifics). For instance:
- Middle Rounds (Width of Donut):
- After the shape has been formed (e.g., 7 rounds for Square), crochet 4 rounds of SC in every stitch (continue in a spiral without increases).
- Decrease Rounds:
- Decrease symmetrically mirroring increases to bring the "donut" back to its original 24-stitch count.
- For cornered donuts (e.g., square, heart), decrease over 3 stitches at each corner marker.
- For circular donuts, decrease evenly spaced around the round.
- Final Closure:
- Stuff every 4-6 stitches to maintain shape and avoid missed corners or sides.
- After the final decrease round (leaving 24 stitches), join and leave a long yarn tail for sewing.
- Sew the edges using whip stitches, closing the donut into its shape.
- Special Note on the Star Shape:
- Made in two flat pieces and joined together at the edges using a whipstitch after stuffing. This is for easier handling of the points.


Creating the Pole:
- Foundation:
- Work vertically to create the pole. Start with a magic circle and build into a cylinder:
- Round 1: SC 6 into MR. (6 stitches)
- Round 2: Increase (2 SC in each stitch). (12 stitches)
- Rounds 3-15+: Work SC around to maintain cylinder shape. (12 stitches per round)
- Work vertically to create the pole. Start with a magic circle and build into a cylinder:
- Insert Dowel/Pencil:
- Push through stuffing gradually around the dowel to ensure it stays centered in the pole and does not shift.
- Head Attachment:
- Extend the pole into a "neck" shape. Leave an opening to attach the later-made head securely.
Head & Facial Features:
- Head Base:
- Follow the basic increase and decrease techniques as you did for donut shapes to form a sphere.
- Eyes:
- Position safety eyes between Rounds 1 and 2 of the white eye pieces to create expressive eyes.
- Align the eyes and sew the whites of the eyes to the head using a matching thread or yarn.
- Mouth:
- Embroider the mouth with black yarn or embroidery floss, placing it between Rounds 4 and 5, centered beneath the magic ring on the head.
- Antennae:
- Create small, stuffed tube shapes for the antennae and sew them onto the head above the eyes around Round 11.

Assembly:
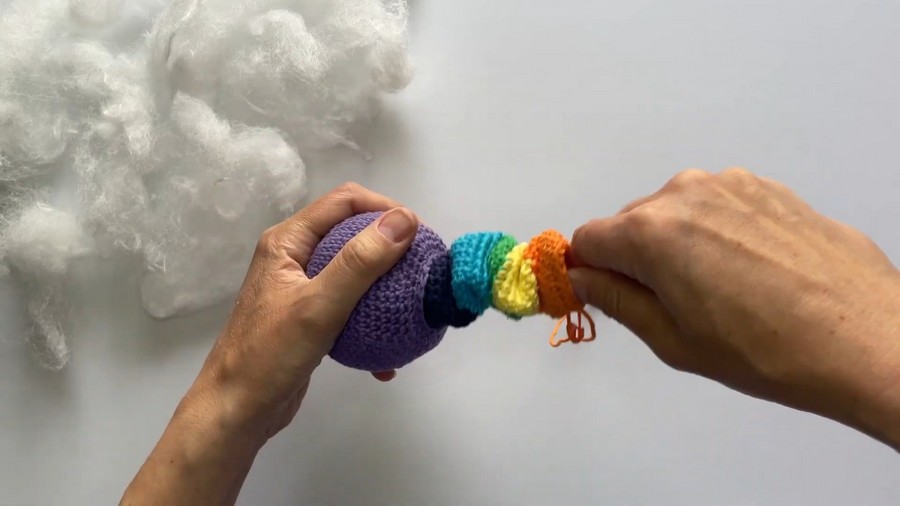
Once all components are made, stack the donut shapes onto the pole, placing the head on top.
Tips for Proper Assembly:
- Each donut piece must be meticulously closed and stuffed for a uniform appearance.
- The dowel ensures that all pieces easily stack and stay in place, allowing for interactive play.
Tips & Customization Ideas
- Colors:
- Choose a rainbow of different colors to make each donut segment bright and playful. You can also coordinate colors for seasonal or themed designs (e.g., pastels for spring).
- Size Adjustments:
- Scale the caterpillar up or down by choosing different yarn weights and hook sizes. For example, chunky yarn with a larger hook will create bigger donuts and a larger toy overall.
- Variations:
- Create two caterpillars and mix-and-match donut shapes for endless fun!
- Safety Tips for Children:
- Avoid using safety eyes for babies. Instead, embroider eyes with yarn to prevent potential choking hazards.
- Ensure all attachments are secure and tails are woven in tightly.
Final Look
When complete, Corey the Caterpillar will be a delightful, stackable plush toy, perfect for play or as a whimsical display piece. Its diversity of shapes and colors makes it visually engaging, while the unique stacking design encourages imaginative play.