
Free Crochet Lily Of the Valley With Pot Pattern - Easy Crochet Steps
Bring charm to your home with a Crochet Lily of the Valley in a Pot that adds warmth and beauty through its soft and handmade flowers.
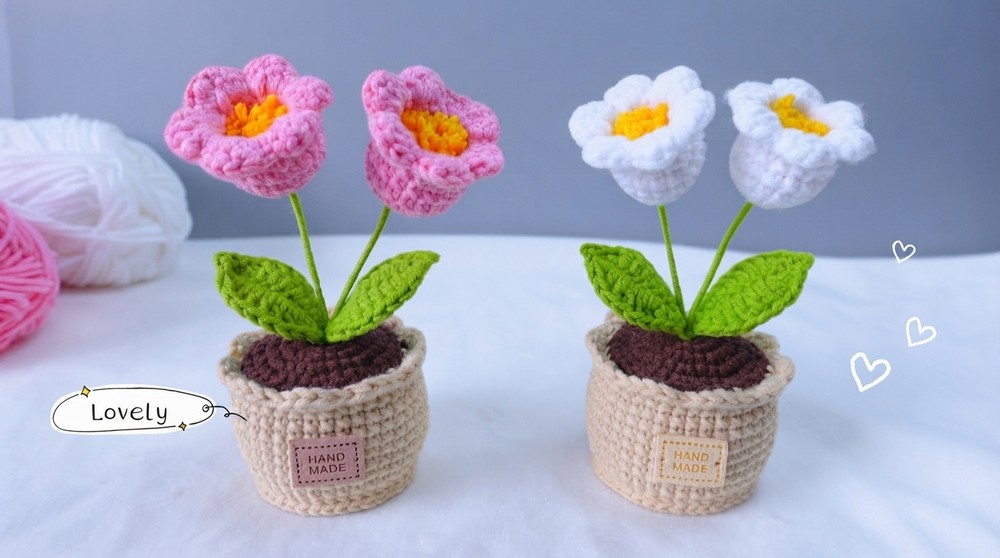
I recently finished a yarn flower decoration that brightened my living space. The Crochet Lily of the Valley in a Pot has small, white, bell-shaped flowers formed from soft yarn, placed inside a green yarn pot. These flowers show a natural look with smooth curves and delicate petals, while the green leaves add a fresh, lively touch.
Easy Crochet Lily of the Valley in a Pot Free Pattern for Home Décor
This handmade piece adds a cozy and gentle vibe to any room. Since it’s made from yarn, it requires no water or sunlight, which makes it easy to maintain. The detailed flowers and neatly shaped pot give it a charming and lasting appearance.
The instructions from DIY Yarn Crafts were clear and simple, which made the process straightforward and enjoyable. The step-by-step guidance helped with shaping the flowers and assembling everything smoothly, even with limited crochet experience. This project suits anyone interested in a creative and relaxing activity.The project can also serve as a thoughtful gift for friends or family who value handmade items. It fits well on desks, shelves, or windowsills, adding a touch of nature indoors without using real plants. Overall, it is a lovely, low-maintenance decoration that adds warmth and beauty to any space.

Crochet Lily of the Valley in a Pot Pattern
In this pattern, I'm going to show you how to crochet a beautiful lily of the valley in a pot. This is a beautiful and easy crochet project for beginners. So, grab your hook and yarn .
Pattern Highlights
Flower Bells
- Made in the round, each with a base and ruffled scalloped edge for the classic bell shape.
- Each flower is finished and attached to a wire stem, with a realistic yellow stamen bundle.
Leaves
- Crocheted around a piece of floral wire, resulting in a realistic, poseable leaf shape.
- Made in two rounds, creating a natural taper.
Pot & Soil
- The pot is worked bottom up, featuring neat rounds, shaping, a decorative rim, and a firm, stable base.
- Soil is a dense, stuffed disk sewn into the pot’s top.
Assembly
- Flowers, leaves, and pot are assembled on wire stems, with all pieces glued and wrapped for durability.
- Finished arrangement is sturdy and beautifully realistic.
Notes
- Always mark the first stitch in each round—this project uses a lot of rounds, and keeping track is important for neat results.
- For best results, make sure to stuff your pot before sewing on the soil to keep the arrangement upright.
- Use a hot glue gun to secure joins and cover wire ends for a neat, safe, and durable finish.
- When wrapping yarn around wires, keep the wraps neat and tight.
- Gauge is not critical, but keep your stitches consistent and slightly tight so stuffing doesn’t show.
Skill Level
Beginner to Advanced Beginner
- Basic single crochet, double crochet, half double crochet.
- Working in rounds and spiral.
- Simple increase/decrease, slip stitch, and wire wrapping.
Materials
- Yarn: Susan’s Family 5 brand, or similar
- White (flower bells)
- Yellow (stamens)
- Green (leaves, stem covering)
- Brown or black (soil)
- Pot color of choice
- Hook: 2.5 mm crochet hook
- Wire:
- 1 mm (for stems and stamens): 14 cm per stem
- 0.5 mm (for leaves): 16 cm leaf frame per leaf
- Fiberfill stuffing
- Small gravel stones (optional, for weight)
- Darning needle
- Hot glue gun & glue sticks
- Scissors & stitch markers
Measurements / Sizing
- Bell flowers: ~2.5–3cm tall each
- Leaves: ~7–8cm long; poseable
- Pot height: ~5–7cm, diameter ~7cm
- Completed arrangement: ~14–18cm tall
Gauge (and Stitch Pattern if applicable)
- Not critical—use firm, even tension.
- Single crochet used predominantly in rounds for all pot and flower work.
Stitch Abbreviations
| ABBR | STITCH |
|---|---|
| ch | chain |
| sc | single crochet |
| hdc | half double crochet |
| dc | double crochet |
| st(s) | stitch(es) |
| inc | increase (2 sc in one st) |
| dec | decrease (sc2tog, see below) |
| sl st | slip stitch |
| BLO | back loop only |
| FLO | front loop only |
Special Stitches
- Magic Ring: Wrap yarn around finger, pull up a loop and work initial stitches into ring. Pull tail to close.
- Invisible Decrease (dec): Insert hook into front loops of next two stitches, yarn over, pull through two front loops, yarn over, pull through all loops.
- Wire Crocheting: Hold wire above foundation chain, insert hook underneath wire when working stitches, enclosing wire as you go.
Pattern Instructions
Lily of the Valley Flower Bell (Make as Many as Desired)
- Magic ring.
- Round 1: 6 sc in magic ring. Mark first st. (6)
- Pull tail to close ring tightly.
- Round 2: inc in each st around (2 sc in each). (12)
- Round 3: (1 sc, inc) around, repeat 6 times. (18)
- Round 4-6: sc in each st around (18)
- Round 7: (sc, dec) repeat around, 6 times. (12)
- Slip st to next st.
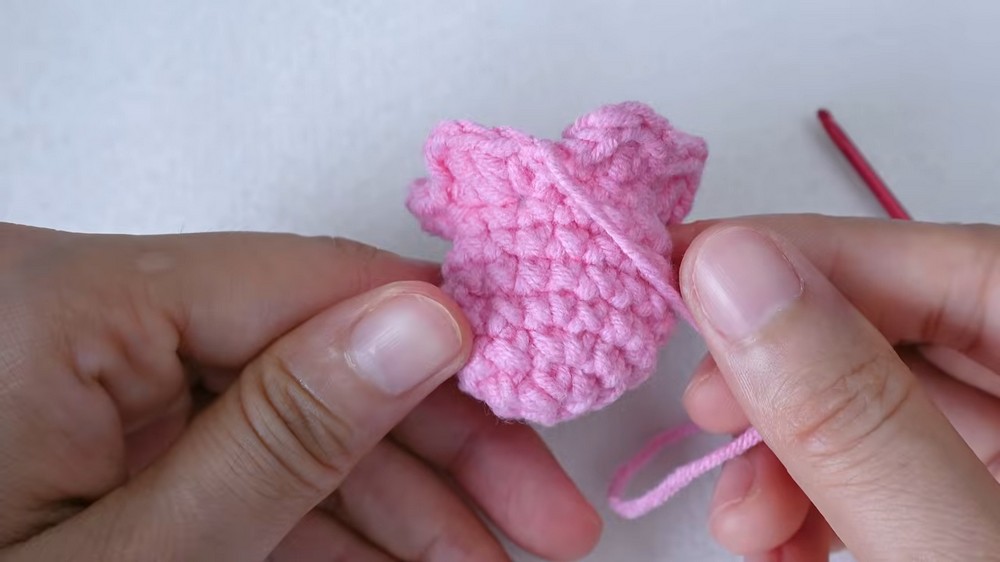
- Round 8 (ruffled edge):
- ch 1. In first st: sc, hdc, dc (all in same st).
- In next st: dc, hdc, sc (all in same st).
- Repeat this 6 times (one "petal" pair per two st).
- End with slip st to first st. Fasten off, weave in ends.

Leaves (Make 2)
- Slip knot, ch 10.
- Prepare 16cm 0.5mm wire, bend softly to match ch.
- Sk first ch, sc in next ch (over wire).
- hdc in next ch (under wire).
- dc in each of next 5 ch (under wire).
- hdc in next ch (under wire).
- sc in last ch.
- ch2, sk first ch, sl st in 2nd ch, sc in same st.
- Turn, work back down foundation:
- hdc in next st, dc in next 5 sts, hdc in next, sc in last.
- sl st in first st, ch 1, cut yarn, wrap excess around wire, knot and trim.

Pot
- Magic ring.
- Round 1: 8 sc in ring, pull closed. Sl st to join. (8)
- Round 2: 2 sc in each st around (16)
- Round 3: (sc, inc) around. (24)
- Round 4: (sc in 2, inc) around. (32)
- Round 5: (sc in 3, inc) around. (40)
- Round 6 (BLO): sc in BLO in each st. (40)
- Rounds 7–14: sc in each st (40) (work both loops, slip st to join each rd)
- Round 15 (FLO decorative edge): working in FLO, 4 sc in same st, sk 3 sts—repeat around. Sl st to join. Cut yarn, weave in.

Bottom Rim:
Join new yarn at BLO from round 6, sl st in each st around. Join, cut yarn, pull tails to inside of pot and knot to secure.
Soil
- Repeat rounds 1–5 of pot pattern (ending with 40 sts in round 5).
- Leave small hole at center for wire stem.
- Finish with slip st; cut yarn leaving 40 cm tail for sewing.
Assembly & Finished Size
Pot and Soil:
- Stuff pot with fiberfill and optionally gravel stones for weight.
- Place soil disk atop and sew in place with long yarn tail. Knot and hide ends inside.
Flower Branch (each bell):
- Cut 14cm wire, bend.
- Wrap yellow yarn around fingers several times, slip off, insert wire bundle.
- Tie yellow yarn tightly, cut ends short for stamen effect.
- Insert into flower bell base from inside, secure with drop of hot glue.
Branch and Leaves:
5. Wrap green yarn around wire stem below flower for approx 5cm, securing with glue.
- Repeat for each flower, if making more than one, join stems by twisting or wrapping together.
- Attach both leaves by placing against stem, adding a little glue, and wrapping stem and leaf bases together with green yarn. Trim any excess wire/yarn neatly and glue down.
- Insert stem through soil’s central hole and secure with glue from inside pot if needed.

Final arrangement:
Leaves and stems can be gently shaped into a natural arch. Your finished lily of the valley will stand stably, with multiple flowers and two leaves emerging elegantly.
Conclusion
This project is an excellent beginner’s pattern, introducing you to essential amigurumi and floral techniques, color change, basic increases and decreases, and creative assembly. Your finished project makes a lovely decorative accent or a thoughtful handmade gift.