
Free Crochet Fish Pattern For Collectible Charm
Enjoy whimsical charm with Crochet FISH Pattern, featuring playful details, vibrant textures, and cheerful appeal for all your projects.
Rippling waters and the vibrant colors of aquatic life have fascinated humans for generations, inspiring both art and storytelling. A crochet fish captures that lively spirit in miniature form, turning the beauty of underwater creatures into a charming, handheld creation. Ideal as a decorative accent, a playful addition to toys, or a unique keychain, it brings whimsy, color, and handmade appeal into everyday spaces.
Vibrant Crochet Fish to Brighten Your Space

The process begins with shaping a rounded body, carefully worked to create a balanced silhouette that mimics the natural curves of a fish. Midway, fins and tail are added, providing dimension and movement, while subtle surface details such as scales or contrasting stitches give texture and life to the figure. Eyes and small facial features are embroidered or stitched on, enhancing personality and character without overpowering the delicate form.
Versatile in color and size, the crochet fish can be crocheted in realistic shades to echo natural species or in playful, imaginative tones to suit personal taste. Lightweight and durable, it can serve as a decorative piece, a whimsical accessory, or a thoughtful handmade gift. Full of charm and creativity, this miniature fish brings the lively essence of aquatic life to homes, bags, and keepsakes, radiating handmade joy with every stitch.
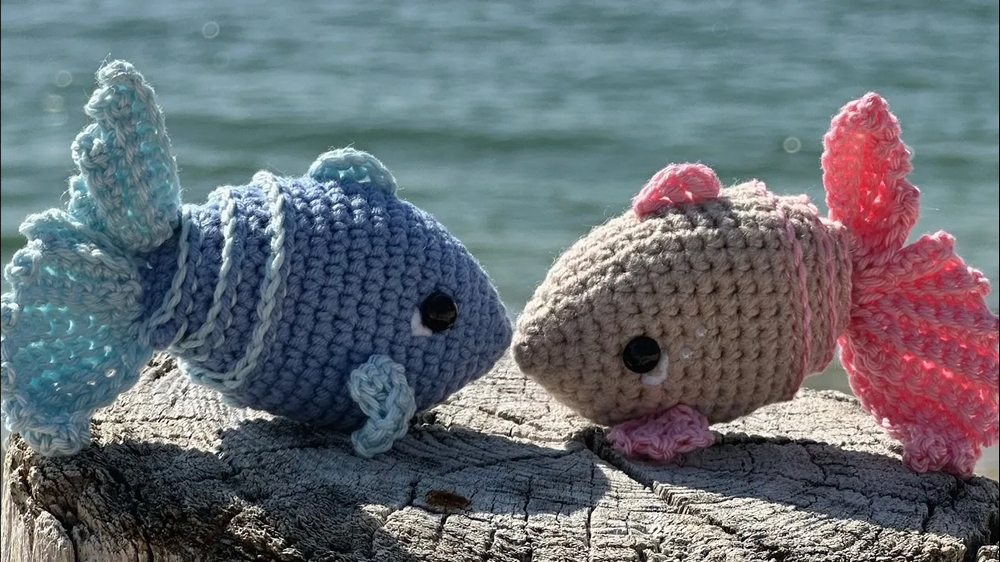
Crochet Little Fish Pattern
Skill Level
Intermediate – Ideal for crocheters familiar with working in rounds, increases, decreases, and assembly of small decorative pieces.
Finished Size
Approximately 4–5 inches long and 2–3 inches wide, depending on yarn weight, hook size, and tension.
Materials
Crochet Materials
- Yarn:
- Main yarn for the body: Choose any lightweight cotton or acrylic yarn (e.g., blue, green, or orange for the fish body).
- Secondary yarn for stripes: White or another contrasting color.
- Yarn for fins: Same or alternate color as the body.
- Crochet Hook: 1.6 mm hook (adjust hook size based on your yarn weight).
- Fiber-Fill/Stuffing: For shaping the fish body.
- Safety Eyes or Embroidered Eyes: Approximately 6–8 mm size for safety eyes (optional).
- Yarn Needle: For sewing and weaving in ends.
- Scissors: For trimming yarn.
Gauge
Gauge is not particularly important for this project, but keep stitches tight to ensure the fish’s structure and shape are firm.
Customization Ideas
- Decorative Colors: Experiment with vibrant stripe patterns or rainbow colors for a playful look.
- Add Details: Embroider small bubbles, scales, or even a smile for extra character.
- Magnets or Keychains: Transform the fish into a refrigerator magnet or keychain by adding appropriate attachments.
- Size Variation: Use chunkier yarn and larger hooks to make a larger fish or finer yarn for a smaller toy.
Pattern Instructions
Part 1: Fish Body
Foundation Round:
- Using your main yarn, create a magic ring.
- Work 6 Single Crochets (SC) into the ring. Pull tight to close.
- Slip Stitch (SL ST) to the first stitch to complete the round. (6 stitches)
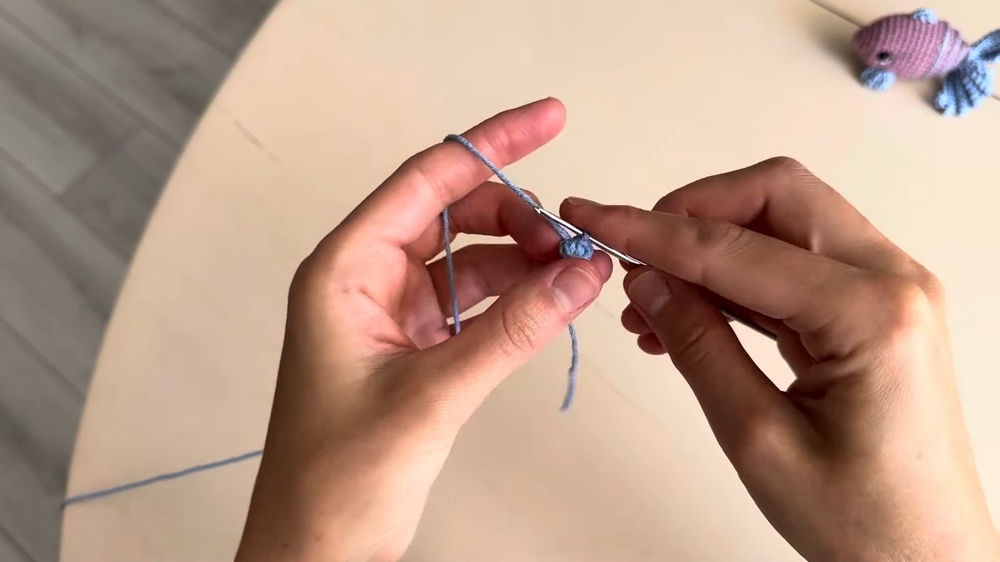
Round 2: Increases (8 stitches)
- SC into the first 2 stitches.
- Make an increase (2 SC in one stitch) into the next stitch.
- Repeat: SC, SC, increase around. (8 stitches)
Round 3: Increases (12 stitches)
- Increase (2 SC in one stitch) in the first stitch.
- SC into the next stitch.
- Repeat: Increase, SC around. (12 stitches)
Round 4: Increases (16 stitches)
- SC into the first 2 stitches.
- Increase (2 SC in one stitch) into the next stitch.
- Repeat: SC 2 stitches, increase around. (16 stitches)
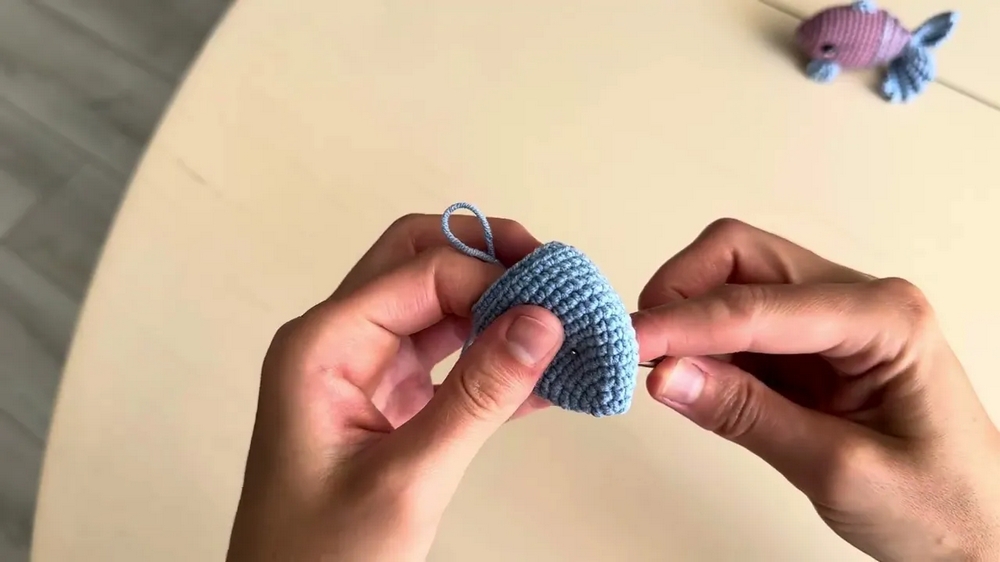
Round 5: Increases (20 stitches)
- SC into the first 3 stitches.
- Increase (2 SC in one stitch) into the next stitch.
- Repeat: SC 3 stitches, increase around. (20 stitches)
Round 6: Increases (24 stitches)
- SC into the first 4 stitches.
- Increase (2 SC in one stitch) into the next stitch.
- Repeat: SC 4 stitches, increase around. (24 stitches)
Round 7: No Increases (24 stitches)
- Work 1 SC into each stitch around.
- SL ST to join. (24 stitches)
Round 8: Increases (28 stitches)
- SC into the first 5 stitches.
- Increase (2 SC in one stitch).
- Repeat: SC 5 stitches, increase around. (28 stitches)
Rounds 9–15: Build-Up (28 stitches)
- SC into each stitch around for 7 rounds.
- SL ST to join each round.
Rounds 16–20: Decreases
- Begin decreases by working into the back loops only.
- Round 16: Work SC into 4 stitches, then decrease (join 2 stitches together). Repeat around. (24 stitches)
- Round 17: SC into 3 stitches, then decrease. Repeat around. (20 stitches)
- Round 18: SC into 2 stitches, then decrease. Repeat around. (16 stitches)
- Round 19: SC into 1 stitch, then decrease. Repeat around. (12 stitches)
- Round 20: Decrease every 2 stitches to form the tail base. (6 stitches)
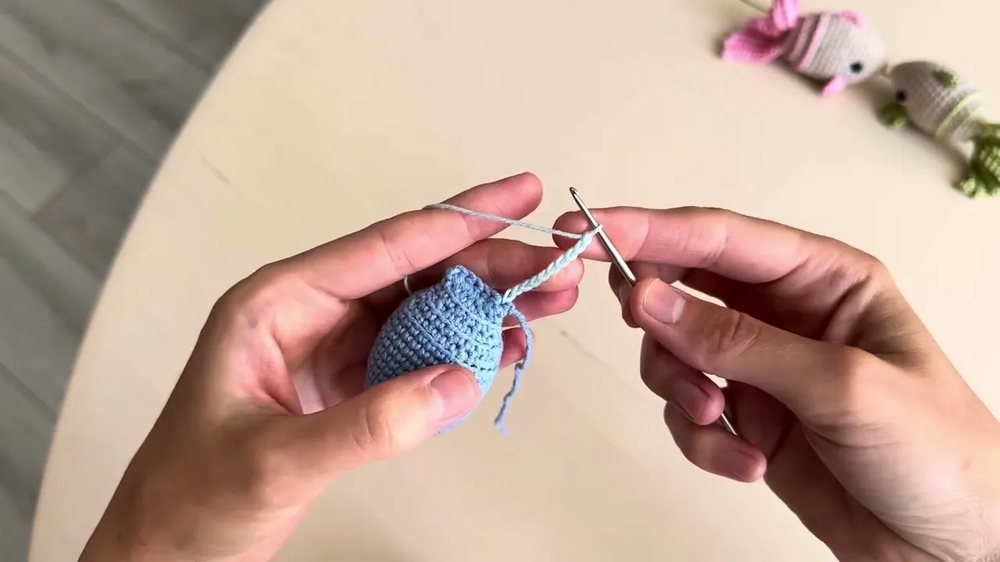
Add fiber-fill gently after each decrease round, ensuring the shape remains smooth without overstuffing.
Part 2: Tail
Foundation:
- Attach the main yarn to the tail base at the last 6-stitch foundation loop.
- Chain 10 to start the tail.
Tail Rounds:
- Work SC into each chain stitch to create the first tail strip. SL ST at the base to secure.
- Turn and work SC into the back loop only for reversed texture.
- Continue building rows and strips as per the video instructions, decreasing as necessary by leaving the last stitch free on each round.
Repeat this process to create decorative fins on both sides of the fish's body.
Part 3: Stripes (Optional)
- Using secondary yarn, embroider stripes horizontally across the fish's body. You can work diagonally for added visual interest.
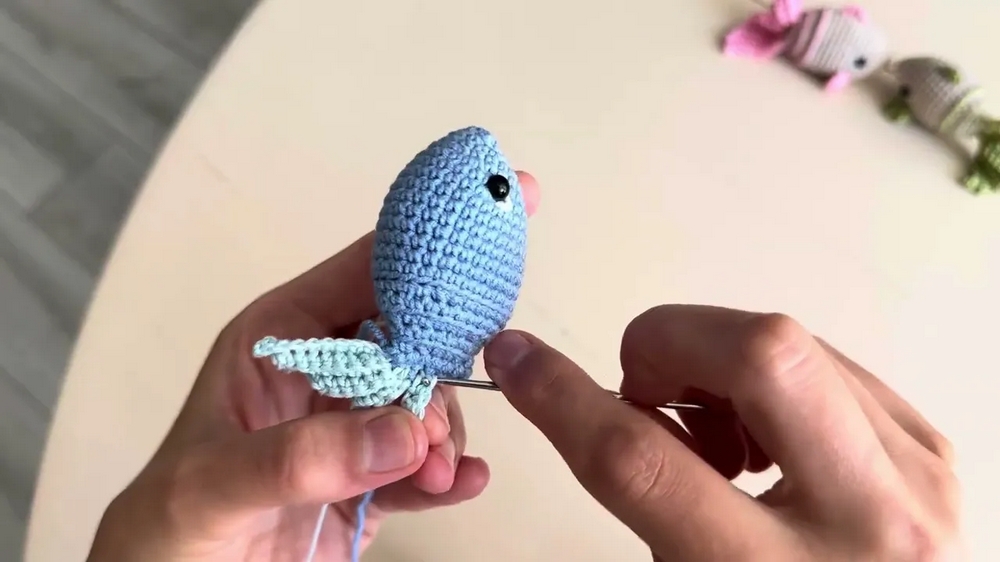
Part 4: Eyes and Final Details
- Attach safety eyes or embroider sleeping eyes using black yarn.
- For more personality, add facial expressions like smiles or worried looks.
Finishing
- Weave in all remaining ends securely.
- Inspect the body shape, adjusting stuffing if necessary.
Special Techniques
- Using Back Loops Only: Creating texture for fins and decorative shapes.
- Increase and Decrease: Shaping the fish body smoothly and symmetrically.
- Stuffing Tips: Insert fiber-fill lightly between rounds to ensure the structure stays uniform.
Conclusion
Congratulations! You’ve completed your Crochet Little Fish. This versatile design can be used for toys, decoration, or even as part of larger projects like mobiles or wall hangings. With its whimsical design and room for customization, it’s sure to charm its viewers and recipients.
Final Words
I hope this pattern has inspired you to enjoy crafting this adorable fish! Feel free to experiment with colors, sizes, and details to make each fish unique.