
Cute Free Crochet Bear Pacifier Holder Pattern
Keep pacifiers clean and close with this adorable Crochet Bear Pacifier Holder using Seal for secure, easy, aesthetic, long-lasting solution.
Babies often find comfort in the smallest things, soft textures, soothing colors, and the gentle security of their favorite pacifier. But keeping that tiny item within reach and off the ground can be a daily challenge. That’s where this charming crochet bear pacifier holder pattern becomes both a practical solution and a heartfelt keepsake. Featuring an adorable bear face with delicate detailing and a cozy texture, it attaches easily to any pacifier and clips securely to baby’s clothing. It’s not just cute; it’s smart, safe, and parent-approved.
Cute Crochet Bear Pacifier Holder Using Seal For Tiny Hands

This piece is made with soft, baby-friendly yarn and uses the Seal method (Secure, Easy-to-use, Aesthetic, Long-lasting), ensuring both function and flair. The gentle, neutral tones pair beautifully with any outfit or nursery style, while the lightweight feel makes it comfortable for little ones to wear throughout the day. It’s perfect for baby showers, thoughtful gifts, or personal use.
Whether clipped to a stroller, bib, or onesie, this delightful accessory brings peace of mind to parents and comfort to babies. The bear adds a soft, playful charm while helping prevent lost pacifiers. With every stitch, it carries warmth, care, and a touch of everyday magic for the tiniest hands.

Free Crochet Bear Pacifier Holder Pattern
Finished Size
The finished pacifier clip measures approximately 28 cm (11 inches) in length, excluding the decoration element, with a width of around 2 cm (0.75 inches). The bear embellishment adds a playful and attractive feature to the clip.
Materials
- Crochet Hook: 1.75mm hook (or a suitable hook for your chosen yarn).
- Yarn:
- Main Body: Thick silk thread (Tex 288, 100% polypropylene) in your desired color(s) (e.g., light blue for boys, pink for girls, etc.).
- Contrast Colors: Black for the nose and eyes, red for the tongue, white for the bear’s face.
- Recycled Soda Can Tab: Cleaned and burrs removed (used as the main frame for the teddy bear's face).
- Accessories (optional):
- Two pearls (size 6 mm) for the eyes.
- Small pearl(s) for bow decoration.
- Metal or plastic clip for attaching the pacifier.
- Tapestry Needle: To sew parts together and embroider the features.
- Scissors: For cutting yarn and trimming loose ends.
- Gift Ribbon (Optional): A small ribbon for the teddy bear bow.
Gauge
Exact gauge is not critical for this pattern due to its small size. However:
- Ensure your stitches are tight enough to prevent the yarn from slipping through the soda can tab.
Abbreviations (US Terminology)
- ch: Chain
- sl st: Slip Stitch
- sc: Single Crochet
- dc: Double Crochet
- inc: Increase (two stitches into the same stitch)
- dec: Decrease (joining two stitches into one)
Special Techniques
- Recycling Soda Can Tabs:
Smooth any rough edges on the tab by filing or pressing them to avoid yarn or skin damage. - Magic Ring:
Create a loop of yarn, insert the hook through the loop, yarn over, draw through, and chain. Use this ring as the base for stitches, pulling the tail to close the ring after the first round. - Embroidery for Features:
Use a tapestry needle to create facial details such as the nose, mouth, and eyes, ensuring the yarn is securely tied and ends are hidden.
Pattern Instructions
Step 1: Preparing the Soda Tab
- Smooth out sharp edges or burrs on the soda tab before beginning. Ensure it is safe to work with.
- Clean and dry the tab completely.
Step 2: Creating the Base Crochet Around the Tab
Using your 1.75mm hook and Tex 288 silk thread:
- Work 12 single crochet stitches around the smaller top hole of the soda tab.
- Move to the larger bottom hole of the tab, and work 12 single crochet stitches around the edge.
- Join with a slip stitch to the first single crochet to close the round.
- Chain 2, then begin working around the tab edge.
- Increase evenly at regular intervals to ensure smooth, tight coverage.
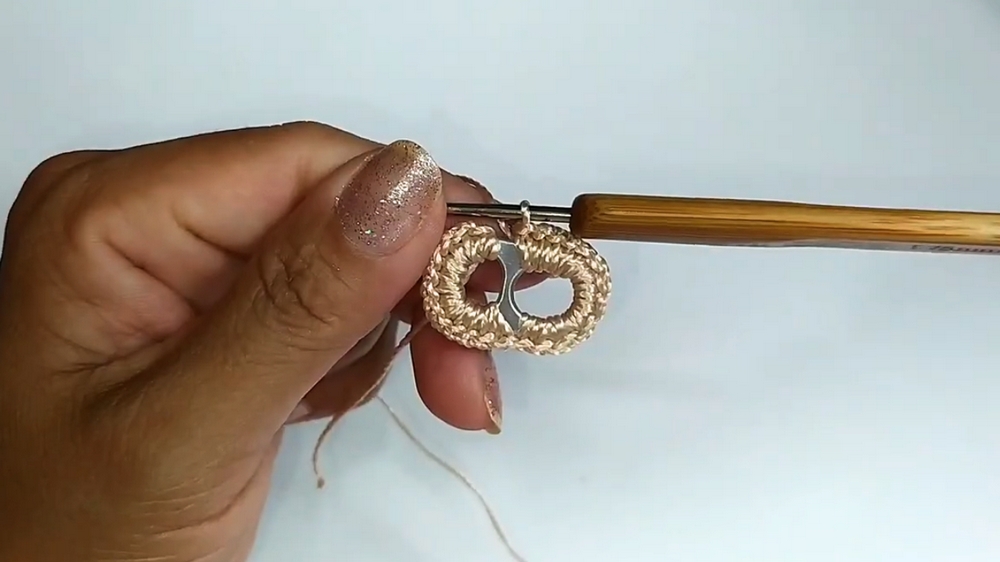
Step 3: Decorating the Bear
1. Forming the Ears
- In the smaller top hole of the soda tab, use the second round of single crochet stitches to create the ears:
- Work 4 chains.
- Starting from the second chain from the hook, work 1 sc, 1 hdc, and 1 dc in consecutive chains.
- Slip stitch into the base to form the ear.
- Repeat for the second ear to complete the top of the soda tab.
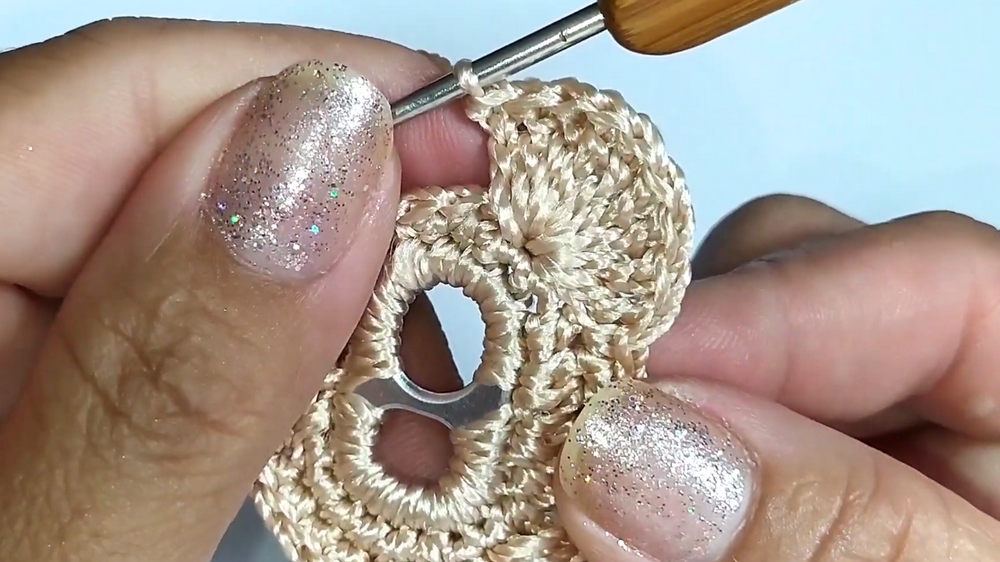
2. Adding the Nose
- Using black yarn, embroider the nose between Rounds 8 and 9 of the work (based on soda tab edges).
- Create a rounded triangular nose shape by working tight, small stitches in an inverted triangle pattern.
3. Embroidering the Mouth and Eyes
- For the mouth:
- Use black yarn to embroider a simple “curved smile” shape beneath the nose.
- Insert the needle at the center of the bottom of the nose and bring it out at the edges to complete the smile.
- For the eyes:
- Sew small black yarn stitches (or use pearls) 6 stitches apart from one another.
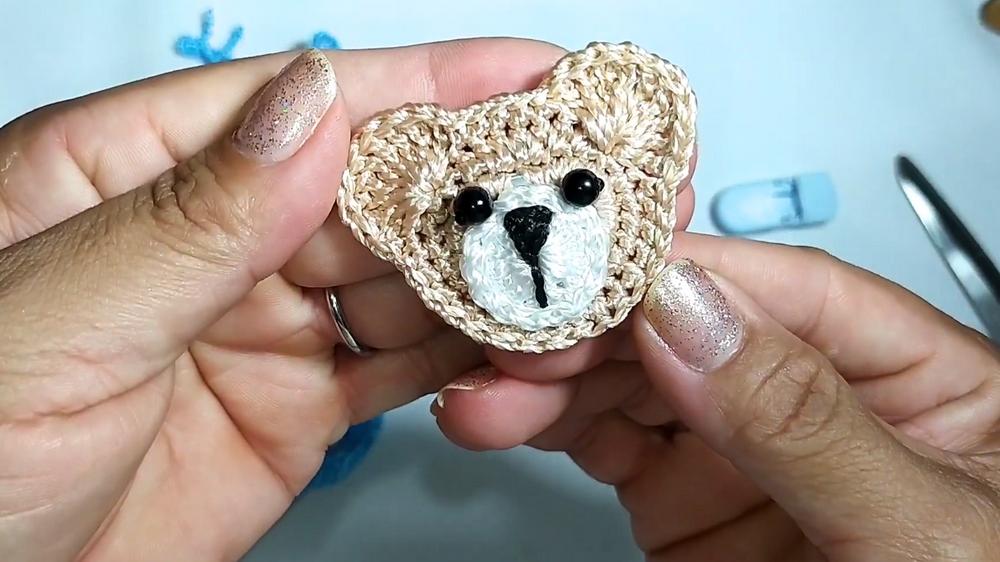
4. Adding the Bow
- With yarn or a small ribbon, create a bow.
- If crocheting:
- Chain 7, then work 7 sc along the chain.
- Turn and repeat for the second row.
- Pull the center tightly with yarn to form the bow and attach it below one of the bear's ears.

Step 4: Crocheting the Pacifier Clip Strap
- Foundation Chains:
- Chain 5 for the width of the strap. Turn and work back across the foundation chain.
- Rows:
- Work single crochets across the chain. Turn at the end of each row by chaining 1.
- Repeat for rows of 28 cm (or desired length).
- Edge Finishing:
- To give a polished finish, work slip stitches evenly around the edges of the strap.
Step 5: Assembling the Pacifier Clip
- Attaching the Strap to the Soda Can Tab Bear:
- Sew one end of the strap to the back of the soda can tab securely using a tapestry needle.
- Creating the Pacifier Holder Loop:
- On the opposite end of the strap, work 30 foundation chains, then attach to form a loop for securing the pacifier.
- Attach the Metal/Plastic Clip:
- Sew or firmly loop the metal or plastic clip to the soda tab or strap as desired.
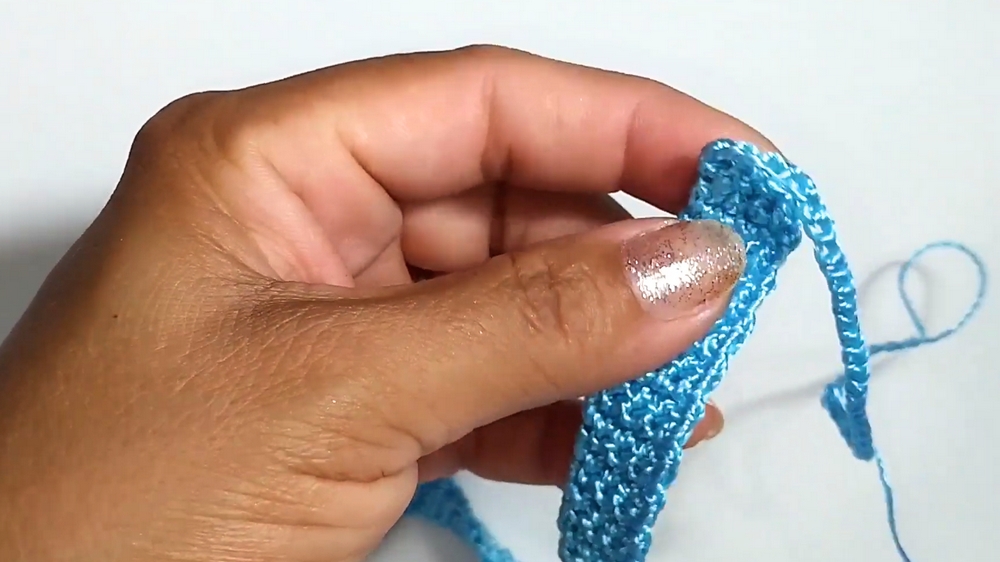
Step 6: Final Embellishments
- Add extra embellishments such as pearls, beads, or sequins based on personal preferences.
- Optional: Use pearls for the teddy bear’s eyes, or glue safety eyes for child-safe usage.
Customization Ideas
- Color Scheme:
- Choose neutral colors for gender-neutral results. Experiment with pastel shades for a softer look.
- Shapes and Themes:
- Instead of a bear, modify the soda can tab face into other animals like a bunny or cat by altering ears and features.
- Personalization:
- Embroider initials or a baby’s name on the strap for unique customization.
Conclusion
This adorable crochet pacifier clip with a teddy bear design is not only a creative way to recycle soda can tabs but also results in a functional and charming accessory. The detailed steps and customizations make it easy to adapt for any baby or occasion. Whether as a gift or for purchase, this eco-friendly project enhances your crochet skills and leaves a lovely final product.
