
Free Crochet Amigurumi Ghostface Pattern For Horror Fans
Set a spooky mood with this Crochet Amigurumi Ghostface Free Pattern and finish a little horror character for Halloween shelves and party decor.
Halloween characters with mysterious faces can add a funny and spooky feeling to your decorations. A tiny version of the famous masked figure is an interesting choice for anyone who loves scary movies and unusual toys.
Mini Crochet Amigurumi Ghostface Free Pattern For Decorations
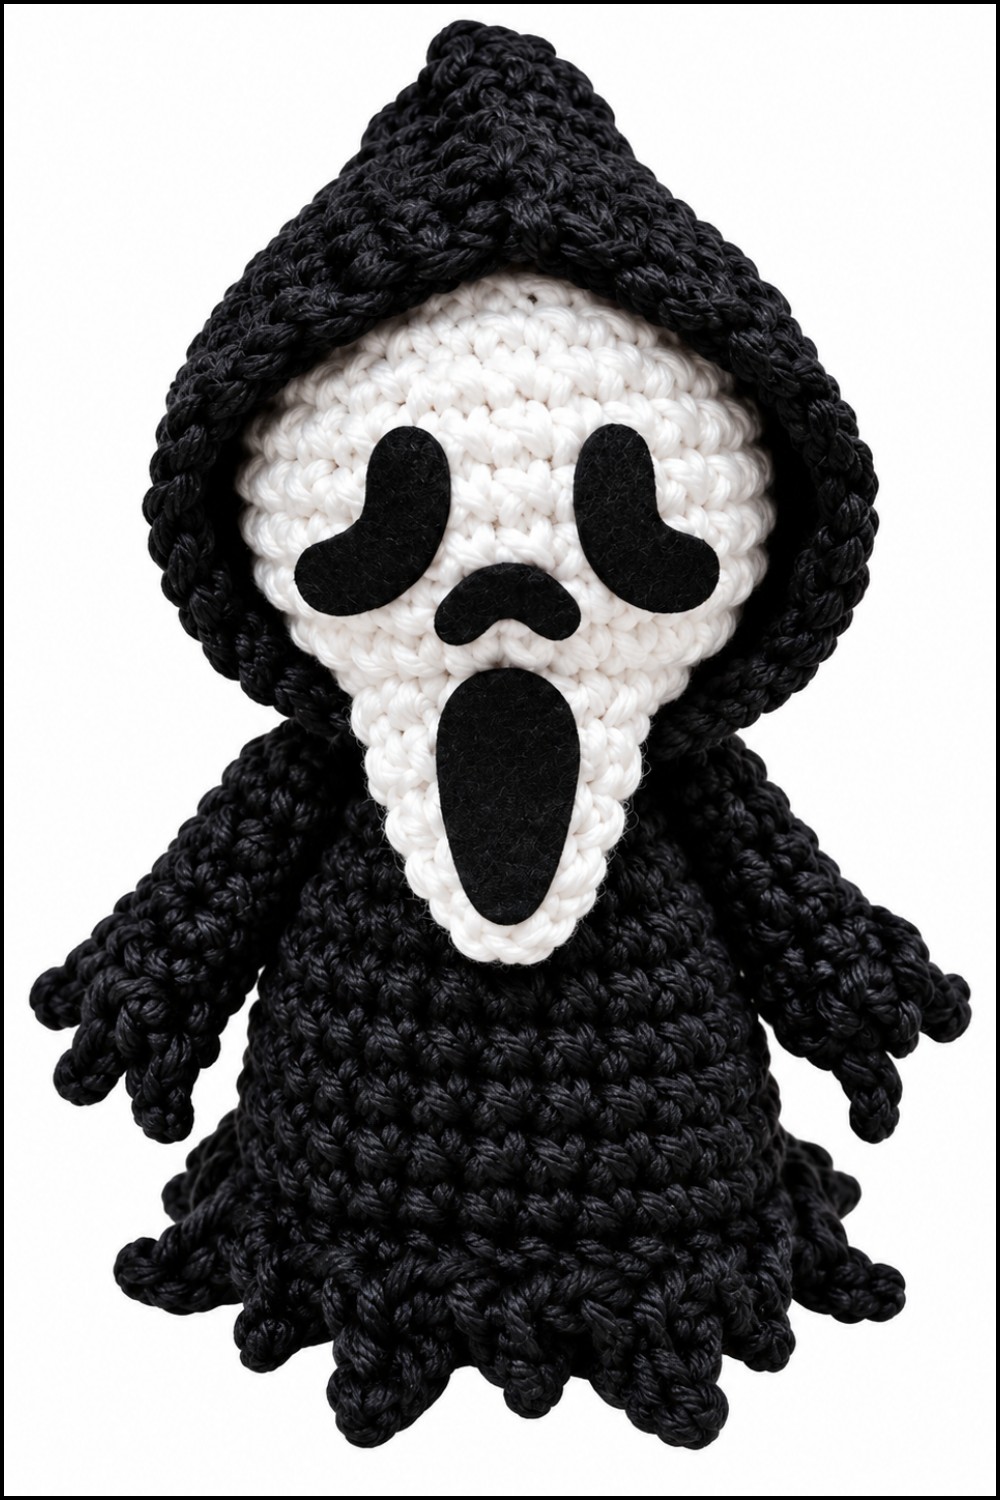
This Crochet Amigurumi Ghostface is a stuffed doll inspired by the well-known character from the Scream movies. Its long white mask, dark hollow eyes, and open mouth give it a frightening expression. The black hood and flowing robe create a strong contrast, while the rounded body gives this scary figure a playful appearance.
The most noticeable feature is its unusual face, which makes the character easy to recognize. The smooth white mask stands out against the dark clothing, and the close crochet stitches give the doll a tidy finish. Its small arms and short legs also help give it a fun cartoon style.
You can place this Ghostface doll on a bedroom shelf, living room table, or among your Halloween decorations. It also makes a handmade birthday gift for horror movie fans or a fun surprise for friends who enjoy spooky characters.
The making process begins with crocheting the head and body using basic stitches. After adding stuffing, the hood and clothing sections are formed. The facial details are then added to complete its famous scary look.
Try this free Ghostface crochet pattern and give your Halloween collection a fun character with a spooky personality!
Created By :
About the Pattern
This amigurumi mini Ghostface is constructed in a classic spiraling crochet method, creating distinct body, head, arms, and signature hood to echo the iconic horror character. The design combines basic amigurumi structure with simple embellishing techniques—using felt for facial features and surface crochet for costume detail. Each part is worked separately then assembled, resulting in a compact figure ideal for desk décor, keyrings, or gifting to fans of the genre.

Pattern at a Glance
- Construction: Amigurumi worked in the round, separate body, head, arms, face piece, and hood.
- Techniques: Magic ring foundation, invisible decreases, color changes, and surface crochet for detail.
- Embellishment: Felt facial details glued on for true-to-character effect.
- Assembly: Sewing parts together for a sculpted 3D form; crocheted edge detailing adds depth.
Important Notes
- Work tightly to minimize gaps. This is crucial for amigurumi and especially for small figures.
- Use invisible decreases to preserve shape.
- Color transitions need smooth joining—especially from body to head.
- Stuff firmly but do not overfill, to keep proportions balanced.
- Surface crochet on the body base (from front loops) adds costume texture; alternate sequences precisely for a layered effect.
- Felt details should be cut crisply and attached cleanly; use a strong adhesive suitable for yarn.
Difficulty Level
Intermediate
Familiarity with amigurumi, working in the round, invisible decrease, color changes, and basic sewing required. Some precision needed for placement and finishing.
Supplies Needed
- Yarn: Worsted-weight black and white yarn (small amounts).
- Hook: 2.0–2.5 mm crochet hook for firm stitch definition.
- Needle: Yarn needle for sewing.
- Scissors
- Stitch marker: For marking beginning of rounds.
- Polyester fiberfill: For stuffing pieces.
- Felt in black: For eyes, nose, mouth.
- Glue: Fabric glue for face details.
Size & Measurements
- Completed figure: Approximately 8–10 cm tall.
- Arms: 3–4 cm length.
- Hood: Covers the head snugly.
Gauge & Stitch Details
- Gauge is not critical; dense fabric is essential for stuffing and shape.
- Maintain even tension throughout; count stitches to ensure pattern integrity.
- Invisible decreases are recommended for smooth shaping.
Crochet Abbreviations
| Abbr | Stitch Name |
|---|---|
| ch | chain |
| sc | single crochet |
| inc | increase (2 sc in 1 st) |
| dec | decrease |
| BLO | back loop only |
| sl st | slip stitch |
| st | stitch |
| R | round/row |
Special Stitch Guide
- Magic Ring: Form an adjustable loop, work stitches into ring, pull tight.
- Invisible Decrease: Insert hook into front loop only of next two stitches, yarn over, pull through both, yarn over, pull through final two loops.
- BLO (Back Loop Only): Work sc into back loop for texture.
- Surface Crochet Edge: Attach yarn, alternate ch 2, sl st and ch 3, sl st, with 2 sc between for layered costume effect.
Complete Crochet Pattern
Body Base (Black Yarn)
- R1:
- Magic ring, 6 sc (6)
- R2:
- Inc in each st (12)
- R3:
- 1 sc, inc around (18)
- R4:
- 2 sc, inc around (24)
- R5:
- 3 sc, inc around (30)
- R6:
- BLO 30 sc (30)
- R7:
- 8 sc, dec 3 times (27)
- R8:
- 27 sc (27)
- R9:
- 7 sc, dec 3 times (24)
- R10:
- 24 sc (24)
- R11:
- 6 sc, dec 3 times (21)
- R12:
- 5 sc, dec 3 times (18)
- R13:
- 4 sc, dec 3 times (15)
- R14:
- 3 sc, dec 3 times (12)
- R15:
- 12 sc
- Switch to white on last st.

Head (White Yarn)
- R16:
- Inc in each st (24)
- R17:
- 3 sc, inc around (30)
- R18-22:
- 30 sc each round (30)
- R23:
- 3 sc, dec around (24)
- R24:
- 2 sc, dec around (18)
- R25:
- 1 sc, dec around (12)
- R26:
- 6 dec, fasten off.
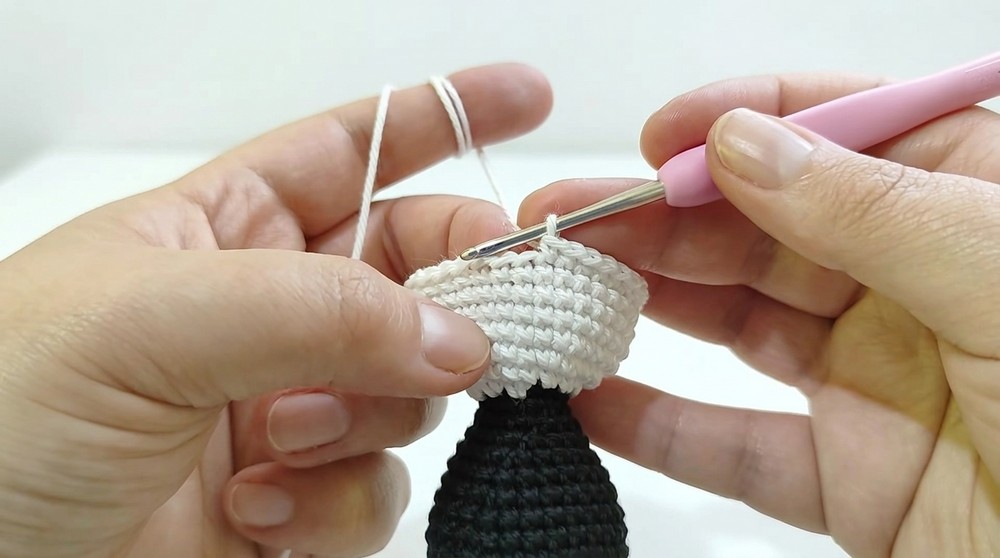
Body Detail (Edge)
- Using front loops from R6, attach black yarn.
- Alternate ch 2, sl st and ch 3, sl st, with 2 sc between each sequence for layered, jagged edge.
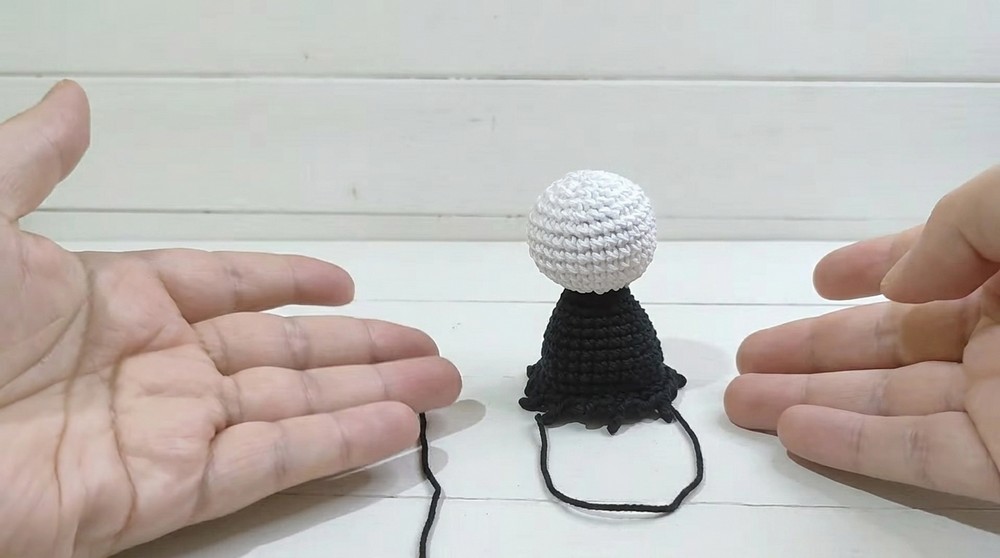
Arms (Black Yarn)
- Magic ring, 6 sc (R1)
- R2–R3:
- 6 sc each round
- R4:
- 1 sc, inc 3 times (9)
- R5:
- 9 sc
- Add edge detail: alternate ch 2, sl st and ch 3, sl st as for body.
Face Piece (White Yarn)
- Magic ring, 6 sc (R1)
- R2:
- 6 sc
- R3:
- 1 sc, inc 3 times (9)
- R4:
- 2 sc, inc 3 times (12)
Hood (Black Yarn)
- Ch 13
- R1:
- 12 sc
- R2:
- 1 sc, inc across (18)
- R3:
- 5 sc, inc across (21)
- R4–R15:
- 21 sc each row
- Sew the top closed.
Assembly & Finished Size
- Stuff the body and head firmly.
- Face Piece: Sew to head, centered on second row of white stitches.
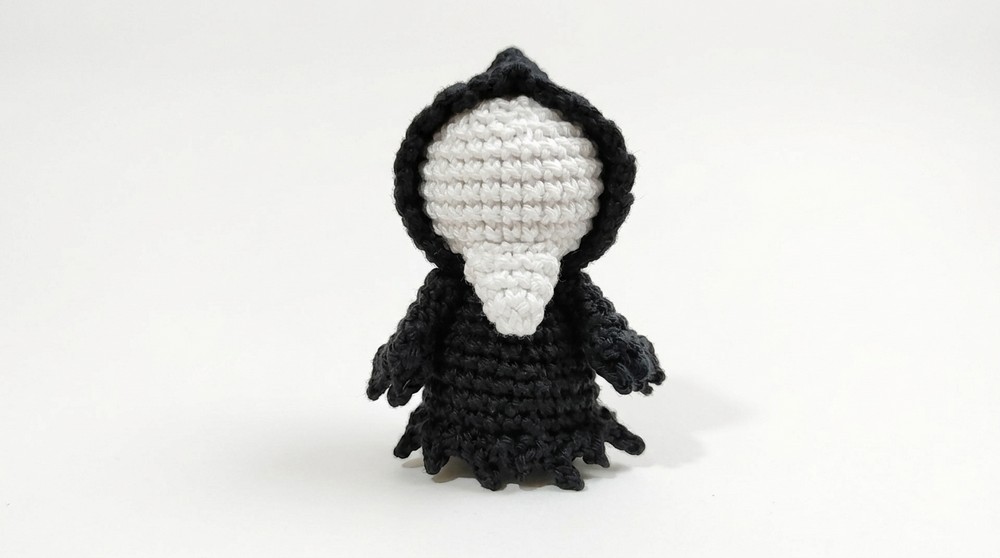
- Hood: Attach as a shroud around the head, aligning so it frames the face.
- Arms: Sew to the sides of the body, below the head.
- Face Details: Cut eyes, nose, mouth from black felt. Glue to face piece, following Ghostface motif.
- Adjust edges and shaping as necessary for iconic look.
Conclusion
This mini Ghostface amigurumi combines fundamental techniques—amigurumi shaping, seamless colorwork, surface details, and crafty finishing into a single compelling silhouette. Strategic use of the front loops creates layered costume effects, and the combination of sewn and glued components ensures robustness and clear character identity. The assembly process invites creativity in arranging facial features and adjusting the hood, resulting in a unique collectible or gift with distinct horror appeal and playful craftsmanship.