
New Free Crochet Cocktail Pattern With Can Tab For Any Occasion
Turn a soda can tab into a charming decor piece with this unique Crochet COCKTAIL Pattern, perfect for gifting, styling, or festive flair.
A single soda can tab may seem unremarkable, easily tossed aside without a second thought. But in skilled hands, it becomes the unexpected foundation for a crochet cocktail that’s anything but ordinary. This piece is a celebration of detail and charm, where vibrant threads swirl into the elegant silhouette of a classic drink, complete with tiny garnishes and just the right hint of whimsy.
Refined Free Crochet Cocktail Ornament with Soda Tab
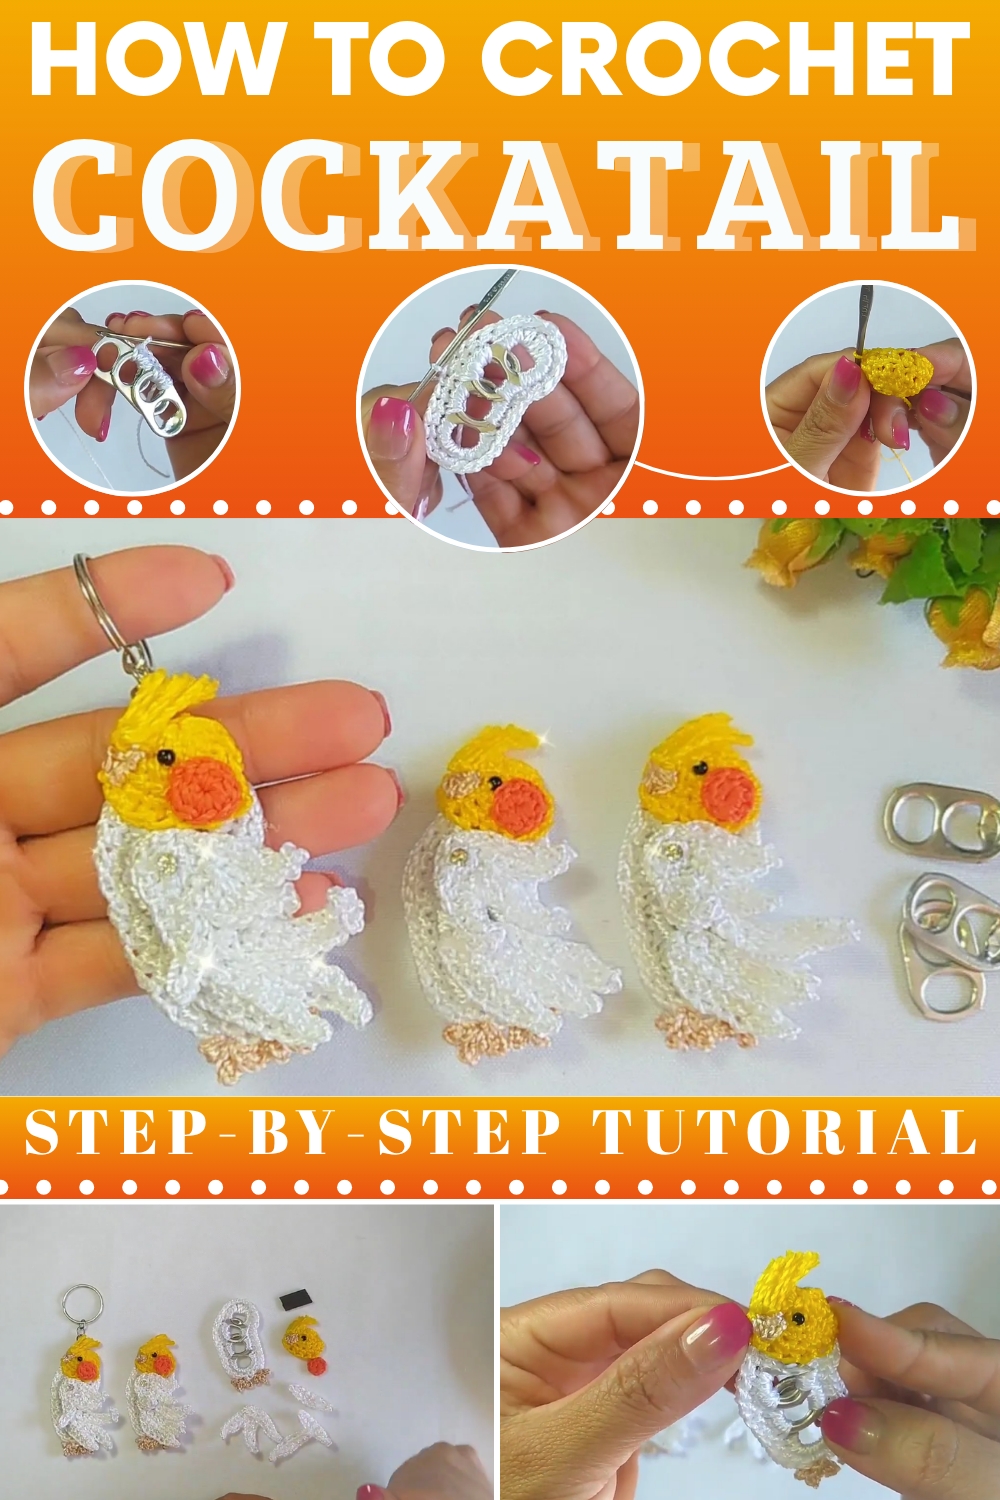
Far more than a novelty, it serves as a refined accent for bar carts, dining displays, or festive tablescapes. Whether gifted to a host with a flair for the playful or displayed as part of seasonal décor, it brings a sense of joy with an undercurrent of sophistication. Each stitch tells a story, not just of style, but of creativity meeting sustainability in a tasteful fusion.
The soda tab lends unexpected structure, giving this lighthearted cocktail a graceful form that holds beautifully over time. Its compact size makes it ideal for thoughtful gifting or curating themed arrangements without overwhelming the space. Perfect for adding personality with polish, it’s a conversation starter, a mood-lifter, and a small gesture of elegance reimagined through yarn. Proof that charm can be both clever and classy, right down to the last loop.
Cute Free Crochet Cocktail Pattern
Finished Size
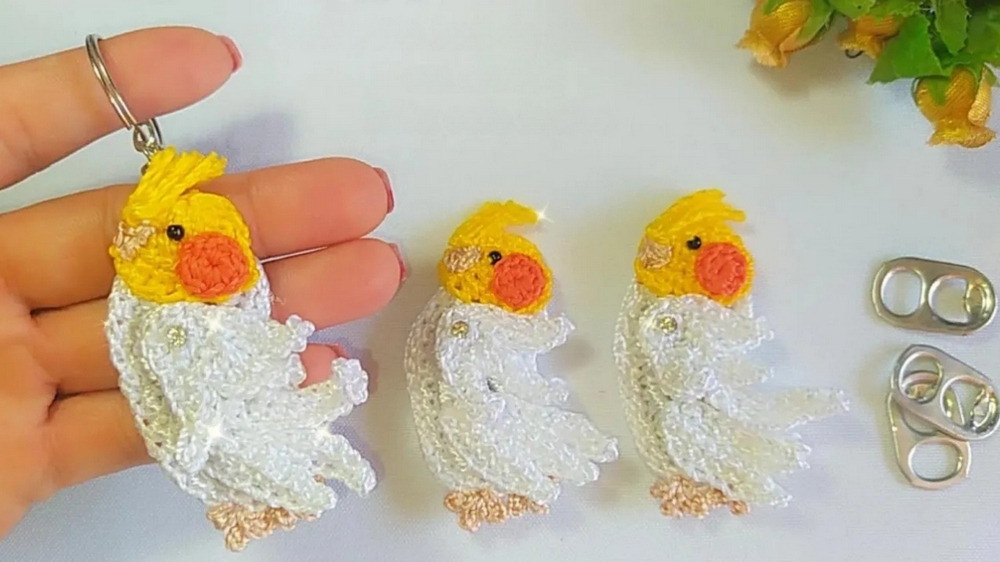
The finished cockatiel measures approximately 9 cm (3.5 inches) in height. The size may vary slightly depending on the thread tension and hook size.
Materials Needed
- Yarn/Thread:
- Tex 288 Silk Thread (thick, 100% polypropylene):
- Beige (body).
- Golden Yellow (topknot).
- Pumpkin/Orange (cheek details).
- White (wings and tail).
- Tex 288 Silk Thread (thick, 100% polypropylene):
- Crochet Hook:
- 1.75 mm hook (size zero).
- Soda Can Tabs:
- Three soda can tabs: These will form the cockatiel's base structure (head and body).
- Pearl Beads:
- Small beads (yellow) for the eyes (approximate size: 2 mm).
- Magnet/Keychain Ring:
- Small lodestone for refrigerator magnet or keyring for a keychain.
- Other Supplies:
- Hot glue gun for attaching parts securely.
- Sewing needle for finishing details.
- Scissors for cutting threads.
- Lighter for sealing yarn ends (optional but recommended for synthetic threads).
Gauge
- While gauge is not critical for this project, consistent tension is crucial for clean shapes and neat finishes.
- Using Tex 288 thread and a 1.75 mm hook will result in the approximate finished size.
Special Techniques
- Magic Ring (MR):
Create a tight, adjustable center for round crochet elements. - Single Crochet (sc):
Insert the hook into the stitch, yarn over, pull up a loop, yarn over, draw through both loops on the hook. - Half Double Crochet (hdc):
Yarn over, insert the hook into the stitch, yarn over, pull up a loop, yarn over, pull through all loops on the hook. - Slip Stitch (sl st):
Insert the hook into the stitch, yarn over, pull through both the stitch and loop on the hook.
Pattern Instructions
Step 1: Preparing Soda Can Tabs
- Smooth the Edges:
Use pliers to smooth any sharp edges or burrs on the soda can tabs to make them safe for handling. - Arrange and Position Tabs:
Place two tabs horizontally for the body, with one tab stacked vertically above for the cockatiel's head.
Step 2: Cockatiel Body Base
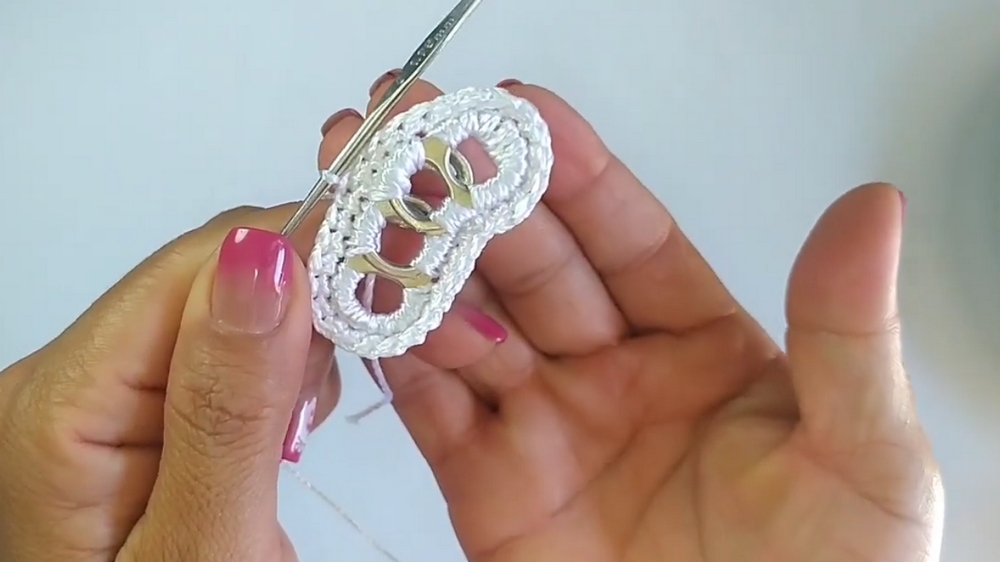
Joining Tabs
- Using Beige Thread:
- Join the two tabs by holding them stacked securely.
- Insert your hook into both tabs simultaneously and evenly work single crochet stitches to join them along the edges.
- Curves:
- On each curve of the tab, evenly work 10 sc stitches to cover the round edges smoothly.
- Continue working evenly around the joined tabs and slip stitch to the first sc to complete the round.
- Third Tab (Head):
- Place the third tab vertically above the two body tabs.
- Attach it by working sc stitches across the connecting edges (bottom of the third tab joined to the aligned top of the body tabs).
- Work 10 sc stitches along the top curve of the third tab.

Step 3: Wings (Make 2)
- White Thread:
- Start with a magic ring and chain 1.
- Work 8 sc stitches into the ring; adjust and join with a slip stitch to close the round.
- Feather Points:
- Work 6 chains, come back through the last chain with a sl st, then continue working sc and hdc stitches for shaping.
- Repeat:
- Create three feathery points using this same method within the wing for texture.
- Fasten off and weave in ends.
Step 4: Tail (Make 3 Parts)
- White Thread:
- Chain 8 stitches, then work sc and hdc stitches back across each chain for the first tail piece.
- Repeat this pattern two more times to create a total of three tail feathers.
- Join:
- Use sc stitches along the edges to join the three tail pieces together.
- Set aside for later assembly with the body.
Step 5: Cheek Detail
- Pumpkin Thread:
- Work a magic ring and chain 1.
- Crochet 8 sc stitches within the ring, pull tight, and join with a slip stitch.
- Fasten Off:
- Cut and seal the thread. Set aside for attaching to the cockatiel's face later.
Step 6: Cockatiel Head
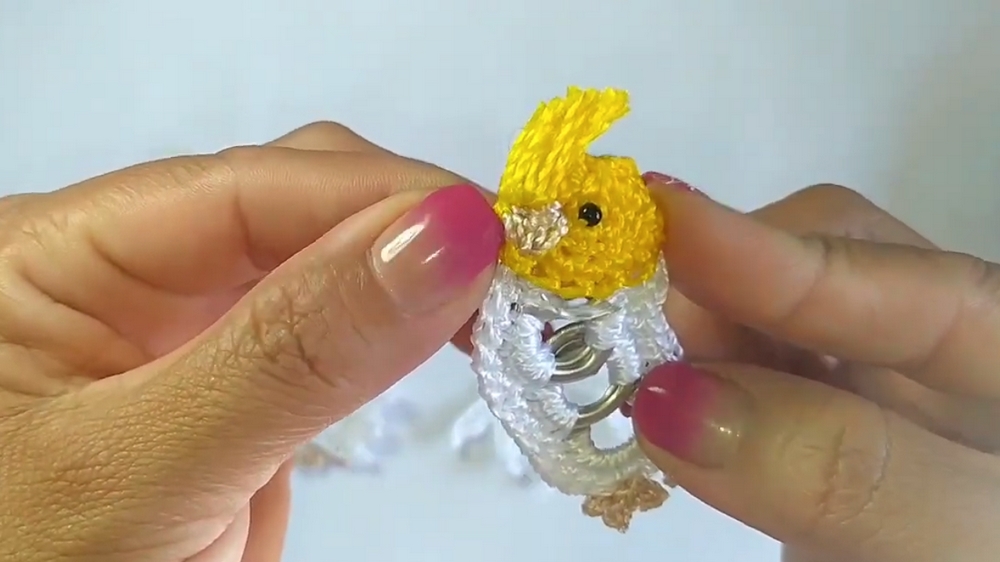
- Beige Thread:
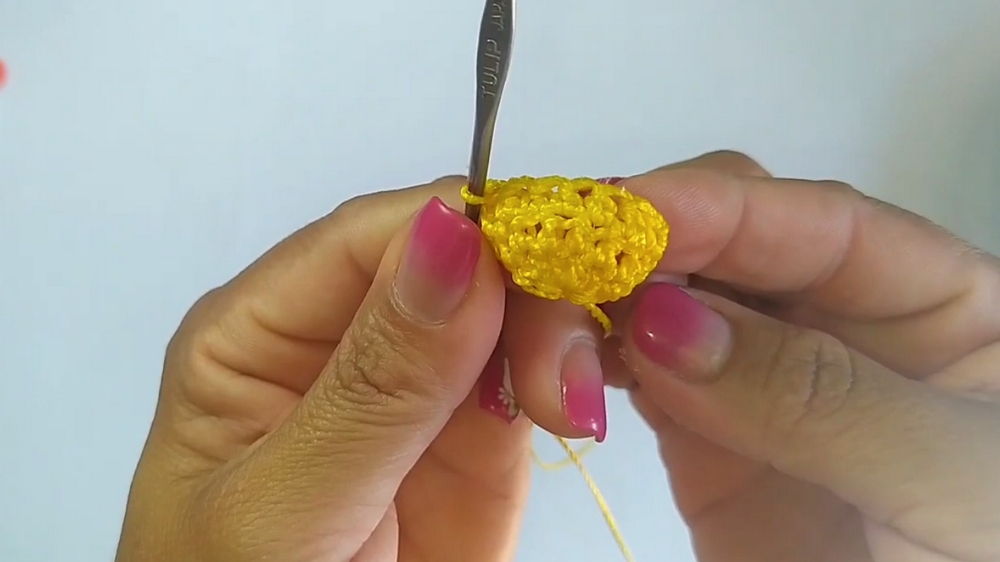
- Start with a magic ring and work 8 hdc stitches inside. Pull the ring tight.
- Begin the second round using hdc stitches: Work hdc into each base stitch with the occasional increase for shaping.
- Topknot (Golden Yellow):
- Wrap the yellow thread 3 times around your fingers to form a loop.
- Secure it at the center of the cockatiel's head, gluing or using stitches to attach.
- Trim and adjust the feathers based on length preferences.
Step 7: Facial Features
- Eyes:
- Insert yellow pearl beads for the eyes or sew them securely. Position the beads symmetrically on the head with small stitches.
- Beak:
- Use the beige thread to embroider the beak directly below the eyes. Fill the beak area with neat stitches (or felt if preferred).
Step 8: Feet
- Beige Thread:
- At the bottom of the two body tabs, create three toes for each foot:
- Chain 2, make sl st back into the base to form one toe.
- Repeat two more times in the same base space.
- At the bottom of the two body tabs, create three toes for each foot:
- Repeat for Second Foot:
- Position the second foot symmetrically next to the first.
Step 9: Assembly
- Attach Wings:
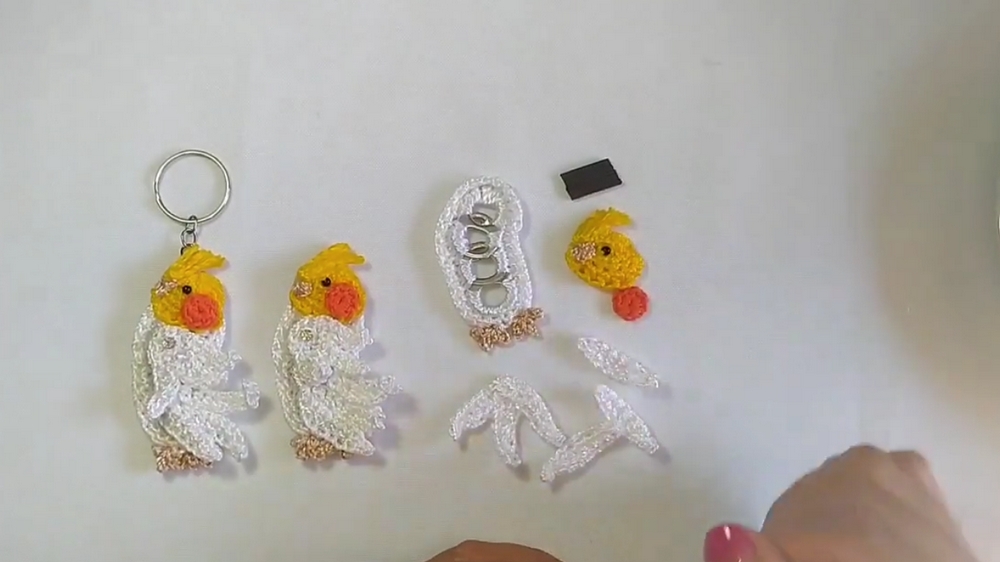
- Use hot glue or sewing to attach the wings symmetrically on either side of the cockatiel's body.
- Attach Tail:
- Position the tail feathers at the base of the body tabs and attach them securely.
- Attach Head to Body:
- Glue or stitch the head tab (third can tab) securely to the body tabs.
- Final Touch:
- Add the magnet or keychain ring based on your preferred use of the cockatiel.
Customization Ideas
- Colors:
- Experiment with playful color combinations for a colorful, tropical look.
- Use metallic threads for added shine and texture.
- Accessories:
- Add a bow to the cockatiel or embroider patterns on its wings and tail.
- Purpose:
- Use this motif for other creations, such as appliqué, wall hangings, or festive decorations.
Conclusion
Congratulations! Your crochet cockatiel is complete! Whether used as a keychain or magnet, it is an adorable and eco-friendly craft project that makes clever use of recycled soda can tabs.
Tips for Maintenance
- Cleaning:
- Hand wash gently with mild soap and a damp cloth, avoiding immersion in water.
- Storage:
- Store safely to avoid damage to threads or attached accessories.
- Durability:
- Secure all glued or sewn parts firmly to ensure longevity.