
Easy Crochet Amigurumi Puppy Free Pattern For Dog Lovers
Fill a small gift box with smiles through the Crochet Amigurumi Puppy Free Pattern, a lovable yarn pup with soft ears and a friendly little face.
Making small, soft toys by hand can be a wonderful and creative hobby for anyone to enjoy. One of the most charming examples is the crochet amigurumi puppy, a delightful little dog crocheted from yarn that captures hearts with its cuteness and charm.
Mini Crochet Amigurumi Puppy Free Pattern In Lovely Yarn Colors
These puppies are special because they can be customized in so many ways. You get to pick your favorite colors, from bright and cheerful shades to gentle and calm tones, making each puppy one-of-a-kind. The size is also up to you — whether you want a tiny puppy that fits in your palm or a larger one that can be hugged, the choice is yours.
The beauty of this crochet lies not just in the end result but in the process itself. The single crochet stitch forms the base of the puppy’s soft, sturdy body. This important stitch helps keep the yarn tight so the stuffing stays safely inside, giving the toy its shape and softness. Because of this stitch’s simplicity, even children can learn to make their own puppy with a little practice and patience.
These adorable puppies make perfect gifts, cozy decorations, and safe playthings. Their soft texture and friendly face brighten up any room or backpack. Whether for a child who wants a tiny friend or an adult looking for a calming hobby, the crochet amigurumi puppy brings joy and satisfaction.
In all, creating your own tiny puppy with yarn is a fun, colorful, and rewarding project. It combines art, crochet, and love into one little bundle of happiness that anyone can make and cherish.
Beginner Amigurumi Puppy Pattern
About the Pattern
This amigurumi puppy pattern is structured for clarity and success, with each part worked separately and joined for a soft, friendly appearance. Rounds with counted increases and decreases shape a plush head and body, while simple ears, legs, and a snout bring playful character. Color changes and careful assembly contribute to a classic puppy form that is highly customizable and suitable as a first amigurumi

Pattern at a Glance
- Construction: Worked in individual pieces—head, snout, body, ears, and legs—finished with hand-sewn assembly.
- Ease of Use: Straightforward steps, clear round-by-round instructions, minimal shaping.
- Features: Snout and safety eyes position the face, with floppy ears and color-contrasting legs for personality.
- Finishing Touch: All details are sewn for secure and lasting results.
Important Notes
- Use a stitch marker to identify the start of each round.
- Maintain consistent stitch tension for a cohesive look across all puppy parts.
- Practice invisible decrease technique for shaping unless otherwise specified.
- Stuff all components before final assembly to create a plush, but not overstuffed, finish.
- Attach features with care for best facial expression and structural stability.
Difficulty Level
This pattern is best suited for complete beginners or early intermediates. Techniques covered include magic ring, single crochet in the round, basic increases and decreases, color change in back loops, and sewing amigurumi parts together.
Supplies Needed
- Worsted weight yarn: main color (puppy), contrast color for legs (optional), small amount for snout if desired
- Crochet hook: 3.5–4 mm (or size for a firm fabric)
- Safety eyes (6–8 mm) or black yarn for embroidered eyes
- Fiberfill stuffing
- Tapestry needle for sewing parts
- Scissors
- Stitch marker
Size & Measurements
- Finished height: approximately 12–16 cm depending on yarn weight and hook size
- Components (before assembly): Head diameter 5–6 cm; body approximately 6–7 cm long; ears and legs each approximately 3–5 cm
Gauge & Stitch Details
- Gauge is not critical, but a tight fabric is preferred to prevent stuffing visibility.
- Pattern uses only single crochet (sc) throughout, with increases (2 sc in one st) and decreases (two sc together).
- Legs feature a round worked in back loops for a color break.
Crochet Abbreviations
- sc – single crochet
- inc – increase (2 sc in same stitch)
- dec – decrease (sc 2 together)
- MR – magic ring
- st/sts – stitch/stitches
- BLO – back loops only
Special Stitch Guide
- Magic Ring (MR): Loop yarn into a ring, work stitches into it, and pull tight to close for a seamless center.
- Invisible Decrease (dec): Insert hook into front loops of two consecutive stitches, yarn over, pull through both front loops, yarn over and pull through both loops on hook.
- Color Change in BLO: When indicated, work the round in the back loop only and switch to contrast color (for legs).
Complete Crochet Pattern
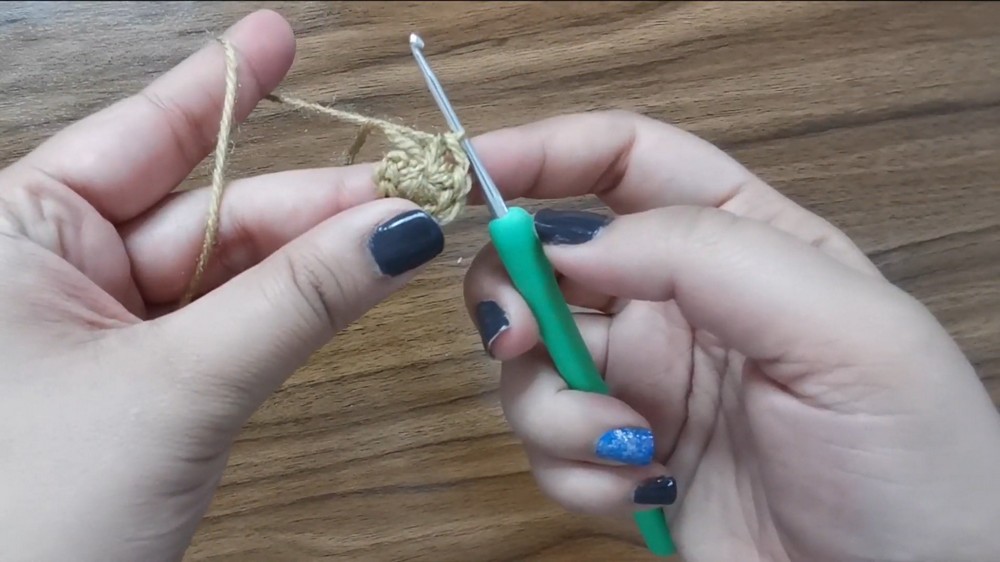
Head
- Round 1:
- Make a magic ring (MR), work 8 sc into ring (8).
- Round 2:
- inc in each st around (16).
- Round 3:
- 1 sc, inc repeat around (24).
- Round 4:
- 2 sc, inc repeat around (32).
- Rounds 5–11:
- sc in every st (7 rounds, 32 each).
- Round 12:
- 2 sc, dec repeat around (24).
- Rounds 13–14:
- sc in each st (24 each).
- Round 15:
- 1 sc, dec repeat around (16).
- Round 16:
- sc in each st (16).
- Finish with a long tail for sewing.

Snout
- Round 1:
- MR, 5 sc in ring (5).
- Round 2:
- inc in each around (10).
- Round 3:
- 1 sc, inc repeat around (15).
- Round 4:
- sc in each st (15).
- Finish with a tail for sewing.
- Sew the snout to the lower front of the head.
- Attach safety eyes directly above the snout (spacing as desired).
Body
- Round 1:
- MR, 6 sc (6).
- Round 2:
- inc in each around (12).
- Round 3:
- sc in each st (12).
- Round 4:
- 1 sc, inc repeat around (18).
- Rounds 5–11:
- sc in each st (18 each).
- Round 12:
- 4 sc, dec repeat (15).
- Round 13:
- sc in each st (15).
- Round 14:
- 3 sc, dec repeat (12).
- Round 15:
- sc in each st (12).
- Round 16:
- 2 sc, dec repeat (9).
- Round 17:
- sc in each st (9).
- Leave long tail for sewing.
Ears (Make 2)
- Round 1:
- MR, 6 sc (6).
- Round 2:
- inc in each around (12).
- Rounds 3–15:
- sc in each st (12 each).
- Fasten off, leave tail for sewing.
Legs (Make 4)
- Round 1:
- MR, 6 sc (6).
- Round 2:
- inc in each around (12).
- Round 3:
- sc in BLO of each st (12; change color here for paws if desired).
- Rounds 4–7:
- sc in each st (12 each).
- Fasten off, leave a long tail for sewing.
Assembly & Finished Size
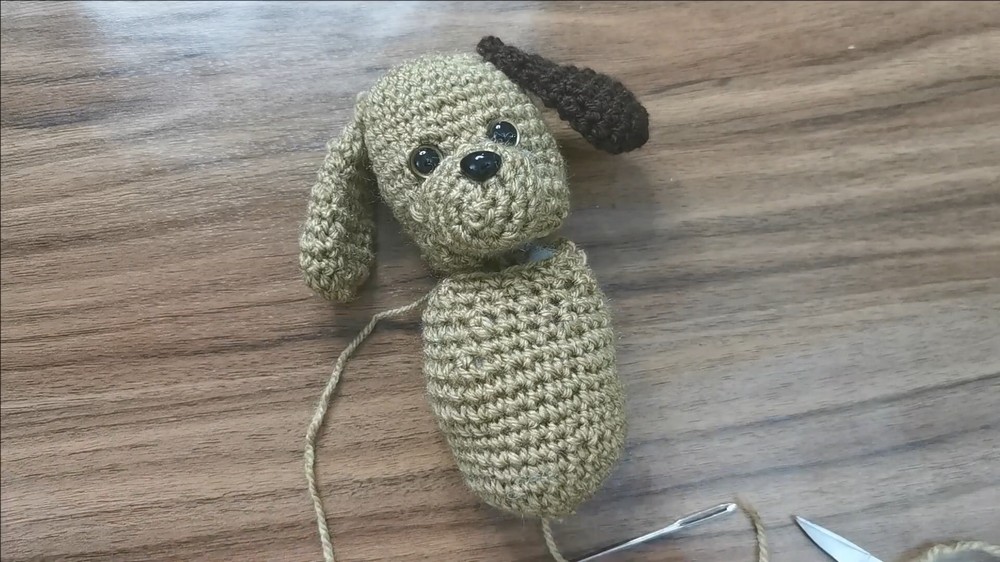
To assemble:
- Firmly stuff the head, body, and legs as you go for a soft, steady shape.
- Sew the snout onto the lower front of the head, ensuring it is centered.
- Attach eyes above the snout before stuffing the head completely for secure fastening.
- Sew the ears to the sides of the head, at the appropriate height for floppy effect.
- Join the head to the top of the body, using sturdy stitches for stability.
- Sew the legs equally spaced on the front and sides of the body for support and balance.
- Weave in all yarn tails and trim for a tidy finish.


Conclusion and Ending Words
This amigurumi puppy pattern introduces the main techniques of stuffed crochet, including seamless rounds, counted increases and decreases, and careful assembly for a playful and endearing plush. Independent parts allow for assembly flexibility and color changes. The finished puppy is soft, expressive, and beginner-friendly, with construction and proportions easily adaptable for creative personalization.