
Fun Free Crochet Monkey Fridge Magnet Pattern Is Too Fun to Resist
Playful charm meets everyday function in this Crochet Monkey Fridge Magnet Pattern, perfect for fun-loving spaces and easy DIY gift ideas alike.
In the quiet corners of home, small touches of creativity breathe life and warmth into everyday spaces. Imagine opening your refrigerator to find a delightful monkey magnet smiling back at you, a tiny treasure that sparks joy. This charming "Monkey Fridge Magnet" makes for both a whimsical decoration and a fantastic gift idea for friends and loved ones. Its playful essence, paired with thoughtful craftsmanship, embodies the heart of personalized home accessories. More than just a magnet, this piece carries a unique blend of skill and artistry, elevating the character of your space with a dose of fun and creativity.
How To Crochet Monkey Fridge Magnet Pattern Worth Smiling At
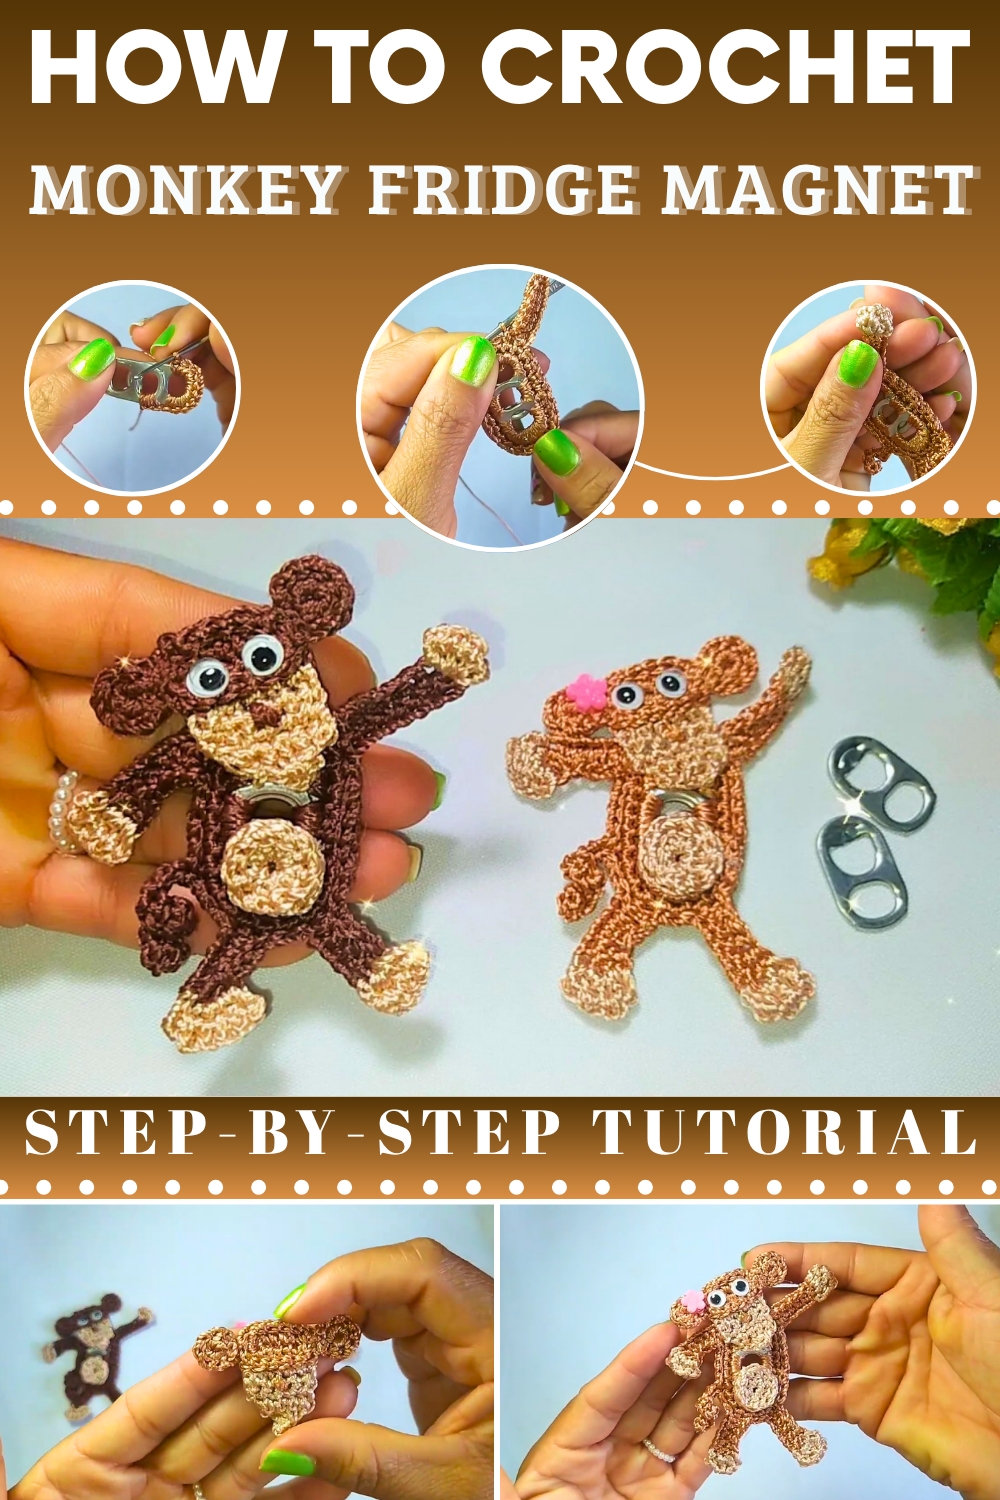
Beyond serving as a decorative item, this monkey magnet fosters environmental consciousness by upcycling soda can tabs. It’s a testament to how creativity can transform even the humblest of materials into something beautiful and functional. Whether you use it as fridge décor, a conversation piece, or a heartfelt gift, its versatility makes it an enduring keepsake.
As a tip to ensure seamless assembly, keep your stitches consistent and ensure the threads are securely sealed for a polished and durable finish. With a little patience and care, this monkey magnet becomes not just a symbol of art but a celebration of ingenuity. Let this joyful creation inspire your everyday moments and brighten your cherished corners.
Crochet Monkey Refrigerator Magnet Using Soda Can Tabs
Finished Size
The completed monkey measures approximately 8–10 cm (3.1–4 inches) in height. The size may vary slightly due to gauge and materials used.
Materials Needed
- Yarn/Thread:
- Beige Thread (Tex 288): For the body base and face details.
- Dark Gold/Antique Gold Thread (Tex 376): For the outline and primary body.
- Brown Thread: For the nose and detailed accents.
- Optional: White thread, for highlighting or extra details.
- Crochet Hook:
- 1.75 mm crochet hook (size zero).
- Soda Can Tabs:
- Two soda can tabs, used to form the monkey’s body structure.
- Magnet:
- Small, flat magnet for the back of the project.
- Other Tools & Supplies:
- Tapestry Needle, to sew parts together and for embroidery details.
- Hot Glue Gun, to secure the magnet or optional embellishments.
- Scissors, for precise cutting.
- Lighter, to seal thread ends (optional).
- Safety Eyes (0.5 cm) or Black Thread, for the eyes.
Gauge
Exact gauge is not critical for this project. Working with Tex 288 thread and a 1.75 mm hook will result in the finished size mentioned above.
Special Techniques
- Magic Ring (MR):
- A method to begin crochet in a seamless circle.
- Single Crochet (sc):
- Insert hook into stitch, yarn over, draw up a loop, yarn over, and pull through both loops.
- Half Double Crochet (hdc):
- Yarn over, insert hook into stitch, yarn over, draw up a loop, yarn over, pull through all three loops.
- Slip Stitch (sl st):
- Insert hook, yarn over, and pull through both the stitch and the loop on the hook.
- Working Around Soda Can Tabs:
- Crochet neatly around the edges of soda can tabs, ensuring smooth coverage.
Pattern Instructions
Step 1: Monkey Body Base
Preparing the Soda Can Tabs
- Remove any sharp edges or burrs from the tabs using pliers.
- Position the two soda can tabs so that one overlaps the other, aligning the neck or center holes.
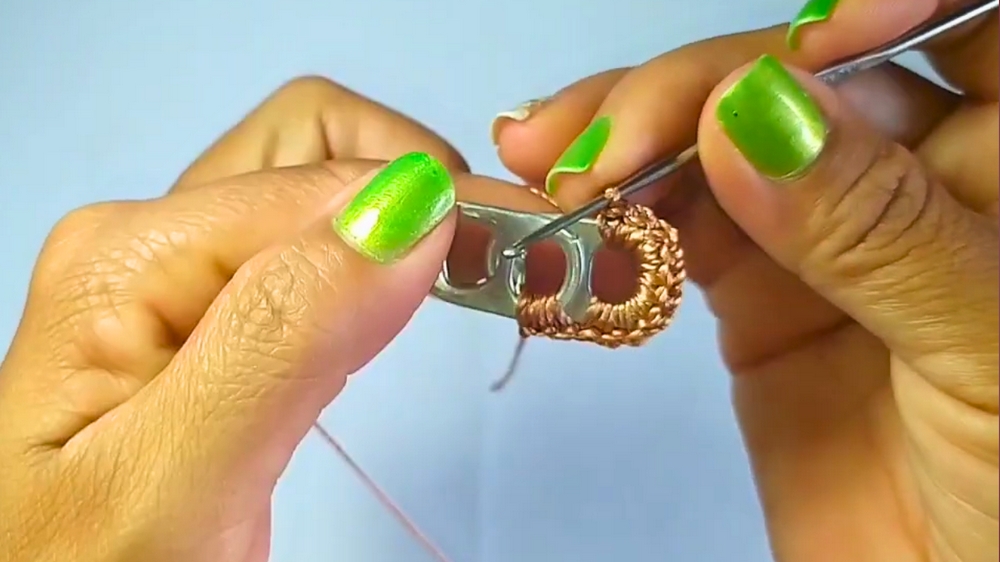
Crocheting Around the Tabs
- With Antique Gold/Dark Gold Thread:
- Insert the hook into the neck portion of the two aligned tabs.
- Work 3 single crochet (sc) stitches through the middle hole to secure them together.
- Curves:
- Work 10 single crochet (sc) evenly along the rounded edge of the upper tab.
- At the joint between the two tabs, work 3 single crochet (sc) stitches.
- Opposite Curve:
- Work 10 single crochet (sc) along the opposite rounded edge of the underside tab.
- Join:
- Join with a slip stitch into the first single crochet and fasten off the thread.
Step 2: Outline and Detailing
- Outline (Gold or Beige Thread):
- Reattach your yarn to the edge of the body base.
- Work 1 single crochet (sc) into each stitch around the entire base, without increases.
- Slip stitch into the starting stitch to complete the round.
- Fasten off and seal the ends.
- Arms, Legs, and Tail:
- Use the gold thread to add limbs to the sides and bottom of the body.
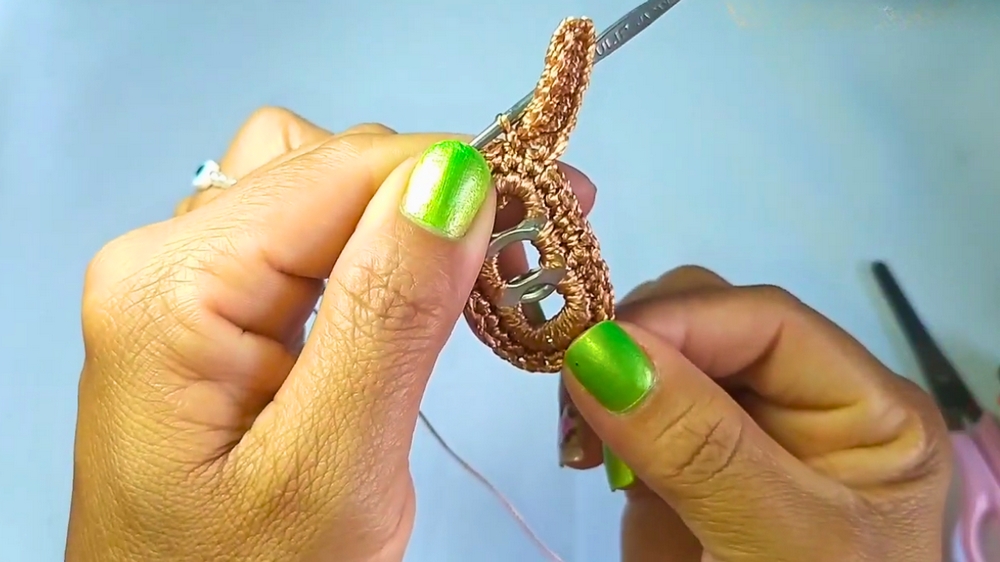
Making the Arms:
- Locate the third stitch of the base curve.
- Reattach the thread and chain 8 stitches to form the arm.
- Work back down the chain:
- Half Double Crochet (hdc): Work into each chain stitch.
- Fasten the arm to the base curve with a slip stitch.
- Repeat for the second arm, placing it symmetrically.
Making the Legs:
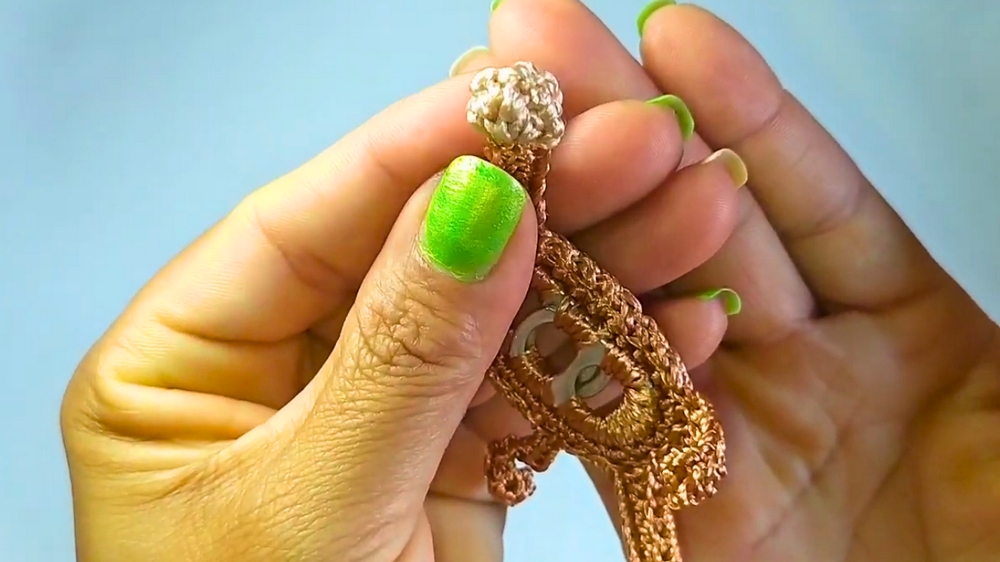
- Locate the bottom part of the base.
- Reattach the thread and chain 7 stitches to form a leg.
- Work back down the chain:
- Half Double Crochet (hdc): Work into each chain stitch.
- Fasten the leg to the base with a slip stitch.
- Repeat for the second leg, placing it symmetrically.
Making the Tail:
- Reattach the thread to the back bottom center of the base.
- Chain 6 stitches for the tail.
- Work back down the chain:
- Use slip stitches for a thinner tail.
- Secure the tail at the base and fasten off.
Step 3: Face (Beige Thread)
- Magic Ring:
- Begin with a magic ring and work 10 half double crochet (hdc) into the ring.
- Pull to close and join with a slip stitch.
- Second Round:
- Work a finishing round of slip stitches (sl st) around the edge of the circle.
- Nose:
- Use brown thread to sew small horizontal "n" shapes into the center of the face for a nose.
- Eyes:
- Attach black safety eyes or sew on black thread for eyes symmetrically above the nose.
- Secure the Face:
- Fasten the face detail to the body just below the top curve.
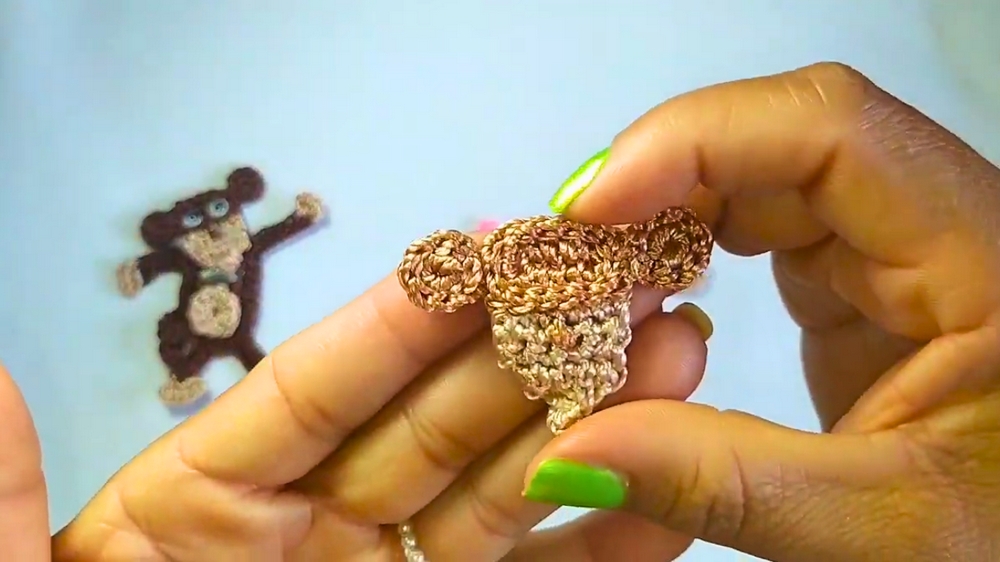
Step 4: Ears (Make 2)
- Magic Ring:
- Begin with a magic ring and make 9 single crochet (sc) stitches.
- Join with a slip stitch to close the ring.
- Outline:
- Work a round of slip stitches around the base of the ear.
- Leave a long tail for sewing.
- Attach:
- Sew each ear to either side of the head with the long yarn tail.
Step 5: Belly Patch
- Magic Ring:
- Begin with a magic ring and chain 2 (counts as the first half double crochet).
- Work 9 more half double crochet (hdc) into the ring and close with a slip stitch.
- Outline:
- Work an edge of slip stitches (sl st) around the base.
- Attach:
- Sew the belly patch to the body, aligning with the center.
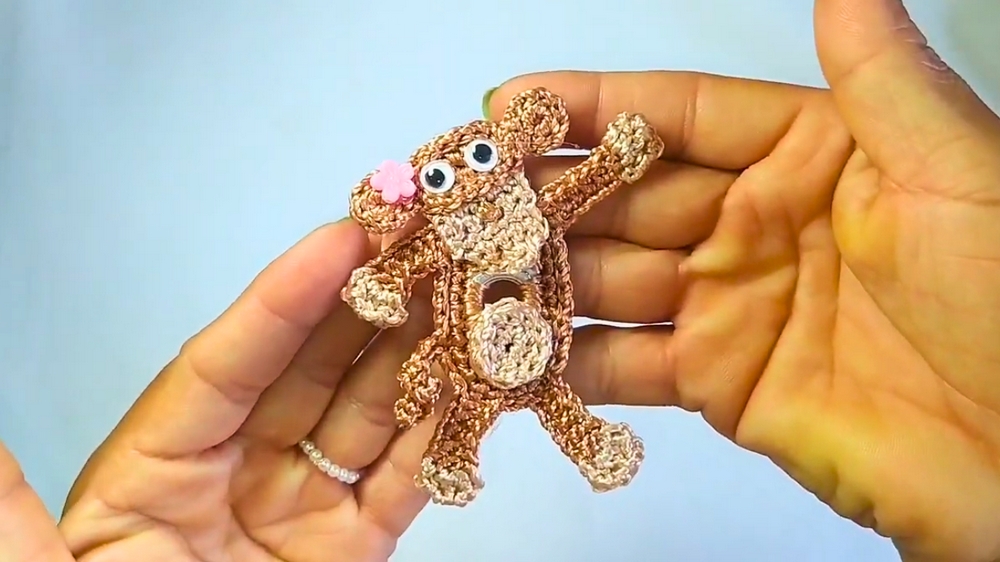
Step 6: Assembly
- Attach the head to the top of the body using slip stitches or hot glue.
- Attach the magnet securely to the back of the soda can tabs using a hot glue gun.
Customization Ideas
- Accessories:
- Add a bow or hat to give a unique character to the monkey.
- Colors:
- Use lighter, brighter tones for a cheerful design or darker colors for a more classic look.
- Purpose:
- Convert the design into a keychain or bag charm by attaching a keychain ring.
Tips for Maintenance
- Cleaning:
- Gently dust your monkey magnet or spot-clean any dirt with a damp cloth. Avoid soaking.
- Storage:
- Store in a dry spot to prevent glue weakening or fading.
Conclusion
Congratulations on completing your Monkey Refrigerator Magnet! This playful, eco-friendly craft is a charming decoration that brings joy to any refrigerator or room. Not only does it make use of recycled soda tabs, but it also allows for endless customization opportunities.