
Free Crochet Figures Mug Pattern to Decorate Your Kitchen
Sip in style with this Free Crochet Figures Mug Pattern, a fun handmade design perfect for cozy décor, unique gifts, or creative mug embellishments.
Brighten up your morning routine with unique, textured designs that bring a touch of charm to everyday mugs. The Free Crochet Figures Mug Pattern, appearing naturally in the second sentence, allows you to decorate mugs with playful and eye-catching figures. These additions are perfect for adding personality to your kitchenware or for gifting a personalized, handmade item that stands out.
Cute Free Crochet Figures Mug Pattern for Coffee Fans

Functional and Stylish Benefits
This pattern goes beyond visual appeal. The crocheted figures provide a soft, tactile layer that can make mugs more comfortable to hold and reduce heat transfer. With flexible color and yarn choices, you can customize each piece to reflect your style or to match the preferences of a friend or family member. Its approachable design ensures that you can finish a project quickly while still achieving a professional, polished result.

Appealing Designs for Everyday Use
The mini figures stitched around the mug offer both depth and character, giving ordinary cups a sophisticated, whimsical flair. Whether you prefer soft pastels, vibrant hues, or subtle neutrals, each figure enhances the overall aesthetic and creates a charming decorative accent. The finished mug not only serves as functional drinkware but also becomes a visually pleasing display piece in any kitchen.
Free Beer Mug (Amigurumi) Keychain Pattern
Materials
- Yarn: Worsted weight yarn (~4 mm thick recommended)
- Mustard/yellow (mug): ~7-8 g
- White (foam): small amount
- Crochet Hook: 3.0 mm (US size D)
- Synthetic Filling: Polyester stuffing
- Movable Eyes: 2 small (or embroider, optional)
- Fabric marker/stitch marker
- Yarn Needle: For sewing and assembly
- Keychain Ring: Optional, for attaching to the mug
- Silicone/glue: Optional, for attaching eyes or parts
- Scissors
Key Abbreviations (US Terminology)
- ch: chain
- sl st: slip stitch
- sc: single crochet
- hdc: half double crochet
- inc: increase (2 stitches in one st)
- dec: decrease (2 stitches worked together)
- st(s): stitch(es)
- rep: repeat
- rnd: round
Special Notes
- Pattern is worked in joined rounds unless otherwise stated.
- Use a stitch marker to mark the first stitch of every round.
- Stuff mug before closing tightly.
- US crochet terminology is used throughout the pattern.
Step-by-Step Pattern
1. Beer Mug Body
Using mustard (yellow) yarn:
Rnd 1
- Make a magic ring, ch 1.
- Work 6 hdc into ring. Pull tail to close.
- Place stitch marker on first hdc.

Rnd 2
- Inc in each st around: 2 hdc in each st (12 hdc).
- Use stitch marker on first st of round.
Rnd 3
- (3 hdc, inc) repeat around. (15 hdc)
- Place marker on first st.
Rnd 4
- Work hdc in back loop only in each st around. (15 hdc)
- Place marker on first st.
Rnds 5–10
- Work hdc in each st around for 6 rounds. (15 hdc each round)
- Place marker on first st of each round.
Rnd 11 (Decrease Round - work in back loops only)
- (3 hdc, dec) repeat around. (12 hdc)
- Place marker on first st.
- Stuff the mug firmly.
Rnd 12 (Final decrease round)
- hdc dec across back loops only until you have 6 sts.
- Sl st to next st. Fasten off, leaving a tail.
- Use yarn needle to weave tail through remaining stitches and pull to close.

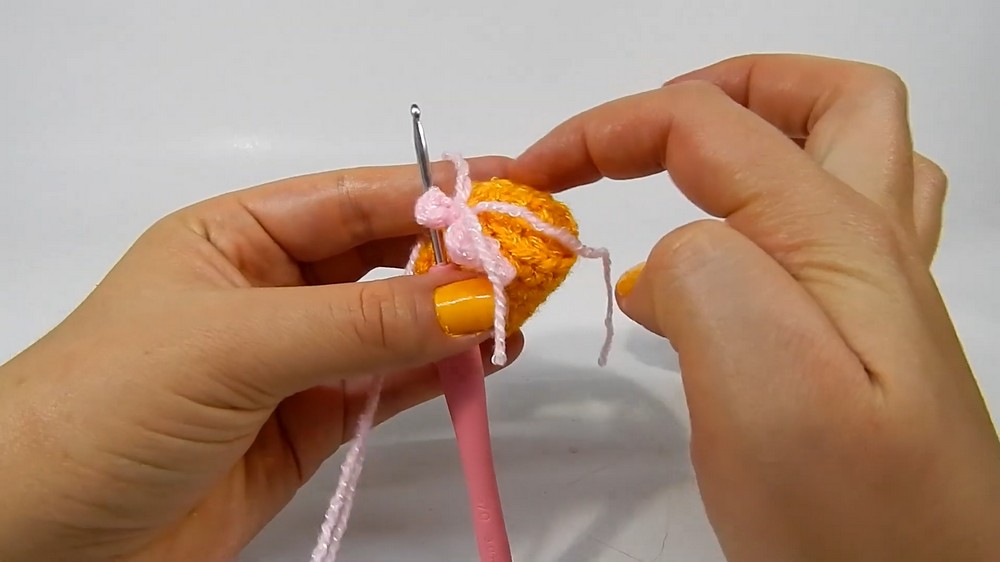
2. Beer Foam
Using white yarn (or any color for clarity):
- Join yarn to front loop at top edge of row 10.
- (In one st: ch 3, sl st in same st; in next st: sl st; in next st: ch 5, sl st in same st; in next st: sl st; in next st: ch 4, sl st in same st; in next st: sl st)
- Repeat this sequence (“3ch, 5ch, 4ch” foam balls) around the edge in a spiral (or as desired for a realistic foam effect).
- Fasten off and weave in ends.
3. Mug Handle
Using mustard/yellow yarn:
Rnd 1
- Make a magic ring, ch 1.
- Work 5 hdc into ring. Pull tail to close.
- Place marker on first st.
Rnds 2–9
- Work hdc in each st around for 8 rounds. (5 hdc each round)
- Place marker on first st of each round.
- Fasten off, leaving a long tail.

Assembly:
- Use yarn needle and tail to sew both ends of the handle securely to mug, positioning at desired height.
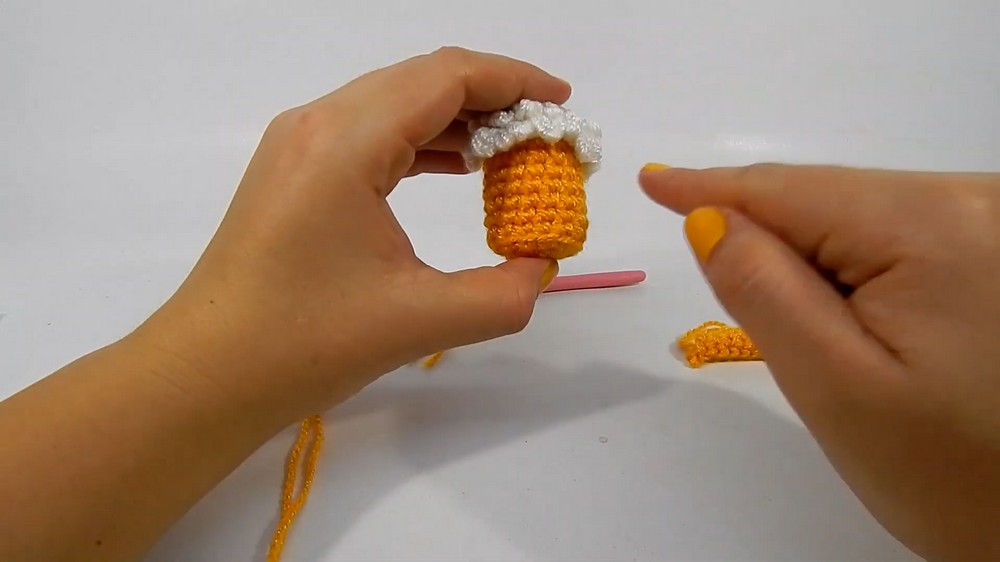
4. Finishing Touches
- Attach Eyes: Sew or glue movable eyes (optional) to the mug front.
- Attach Keychain Ring: At top if desired.
- Weave in all ends.
- Shape mug as needed.
Conclusion
Your tiny beer mug amigurumi is now complete! This quick, fun pattern is excellent for gifting (especially for Father’s Day), party favors, or everyday keychains.
Pattern Correction & Tips
- Use a stitch marker and count stitches carefully to maintain shape.
- Stuff firmly but don't overfill to prevent distortion.
- Handle: Use the same color as the mug for realism. Make sure handle is tightly sewn for durability.
- Foam: Vary the number of chains in each “foam ball” for added realism.
- Eyes: Use safety eyes or embroider if movable are not available.