
Best Free Crochet Bear Keychain Pattern That’s Hard to Resist
Carry cheerful vibes with the Free Crochet Bear Keychain Pattern, an inviting project that adds cuteness to bags, keys, or heartfelt handmade gifts.
A handwritten note tucked into a bag or a tiny token dangling from a keyring can carry warmth and a touch of personality that brightens mundane moments. The Free Crochet Bear Keychain Pattern brings that sentiment to life through a miniature companion that delights at just a glance. Compact and lightweight, this keychain’s charm lies in its approachable simplicity and tactile appeal.
Free Crochet Bear Keychain Pattern That Fits in Your Palm

Benefits stretch beyond décor: it's a satisfying project to build hand dexterity, stitch memory, and quick wins for beginners on tight schedules. Whether clipped to a bag, keys, or given as a heartfelt gift, this little bear carries both practicality and personality, brightening everyday routine with craft and charm.
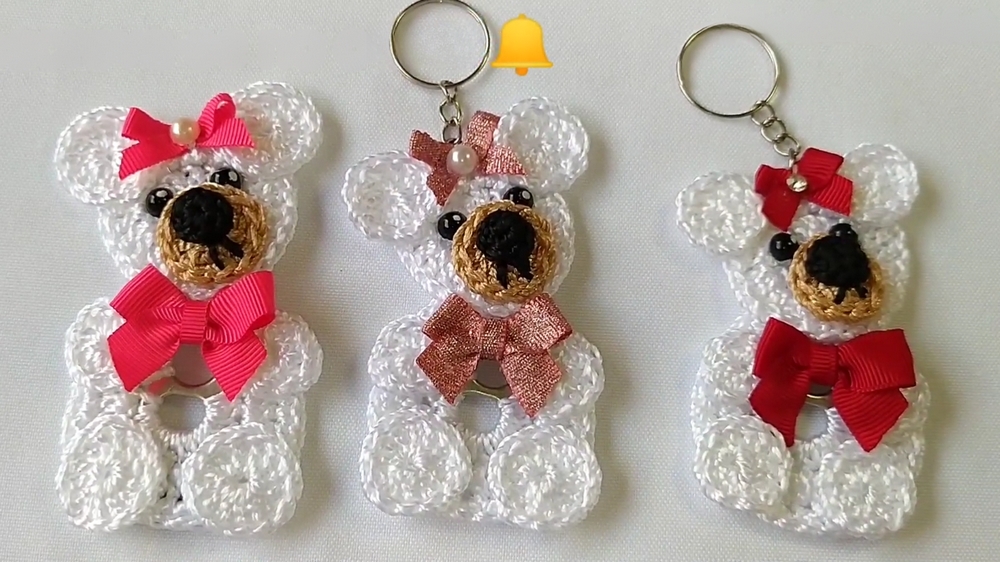
Cute Free Crochet Bear Keychain Pattern
Skill Level
Intermediate
Requires familiarity with amigurumi techniques, working in the round, and assembly.
Finished Size
Approximately 3–4 inches (depending on yarn and tension).
Materials Needed
- Yarn:
- White yarn: Main color for the body (Tex 288 or similar; 100% polypropylene recommended).
- Beige yarn: For snout.
- Black yarn: For the nose and details.
- Crochet Hook: 1.75 mm.
- Magnet or keychain ring: Optional for assembly depending on the item use.
- Half Pearls/Movable Eyes: For creating the eyes (size 5mm). Optionally, nail polish can be used to add “light marks” on the eyes.
- Glue: For attaching decorative pieces.
- Sewing Tools:
- Tapestry needle.
- Pliers (optional for preparing the sardine seal).
- Basic Tools:
- Scissors for cutting threads.
- Lighter for sealing yarn/thread ends.
Key Abbreviations
- ch – Chain
- sc – Single Crochet
- hdc – Half Double Crochet
- dc – Double Crochet
- sl st – Slip Stitch
- st(s) – Stitch(es)
- inc – Increase (2 stitches in 1 stitch)
- dec – Invisible Decrease (crochet 2 stitches together)
- MC – Magic Circle
Special Notes
- Continuous Rounds: Work in spiral rounds unless stated otherwise. Use a stitch marker to indicate the beginning of each round.
- Stuffing: This project requires no stuffing as it works over the sardine seal, making the structure firm.
- Customization: The project size may vary based on how high or low you place the head on the body. Adjustments are welcome!
Pattern Instructions
1. Preparing the Seal Base
- Before starting, remove any burrs or sharp edges from the sardine seal using pliers to ensure smoothness and easier crochet coverage.
- Sand down the edges if needed or wrap around with tape for safety.
2. Teddy Bear Body
Yarn Color: White
- Attach yarn to the bottom of the sardine seal:
- Attach the yarn and ch 1.
- Work 12 hdc evenly spaced along the lower part of the seal.
- Top of the Seal:
- Without cutting the yarn, move to the upper edge. Work 12 sc evenly spaced into the top side of the seal.
- Finish the Round:
- Join the round with a sl st.
- Round 2: Work 1 hdc inc (2 hdc in each st around) at the bottom side (in all 12 hdc; you’ll have 24 sts). On the top part, work 12 sc with no increases. (Total: 36 sts around both layers).
- Round 3 (All Around):
- Ch 1, and work sc in every st around. (36 sc).
3. Teddy Bear Head
Yarn Color: White
- Start with a Magic Ring (MC):
- Round 1: Into the MC, 12 dc. Pull the ring tight and join with a sl st in the first dc.
- Round 2: Ch 3 (counts as the first dc). In the same st, work 1 dc inc (2 dc in each stitch around). (Total: 24 sts).
- Finish the Head Base:
- Cut the yarn, leaving a tail for sewing.

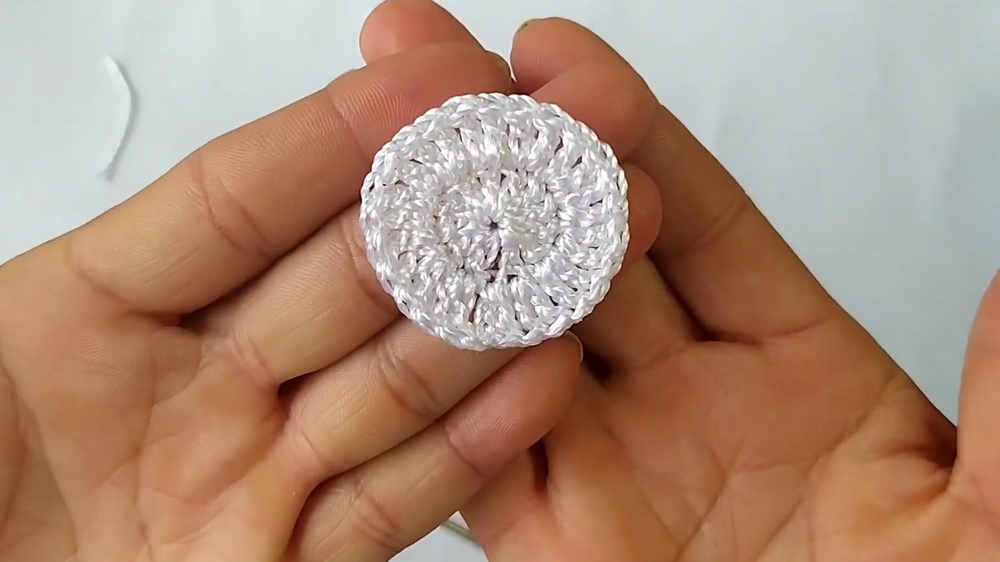
4. Ears and Paws (Make 4)
Yarn Color: White
- Start with a Magic Ring (MC):
- Round 1: Work 12 dc inside the MC. Pull it tight and join with a sl st into the first dc.
- Cut the yarn and leave a tail for assembly.
- Make 2 Smaller Paws:
- Round 1: Work 12 hdc into the MC. Pull tight and join with a sl st. (Creates smaller-sized paws).
5. Snout
Yarn Color: Beige
- Start with a Magic Ring (MC):
- Round 1: Work 12 dc inside the MC. Pull tight and join with a sl st into the first dc.
6. Nose
Yarn Color: Black
- Start with a Magic Ring (MC):
- Round 1: Work 8 sc into the MC. Pull tight and join with a sl st into the first sc.
- Leave a tail for sewing.

7. Assembly
- Attach the Head to the Body:
- Sew the head securely to the top of the sardine seal. Adjust the height based on desired size/proportion.
- Attach Ears and Paws:
- Use four identical pieces for the ears (attached to the top of the head) and paws (attached to the base of the body).
- Attach Snout and Nose:
- Position the beige snout onto the face and sew it securely. Center the black nose on the snout and attach it.
- Eyes (Optional):
- Attach half pearls or movable eyes with glue or sew on. For a light effect, use a small white dot on the eyes (easily made with white nail polish).
- Feet:
- Add two smaller paw pieces near the base of the bear (these appear as its feet).

8. Finishing and Embellishments
- Magnet: Attach a flat magnet to the back of the seal using hot glue.
- Keychain: Replace the magnet with a small metal ring for a keychain option.
- Optional Ribbon: Attach a decorative ribbon or bow around the bear’s neck.
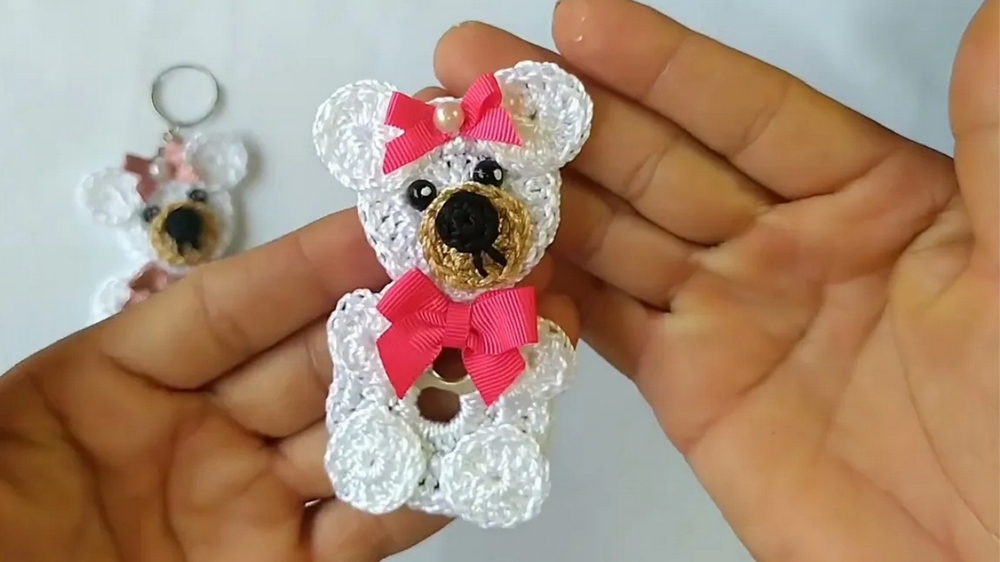
Conclusion
Congratulations on completing the Teddy Bear Magnet/Keychain! This super-cute handmade project is versatile, quick to make, and perfect for gifting.
Pattern Corrections
- Be cautious when attaching the pieces; symmetry is essential to maintain the bear’s balanced look. Always align properly.
Tips
- Use tight stitches to maintain firmness and clean borders.
- If giving as a baby shower favor, consider attaching a small tag with the baby’s name or the event date.
- Work systematically—assemble one section at a time to avoid confusion.