
Easy Free Crochet Tigger Pattern For Handmade Gift
Experience the playful charm of Tigger with this easy-to-follow Crochet Tigger Pattern, ideal for gifts, decor, and delightful amigurumi creations.
Childhood memories often come to life through the most unexpected forms, a plush figure on a shelf, a bouncy character brought to life with thread and patience. Tigger, with his bright stripes and energetic charm, remains one of those timeless characters. This crochet version brings that same personality into yarn form, transforming Tigger into a soft, squishy friend full of movement and joy. Known for his lively tail and signature grin, this version captures those details in a compact and beginner-friendly way.
Simple Free Crochet Tigger Pattern with Step-by-Step

Ideal as a gift, nursery addition, or character collectible, this Tigger brings a dash of nostalgia to modern crochet. The pattern suits confident beginners and intermediate makers, especially those looking to improve their shaping and assembly skills. It’s not just fun to work on—it’s rewarding to complete.

Playful Free Crochet Tigger Pattern
Finished Size
- Approximately 12–14 cm (5–6 inches) tall when completed, depending on the yarn and hook size.
Materials
Yarn:
- 4-ply Cotton Yarn, recommended for durability:
- Orange (Main Color): Tigger’s body
- Black (Stripe Details)
- Light Yellow (Tummy, Snout, and Face Details)
- Pink (Nose)
Tools:
- Crochet Hook: Size 3.0 mm
- Stuffing Tool: Fiberfill for stuffing
- Yarn Needle: For assembly and weaving in ends
- Scissors
- Eye Beads (Pair): 5 mm safety eyes
- Optional: Lighter or glue to secure eyes better.
Gauge
Gauge is not crucial for this project. However, ensure tight and even stitches to minimize gaps where stuffing might show. Working in tight tension is recommended for better structure.
Skill Level
Intermediate
- Techniques include working in rounds, invisible decreases, color changes, and basic assembly.
Key Abbreviations (US Terms)
- ch: Chain
- sc: Single crochet
- inc: Increase (2 sc in the same stitch)
- dec: Decrease (crochet 2 stitches together)
- sl st: Slip stitch
- yo: Yarn over
- BLO: Back loop only
- […]: Repeat instructions within brackets as specified
Special Techniques
- Invisible Decrease:
Insert the hook into the front loop only of the next two stitches, yarn under, pull through both loops; yarn under and pull the final loop. - X Stitch (Optional): Use "yarn under" instead of "yarn over" for a neater, tighter stitch, particularly on curving parts like the head.
Pattern Instructions
Step 1: Head
Foundation:
- Using orange yarn, ch 8.
Round 1:
- Ch 1, insert the hook into the back bump of the second chain from the hook. Work 1 sc inc into that chain.
- Work 6 sc.
- In the last chain, work 3 sc in the same stitch.
- Turn work and crochet 7 sc along the opposite side of the chain.
- Use an X stitch technique if you want tighter stitches.
- Close the round by working the last sc in the same spot as the first increase.
- Sl st to the first stitch to close the round. Ch 1 to begin the next round.
(You now have a total of 18 stitches)
Round 2:
- 1 inc, followed by 2 sc.
- Repeat: [1 inc, 2 sc] a total of 6 times.
- Close the round with a sl st. Ch 1 to start the next round.
(Now 24 stitches)
Round 3:
- 3 sc, followed by 1 inc.
- Repeat: [3 sc, 1 inc] around for 6 times.
- At the end of the round, you will have 30 stitches.
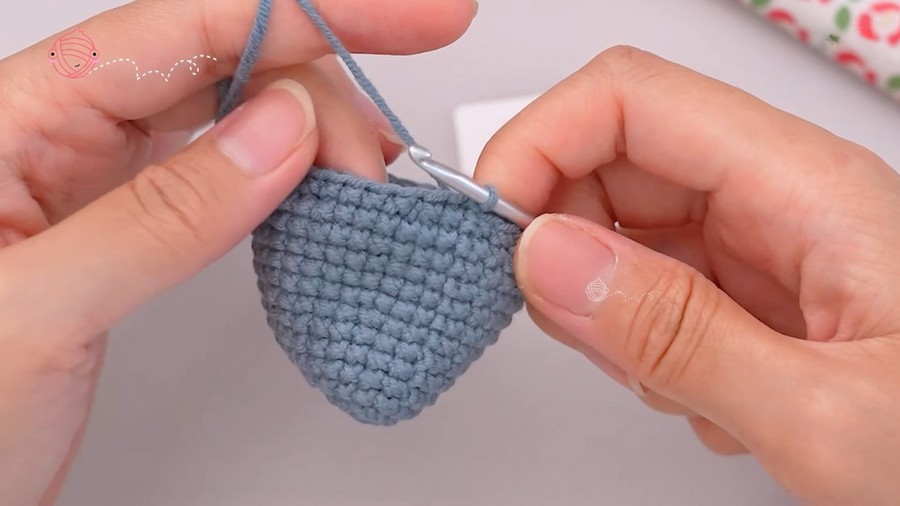
Rounds 4-6:
- Work 1 sc in each stitch around.
- Maintain 30 stitches for these rounds.
Round 7:
- 2 sc, followed by 1 inc, then 2 sc.
- Repeat: [2 sc, 1 inc, 2 sc] around.
- By the end, you will have 36 stitches.
Rounds 8–12:
- Work 1 sc in each stitch around to maintain 36 stitches.
Round 13 (Decreasing Begins):
- 2 sc, followed by 1 invisible dec, then 2 sc.
- Repeat: [2 sc, 1 invisible dec, 2 sc] around.
- End with 30 stitches.
Round 14:
- 1 invisible dec, followed by 3 sc.
- Repeat: [1 invisible dec, 3 sc] around to end with 24 stitches.
Closing the Head:
- Use a yarn needle to gather the remaining stitches and pull tight.
- Weave in the ends.
- The head is now complete!

Step 2: Body
Foundation:
- Using orange yarn, create a magic ring.
- Work 6 sc into the ring, pull tight to close.
Round 1:
- Work 1 inc in every stitch. (12 stitches total)
Round 2:
- 1 sc, then 1 inc. Repeat around. (18 stitches total)
Rounds 3–7:
- Work 1 sc in each stitch around to maintain 18 stitches.
Round 8 (Decreasing):
- 5 sc, followed by 1 invisible dec. Repeat 3 times. (15 stitches total)
Closing the Body:
- Stuff firmly with fiberfill.
- Leave a long tail for sewing.
Step 3: Hands (Make 2)
- Follow the same foundation as the body but adjust for scale:
- Start with 6 sc in a magic ring and increase for the required size.
- Embroider the black stripes after completing the hands.
Step 4: Legs (Make 2)
- Similar to the hands, follow the foundation as per the pattern.
- Use black yarn to embroider the stripes once the legs are complete.
Step 5: Tail
- Work in orange yarn until desired tail length (in the video, up to Round 14).
- Add black stripes afterward.

Step 6: Tummy
- Use light yellow yarn to crochet the tummy piece flat.
- Place between Rounds 3–7 on the front body.
Step 7: Face and Nose
Face:
- Foundation:
- Use light yellow to ch 7 and crochet back and forth, following the rows in the transcription to form the face shape (7 stitches to start, increasing gradually to 11 stitches).
Nose:
- Use light yellow yarn to work 6 sc into a magic ring, following the striped colorwork pattern:
- Round 1: Alternate between yellow and orange for color.
- Round 2–5: Maintain color changes, ending with a blended, striped nose.

Step 8: Assembly
- Attach Nose to Head: Place the nose between rounds 8–13.
- Face Part: Align above the nose and sew on securely.
- Eyes: Attach with a hot glue gun or sew. Use a lighter for better eye bead security.
- Ears: Attach one ear to each side of the head.
- Stripes: Use black yarn to add Tigger’s iconic stripes on the head, body, limbs, and tail.
- Attach Limbs: Sew the legs, arms, and tail onto the body as noted in the transcription.
Tips for Customization
- Colors: Adapt Tigger’s colors with pastel shades for a cuter look or use felt for stripes instead of embroidering.
- Eyes: Experiment with different bead sizes or use embroidered eyes for younger children.
Conclusion
This charming Tigger crochet pattern provides a delightful challenge for intermediate crocheters. With meticulous detailing and assembly, the final creation is lively and personality-filled, just like Tigger! Use it as a thoughtful handmade gift or a whimsical decorative piece.