
Crochet Little Whale Amigurumi Pattern for Ocean Charm
Make waves with the adorable Crochet Little Whale Amigurumi Pattern—effortlessly combine creativity, fun, and cuteness in one delightful crochet design.
A charming crochet whale, perfect for adding a splash of personality to any space, is designed with adorable fins, a curved tail, and a rounded body for a playful look. Whether gifted to a loved one, used as a decorative piece, or kept as a keepsake, this cute amigurumi whale is a versatile addition to your handmade collection. Its compact size makes it ideal for accessorizing shelves, nursery rooms, or workspaces with an ocean-inspired touch.
Crochet Little Whale Amigurumi

Crochet Little Whale Amigurumi Pattern
In this crochet tutorial, you'll learn how to create an adorable whale plushie—a perfect handmade gift or decoration! Designed for beginner to intermediate crocheters, this guide walks you through each step of the project, from making the whale's body to crafting its cute tail and fins. The final product is approximately palm-sized, making it ideal as a collectible or toy. Grab your materials, and let's dive in!
Materials Needed
To crochet the whale plushie, you will need:
- Yarn:
- Blue (main color for body and tail)
- White (color for the whale’s underside)
- Crochet hook: 4 mm hook
- Scissors
- Yarn needle
- Stuffing: Polyfill or fiberfill
- 2 safety eyes
- Optional: Bobby pins or stitch markers
Abbreviations
Below are the stitches used in this pattern:
- ch: Chain
- sc: Single crochet
- inc: Increase (make 2 single crochets in the same stitch)
- dec: Decrease (single crochet 2 stitches together)
- sl st: Slip stitch
- hdc: Half double crochet
- dc: Double crochet
- MR: Magic Ring (create a circle foundation for working in the round)
Crochet Pattern
Whale Body
Step 1: Start with a Magic Ring
- Begin with blue yarn.
- Make a magic circle and crochet 6 single crochets (sc) into the loop.
- Tighten the loop by pulling the tail end of your yarn.

Step 2: Increase the Diameter
- Round 2: Work 2 sc into each stitch (increase in every stitch). At the end of this round, you should have 12 stitches.
- Round 3: Work 1 sc into the first stitch, then 1 sc inc into the next stitch. Repeat this pattern all the way around. At the end of the round, you’ll have 18 stitches.
- Round 4: Work 2 sc into the first two stitches, then 1 sc inc. Repeat this pattern all the way around. At the end of the round, you should have 24 stitches.
Step 3: Form the Body
- Round 5: Work 1 half double crochet (hdc) into each stitch all the way around. Maintain a stitch count of 24 sts.
- Rounds 6–8: Work 1 sc into each stitch all the way around (maintaining 24 sts per round).
- At the end of Row 8, you will change the yarn color to white (see below).

Step 4: Change Yarn Color
- At the end of Row 8, stop midway while completing the last single crochet (leaving two loops on your hook).
- Cut the blue yarn, leaving a small tail.
- Place the new white yarn on your hook and pull it through the two loops to complete the final stitch.
- Crochet over the tails (blue and white) for the next few stitches to secure them without the need for additional weaving.
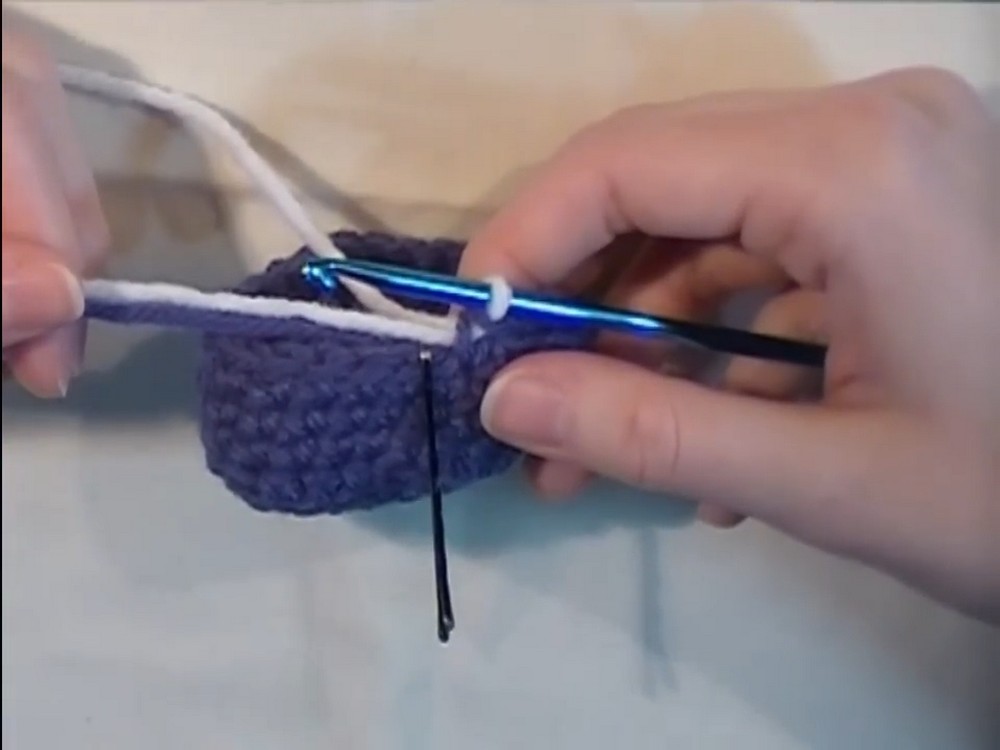
Step 5: Add Safety Eyes
- Round 9: Work 1 sc into each stitch all around with the white yarn (24 sts).
- After completing Row 9: Place the safety eyes at the transitional line between the blue and white sections (Rows 8 and 9).
- Position the eyes evenly opposite each other, with the back join of the color change as your reference point.
Step 6: Decreasing Rows
- Round 10: Work 2 sc, then 1 dec. Repeat this pattern all around (total: 18 sts) at the end of the round.
- At this stage, stuff the body firmly with fiberfill but not too tightly.
- Round 11: Work 1 sc, then 1 dec. Repeat this pattern all around (total: 12 sts) at the end of the round.
- Final Round: Dec across all stitches. You should have 6 sts remaining.
- Finish off the body by cutting off the excess yarn and weaving in the ends.
Whale Tail
- Switch back to your blue yarn to make the tail.
- Step 1: Make a slip knot.
- Step 2: Chain 8.
- Step 3: Start working into the chain:
- Into the third chain, make 1 double crochet (dc).
- Into the next stitch, make 1 half double crochet (hdc).
- Into the next two stitches, make 2 slip stitches (sl st).
- Into the next stitch, make 1 half double crochet (hdc).
- Into the next stitch, make 1 double crochet (dc).
- Into the last stitch, make 1 single crochet (sc).
- Cut a long tail of yarn, leaving enough to sew the tail to the body.

Step 4: Tail Assembly
- Weave in the shorter yarn tail using your yarn needle.
- Use the longer tail to pinch the middle of the tail into a "fan" shape and secure by tying a knot.
- Align the tail at the back of your whale, centered between the blue and white sections.
- Sew the tail firmly in place using the long yarn tail you left earlier.
Whale Fins
- Insert your hook into a stitch approximately 3 stitches behind the safety eyes along the side of the whale.
- Grab the blue yarn, wrap it around your hook, pull through the stitch, and tighten with a sl st.
- Step 1: Chain 3 stitches.
- Step 2: Insert your hook back into the same stitch and work a sl st.
- Step 3: Finish off and weave in the ends.
- Repeat the same steps for the fin on the opposite side, ensuring symmetry.
Final Touches
- Stuffing Check: Before finishing, check that you've stuffed the whale firmly to maintain its shape.
- Cleanup: Ensure all yarn tails are neatly woven in. Trim excess yarn if needed.
- Your whale is now ready!

Conclusion
Congratulations on completing your very own Cute Whale Plushie! This beginner-friendly project is quick, fun, and perfect for gifting or displaying. You can vary the yarn colors to make whales in different themes or sizes. Share your creation with friends and family, or make a whole pod! If you enjoyed this tutorial, explore more projects to expand your crochet skills.