
Free Crochet Garland Keychain Pattern For Playful Elegance
Brighten your day with this delightful Crochet Garland Keychain Pattern that blends playful charm and handmade beauty into one creative accessory.
In the gentle art of crochet, simple pleasures often carry the most significance, like the charm of a handmade keychain that accompanies you daily or serves as a heartfelt gift to a cherished friend. The "Free Crochet Garland Keychain Pattern" embodies this essence by offering a delightful way to infuse ordinary objects with warmth and personality. This engaging project beautifully marries functionality with whimsy, making it ideal for crocheters across all skill levels, from enthusiastic beginners to seasoned artisans seeking a cheerful endeavor.
Free Crochet Garland Keychain Pattern for Playful Elegance
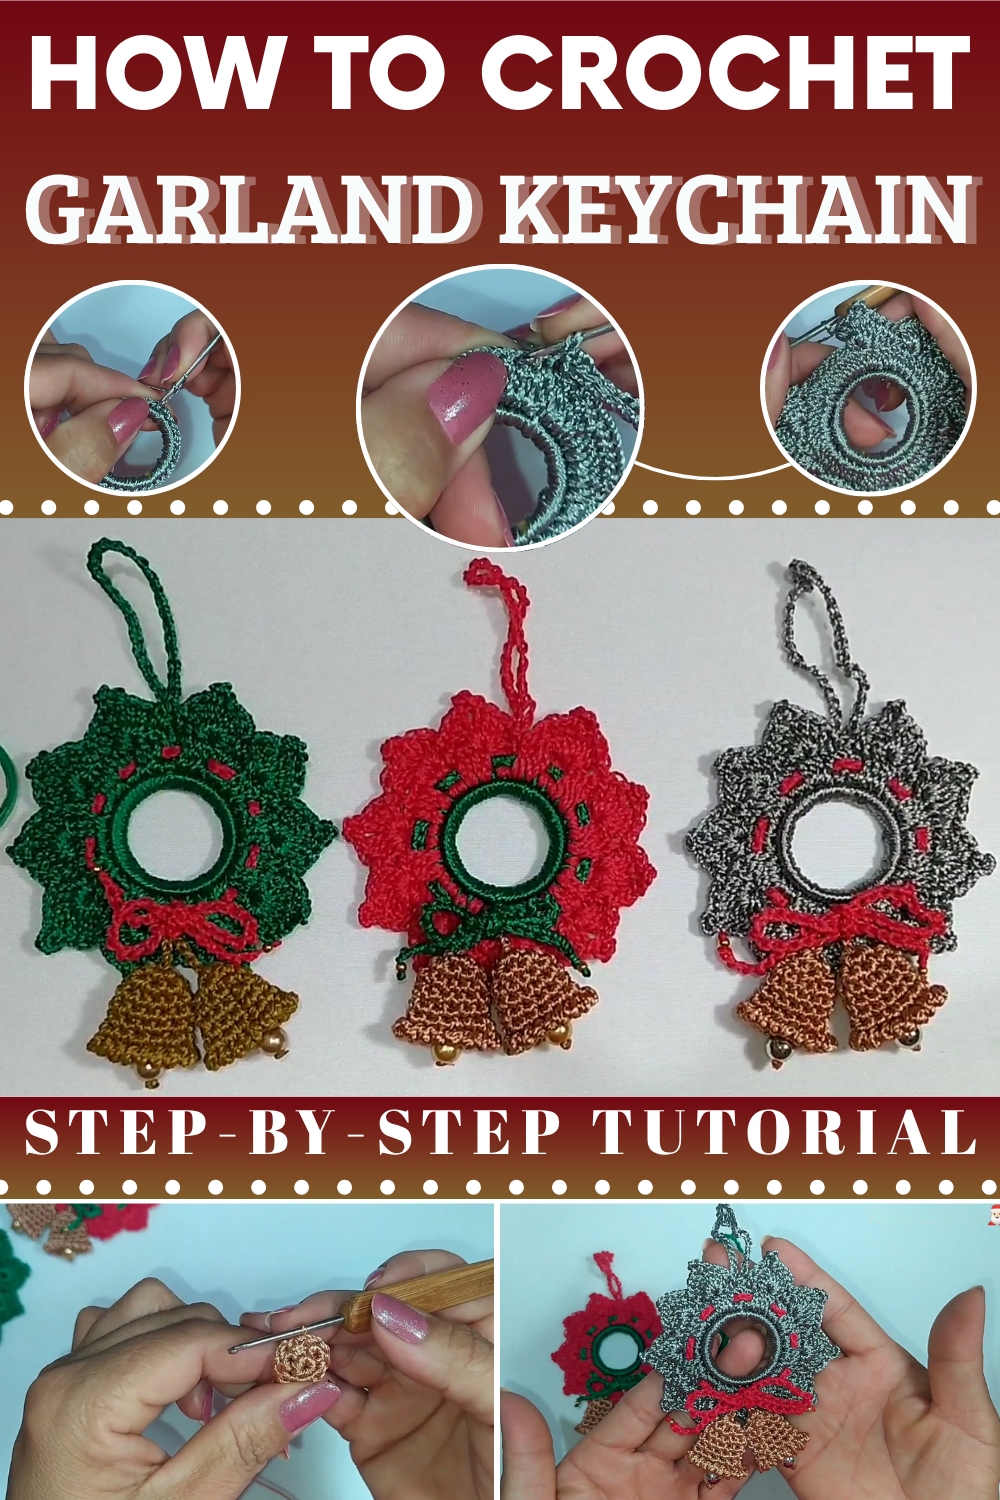
The potential uses of this crochet garland keychain are numerous. While it serves as a functional object, its role as a personal or gift accessory makes it truly special. Whether you’re crocheting it to surprise a loved one or to add a personal touch to your belongings, this keychain offers a fun and creative outlet.
A valuable tip from the tutor is to experiment with different color schemes, enabling each piece to reflect unique seasons or personal tastes, thus guaranteeing a distinctive creation each time. In the end, the "Free Crochet Garland Keychain Pattern" is a testament to how small, simple efforts can yield delightful results that brighten everyday life.
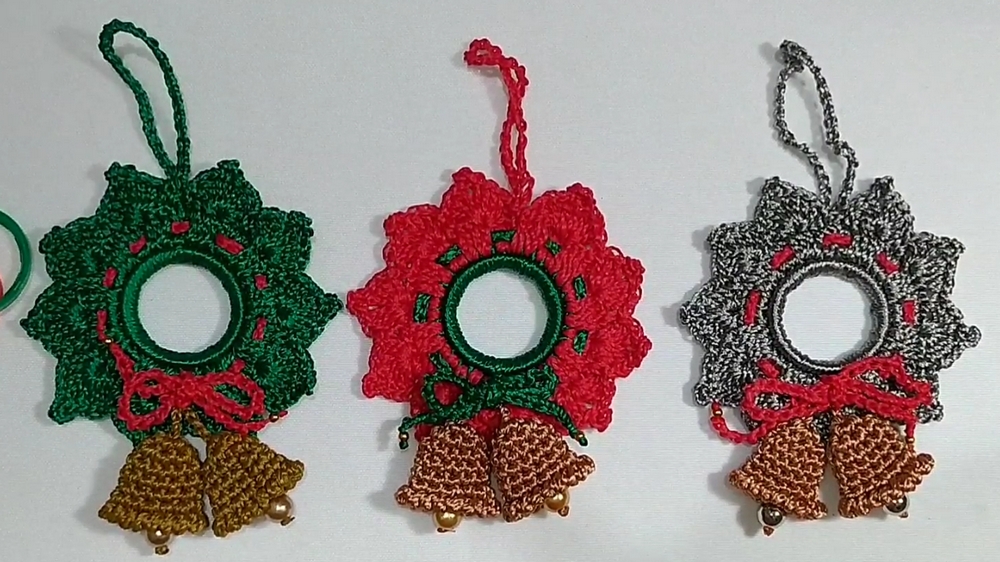
Free Crochet Garland Keychain Pattern
Materials Needed
- Yarn: Thick silk thread (Tex 288) or 100% polypropylene, any desired color
- Hook: 1.75 mm crochet hook
- PET bottle ring (clean and de-burred)
- Pearl beads, size 6 (for decoration)
- Small gems/mini pearls (optional, for accent)
- Yarn/tapestry needle
- Scissors
- Lighter (to seal thread ends, optional)
- Silicone glue or strong craft glue
- Magnets, keychain findings, or hanging chains (optional, depending on final use)
Key Abbreviations (US Terms)
- ch: chain
- sc: single crochet
- dc: double crochet
- sl st: slip stitch
- st(s): stitch(es)
- picot: ch 3, sl st in top of previous st (used for decorative points)
- inc: increase (2 stitches in same st)
- crab st: (reverse single crochet)
Special Notes
- Always ensure your plastic ring is prepped and smooth before you begin.
- Adjust colors or bead decorations to match your festive theme.
- This pattern is suitable for any upcycled plastic ring of a similar size.
Pattern Instructions
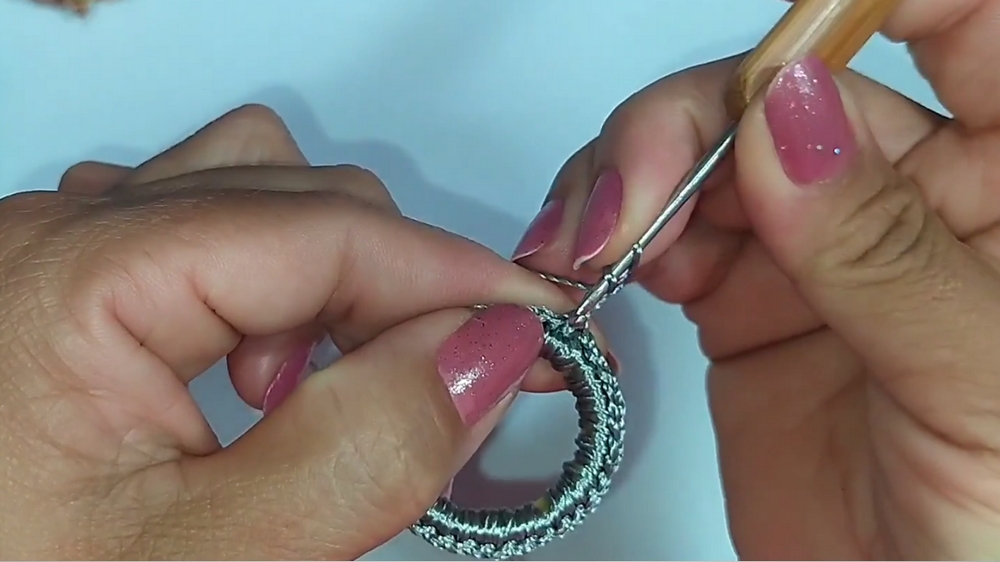
I. Covering the PET Ring
- Join yarn to the ring with a slip knot.
- Work sc (single crochet) evenly around the entire ring until fully covered.
- There is no specific number; stitches should sit snugly and evenly.
- Join with a sl st to the first sc.
- Fasten off, weave in end, and seal with a lighter if necessary.
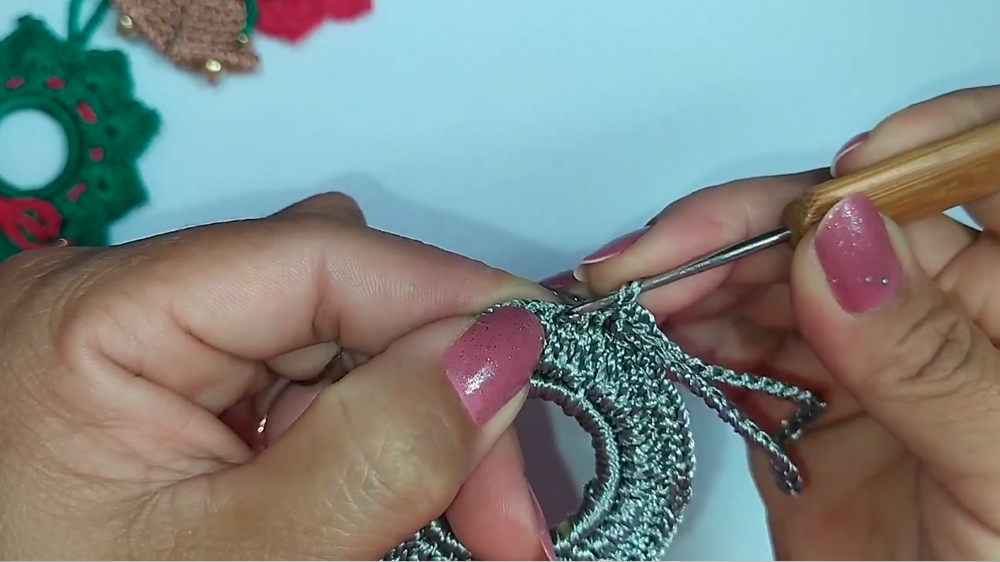
II. Wreath "Puff" Round (Double Crochet Increases)
- Join yarn at any sc with a sl st.
- Ch 3 (counts as first dc).
- In same st: 1 dc (increase).
- In each sc around, 2 dc in each st (work increases in every stitch).
- Join with a sl st to top of starting ch-3.
- Fasten off, weave in/seal end.
III. Hanging Loop
- Ch 35 (for a hanging loop).
- Sl st in same base stitch to secure.
- Fasten off.
IV. Decorative Fans for Wreath (Repeat round)
- Attach yarn to base (at the join point or wherever you want your first fan).
- Skip 2 sts, into third st:
- (3 dc, picot, 3 dc) in same stitch
- (For picot: ch 3, sl st in top of last dc made)
- (3 dc, picot, 3 dc) in same stitch
- Skip next 2 sts, sc in next st.
- Repeat fan (3 dc, picot, 3 dc in same st), skip 2, sc in next all the way around. (You will make about 10 fans.)
- Join with a sl st to the base of the starting fan or sc as needed.
- Fasten off, weave in, and seal end.
V. Beaded Cord Decor
- Ch 90 (for a long decorative string).
- Optional: Leave a bit of extra thread at both ends for attaching beads/pearls.
- Thread a tapestry needle with one end, and use it to weave the cord in and out around the wreath or hang as desired.
- Add a pearl (or bead) to each end and secure with a knot. Trim excess and seal.
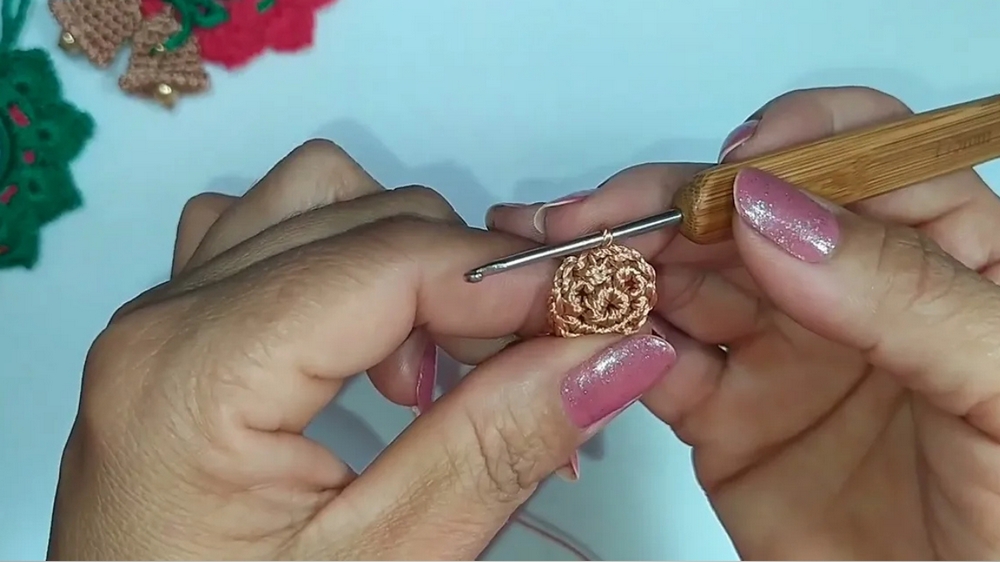
VI. Mini Bell (Make 2 for dangles)
- Make a magic ring.
- Rnd 1: 6 sc in ring. Tighten ring.
- Rnd 2: 2 sc in each st around (12 sc).
- Rnd 3–5: sc in each st around (12 sc per round; work 3 rounds total).
- Rnd 6: (inc in first st, sc in next) repeat around – (increase row).
- Rnd 7: Crab stitch (reverse sc) in each st around for a firm edge.
- Fasten off and leave a long tail.
- At center top, attach yarn, ch 4, fasten off for hanging bell loop.
- Add a pearl/gem to the bottom inside of the bell, secure thread, and neatly seal ends.
- Make two bells; attach to bottom of the wreath or wherever you wish.
VII. Assembly & Final Details
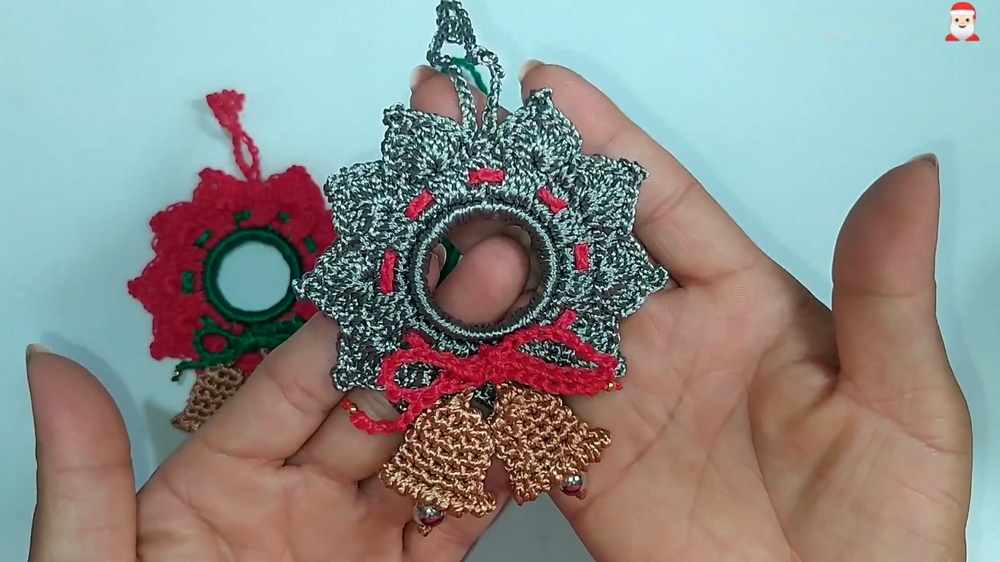
- Arrange and glue any extra beads, pearls, or gems onto the wreath for glam.
- Use the hanging loop to hang as a tree ornament, thread with a keyring for keychain, or glue a magnet to the back for a fridge magnet.
Conclusion
This charming mini crochet wreath is a fantastic way to upcycle PET bottle rings and can be finished in one sitting. Versatile, festive, and ideal for gifting or decorating.
Pattern Correction & Tips
- Correction: If your ring is larger or smaller, increase or decrease the number of sc so your work sits flat and even.
- Tip: For a fluffier wreath, add an extra increase round (dc 2 in each st) before working fans.
- Tip: Mix greens, reds, and whites for traditional Christmas look; gold or silver for elegance.
- Tip: Use a reverse single crochet (crab stitch) for a sturdy bell edge.
- Tip: Always securely seal synthetic fiber ends for a neat finish.