
Crochet Doll Amigurumi Pattern That Feels a Cozy Hug
Bring charm to your hands with the Free Crochet Doll Amigurumi Pattern, creating a cute, huggable doll that sparks creativity and joy in every stitch.
Few handmade toys capture the charm and personality of a miniature companion like a perfectly crocheted doll, blending creativity, skill, and heart into every stitch. The Free Crochet Doll Amigurumi Pattern offers a delightful way to crochet your own soft, expressive doll that can brighten any room, become a cherished cuddle buddy, or serve as a thoughtful, personalized gift.
Charming Crochet Doll Amigurumi Pattern Ideas You’ll Love

The Free Crochet Doll Amigurumi Pattern not only produces a beautiful, huggable finished piece but also provides the meditative rhythm of crocheting that can calm the mind, inspire creativity, and offer a satisfying sense of accomplishment. Whether displayed on a shelf, gifted to a loved one, or used as a playful companion, this project blends functionality, aesthetics, and hands-on enjoyment into one irresistible poject.

The process begins with a magic ring, followed by single‑crocheting in continuous rounds to form the body, with gradual increases and decreases to sculpt curves perfectly. Limbs are attached with slip‑stitch joins, facial features are embroidered for personality, and stuffing with polyester fiberfill ensures a soft, cuddly texture.
Crochet Doll Amigurumi Pattern
Materials List
- Yarn (sport, fine, or light DK recommended):
- White (dress, arm, foot, and hair highlights)
- Light blue & blue (skin tone and details)
- Dark blue or burgundy (for flowers)
- Black (for worm, details)
- Small amounts of green, pink, and other accent colors (optional details)
- Hooks:
- Main: 2.0–2.5 mm crochet hook
- Detail/Sewing: 0.9 mm steel hook (for worm, fine details)
- Stuffing: Polyfil or similar
- Safety eyes: 9 mm, or embroidery supplies for alternative eye and worm
- Yarn needle
- Stitch markers
- Embroidery floss/markers (for eyebrows, eyelashes, worm face, rib outline)
- Scissors
- Hot glue or craft glue (for attaching details)
- Small brush (for painting fine lines, optional)
Key Abbreviations
| Abbreviation | Meaning |
|---|---|
| st(s) | Stitch(es) |
| ch | Chain |
| sc | Single Crochet |
| hdc | Half Double Crochet |
| dc | Double Crochet |
| inc | Increase (2 sc in same st) |
| dec | Decrease (single crochet 2 together) |
| sl st | Slip Stitch |
| MR | Magic Ring (adjustable ring) |
| BLO | Back Loop Only |
| FLO | Front Loop Only |
| () | Repeat instructions |
Special Notes
- Pattern is worked in continuous rounds unless otherwise stated.
- Use a stitch marker to track your round beginnings.
- Stuff as you go, especially the feet and head.
Pattern Instructions
Feet & Legs (Make 2; 1 "bone" in White, 1 "skin" in Blue)
Bone Foot/Leg (White):
- Round 1: MR, 6 sc (6)
- Round 2: sc in each st (6)
- Change to blue (skin):
- Round 3–4: sc in each st (6 each round)
- Round 5: (sc, sc, inc) x2 (8)
Finish off, weave end.

Skin Foot/Leg (Blue):
- Round 1: MR, 6 sc (6)
- Round 2: sc in each st (6)
- Change to blue:
- Round 3: sc in each st (6)
- Change to white (BLO):
- Round 4: sc in each back loop (6)
- Round 5: (sc, sc, inc) x2 (8)
Do NOT cut yarn after Round 5 — proceed to joining legs.
Joining Legs, Starting Body
- Ch 2, bring both legs together.
- Round 6: Using white, sc in each of 8 sts on first leg, sc in each ch (2), sc in each of 8 sts on second leg, sc in other side of ch (2). (Total: 20 sc)
- Round 7: sc in each st around (20)
- Round 8: sc in next 7, dec x2, sc in remaining sts (16)
- Round 9 (BLO): sc in each st around (16)
- Round 10: sc in next 6, dec x2, sc in remaining sts (14)
- Round 11 (change to blue): sc in next 5, dec x2, sc in remaining sts (12)
- Round 12: sc in each st (12)
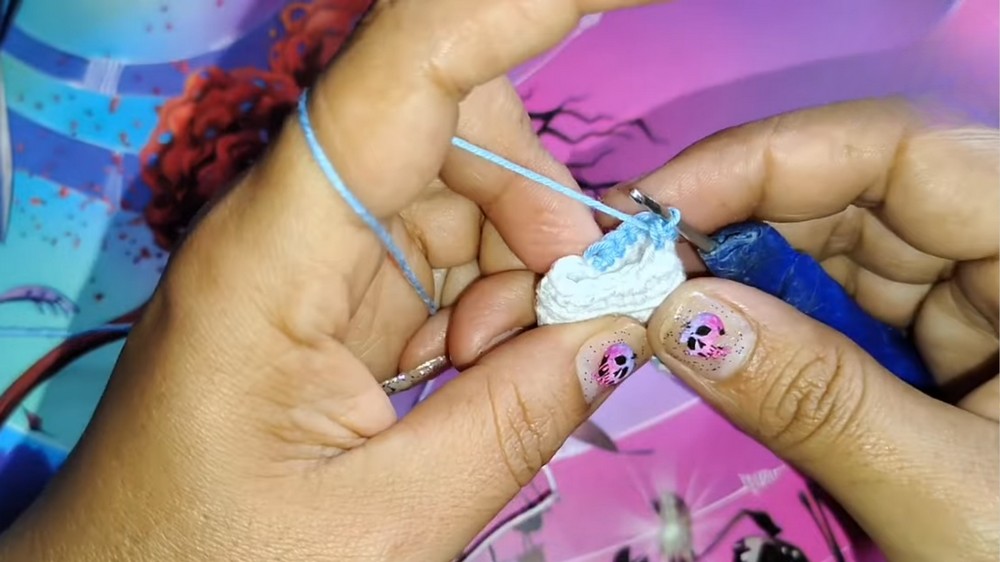
Stuff legs and body firmly as you go.
Head
- Round 13: inc in every st (24)
- Round 14: (sc in next 3, inc) x6 (30)
- Round 15: (sc in next 4, inc) x6 (36)
- Rounds 16–23: sc in each st (36, 8 rounds)
- Round 24: (sc in next 4, dec) x6 (30)
- Insert safety eyes between Rnds 6–7 of the head (counting up from neck), about 9 sts apart. Add worm detail if desired (see finishing).
- Stuff and shape as you go.
- Round 25: (sc in next 3, dec) x6 (24)
- Round 26: (sc in next 2, dec) x6 (18)
- Round 27: (sc, dec) x6 (12)
- Finish stuffing; close with (dec) x6 and finish off. Use tail to close hole neatly with a tapestry needle.

Second Eye (Crochet Version)
- With Black: MR, 6 sc. Tighten and finish off, leaving long tail to sew onto face.
Dress/Skirt
- Join white at FLO on body at round where BLO was worked.
- Round 1: (sc, inc) around (24)
- Round 2: sc in each st (24)
- Rows 3–4 (work in rows for opening):
- Ch 1, turn. 21 (then 22) hdc, leave last 2–3 sts unworked for "slit" effect.
- Continue one hdc in each for 2 rows (increasing to 22 after turning).
- Row 5: (hdc in next 2, hdc inc) to end (28)
- Last hdc is in light blue.
- Row 6 (Blue): sc in each st (28)
- Row 7: ch 1, turn. sc in st, ch 2, sl st in base of same st (picot); repeat across, making decorative edge.
- "sc, ch 2, sl st, next st..." Repeat to end.
- Fasten off, weave in ends.
Bust/Strapless Top
- With White: ch 5, turn.
- Row 1: 1 hdc in 2nd ch from hook, 2 dc in next 2 ch, 1 hdc, 1 sc in last ch; stop.
- Sl st, turn, sc, hdc, 2 dc, hdc, sc, sl st in opposite direction for mirrored shape.
- Fasten off, leaving tail to sew to body.
- Attach over chest area as shown in the video.
Arms (Make 2; 1 White "bone", 1 Blue "skin")
- Round 1: MR, 6 sc (6)
- Rounds 2–5: sc in each st (6)
- Finish arm:
- Press arm flat, sc through both layers, 3 sc to close. Fasten off, long tail for sewing.
- Repeat in alternate color for second arm ("bone" in white, other in blue).
- Arms are not stuffed.

Hair
- With blue: For each strand
- Ch 20, turn; hdc in 2nd ch from hook and in each ch (19)
- Attach strand to head with sl st.
- Repeat to cover entire head, adjusting placement for fullness (about 36 strands).
- For bangs/forelock:
- Ch 20, turn; 19 dc for thickness. Make at least 5 thick strands for the bangs.
- Attach as shown, styled to side.
Veil
- With white: ch 10, turn.
- Row 1: inc in 1st st (2 dc), 7 dc, inc in last st (2 dc) (11)
- Row 2: ch 1, turn, inc in first st (2 dc), dc in each across, inc in last st (13)
- Row 3: ch 1, turn, inc in first st (2 dc), dc across, inc in last st (15)
- Row 4: ch 1, turn, inc in first st, dc across, inc in last st (17)
- Row 5: ch 1, turn, inc in first st, dc across, inc in last st (19)
- Row 6: Increase sections and details as desired, finish when veil is an appropriate size (see video for max 23 dc).
- Edging (optional): sc, ch 2, sl st, repeat for picot edge all along lower curve.
Roses & Flowers for Veil (Make 5)
- With burgundy/dark blue:
- MR, (ch 3, sl st in ring) x5
- Finish off and pull ring closed.
- Stitch or glue as a floral crown atop head, over veil.
Worm
- With black and 0.9 mm hook:
- MR, 4 sc.
- Rounds 2–6: sc in each st (4 per round). (5 rounds)
- Finish off; shape as desired.
- Glue into "hole" eye.
- Use markers to draw mouth, eyes, and eyebrows on worm.
Assembly & Details
- Stitch or glue arms in place at sides.
- Attach hair strands all around crown; arrange bangs and veil as desired, sewing or gluing in place.
- Embroider or glue blue and white eye details as shown in the video.
- Use markers/embroidery for eyelashes, eyebrows, rib detail on dress or body, worm's face, and any other accents.
- Glue or sew flowers to top of veil.
- Hide and weave in all ends neatly.
Pattern Correction
- If your stitch counts slightly differ, adjust with small increases/decreases to match target counts for dress and skirt—do not stress over one stitch off.
- For the veil, increase evenly at edges for a gently widening triangle.
Tips
- For an easier veil or a different look, use tulle or lace instead of crocheted fabric.
- Use a stitch marker when working small/continuous rounds, especially for worm and baby parts.
- Be careful with hot glue near yarn – use craft glue for lighter pieces if worried.
- Style/attach hair securely to withstand play if gifting to children.
Conclusion
Enjoy making this special and unique Corpse Bride amigurumi! From her expressive mismatched eyes and sweet skeleton details to her delicate hair and romantic veil, your project will be as charming as it is creative. Customize with accents, flowers, and embroidery—and embrace the wonderful quirkiness of this Day of the Dead muse.