
Chic & Spooky Free Crochet Zombie Pattern for Bold Looks
Spice up your style with the Free Crochet Zombie Pattern, a playful handmade piece that adds charm, comfort, and quirky vibes to any outfit.
A pop of green and a quirky twist can turn any ordinary accessory into a statement piece. The Free Crochet Zombie Pattern brings playful charm and character to your wardrobe, combining function with a hint of mischief. Its soft, rounded silhouette drapes comfortably while maintaining structure, making it suitable for a variety of yarn types from chunky for warmth to lighter weights for a casual, airy look.
Free Crochet Zombie Pattern with Unique Texture

Combining whimsy, functionality, and creativity, this project delivers satisfaction from the first stitch to the final finished hat. Whether worn for fun, fashion, or flair, it’s a standout piece that turns everyday moments into something memorable.
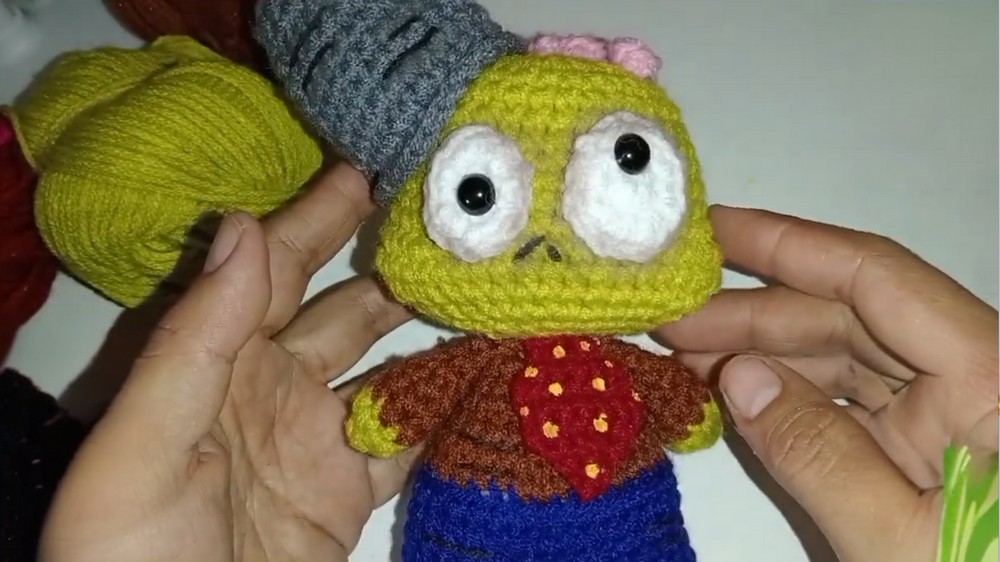
Worked in continuous rounds, the hat achieves a seamless finish that sits snugly without losing its shape, while the subtle textures add visual interest and a touch of personality. Perfect for outdoor adventures, casual hangouts, or themed events, this bucket hat doubles as both a practical accessory and a conversation starter.
Free Crochet Crochet Zombie Pattern Pattern
Materials
- Yarn (Worsted or DK preferred):
- Green (head, body; apple or zombie shade)
- Black (feet, bucket lines, optional: face details)
- Blue (pants)
- Brown (shirt, arms, optional: bucket detail)
- White (large eye)
- Gray (bucket)
- Red (tie)
- Pink (brain accent)
- Yellow (small eye, tie balls)
- Hook: 2.0 mm – 2.5 mm (or suitable for your yarn)
- Stuffing: Polyester fiberfill
- Stitch markers
- Yarn needle
- Scissors
- Pins
- Hot glue gun (optional, for assembly)
- Permanent marker/paint for facial details (optional)
- Blush/chalk for cheeks (optional)
Key Abbreviations
| Abbreviation | Description |
|---|---|
| MR | Magic Ring |
| ch | Chain |
| sc | Single crochet |
| inc | Increase (2 sc in the same st) |
| dec | Decrease (sc 2 together) |
| sl st | Slip Stitch |
| BLO | Back Loop Only |
| FLO | Front Loop Only |
| st(s) | Stitch(es) |
Special Notes
- This pattern uses continuous (spiral) rounds unless otherwise specified.
- For color changes, finish the last yarn over of previous stitch with the new color.
- Attach parts securely by sewing for durability or use hot glue for display pieces.
- Use stitch markers to keep track, especially for facial feature placement.
Pattern
Head
With green:
- Round 1: 8 sc in MR (8)
- Round 2: inc around (16)
- Round 3: (sc 1, inc) around (24)
- Round 4: (sc 2, inc) around (32)
- Rounds 5-6: sc in each st (32)
- Round 7: sc 8, inc, sc 14, inc, sc 9 (34)
- Round 8: sc in each st (34)
- Round 9: sc 9, inc, sc 14, inc, sc 9 (36)
- Rounds 10-11: sc in each st (36)
- Round 12: sc 10, inc, inc, inc, sc 10, inc, inc, inc, sc 10 (42)
- Round 13: sc 10, inc, sc 1, inc, sc 1, inc, sc 10, inc, sc 1, inc, sc 1, inc, sc 10 (48)
- Round 14: sc in each st (48)
- Round 15: sc 10, dec, sc 1, dec, sc 1, dec, sc 10, dec, sc 1, dec, sc 1, dec, sc 10 (42)
- Round 16: sc 10, dec 3, sc 10, dec 3, sc 10 (36)
- Round 17: (sc 4, dec) around (30)
- Round 18: (sc 3, dec) around (24)
- Stuff head firmly
- Round 19: (sc 2, dec) around (18)
- Round 20: (sc 1, dec) around (12)
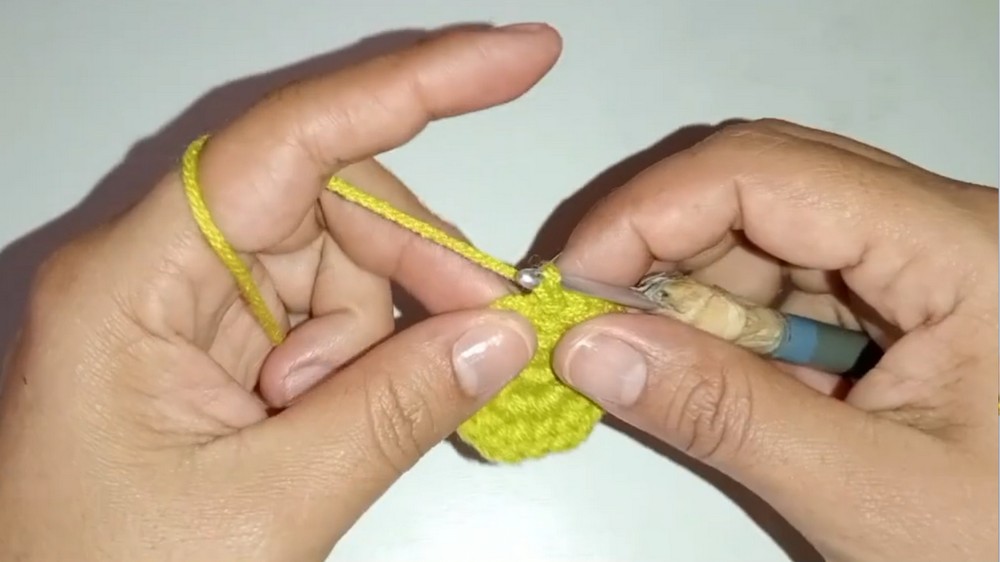

Neck
- Round 21: 6 dec (6).
Or for a longer neck: continue as in the video — see next steps:
Optional “Neck Extension”
- (sc 10, dec) around (11)
22-25. sc in each st (11)
Fasten off, close, and leave long tail for sewing.
Large Eye
With white:
- Round 1: 8 sc in MR (8)
- Round 2: inc around (16)
- Leave a hole for safety eye or insert felt/embroider center. Fasten off.
Small Eye
With yellow:
- Round 1: 6 sc in MR (6)
- Round 2: inc around (12)
- Leave a hole in the center if using safety/felt eye. Fasten off.

Mouth/Nostrils
- Embroider with black and make nostril holes with a marker or thread.
- Use brown yarn/paint for details around the eyes (as described in “Details”).
Brain (Accent, Optional)
With pink:
- Ch 31
- Row 1: sc in each ch (30)
- Roll/zigzag and attach with glue or tack stitch atop the head for a “brain” accent.
Feet (Make 2)
With Black:
- Round 1: 6 sc in MR (6)
- Round 2: inc around (12)
- Change to Blue
- Round 3: sc in each st, BLO (12)
- Round 4: sc in each st (12)
- Fasten off the first foot. Make second foot but do not fasten off.
Body
With Blue:
- Join feet with 4 chs (forms crotch bridge).
(12 sts for first foot, 4 ch, 12 sts for the second, 4 sts along bridge = 32 sts total) - Rounds 6-9: sc in each st (32)
Continue “pants” section, adjust or add a round if body appears short. - Change to Brown:
Round 10: sc in each st, BLO (32) - Round 11: (sc 2, dec) around (24)
- Round 12: sc in each st (24)
- Round 13: (sc 1, dec) around (16)
- Rounds 14-15: sc in each st (16)
- Round 16: (sc 1, dec) around (11)
- Round 17: (sc 1, dec) around to 8
- Rounds 18-21: sc in each st (8)

Stuff firmly as you go. Sew or glue body to neck when finished.
Arms (Make 2)
With green:
- Round 1: 6 sc in MR (6)
- Round 2: (sc 1, inc) around (9)
- Change to Brown.
- Rounds 3-5: sc in each st (9)
- Round 6: (sc 1, dec) around (6)
- Round 7: sc in each st (6)
- Lightly stuff only the “hand” part. Fold and close with 3 sc across both sides.
- Fasten off, leave a long tail.
- Attach to body at shoulder.
Bucket
With Gray:
- Round 1: 6 sc in MR (6)
- Round 2: inc around (12)
- Round 3: (sc 1, inc) around (18)
- Round 4: sc in each st, BLO (18)
- Round 5: (sc 2, inc) around (24)
- Rounds 6–7: sc in each st (24)
- (Optional) Stiffen the base with a dab of hot glue, as in the video.
- Round 8: (sc 11, inc) twice (26)
- Round 9: sc in each st (26)
- Round 10: sc 6, inc, sc 12, inc, sc 6 (28)
- Rounds 11-12: sc in each st (28)
- To finish, work FLO (1 sc in each st around) for raised rim.

Decorate bucket with embroidered/painted lines with black and brown for “handle/aging” effect.
Tie
With Red:
- Ch 4, turn.
- Row 1: sc 3, ch 1, turn.
- Row 2: inc, sc 1, inc (5), ch 1, turn.
- Row 3: inc, sc 3, inc (7), ch 1, turn.
- Rows 4-5: sc in each st.
- Row 6: dec, sc 3, dec (5), ch 1, turn.
- Row 7: dec, dec (3), ch 1, turn.
- Row 8: dec (1), finish off.
Add yellow French knots or sew on small yellow balls for polka dots, and embroider/paint black lines as tie detail.
Assembly
- Sew head to body by fitting neck piece into opening of head.
- Insert and sew large and small eyes. Add black dots to center with permanent marker or embroidery.
- Add mouth and nostril details with embroidery or paint.
- Pin and sew arms to shoulders.
- Attach bucket at the side or to hand, stuff as necessary.
- Stitch or glue tie under head.
- Stitch or glue on brain accent (optional).
- Blush cheeks for finishing touch.
- Embroider or paint any stitching scars, stitches, or marks as desired for zombie effect.
Conclusion
You have finished your adorable Halloween Zombie amigurumi!
- The pattern allows for customization with “brain out” or not, and details can be painted or embroidered to taste.
- The bucket, tie, and facial details give your zombie unique character—perfect for Halloween décor or gifting.
Pattern Corrections
- If stitch counts seem off, ensure increases and decreases are distributed evenly.
- Adjust body or head length as needed for proportions.
- For facial expressions and brain accent, refer to transcript for freeform attachment and creativity.
Tips
- Use stitch markers to track rounds and facial feature placement.
- For a sturdier toy, always sew rather than glue pieces.
- Use embroidery floss or thin yarn for tiny face details.
- Stiffen bucket base with a dab of glue as shown for stability.
- Adjust eye size/placement for maximum “cute or scary” effect.