
Chic Crochet Hygienic Kit Jar Cover Pattern for Neat Storage
Organize essentials beautifully with the Free Crochet Hygienic Kit Jar Cover Pattern, a reusable storage idea that keeps jars neat and stylish
Organizing small essentials has always been a thoughtful way to maintain both cleanliness and charm within a living space. A simple jar, often overlooked, can become a useful storage piece when given a touch of handmade detail. The Free Crochet Hygienic Kit Jar Cover Pattern offers a practical yet graceful way to dress up ordinary jars, turning them into attractive holders for personal care items such as cotton balls, earbuds, or travel toiletries.
Modern Crochet Hygienic Kit Jar Cover Pattern for Home Spaces

This pattern focuses on neat stitches that shape perfectly around the jar, ensuring a snug fit while adding a soft texture that looks inviting on shelves or countertops. The flexibility of the project allows it to be adjusted for various jar sizes, making it suitable for bathrooms, bedrooms, or even office desks. Its reusable nature not only supports sustainability but also provides an elegant alternative to disposable storage.
By working in easy rounds, the project remains approachable for different skill levels, offering a steady rhythm that results in both satisfaction and usefulness. Once complete, the octopus enhances the overall look of hygienic kits while keeping items tidy and accessible. The Free Crochet Hygienic Kit Jar Cover Pattern proves that practical storage can carry beauty, charm, and long-lasting value.

Special Features
- Eco-Friendly: Recycles mayonnaise jars, making it a sustainable and creative upcycling project.
- Practical and Decorative: The jar cover is both functional and stylish, with the flexibility to match any theme or color palette.
- Customizable: Use the colors and decorations of your choice to create unique pieces tailored to your preferences.
Level of Difficulty
The project is great for beginner to intermediate crocheters. It requires knowledge of basic crochet techniques such as magic rings, double crochets, and slip stitches. While clear instructions are provided, attention to detail is needed for the shaping and finishing steps.
Step-by-Step Instructions
Step 1: Gather Materials
You’ll need the following materials:
- Silk Thread: Two colors of your choice (e.g., pink and purple, texture 288). You can substitute with other threads like Anne.
- Crochet Hook: Size 1.75 mm.
- Recycled Mayonnaise Jar: 250g jar with the lid. Two jars are needed to complete the set.
- Silicone or Elastic String: Used for securing the crochet cover.
- Pearl Beads: Size 8, for embellishments.
- Universal Glue or Hot Glue: For attaching decorations.
- Lighter: To seal thread ends.
- Scissors: To trim threads.
- Appliqué or Decorative Ribbon: For final touches.
Step 2: Start the Base Cover
- Create a Magic Ring: Using the purple thread, form a magic ring and secure it with a slip knot.
- First Round: Chain 3 stitches (counts as the first double crochet). Add 14 additional double crochets inside the ring (total of 15 stitches).
- Tighten and Join: Pull the ring tight and join the last stitch to the third chain using a slip stitch.

Step 3: Add Rounds with Increases
- Second Round:
- Chain 3 to begin.
- Work an increase (2 double crochets) into each base stitch from the first round.
- Slip stitch to join.
- Third Round:
- Chain 3 to start.
- Alternate between 1 double crochet in the first stitch and an increase in the next stitch.
- Repeat this pattern around the circle.
- Join with a slip stitch.
- Check the diameter of the base. If using a larger jar, you can add more rounds, increasing based on the pattern (e.g., increase every third stitch in the next round).


Step 4: Begin Vertical Rows (Jar Body)
- Transition Row: For the next row, work double crochet stitches, but insert the hook into only the back loop of each base stitch. This creates the vertical edge for the jar.
- Build Height:
- Chain 3 at the start of each row, and work one double crochet into every base stitch.
- Continue until you complete 9 rows to cover the height of the jar.
- Secure with Silicone/Elastic String:
- Insert the silicone string at the top edge of the jar cover.
- Work a round of single crochet stitches to secure the string in place.
Step 5: Add the Crab Stitch Border
- Switch to a pink thread for the border.
- Work crab stitches (reverse single crochets) along the top edge of the jar cover.
- Insert the hook into the previous stitch, yarn over, pull through, and complete the single crochet.
- Continue around the edge to give the cover a polished, decorative finish.
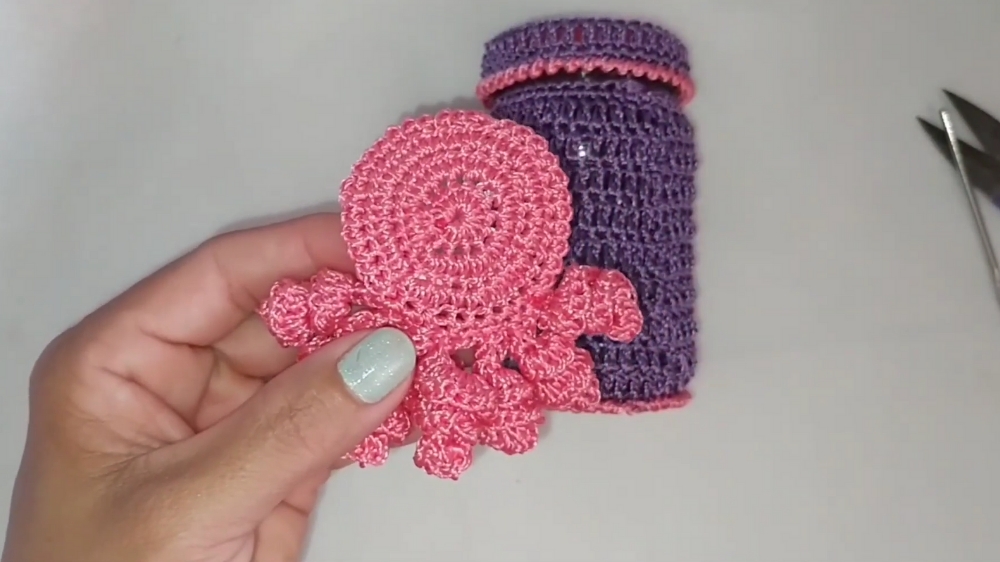
Step 6: Create the Lid Cover
- Repeat Base Steps: Follow the same steps used to create the jar cover’s base (three rounds with increases).
- Add Vertical Rows:
- For the vertical sides of the lid, create one row of single crochet.
- Follow with a row of double crochet, working into only the back loop.
- Alternate rows until the lid fits snugly.
Step 7: Final Touches
- Work another row of crab stitches around the edge of the lid cover for a cohesive finish.
- Attach Embellishments: Use universal glue or hot glue to attach pearl beads, appliqués, or a decorative ribbon at the seam.
- Secure Lid:
- Apply a thin layer of glue to the top of the lid and center the crochet piece securely.
- Alternatively, sew the cover to ensure it stays in place.
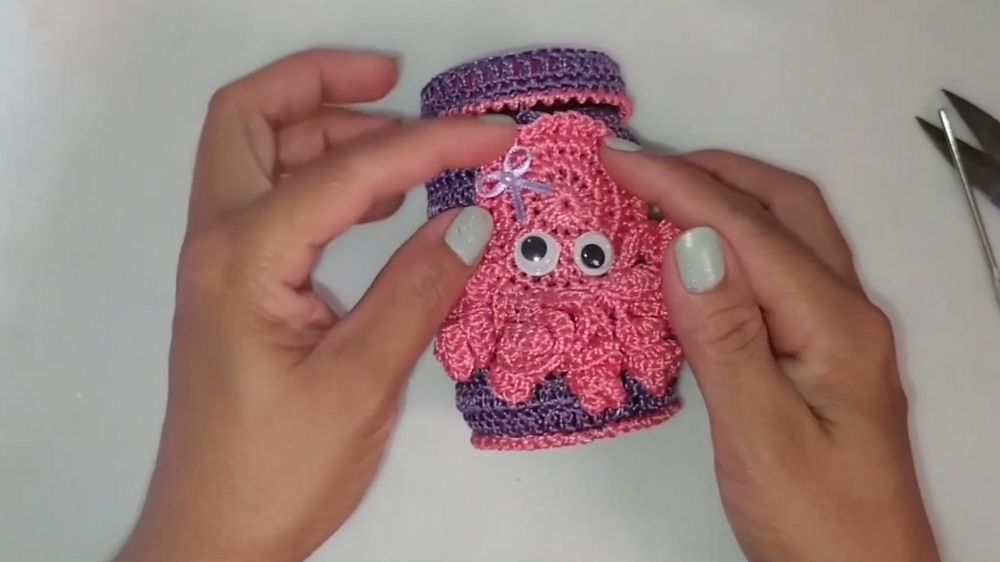
Tutor's Suggestions
- Color Choices: Customize your project by using thread colors that match the recipient’s room or personal preferences.
- Alternative Materials: If you prefer a matte finish, consider using cotton threads instead of silk threads for a different texture and look.
- Reuse and Recycle: This project is a perfect example of turning waste into something both functional and beautiful.
- Experiment with Sizes: Larger jars can be used to create additional pieces for a complete set, like a cotton swab holder or storage for other small items.
Uses
- Hygiene Kits: Perfect for storing personal items like cotton pads, earbuds, or small toiletries.
- Decorative Pieces: Adds a chic, handmade touch to bathrooms, bedrooms, or vanity areas.
- Gifting: Customizable, functional, and affordable gifts for friends and loved ones.
- Sell for Extra Income: These eco-friendly crafts are an attractive option for selling at fairs or online.
Tip
Pro Tip: Use a flexible and strong string like silicone for the top of the jar cover. This ensures the cover is snug but easy to remove for cleaning.
Conclusion
This crochet hygiene kit pattern is an excellent project for those looking to combine eco-friendliness, creativity, and practicality. Perfect for beginner and intermediate crocheters, this project allows you to upcycle jars, creating a useful product that’s both beautiful and customizable.