
Free Crochet Giraffe Pacifier Holder Pattern Using Can Seal
Keep pacifiers off the floor in style with this charming Crochet Giraffe Pacifier Holder Pattern, made with seal for safety, ease, and lasting comfort.
Sometimes, it’s the smallest solutions that bring the biggest relief. One mother shared how her baby’s pacifier would constantly fall to the floor, until a handmade crochet giraffe pacifier holder became the silent hero of the nursery. That tiny giraffe, cheerful and lightweight, stayed close to the baby and kept the pacifier right where it was needed. The idea wasn’t just cute, it was incredibly useful. This holder isn’t just a novelty; it helps minimize germs, prevent losses, and keep babies entertained with a soft, familiar face.
Adorable Free Crochet Giraffe Pacifier Holder For Everyday Charm
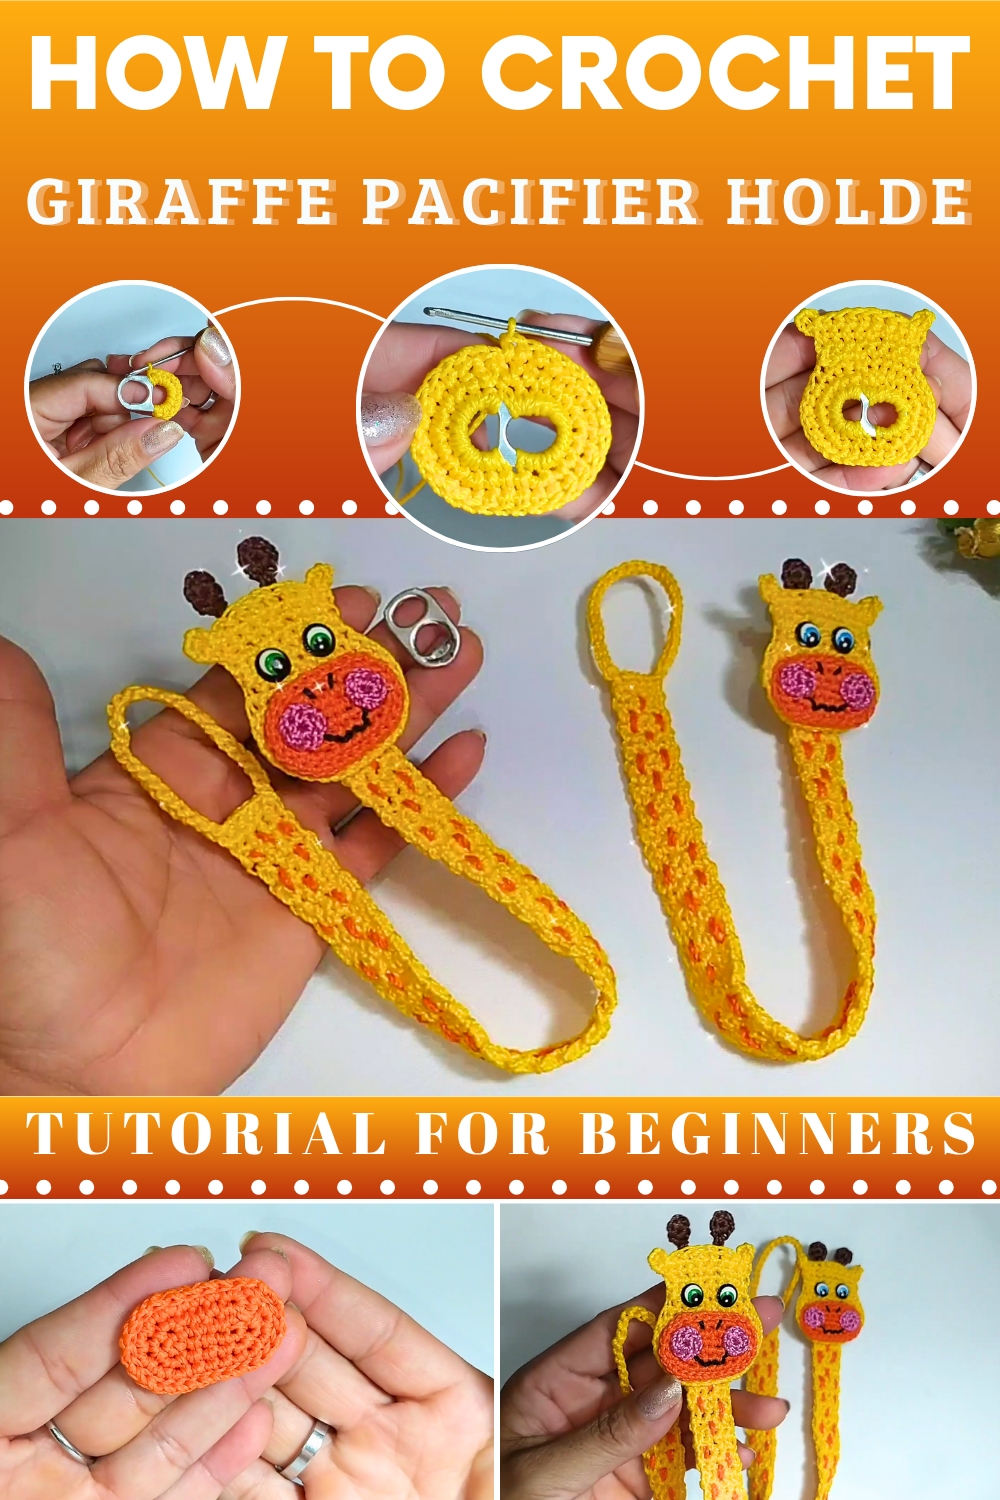
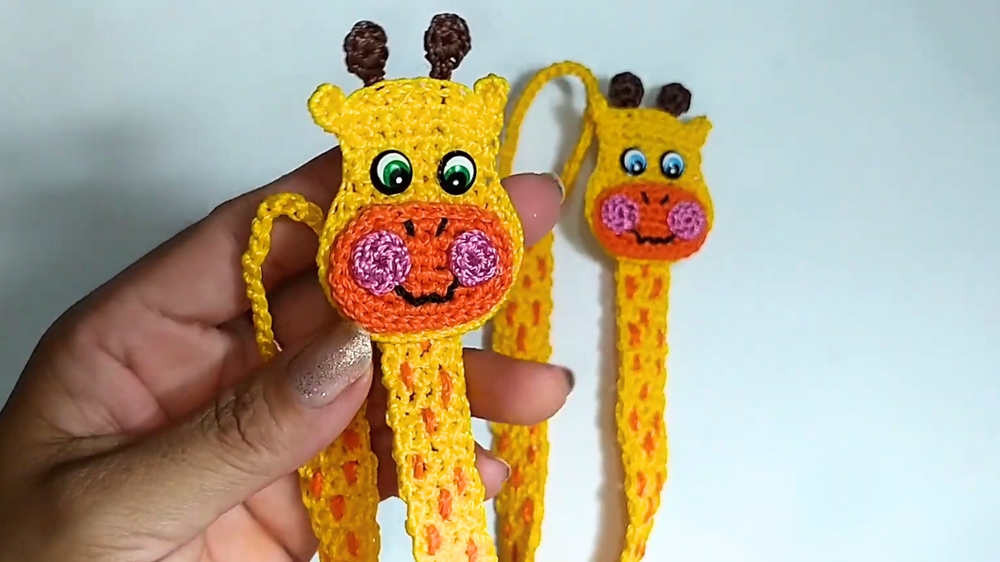
The main idea of giraffe pacifier holder behind this pattern is to combine functionality and baby-friendly appeal in a single item. The giraffe acts as both a clip and a soft toy, easy for little hands to hold and charming enough to brighten everyday moments. The secure clip attaches to baby’s clothes or bib, ensuring the pacifier stays clean and within reach. The use of baby-safe yarn adds softness, while the structure remains firm enough to hold its shape with regular use.

Free Crochet Giraffe Pacifier Holder Pattern
Finished Size
Approximately 28 cm (11 inches) in length (excluding the attached pacifier clip). This size ensures ample length to attach to clothing or bags securely while still being safe for children.
Materials Needed
- Yarn:
- Silk thread, Tex 288, 100% polypropylene.
- Colors: Yellow, Brown, and optionally Black/White for eyes.
- Crochet Hook:
- 1.75 mm hook.
- Soda Can Pull Tab:
- Serves as the base for securing the pacifier.
- Eyes:
- Safety eyes (optional), pearls (size 6 mm), or embroidery for child safety.
- Scissors:
- For cutting yarn.
- Tapestry Needle:
- For sewing small parts and adding embroidery details.
- Lighter:
- To seal thread ends for a neat and secure finish.
- Optional: Hot glue gun for securing parts like eyes if not sewn.
Gauge
Gauge is not critical for this project, but using the recommended materials will achieve the best results.
Special Techniques
- Single Crochet (sc):
- Insert hook into stitch, yarn over, pull up a loop, yarn over, draw through both loops on hook.
- Half Double Crochet (hdc):
- Yarn over, insert hook into stitch, yarn over, pull up a loop, yarn over, pull through all loops on hook.
- Magic Circle (MR):
- Form a loop, insert the hook, pull up yarn through the loop to begin, and crochet directly into the circle.
- Invisible Increase/Decrease:
- Work increases or decreases subtly to keep the shape of the design smooth.
Pattern Instructions
Step 1: Preparing the Soda Can Pull Tab
- Preparation:
- Remove any rough edges or burrs from the soda can pull tab to ensure it's safe for use.
- Set it aside for use.
Step 2: Giraffe’s Base Around the Pull Tab
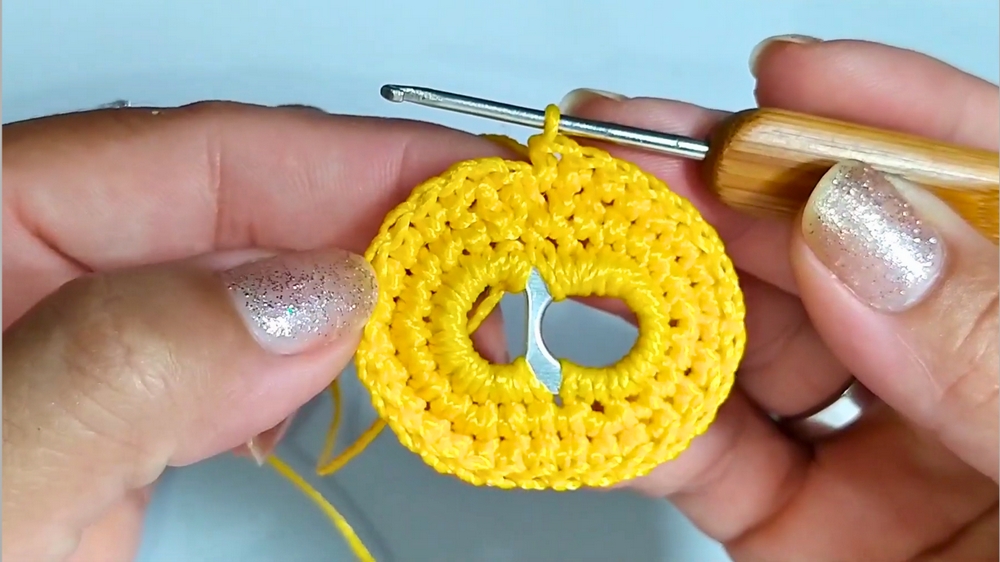
- Start Crocheting the Edge:
- Attach yellow silk thread to the smaller ring of the pull tab.
- Work 12 single crochets (sc) around the smaller ring, spacing them evenly.
- Proceed to the larger section of the pull tab and continue with 12 single crochets, ensuring firm stitches.
- Complete Round 1:
- Slip stitch into the first sc to join the round.
- Chain 2 (acts as the starting half double crochet for the next round).
- Round 2 (Increases):
- Work 1 hdc into the first stitch, hdc into the second stitch, and in the third stitch, make an hdc increase (2 hdc in one stitch). Continue this sequence: [1 hdc, 1 hdc, increase (2 hdc)] all around.
- Finish with a slip stitch to close the round.
- Round 3:
- Work a single crochet (sc) evenly into each stitch from the previous round. Slip stitch to join.
- Form Giraffe’s Head Shape:
- Work sc stitches along the top section of the pull tab to start the giraffe's head.
- Chain 1, sc back across.
- Repeat 3 rows of sc to build the desired height for the giraffe’s face shape.
- Finalize the Head Shape:
- Begin decreasing stitches using invisible decreases on both sides to taper at the top.
- After shaping, fasten off neatly and weave in the ends.

Step 3: Giraffe Ears (Make 2)
- Magic Circle (MR):
- Start with a magic circle and work 6 sc into it. Pull tight and join with a slip stitch.
- Form the Points of the Ears:
- Chain 5, and slip stitch back down the chain to create the ear tip.
- Repeat for the second side of the ear.
- Fasten Off:
- Leave a long tail for attaching the ears to the giraffe's head later.

Step 4: Giraffe Horns (Make 2)
- Magic Circle (MR):
- Work 7 sc into the magic circle. Pull tight and join with a slip stitch.
- Create Horn Shape:
- Chain 5, work 1 sl st in each of the chain stitches, and return to the base.
- Secure with a sl st and fasten off, leaving a tail for sewing.
Step 5: Pacifier Attachment Strap
- Foundation Chain:
- Chain 5 stitches. Work 5 sc across.
- Turn and repeat rows of 5 sc until the strap measures 28 cm (11 inches).
- Attachment Loop:
- After reaching the desired length, chain 30.
- Slip stitch into the start of the chain to form a loop for attaching the pacifier.
- Work slip stitches back across the chain stitches for reinforcement.
- Edging:
- Work a round of slip stitches along the strap edges to create a clean border.
- Fasten off and weave in any loose ends.
Step 6: Assembly
Attach Ears and Horns:
- Sew the ears symmetrically onto the head, slightly below and to the sides of the horns.
Sew the Strap:
- Securely sew the strap to the back of the giraffe’s face at the base of the pull tab to attach the pacifier.
Embroidery and Details:
- Spots:
- Using brown thread, embroider spots across the giraffe’s face and strap. Create random shapes for more character.
- Space them evenly or vary the pattern based on personal preference.
- Eyes and Nose:
- Sew on safety eyes, beads, or embroider closed eyes with black thread.
- Use black or brown thread to embroider small oval nostrils at the base of the head.

Step 7: Final Touches
- Inspect the entire project for loose threads. Knot and secure any ends, hiding them neatly into the design.
- Optionally, add a finishing touch by attaching a small ribbon or bow to the base of the pacifier strap.
Customization Ideas
- Color Options: Use soft pastel colors or bold primary hues for more unique giraffes.
- Add Accessories: Create scarves, hats, or other cute accessories for themed variations (e.g., winter giraffe).
- Patterns: Add stripes or spots along the strap for extra customization.
Conclusion
Your handmade giraffe pacifier clip is complete! This charming accessory is perfect for gifting or personal use. It is practical, durable, and lightweight. With its dual functionality as a cute toy and pacifier holder, it surely adds a personal touch to everyday items for babies.
Tips for Maintaining
- Cleaning: Handwash gently with mild soap and warm water. Do not machine wash.
- Storage: Store in a dry, clean area when not in use.
- Safety: Avoid small detachable parts if intended for babies under 3 years.