
Free Crochet Pencil Amigurumi Pattern That Adds Fun to Any Desk
Whimsical yet practical, this Crochet Pencil Amigurumi Pattern is a fun project that adds charm to desks, gifts, and creative spaces alike.
In a world filled with bulk and bustle, a simple handmade piece can bring a touch of elegance. This piece uses the Free Crochet Pencil Amigurumi Pattern to transform a basic writing tool into a charming miniature that’s both refined and playful. You’ll enjoy guiding your yarn through rounds, shaping the tip and body, and finishing with crisp colour changes to mimic the familiar pencil form—bringing an understated yet memorable accent into your space.
Free Crochet Pencil Amigurumi Pattern Perfect for School Season

Practical Usage & Skill-Building
This pencil amigurumi isn’t just an attractive objet—it serves—whether dangling from a bag as a decorative keychain, perched on a desk as a quirky accessory, or gifted to someone who appreciates subtle handcrafted charm. Meanwhile, the process strengthens vital skills like working in the round, practising neat colour transitions, and finishing smoothly—making it a worthy project for anyone looking to sharpen their technique.

Visual Appeal & Elegant Detail
With its slender form, precise stripe at the ferrule, and softly pointed tip, the finished piece offers a delightful nod to everyday stationery reimagined in yarn. The compact size and clean lines mean it fits seamlessly into minimalist décor, study corners, or creative spaces that value texture and personal touches. The subtle interplay of rigid shape and soft material gives it a refined tactile presence that invites closer inspection.
Mini Pencil Amigurumi Keychain
Materials List
- Yarn: 3–4 mm thick yarn in:
- Pink (eraser)
- Gray (ferrule)
- Mustard Yellow (or any color for the pencil body)
- Beige (wooden tip)
- Black (for lead at tip and facial features, optional)
- Hook: 3.5 mm crochet hook
- Stuffing: Synthetic fiberfill
- Tapestry/Yarn Needle: For sewing and embroidery
- Stitch Marker (optional)
- Small beads or black yarn/thread (for eyes)
- Jump ring or keychain finding (optional, for keychain)
- Scissors
Abbreviations (US Terms)
- MR: Magic ring
- ch: Chain
- hdc: Half double crochet
- sc: Single crochet
- sl st: Slip stitch
- inc: Increase (two stitches [sc or hdc] in same stitch)
- dec: Decrease (stitch two together)
- st/sts: Stitch/Stitches
Special Notes
- The pencil is worked in a continuous spiral unless otherwise noted.
- Use a stitch marker to keep track of rounds.
- Adjust color choice to make colored pencils or regular pencils.
Pattern
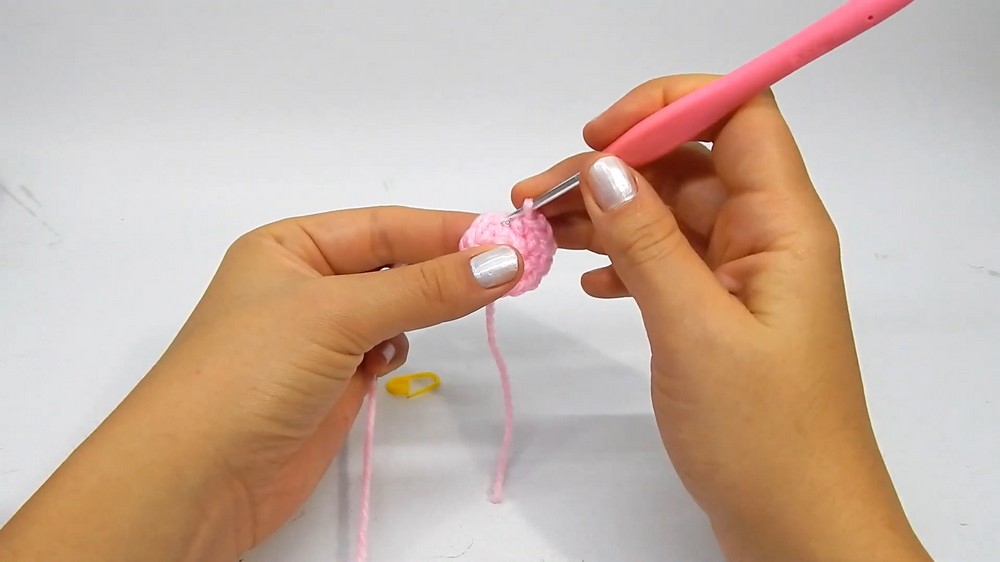
Eraser (Pink)
- MR, ch 1 (does not count as a st).
- Work 6 hdc in MR. (6)
- Pull tail to close ring.
(You will now work in a spiral.)

Round 2:
- Inc in each st around (that is, 2 hdc in each st) (12)
- Mark the first st of this round if desired.
Round 3:
- sc in each st around (12)
Ferrule (Gray)
Change to gray yarn (see tip below for changing colors):
- Join gray: sl st to next st and fasten off pink.
- With gray, ch 1, sc in same st, sc in each st around (12)
- Repeat 1 more round (2 total rounds of gray sc, 12 sts each).

Pencil Body (Yellow or body color)
- Change to yellow (or color of choice):
- Join as before, ch 1, sc in same st, sc around.
- Continue in spiral:
- Work 5 more rounds (6 rounds total in pencil color, 12 sts each).

(Optional—Before Continuing)
Embroider face:
- Use a tapestry needle and black thread or yarn to embroider a simple "V" smile between the second and third rounds from the color change line at the body.
- Attach small beads or embroider French knot eyes above the mouth, or sew on safety eyes.
Wooden Point (Beige)
Change to beige:
- Join beige: ch 1, sc in same st.
- (Start decreases)
- [sc, dec] around (i.e., sc in 1 st, sc2tog over next two); repeat around.
- Stuff with fiberfill before the top narrows.
Next Round:
- sc in each st around (if 8 remaining)
- Next round: Work dec around until just a several sts remain (about 4–6).
- Fasten off, leaving a tail.
Close the Tip
- With a tapestry needle, weave tail through remaining sts and pull to close.
- Weave in end.
Lead Detail
- With black yarn or thread and a yarn needle, embroider or satin stitch over the very tip to replicate the pencil “lead”.
- For colored pencils, use matching color.
Assembly
- Attach key ring: Insert a jump ring or sew a loop at the eraser’s top (through the center or side of the pink section).
- Weave in all yarn ends neatly inside the pencil.

Conclusion
Congratulations! You have made a charming mini pencil amigurumi, perfect for a keychain, backpack charm, or small gift. This project is quick, beginner-friendly, and a great use for colorful yarn scraps.
Pattern Corrections & Tips
- Color changes: To change colors seamlessly, complete the last "yarn over/pull through" of the final stitch in the old color with the new yarn.
- Stitch counts: You should consistently have 12 stitches per round until decreases for the pencil tip.
- Tighter stitches: Keep your gauge tight to prevent stuffing from showing.
- Variations: For colored pencils, swap tip color to red, blue, etc.
Tips:
- Add embroidered cheeks for more cuteness.
- Use safety eyes if making for small children.
- You can make a set in different colors for gifts or classroom tokens.