
Easy Free Crochet Beer Mug Keychain Pattern for Beer Lovers
Pop some charm into your day with Crochet Beer Mug Keychain, a cute handmade accessory perfect for keys, or playful decor.

Learn how to crochet an adorable Beer Mug Keychain with this step-by-step pattern! This quick and easy project is perfect for gifting to a beer lover, a friend, or even as a fun addition to your personal accessories. The design is carefully crocheted to include a mug, a functional handle, and a foamy white top, giving it a realistic yet playful appearance. You can clip this plush mug onto a gym bag, gift it to a friend who loves a cold drink, or keep it on your house keys as a sturdy, easy-to-grab handle.
Free Crochet Beer Mug Keychain Pattern That's So Easy & Fun
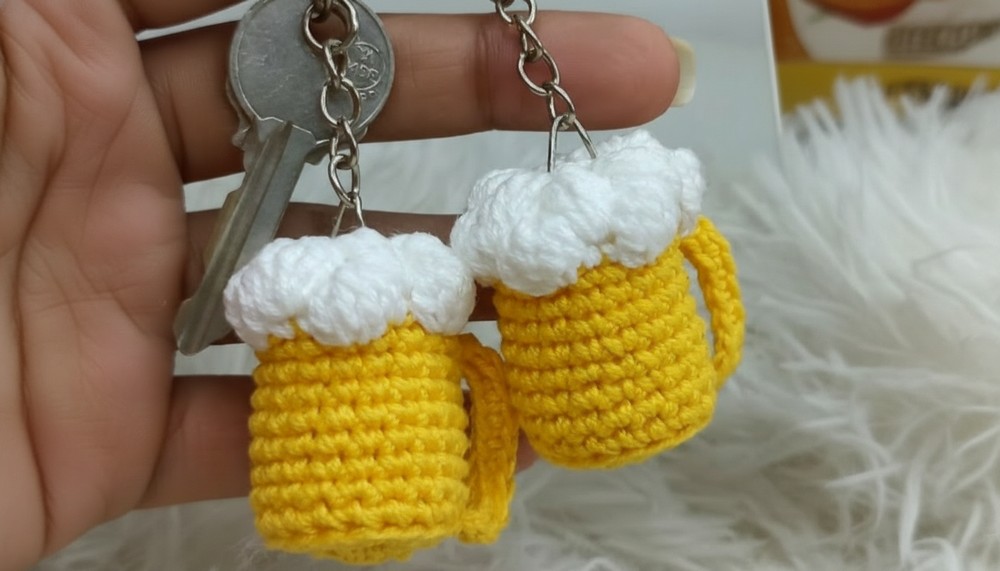
This Mug Keychain features a vibrant golden body and a snowy white top that spills over the brim like real, frothy foam. Its charm with its bumpy "puff stitches" used for the foam, which give the topper a textured, airy appearance that feels great to the touch.
Step-by-Step Crochet Beer Mug Keychain
Special Features
- Charming Keychain Design: A miniature beer mug with realistic foam at the top and a functional handle.
- Quick and Beginner-Friendly: Can be completed in a short amount of time, requiring basic crochet skills.
- Customizable: You can experiment with colors and size depending on the type of yarn and hook used.
- Practical Use: Perfect as a keychain or bag charm for any beer lover!
Materials Needed
- Yarn:
- White yarn (for the foam).
- Yellow/amber yarn (for the mug).
- Cotton or acrylic yarn with a thickness of around 1 mm (or as preferred, adjust hook size accordingly).
- Crochet Hook: 2 mm.
- Stuffing: Synthetic fiberfill or cotton stuffing.
- Keyring: To attach the end product as a keychain.
- Yarn Needle: For sewing and attaching details.
- Scissors: To cut yarn and trim excess ends.
Step-by-Step Pattern
Base of the Mug
Step 1: Magic Ring and Round 1
- Create a magic ring: Place the shorter yarn tail inside your palm, wrap the yarn around your fingers, and create a loop.
- Crochet 6 single crochets (SC) into the magic ring. Pull the tail to tighten.
- Total stitches: 6 SC.
- Close the round with a slip stitch (SLST) into the first SC.

Step 2: Round 2 (Increase)
- Chain 1 to begin the round.
- Work 2 SC into each stitch (increase in every stitch).
- Total stitches: 12 SC.
- Close the round with a slip stitch.
Step 3: Round 3 (Increase Round)
- Chain 1, and work:
- 2 SC in the first stitch (increase), 1 SC in the next stitch. Repeat around.
- Total stitches: 18 SC.
- Connect with a slip stitch into the first SC.
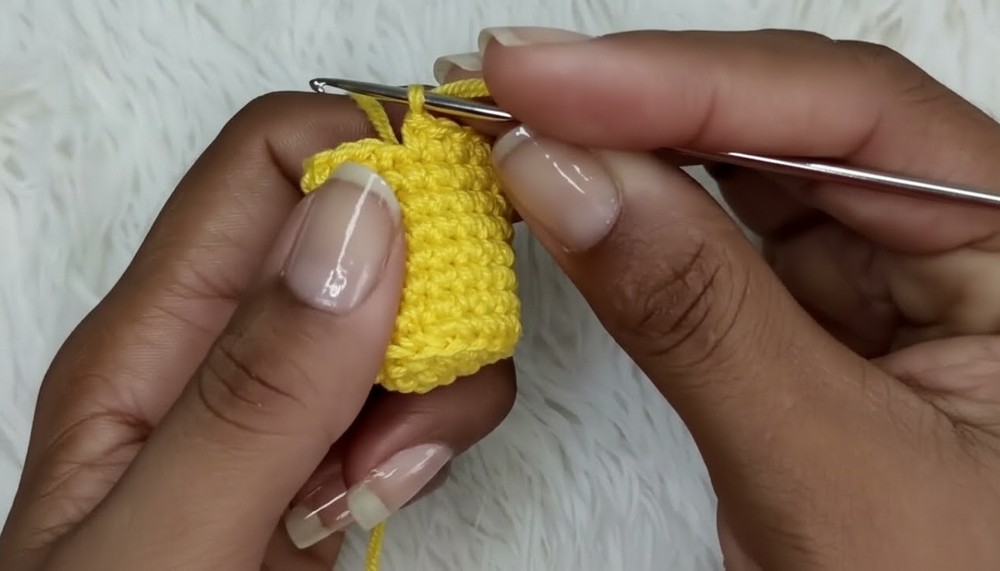
Step 4: Rounds 4 to 11 (No Increase)
- Chain 1 to start each round.
- Make 1 SC in each stitch around. (Work through back loops only for Round 4 to define the base.)
- Total stitches: 18 SC in each round.
- Repeat this pattern for 8 rounds to form the mug's body.
- Fasten off and leave a long tail for sewing.
Mug Handle
Step 1: Create the Base
- Leave a long tail for sewing.
- Chain 10 stitches to form the base chain.
Step 2: Work Single Crochet
- Turn the chain, start working single crochets along the chain: Insert your hook into the back loop of each chain (back bump). This will create a polished edge:
- Total: 9 SC.
- Chain 1, fasten off, leaving a long tail for sewing.
Step 3: Attach the Handle
- Position the handle on the side of the mug, forming a "C" shape.
- Use the long yarn tails to attach the handle:
- Thread one tail through the top of the mug and knot securely.
- Thread the other tail through the bottom of the mug and knot securely.
- Optionally, sew the handle for extra security.

Foam on Top of the Mug
Step 1: Attach the White Yarn
- Rejoin the yarn at the top edge of the mug, using a slip stitch in any stitch.
Step 2: Foam Texture (Puff Stitches)
- Chain 1 to begin.
- Alternate between these stitches in the next 2 stitches:
- 2 SC in one stitch, 1 SC in the next stitch (for stability).
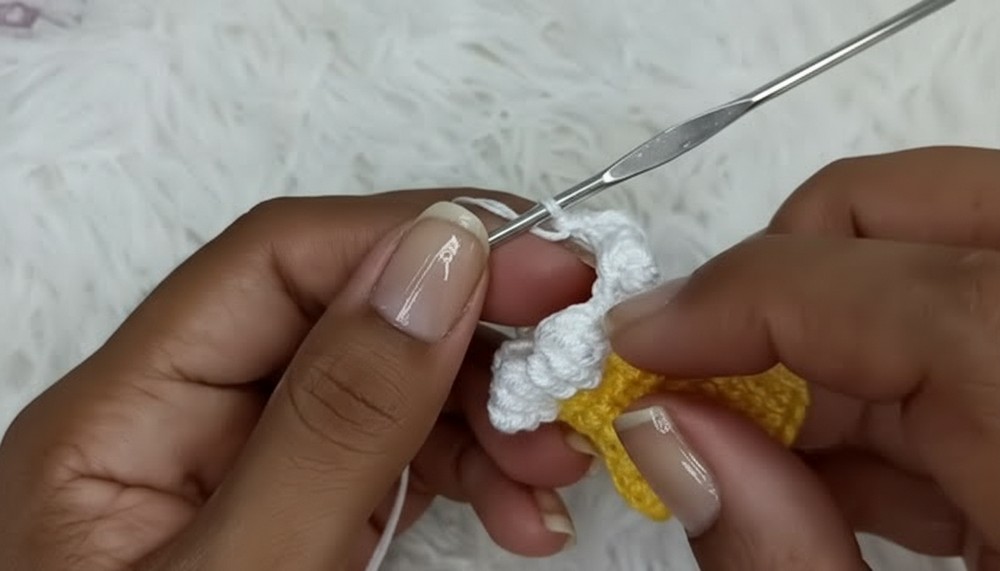
- For the bubbly foam effect, work 4 puff stitches in one stitch:
- Yarn over (YO) twice, insert hook into the stitch, pull up a loop, YO pull through 2 loops (repeat).
- Repeat for a total of 4 puff stitches, then pull yarn through all loops and chain to secure.
- Make 2 SC in the next stitch to balance, then create another puff in the next stitch.
- Keep alternating this pattern around the top edge for a bubbly foam effect!
Note: You should have 7 foam clusters at the end of this row.
Finishing the Foam
- Fill the mug with synthetic stuffing before closing.
- Continue a second row of foam following the same process, but place puffs in alternating spaces compared to the previous row.
- Secure the yarn and fasten off.

Assembly
Attach The Keyring:
- Sew or knot a small loop at the mug’s center handle using yellow yarn.
- Attach the keyring to this loop securely.

Tutor Suggestions
- Yarn Choice: Use cotton yarn for a well-defined texture, or acrylic yarn for a stretchier finish.
- Proper Stuffing: Don’t overstuff to maintain the mug’s shape while keeping it lightweight.
- Experiment with Colors: For a fun twist, use green for a matcha latte effect or blue for a novelty look!
Uses
- Perfect Gift: Ideal for Father's Day, birthdays, or friends who love beer!
- Decor: Use it as a bag charm or a quirky addition to your keys.
- Seasonal Craft: A great mini-project during Oktoberfest or beer-themed parties.
Tip for Success
Take your time while working puff stitches, ensuring they’re evenly spaced for a neat and foamy finish. Use pins to secure the handle before sewing for perfect placement.
Conclusion
Congratulations on completing your beer mug keychain! This fun, practical, and beginner-friendly project combines creativity with functionality. Share your creations with friends, or gift them to someone special — they are sure to bring a smile.