
Bright Crochet Carrot Fridge Magnet to Liven Any Door
Cheer your kitchen décor with this Free Crochet Carrot Fridge Magnet Pattern, ideal for holding notes while adding vibrant charm to any magnetic space.
Busy kitchens often hold the most delightful surprises, from the aroma of fresh meals to the little details that brighten a refrigerator door. A playful touch shaped like a crisp carrot can add both charm and purpose to that daily setting. The Free Crochet Carrot Fridge Magnet Pattern captures this cheerful idea in a fun accessory that keeps grocery lists, family notes, or children’s artwork right where they belong.
How to Crochet Carrot Fridge Magnet Pattern Step by Step

This small project requires only a few scraps of yarn, making it a smart way to use leftovers while bringing vibrant color to your kitchen. Its bright orange body and leafy green top provide a lively accent that stands out against stainless steel or white appliances. Lightweight yet strong, it grips magnetic surfaces securely without leaving marks, offering both style and function.
Ideal as a quick gift or a personal treat, the magnet suits a variety of spaces beyond the kitchen think office boards, lockers, or any spot needing a dash of personality. Simple steps allow both beginners and experienced enthusiasts to enjoy a satisfying result in minimal time. With its fresh look and practical purpose, this cheerful carrot magnet turns everyday organization into a little moment of joy.
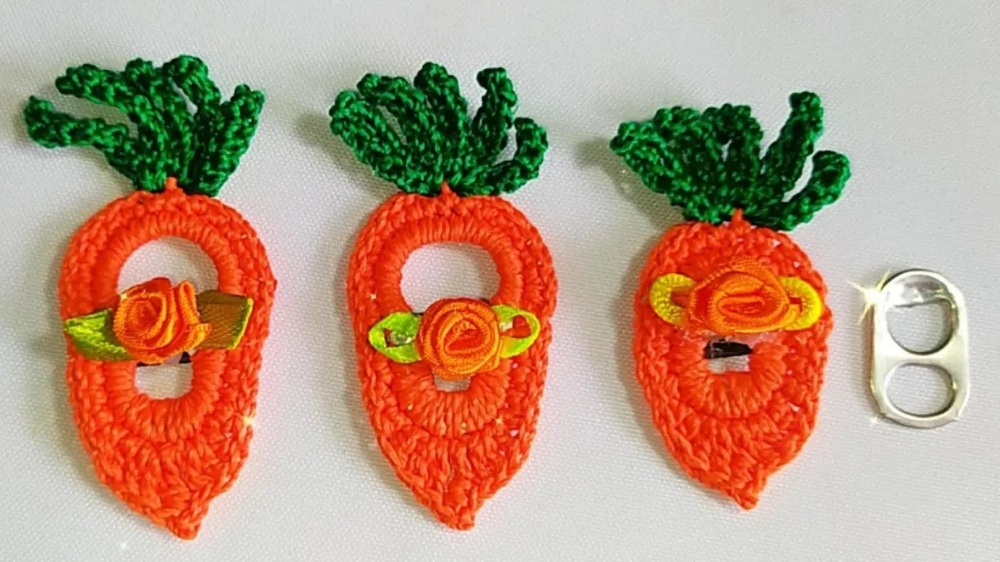
Materials Needed
- Base:
- Sardine can seal (or soda can pull-ring for a smaller version).
- Threads:
- Orange thread (to form the carrot).
- Green thread (for the leaves).
- Tools:
- Crochet hook (1.75 mm).
- Sewing needle.
- Scissors.
- Lighter (to seal thread ends).
- Additional Items:
- Magnet stone (for the back of the carrot).
- Rococo flower (optional decorative detail).
- Glue: To attach the magnet and rococo flower securely.
Step-by-Step Instructions
Step 1: Covering the Seal with Crochet (Orange Thread)
- Insert your crochet hook into the sardine can seal and begin with a slip stitch to secure the thread.
- Crochet single crochet stitches all around the seal.
- Make sure the stitches are tight and evenly spaced to completely cover the metal.
- Adjust the stitches as you go to ensure no gaps are visible.
- Once the entire seal is covered, finish with a slip stitch, cut the thread, and seal the ends using a lighter.

Step 2: Adding the Second Row of Orange Crochet
- Attach the orange thread back to the base of the crochet-covered seal.
- Work a second row of single crochet stitches along the existing stitches.
- Stop after completing the row and secure with a slip stitch.

Step 3: Shaping the Carrot Bottom (Orange Thread)
- Using orange thread, identify the middle section of the crochet base.
- Work a tapered design:
- Start with 7 stitches in the middle of the base.
- For the first stitch, create a half double crochet.
- In the next stitch, create a double crochet, followed by two double crochets in the same space.
- Create a triple crochet with a small peak on top (chain 2, secure with a single crochet, then return downward).
- Mirror the steps on the other side to create symmetry in the carrot shape.
- Finish the tapered bottom at the end of the section with a slip stitch, trim the thread, and seal it.
Step 4: Creating the Leaves (Green Thread)
- Attach the green thread to the top of the carrot’s crochet base.
- To form the leaf stems:
- Chain 7 stitches, then work single crochets back along the chain.
- Secure to the base with a slip stitch.
- Repeat the process five more times to create a total of 6 leaf stems.
- Each stem is spaced evenly across the top of the carrot.
- Cut and seal the thread after completing the leaves.

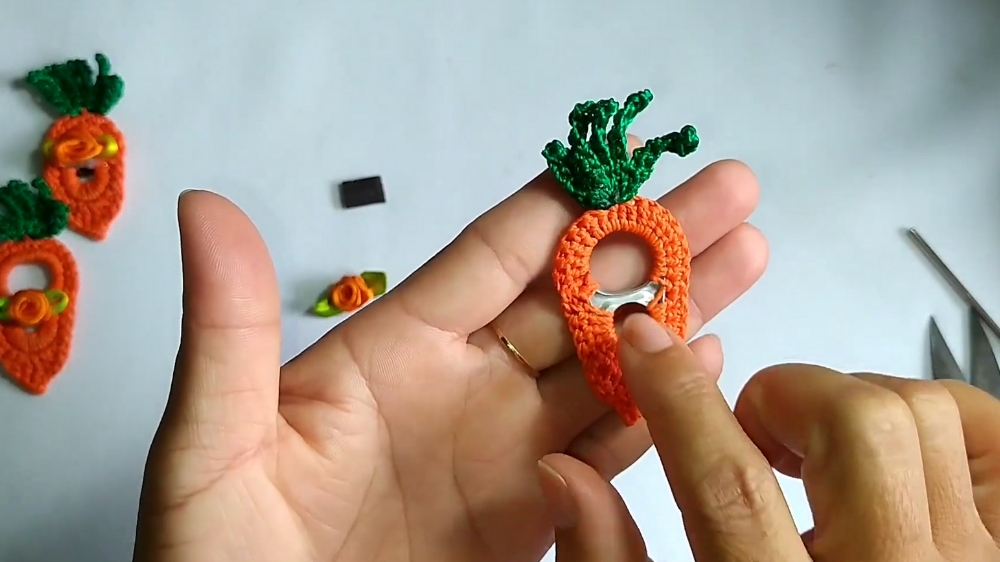
Step 5: Adding Finishing Touches
- Attach the Rococo Flower:
- Use glue to attach a decorative rococo flower to the top of the carrot (optional).
- Glue the Magnet:
- Flip the carrot over and attach the magnet stone securely to the back with glue.
Special Features
- Eco-Friendly Crafting: This tutorial repurposes everyday items, such as sardine can seals, making it an environmentally friendly project.
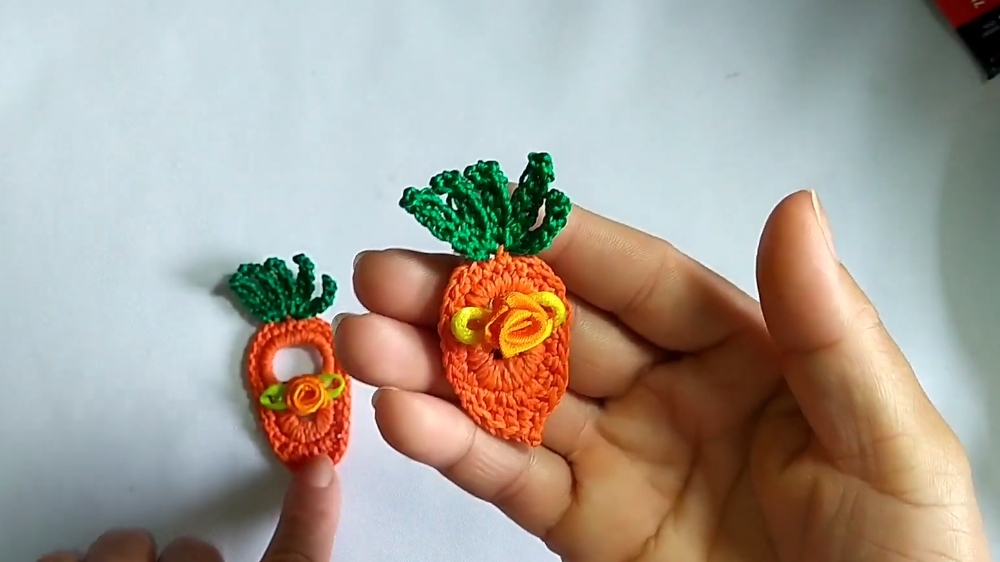
- Adaptable Sizes: By swapping the sardine can seal with a soda can pull-ring, the project can easily be resized.
- Simple Yet Attractive Design: The carrot design is minimalist yet eye-catching, with added versatility as a keychain or fridge magnet.
- Affordable Materials: Using leftover threads and household items keeps the project cost-effective.
Level of Difficulty
- Beginner to Intermediate:
- The design is simple and involves basic crochet techniques like single crochets, double crochets, and slip stitches.
- Some precision is needed to create the tapered carrot shape and leafy top. Intermediate crafters will find the project straightforward, while beginners may require a bit of practice.
Tutor’s Suggestions
- On Materials:
- If you don’t have a sardine can seal, a soda can seal works just as well. However, the final product will be slightly smaller.
- Customization:
- Experiment with different thread colors or add unique embellishments, like rhinestones or sequins, for a personalized touch.
- For a Neat Finish:
- Be sure to adjust your crochet stitches tightly over the seal to ensure it’s fully covered and has a polished appearance.
Uses
- Fridge Magnet: The carrot design is perfect for adding fun and personality to your kitchen decor.
- Keychain Alternative: Swap the magnet for a keyring to create a quirky accessory.
- Gift Idea: A handmade carrot magnet makes for a thoughtful, creative gift.
- Resale Potential: Sell finished products at craft fairs or online for an affordable and eco-friendly handmade item.
Conclusion
This crochet carrot fridge magnet is a delightful and eco-conscious project that transforms everyday household waste into something useful and beautiful. The tutorial provides a perfect balance between creativity and functionality. Whether you’re looking to decorate your fridge, create handmade gifts, or explore new crochet techniques, this project is both enjoyable and rewarding.
Pro Tip
If you’re working with thinner materials, such as soda can seals, reduce the number of stitches slightly in each section to avoid overfilling the design. This will ensure the final product remains proportionate and polished.