
Free Crochet Cappuccino Assassin Pattern With Dark-Cute Energy
Bold coffee humor shines with this Crochet Cappuccino Assassin Pattern, blending café style with quirky character for eye catching decor.

Fresh-Brewed Free Crochet Cappuccino Assassin Pattern With Killer Style
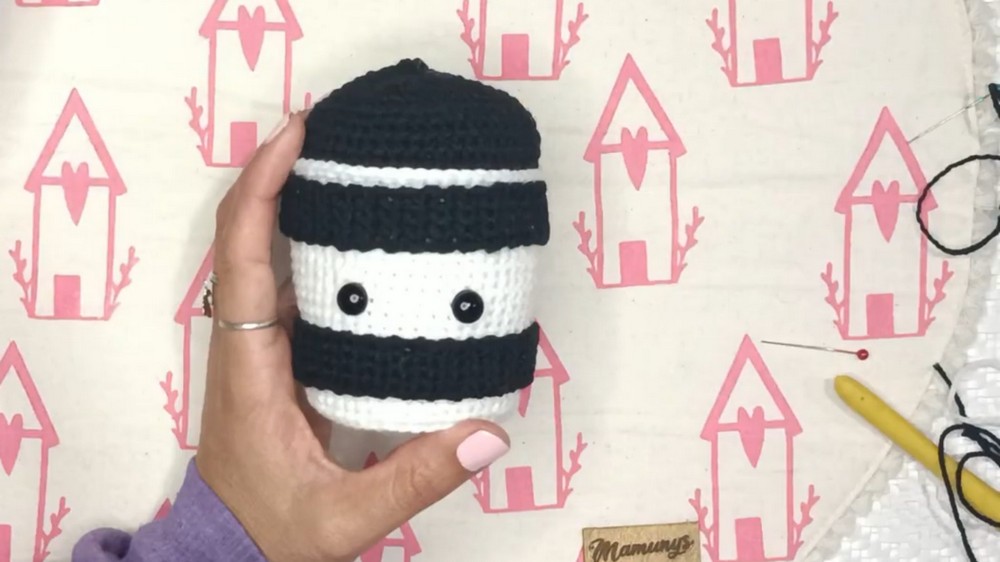
Adventurous fans of amigurumi will find this project a delightful blend of humor and skill, transforming a simple beverage concept into a bold warrior. This unique design stands out as a brilliant gift for coffee lovers and anime enthusiasts alike, offering a finished figure that stands about 16 cm tall. One of the best features is the sturdy flat base, which uses a hidden plastic or cardboard insert to keep the cup perfectly balanced on any shelf. It serves as a fantastic conversation starter, bringing a sense of whimsy and personality to your home or office decor.

Materials
- Yarn: Fine-weight cashmere or equivalent in these colors:
- White (cup/body)
- Black (details, limbs, band, swords, straw)
- Light gray (headband)
- 10 mm safety eyes
- 2.5 mm crochet hook
- Toy stuffing (silicone fiberfill or polyester)
- Small piece of acetate, cardboard, or stiff plastic (for the cup base)
- Tapestry needle (for assembly and embroidery)
- Scissors
- Stitch marker (or contrasting scrap yarn)
- Liquid silicone glue (for attaching base and some details; optional)
Key Abbreviations (US Terms)
| Abbreviation | Meaning |
|---|---|
| MR | Magic ring |
| ch | Chain |
| sc | Single crochet |
| inc | Increase (2 sc in same st) |
| dec | Decrease (sc2tog) |
| BLO | Back loop only |
| sl st | Slip stitch |
| hdc | Half double crochet |
| dc | Double crochet |
| st(s) | Stitch(es) |
| FO | Fasten off |
Special Notes
- Work in continuous rounds unless otherwise stated (mark the first st of each round).
- Stuff pieces firmly but not overfilled.
- All embroidery is optional and for decorative details.
- Safety eyes are not suitable for children under 3; embroider eyes if safety is a concern.
- Use a firm/stiff base (acetate/cardboard) to stabilize the cup.
Pattern
BODY/CUP (White)
- MR, 6 sc into ring. Pull to close.
- Rnd 2: inc in each st around (12)
- Rnd 3: (sc in next st, inc) x6 (18)
- Rnd 4: (sc in next 2 sts, inc) x6 (24)
- Rnd 5: (sc in next 3 sts, inc) x6 (30)
- Rnd 6: (sc in next 4 sts, inc) x6 (36)
- Rnd 7: (sc in next 5 sts, inc) x6 (42)
- Rnd 8: (sc in next 6 sts, inc) x6 (48)
- Rnd 9: BLO, sc around (48)
- Rnds 10–19: sc in each st around (48, 10 rounds)
- Cut and glue a piece of acetate or cardboard to fit as the base inside.
- Rnd 20: (15 sc, inc) x3 (51)
- Rnds 21–27: sc in each st around (51, 7 rounds)
- Change to Black: (close last st with black)
- Rnd 28: BLO, sc around (51)
- Rnds 29–31: sc in each st around (51, 3 rounds)
- Rnd 32: BLO, (15 sc, dec) x3 (48)
- Rnd 33: (sc in next 6 sts, dec) x6 (42)
- Rnd 34: (5 sc, dec) x6 (36)
- Insert safety eyes between rounds 18–19, spaced by 4 visible sts; add washers.
- Rnd 35: (2 sc, dec, 4 sc, dec) x5 (30)
- Rnd 36: (3 sc, dec) x6 (24)
- Stuff firmly.
- Rnd 37: (sc, dec, 2 sc, dec) x5 + 1 sc (18)
- Rnd 38: (sc, dec) x6 (12)
- Add more stuffing.
- Rnd 39: dec x6 (6)
- FO, close hole and weave in end.


BODY STRAPS (Make 2, Black)
- ch 5
- Row 1: sc in 2nd ch from hook and across (4)
- ch 1, turn.
- Rows 2–57: sc across (4); ch 1, turn at each row (57 total).
- Check against body’s circumference before FO.
- FO, leave long tail for sewing.
For the shorter bottom strap, make slightly fewer rows as the bottom is narrower.

ARMS (Make 2, Black)
- MR, 6 sc into ring.
- Rnd 2: inc in each st (12)
- Rnds 3–6: sc in each st (12, 4 rounds)
- Rnd 7: (sc, dec) x4 (8)
- Rnds 8–12: sc in each st (8, 5 rounds)
- sl st to join, ch 1, FO, leaving long tail for sewing.
- Stuff lightly and sew shut with 4 sts. Attach to body on side strips.
LEGS (Make 2, Black)
- ch 6
- Row 1: sc in 2nd ch from hook, sc in next 3 (4), 3 sc in last ch.
- Rotate, sc in other side of chain (3), inc in last st. (12)
- Rnd 2: inc, 3 sc, inc, 3 sc, 3 inc, 3 sc, 2 inc (18)
- Rnd 3: (sc, inc), 3 sc, (sc, inc), 3 sc, [(sc, inc) x3], 3 sc, (sc, inc) x2 (24)
- Rnd 4: 2 sc, inc, 3 sc, 2 sc, inc, 2 sc, inc, 2 sc, (sc, inc) x2, 3 sc, 2 sc, inc, 2 sc, inc (30)
- Rnd 5: BLO, sc in each st (30)
- Rnd 6: sc around as normal in both loops (30)
- Rnd 7: 6 sc, 6 dec, 12 sc (24)
- Rnd 8: 4 sc, 4 dec, 12 sc (20)
- Rnd 9: 3 sc, 4 dec, 9 sc (16)
- Rnd 10: (sc, 4 dec), 9 sc (13)
- Rnd 11: sc, 3 dec (BLO if possible for easier closure), sc in remaining (9)
- Rnds 12–16: sc in each st across (9)
- Stuff lightly and close; sew to body base sides.
HEADBAND (Light Gray)
- ch 4
- Row 1: sc in 2nd ch from hook and across (3), ch 1, turn.
- Rows 2–10: sc in each st (3), ch 1, turn.
- FO, leave tail for sewing.
Headband Knot (Black)
- ch 12
- In 3rd ch from hook: dc, next ch: hdc, next 8 ch: sc
- ch 12, in 3rd ch from hook: dc, next ch: hdc, next 8 ch: sc
- sl st to join, FO, leave tail for sewing knot to headband.
SWORD (Make 2)
Sword Handle (Black)
- ch 6
- sc in 2nd ch and across (5). FO, leave tail for assembly.
Sword Blade (Light Gray, then Black for tip)
- ch 13
- Row 1: sl st in 2nd ch, sc in next, 10 hdc in next 10 ch.
- In last st, join black and ch 5
- sc in 2nd ch and across (4).
- sl st in last gray st to anchor, FO, leave tail for sewing.
STRAW
- Black Yarn: MR, 6 sc in ring.
- Rnd 2: (sc, inc) x3 (9)
- Rnds 3–5: sc around (9)
- Rnd 6: (sc, dec) x3 (6)
- Rnds 7–8: sc around (6)
- FO, stuff lightly, sew to top side of cup.
ASSEMBLY
- Use tapestry needle to close top of cappuccino body.
- Attach acetate/cardboard base to inside bottom of cup with glue.
- Sew both black straps around cup (one bottom, one near top).
- Stuff and close arms, sew to sides onto straps.
- Stuff and close legs, sew to bottom sides of cup.
- Attach headband and knot in a straight line above the eyes.
- Embroider the Naruto symbol onto the gray headband part.
- Attach sword to each hand (sew or use a dab of glue for extra security).
- Sew straw to top.
- Using white yarn, embroider eye highlights and accent eyebrows if desired.
- Weave in all loose ends securely.
Conclusion
Your Killer Cappuccino amigurumi is complete! This creative pattern combines kawaii style with fun pop-culture references, making a perfect display, gift, or collector’s plush. Adapt colors or accessories for your own unique character!
Pattern Correction & Tips
- Straps may be made slightly longer or shorter to fit your cup’s body.
- Be sure to add safety eyes before stuffing and closing the top.
- Acetate/cardboard base is optional but adds great structure.
- Use a bright workspace for sewing black pieces and eyes—black is hard to see!
- If making for a small child, embroider the eyes instead of using safety eyes.
- Tip: Use a tapestry needle and strong thread for best control when assembling pieces. Customize accessories (e.g., sword, headband emblem) for favorite anime crossovers!