
Adorable Free Crochet Octopus Amigurumi Pattern With Tentacles
Bring ocean charm to life with the Free Crochet Octopus Amigurumi Pattern, a cute, soft, and playful accessory perfect for gifts or decor today
Beneath the gentle waves, the octopus glides with grace, its tentacles moving in rhythmic harmony, inspiring fascination and admiration. The Free Crochet Octopus Amigurumi Pattern brings this ocean wonder to life in a small, handheld form, transforming simple yarn into a delightful companion. Its compact size and soft texture make it perfect as a keychain, bag charm, or whimsical decor for shelves and desks. Beyond charm, it serves as a thoughtful handmade gift, ideal for brightening someone’s day with a touch of playful personality.
Cute Crochet Octopus Amigurumi Pattern To Personalize Accessories

The Free Crochet Octopus Amigurumi Pattern offers multiple benefits: it’s beginner-friendly, perfect for using leftover yarn, and provides a satisfying, quick project with a polished, charming result. Small yet striking, it adds softness, whimsy, and personality to everyday items while celebrating the joy of handmade creativity in a playful, practical form.
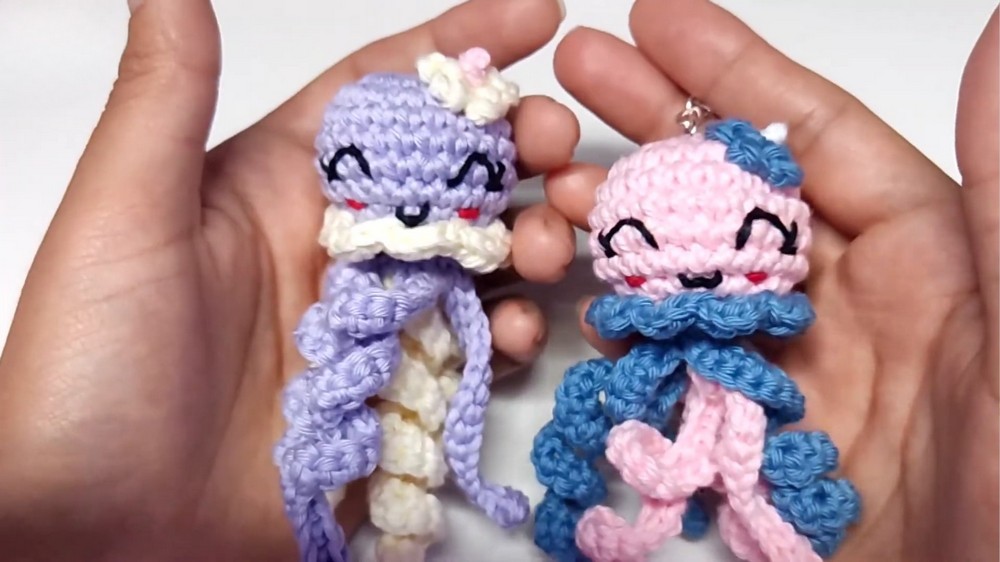
Crochet Mini Jellyfish Keychain Pattern
Finished Size
Approximately 5-6 cm tall, depending on yarn thickness and hook size.
Materials Necessary
- Yarn:
- Main color (e.g., light-colored yarn like pastel tones).
- Accent color for tentacles (e.g., contrasting or complementary color).
- Small amounts of black for facial details and red for cheeks (optional).
- You can use DK weight or 4-ply yarn for best results.
- Hook:
- 2.5 mm crochet hook.
- Accessories:
- Safety eyes (optional; size 6-10 mm depending on preference).
- Polyester filling or fiberfill for stuffing.
- Tapestry needle (for sewing details).
- Keychain ring (optional if making a keychain).
Gauge
Gauge is not crucial for this project since it is an amigurumi. Tight stitches are recommended to prevent stuffing from showing through.
Pattern Instructions
Part 1: Jellyfish Body
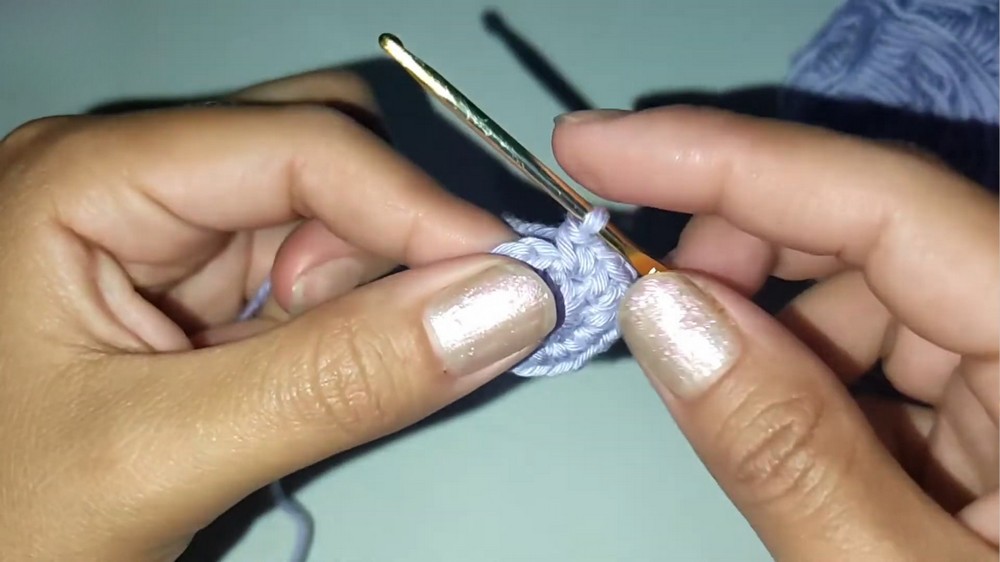
- Start with a magic ring:
- Work 8 single crochet (sc) into the ring.
- Pull the short strand to close the ring tightly.
- Round 2:
- Work 2 sc into each stitch (increase in all stitches). [16 stitches]
- Round 3:
- 1 sc, 1 increase, repeat around. [24 stitches]
- Rounds 4-7:
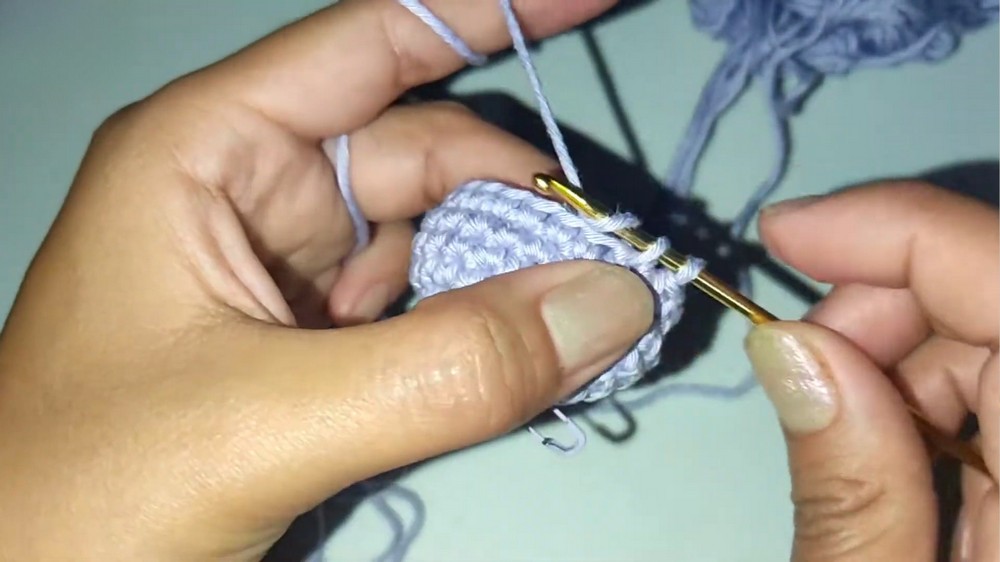
- Work 1 sc in each stitch (no increases). [24 stitches]
- Use a stitch marker to track the beginning of each round.
- Round 8:
- 1 sc, 1 decrease, repeat around. [16 stitches]
- Start gently stuffing the jellyfish body as you continue.
Facial Details (Eyes, Mouth, and Cheeks)
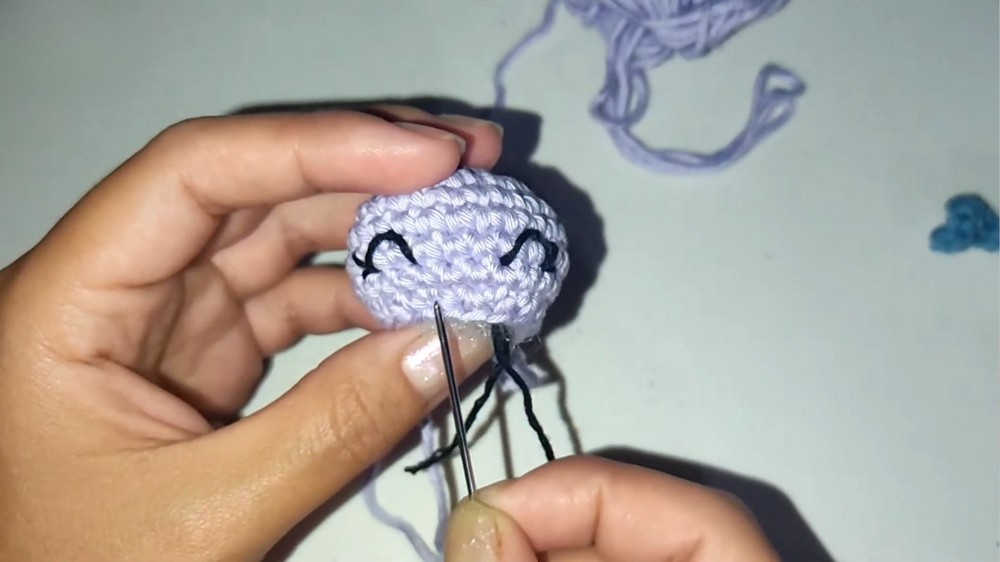
- Eyes:
- Use black thread or yarn.
- Locate the position for the eyes:
- Count 3 rows from the magic ring and leave 2 stitches in between for spacing.
- Embroider small round eyes using black yarn or attach safety eyes.
- Mouth:
- Skip 1 row below the eyes and embroider the mouth using black yarn:
- Create a small curved smile to give the jellyfish a cheerful look.
- Skip 1 row below the eyes and embroider the mouth using black yarn:
- Cheeks:
- Use red yarn to embroider two small dots under the eyes.
- Tie off securely and weave in ends to keep the stitching neat.
Part 2: Closing the Body
- Round 9:
- Work decrease-only round by crocheting through the back loop only of each stitch.
- Continue making decreases until only 8 stitches remain.
- Cut the yarn:
- Leave a long strand for sewing.
- Finish and close:
- Using a tapestry needle, pull the long strand through the remaining 8 stitches.
- Tighten securely to close the jellyfish body.
- Tie a knot and weave the end inside the stuffed body.
Part 3: Skirt (Jellyfish Fringes)
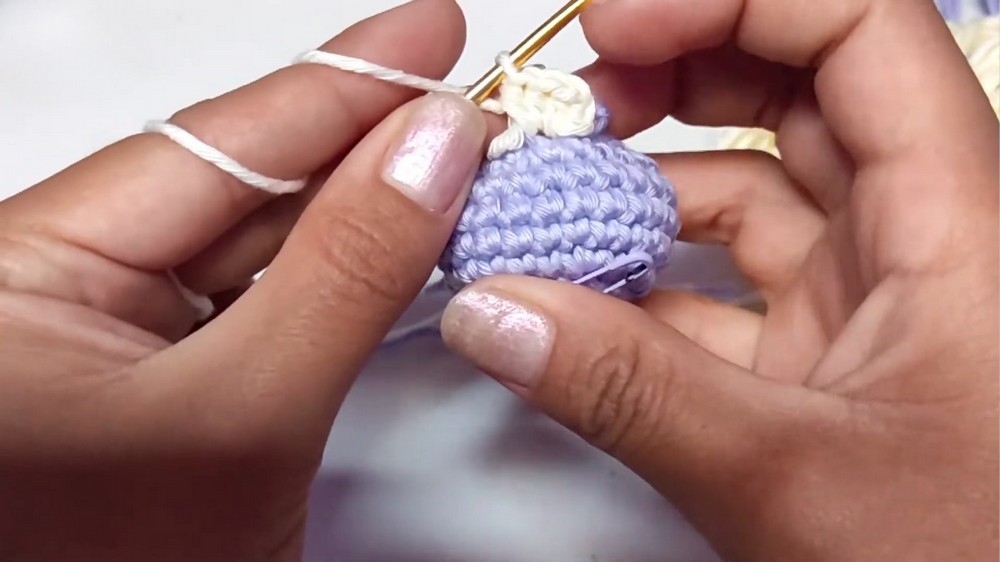
- Attach the accent color yarn to the remaining loops of the final row.
- Insert the hook into the back loops left from Round 9 and pull up your yarn.
- Work fan stitches (half-double crochet):
- Start with a chain 1.
- Work 4 half-double crochets (hdc) into the first space.
- Slip stitch into the next space.
- Alternate between clusters of 4 hdc and 1 slip stitch until you complete the round.
- Close the round with a slip stitch into the first stitch.
- Cut yarn and weave in ends:
- Leave a small strand to hide the loose end.
Part 4: Tentacles
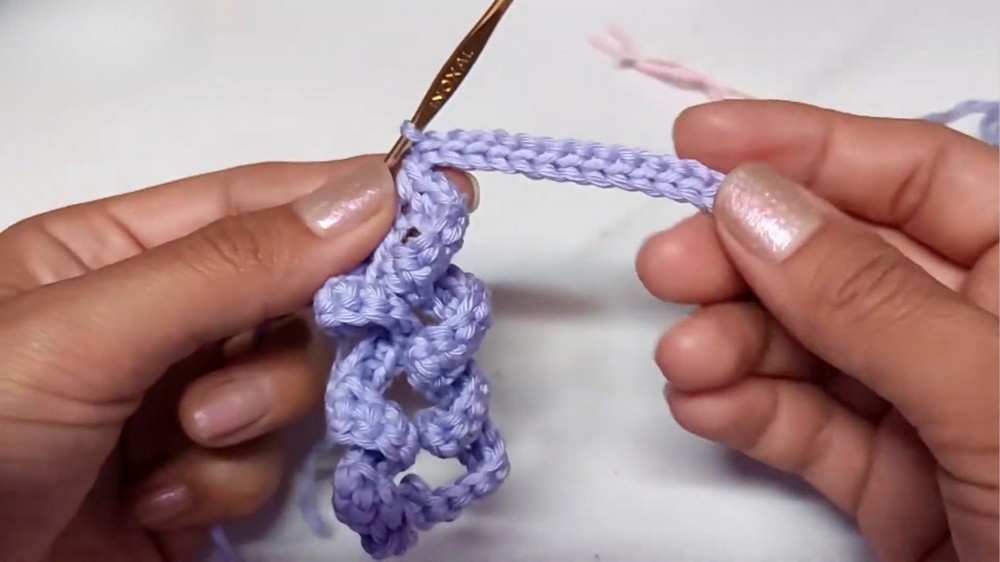
- Create tentacles using two shades of yarn (main color and accent color):
- For short tentacle:
- Chain 18, starting in the 2nd chain.
- Work alternately 1 single crochet in one chain and 1 increase in the next chain until the end of the row.
- For long tentacle:
- Chain 26 and repeat the same technique for increasing and single crochet stitches.
- For short tentacle:
- Slip stitches for dimension:
- Work slip stitches across all chains for added texture.
- Repeat:
- Make 3 tentacles in each color (6 total).
- Attach tentacles:
- Position the tentacles at the bottom center of the jellyfish body.
- Use a tapestry needle to sew them securely in alternating colors.
Part 5: Flower (Optional Decoration)
- Magic ring:
- Work the following sequence to create petals:
- Chain 3 and slip stitch into the ring.
- Repeat chain 3, slip stitch into the ring 5 times to create 5 petals.
- Work the following sequence to create petals:
- Finish:
- Tighten the magic ring securely and tie off.
- Attach flower to jellyfish head:
- Use a contrasting yarn to sew the flower onto the jellyfish body, slightly off-center.
Special Techniques
- Back Loop Only (BLO):
- Crocheting through the back loop creates a ridge effect and neatly separates the fringes from the body.
- Half-Double Crochet (HDC):
- Use this for creating soft fan-like fringes around the jellyfish body.
- Fan Stitch:
- Ensure consistent tension for uniform fringe placement.
- Shape the Tentacles:
- To add movement and definition, twist tentacles slightly after sewing.
Tips & Customization
- Color Variations:
- Experiment with ombre yarns or multicolored schemes for vibrant jellyfish.
- Size Adjustments:
- Use thicker yarn and larger hooks to make bigger jellyfish or finer yarn for smaller jellyfish.
- Accessories:
- Add beads or tiny bells to the ends of the tentacles for a fun touch.
Conclusion and Final Remarks
Congratulations on completing your whimsical jellyfish! This charming accessory can brighten up bags, serve as a fun decoration, or make the perfect handmade gift. The pattern provides flexibility for creativity, allowing you to infuse your personal touch into color combinations and accessories.
If making a keychain, attach the ring through the closed stitch top for extra durability. Share your finished project and inspire others with your crochet creativity!
Uses
You create a finished stuffed amigurumi toy or decorative pendant, suitable for:
- Amigurumi Toy: A soft, squishy companion.
- Keychain or Pendant: Attach a keyring to the top loop for a custom accessory.
- Nursery Decor: A colorful addition to a child's room.
Materials
Gather these items to complete the project:
- Yarn: Worsted weight yarn or similar.
- Main Color: For the head/body.
- Accent Color: For the skirt and tentacles.
- Detail Colors: Black thread (for eyes/smile) and Red/Pink thread (for blush/cheeks).
- Hook: A 2.5 mm crochet hook.
- Notions:
- Stuffing (relleno): Polyester fiberfill.
- Tools: Tapestry needle, Fine needle for embroidery, Keyring (optional).
Special Features
This pattern incorporates specific techniques for shaping and detail:
- Ruffled Skirt Foundation: You create a foundation for the ruffled skirt by working the final decrease round of the head/body using only the back loops of the stitches. This leaves the front loops exposed at the base for the skirt detail.
- Scalloped Skirt: You use the accent color to work a decorative scalloped edge around the base using a repeating sequence of 4 Half Double Crochet (HDC) clusters followed by a Slip Stitch to secure the ruffle.
- Spiral-Curled Tentacles: You achieve the signature tight curl by crocheting a long chain and then working a simple pattern of alternating Single Crochet and Increases along the length, which forces the piece to spiral on itself.
- Embroidered Face: You create the eyes, eyelashes, smile, and blush using yarn and thread instead of safety eyes, giving the piece a softer, more personalized look.
Level of Difficulty
This is an Intermediate level project. You must be able to:
- Execute a Magic Ring and consistently work in the round (Amigurumi style).
- Correctly perform increases and decreases to shape the body.
- Work accurately into the Back Loops Only (BLO) for the skirt foundation.
- Work basic Half Double Crochet clusters (HDC) for the skirt.
- Manage detailed embroidery for the facial features.
Tutor's Suggestions
Follow these suggestions from the instructor for a successful result:
- Embroidery Thread: If your detail yarn is too thick for delicate features, divide the yarn in half before embroidering the eyes and lashes. This creates a thinner thread for a neater, more delicate look.
- Facial Placement: Place the eyes starting on the third row up from the increase section of the head for correct vertical alignment.
- Tentacle Security: When bundling the tentacles, tie a large knot with the yarn tails. This knot acts as a stopper or "bumper" that sits inside the head when you close the bottom opening, securing the tentacles firmly in place.
Step by Step Details
Create an adorable Crochet Jellyfish or Octopus Amigurumi. This pattern focuses on creating a round head, an expressive embroidered face, a two-tone ruffled skirt, and uniquely spiral-curled tentacles. You will construct the main body and head in one piece before adding the decorative elements.
Conclusion
You successfully crocheted a detailed Amigurumi Jellyfish/Octopus featuring a two-tone body, expressive embroidered face, scalloped skirt, and spiral-curled tentacles. The combination of techniques creates a unique and whimsical finished piece ready for use as a toy or decoration.
Tip
When making the curled tentacles, ensure you place the increase (two stitches) in the same stitch or chain. The key to creating the tight spiral shape is the consistent pattern of one Single Crochet followed by an Increase. The repeated increase on one side forces the piece to curl tightly on itself.