
Trendy Free Crochet Santa Claus Pattern For Seasonal Decor
Celebrate the holidays with this Free crochet Santa Claus Pattern, creating jolly, festive dolls that bring charm, warmth, and holiday cheer to any space.
The magic of creating festive crochet pieces lies in their charm and versatility, and Santa Claus pattern is no exception. These detailed and heartwarming designs bring the joy of Christmas to life with their intricate textures, iconic red-and-white outfits, and adorable beards.
Lovely Free Crochet Santa Claus Pattern For Christmas Tables
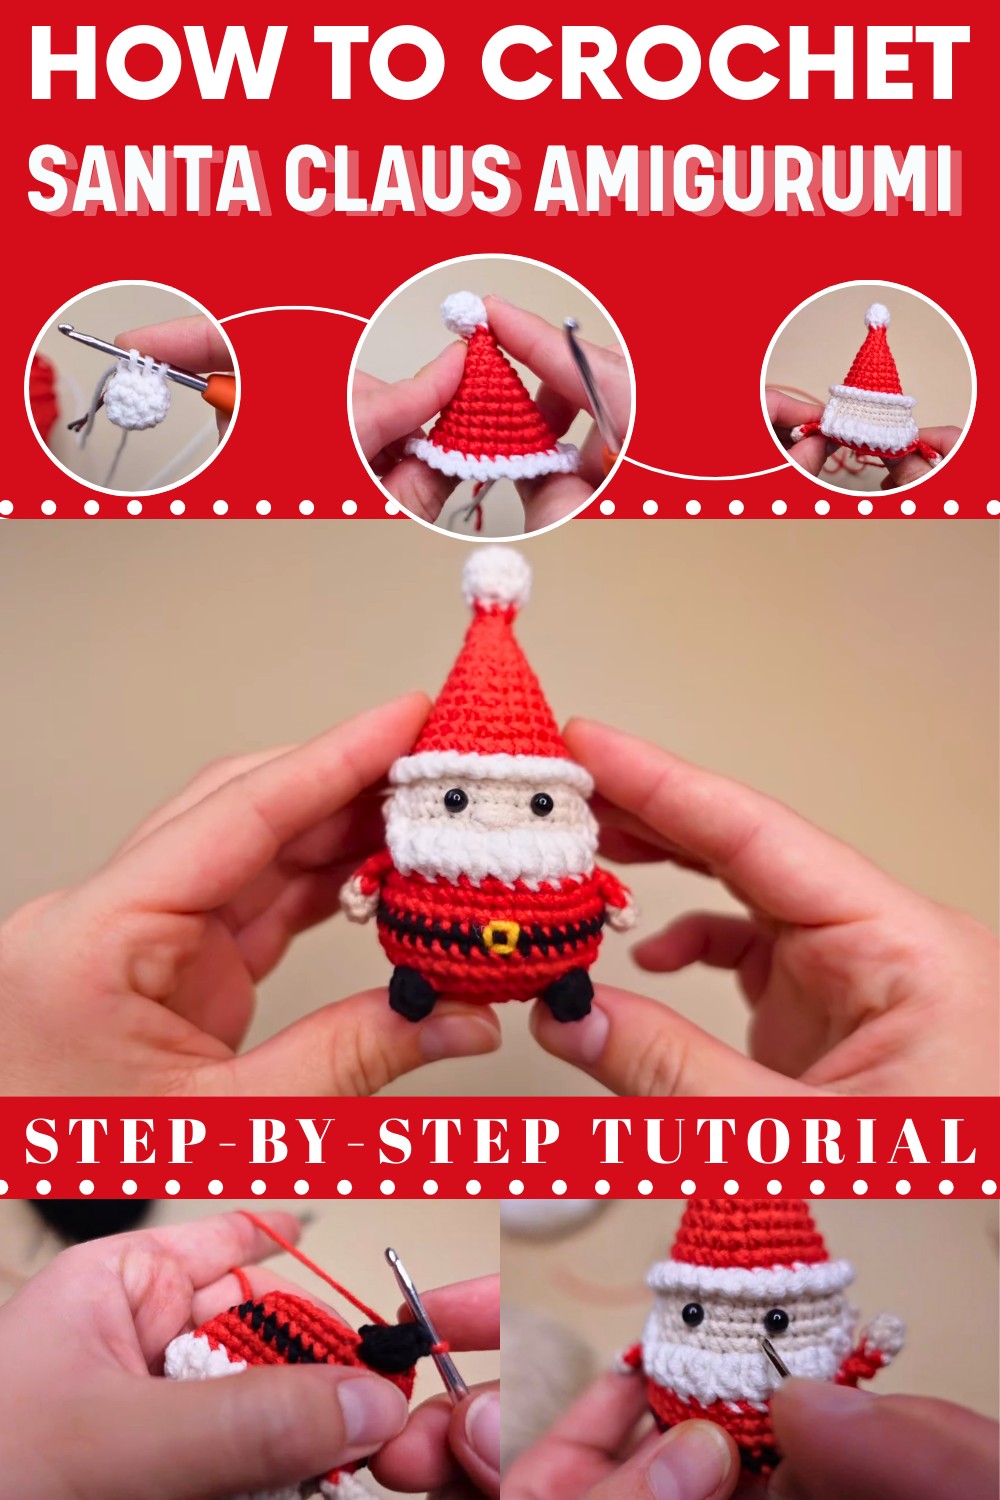
Whether you’re an avid crocheter or simply looking to create personalized holiday decorations, these patterns add a touch of handmade beauty to your celebrations. A well-designed Crochet Santa Claus Pattern offers endless possibilities. You can crochet a cheerful centerpiece for your holiday table, a charming ornament to adorn your Christmas tree, or even a thoughtful, handmade gift for loved ones. These creations hold the power to evoke nostalgia and spark joy, making them an indispensable part of the festive season. Many modern patterns are beginner-friendly while still offering enough detail to delight more experienced crocheters.
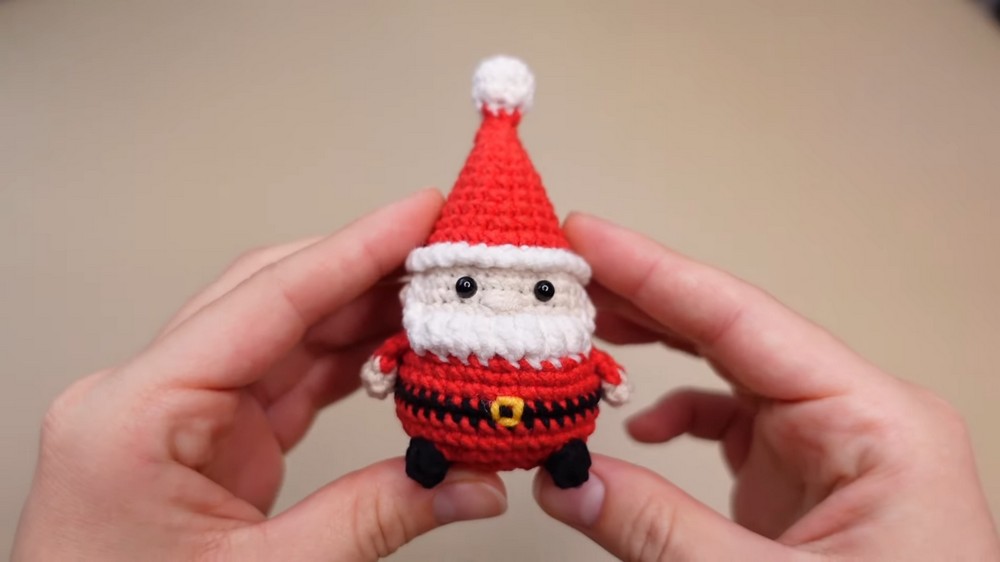
Materials
- Yarn (Worsted/Aran or Sport, according to preferred size):
- Red (hat & body)
- White (pom pom, hat rim, beard)
- Skin tone (head, nose, ears, hands)
- Black (belt, boots)
- Yellow (belt buckle - embroidery)
- Crochet Hook: Size appropriate for yarn (usually 2.0–2.5 mm for mini, 3.5–4 mm for worsted)
- Polyfill Stuffing
- Stitch marker
- Small scissors
- Yarn needle (for embroidery and weaving ends)
- Safety eyes (5 mm, x2)
- Fabric glue (optional, for attaching arms)
- Pins (optional; to hold glued arms in place)
- Bobby pin (for stuffing pom pom; optional)
Key Abbreviations
| Abbreviation | Meaning |
|---|---|
| MR | Magic Ring |
| sc | Single Crochet |
| inc | Increase (2 sc in one stitch) |
| dec | Decrease (sc2tog, invis. dec preferred) |
| hdc | Half Double Crochet |
| dc | Double Crochet |
| sl st | Slip Stitch |
| ch | Chain |
| FO | Fasten Off |
| FLO/BLO | Front/Back Loop Only |
| st(s) | Stitch(es) |
| popcorn | See special notes below |
Special Notes
- Work in continuous rounds unless specified. Use a stitch marker.
- Change colors on the last pull-through of the previous stitch.
- Invisible decrease (inv dec): Insert hook through FLO of the next 2 sts, yarn over & pull through both, yarn over & pull through final 2 loops.
- Popcorn stitches: See instructions at first use in pattern.
- No sewing required! The arms and ears are crocheted or tied into the body.
- You may glue arms to body at end (optional).
Pattern Instructions
Pom Pom and Santa Hat
Start with white:
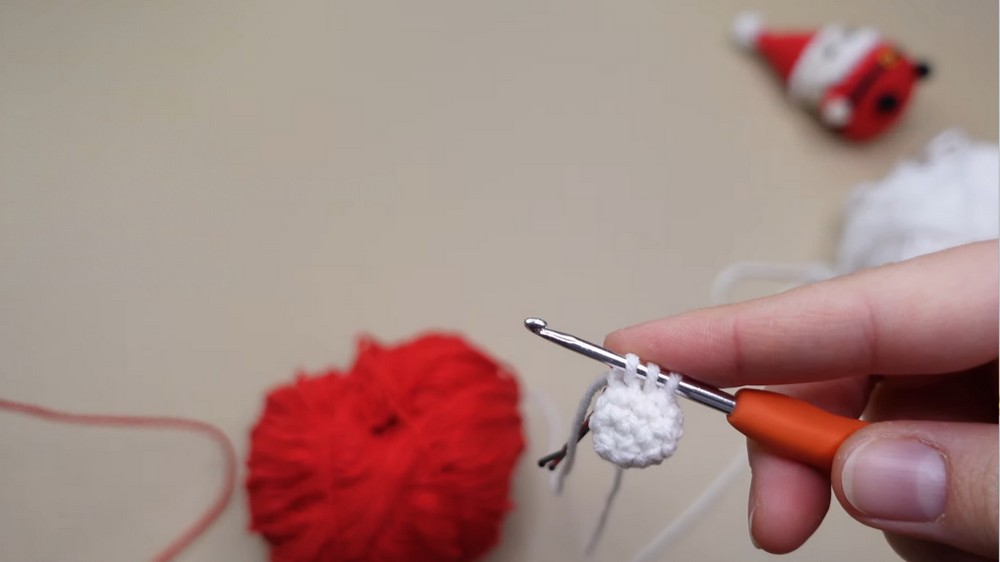
Pom Pom (Rounds 1–4)
- Rnd 1: MR, 5 sc in ring (5)
- Rnd 2: inc in each st around (10)
- Rnd 3: (sc, inc) x5 (15)
- Rnd 4: (sc, dec) x5 (10)
- On the final decrease: switch to red yarn, complete the stitch with red.
- Cut white yarn.
Hat (Rounds 5–16 in Red, then White for brim)
You will increase as for a cone (hat), working seamlessly from the pom pom.
- Rnd 5: (sc, dec) x2 (4) — This round reduces to 4 sts (a tiny round – it's fiddly)
- Rnd 6-onward (Red): Work increases evenly to widen the hat (continue as pattern below).
- See note: the hat increases about 4 sts every several rounds; aim to get to 24, then 30 sts.
- Continue as follows:
Rnd Instruction Sts 6 sc around 4 7 (inc in each st) 8 8 (sc, inc) x4 12 9 (2 sc, inc) x4 16 10 (3 sc, inc) x4 20 11 (4 sc, inc) x4 24 12–15 sc around 24 16 (3 sc, inc) x6 (Increase to 30 at brim) 30
Switch to white:
- Before last st of previous rnd, change to white.
- Rnd 17 (Brim, worked in FLO):
- FLO - (sl st, ch 1) in each st around x29, ending with an additional sl st in FLO of last st.
- FO white and cut yarn.
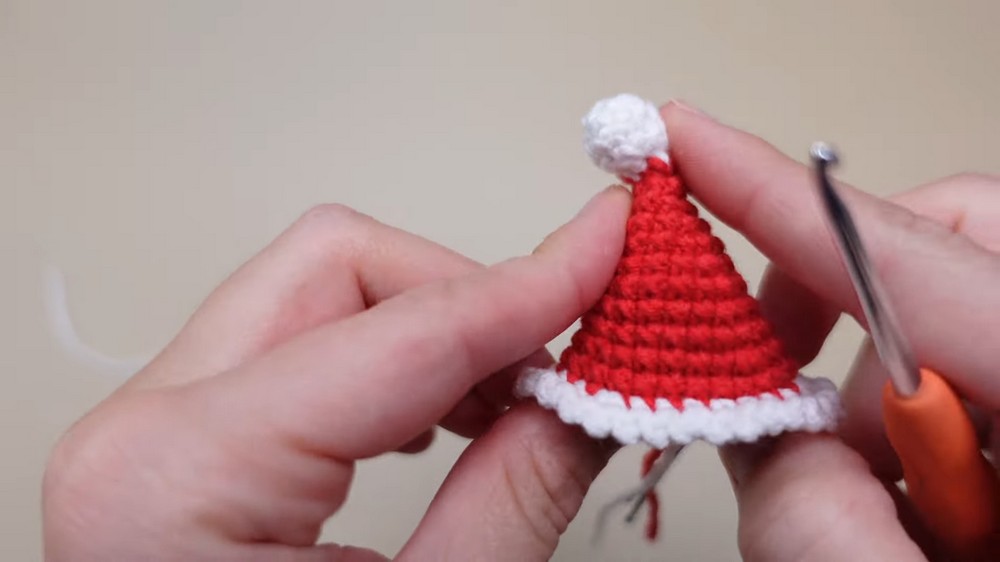
Set aside hat.
Arms (Make 2, Skin Tone)
- Rnd 1: MR, 4 sc (4)
- Rnd 2: (sc, inc) x2 (6)
- Rnd 3: sc around (6)
- Rnd 4 (flat close): Fold arm flat. Insert hook through next st and st directly across from it, sc together (1). Repeat for remaining 2 pairs (total 3 sc).
- FO, leave a short tail.
Ears (Make 2, Skin Tone)
- Make a slip knot.
- Ch 1.
- Cut and FO, leaving a long tail at both the start and end of your chain for tying.
Head & Beard
Start in Skin Tone. You will join at back loop of the round where the brim finished.
- Find BLO of first st of round 17 (that formed the brim).
- Rnd 18: In BLO, start sc in skin yarn & continue around (follow color change instructions for beard):
- (sc in BLO) x8, switch to white, sc in BLO x1 (white, beard detail), switch to skin, sc in BLO x11 (skin), switch to white, sc in BLO x1, switch to skin, sc in BLO x9
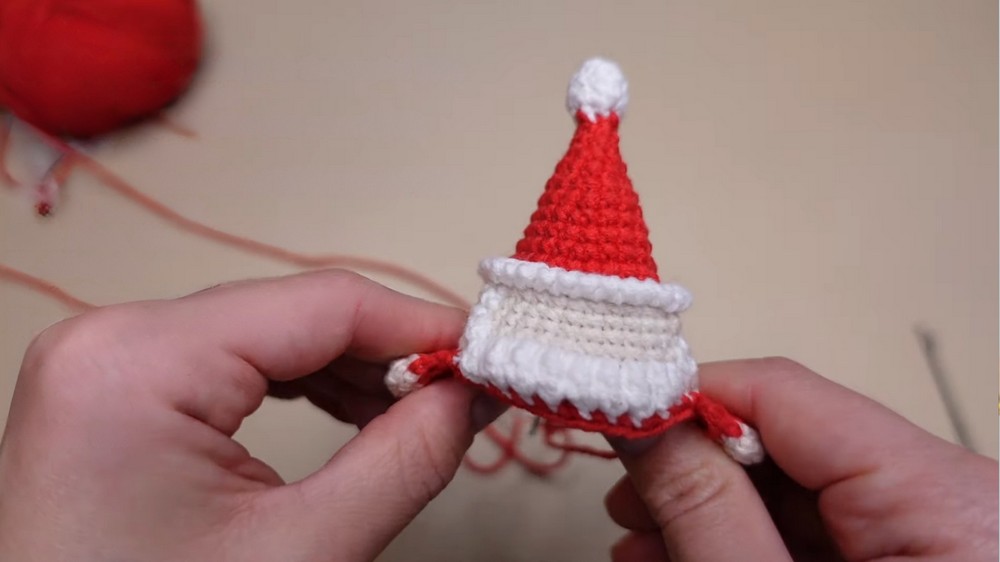
Rounds 19–21: Forming Face, Cheeks, BEARD
- Round 19:
Repeat as above, but start introducing popcorn stitches (for beard cheeks) in white in correct places as you go (see notes below).- In general:
- sc around, but at places for beard/cheeks, insert popcorn stitches in white, switching back to skin as described below.
- In general:
- Popcorn Stitch (2-sc popcorn):
- Into the correct st: [sc, sc, remove hook from loop, insert into first of the 2 sc, grab working loop, pull through].
- Popcorn Stitch (3-sc/3-hdc/3-dc popcorn):
- Same as above, but with 3 (sc or hdc or dc) into one st, pop as above.
- Beard Placement
- Rnd 18:
- Place cheek “popcorn” with 2 sc at each side of face with white; the rest in skin color.
- Rnd 19:
- Repeat above, cheeks with 2-sc popcorn.
- Rnd 20:
- Place “popcorn” cheeks with 3-sc popcorn stitches in white at each side, rest in skin.
- Rnd 21:
- At center underface, work 3-hdc popcorn (chin), then 7x (3-dc popcorn) in white for beard, then 3-hdc popcorn (other chin), rest in skin.
- Rnd 18:
- Stuff hat/upper head, including pom pom, as you go before opening becomes too small at base.
Arms/Ears Attachment & Safety Eyes
Before starting body:
- Add ears:
- Use darning/yarn needle to thread one end of each ear through the head above the beard.
- For one ear: place with one stitch space between beard and ear; for the other, place next to the beard.
- Tie the tails inside, do not pull too hard.
- Add safety eyes:
- Place between Rounds 18 & 19, 4 sts apart, centered above beard. Secure with safety backs.
Body and Belt
Continue with red; change to black for belt row.
- Rnd 22 (Join arms):
- With red, crochet into arm and body as you go (see transcript for details):
- (2 sc, inc)x2 along body (8), then (2 sc, inc)x1 over arm and body (by inserting into both arm and body at same time for 2 sc, then 2 sc in both for inc), continue pattern around.
- (Instructions alternate between working only body and working both arm and body for joining.)
- Follow: *(2 sc, inc) x2 along body, then (2 sc, inc) over arm and body, (2 sc, inc)x3 along body, 2 sc, (inc: 1 sc in both, 1 sc in both for other side/arm), finish with two sc).
- You should now have both arms joined into body!
- With red, crochet into arm and body as you go (see transcript for details):
- Rnd 23–24 (Red): sc in each st around.
- Attach ears, add eyes now if not already done.
- Rnd 25 (Belt, Black):
- Before last sc of R24, change to black; sc around.
- Rnd 26–27 (Red):
- Switch back to red, sc in each st around.
Legs (Popcorn Boots), Santa's Bottom
- Rnd 28 (Red & Black):
- Work one sc, one dec, then (3 sc, dec) x2, sc,
- Switch to black, make a 5-dc popcorn (see below), switch back to red (instructions as before for next leg), then switch to black, make second 5-dc popcorn.
- [Popcorn Boot]
- (5 dc in designated st, drop loop, insert hook in first dc, draw up loop to pop, continue in pattern).
- Continue around with required single crochet and decreases to finish round.
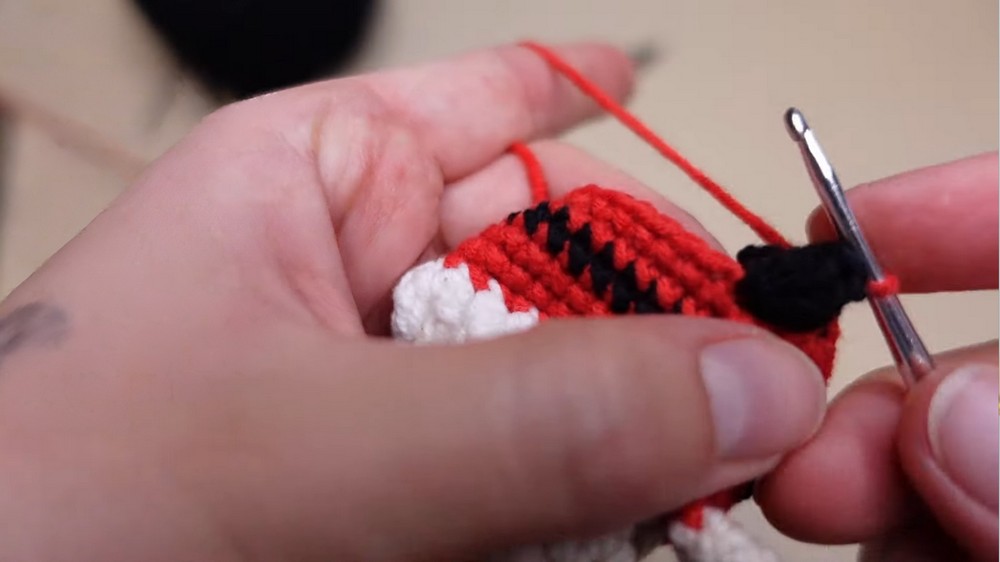
Final Decreases/Closure
- Rnd 29–31: 8 dec per round.
- Stuff body well before hole becomes too small.
- Finish off:
- After last round, FO and thread tail through remaining stitches, cinch hole closed. Tie knot, weave in end.
Embroidery & Final Assembly
Nose:
- With skin tone yarn, embroider nose between Rounds 19 & 20, spanning approx 2.5 sts, using 3 loops for round nose.
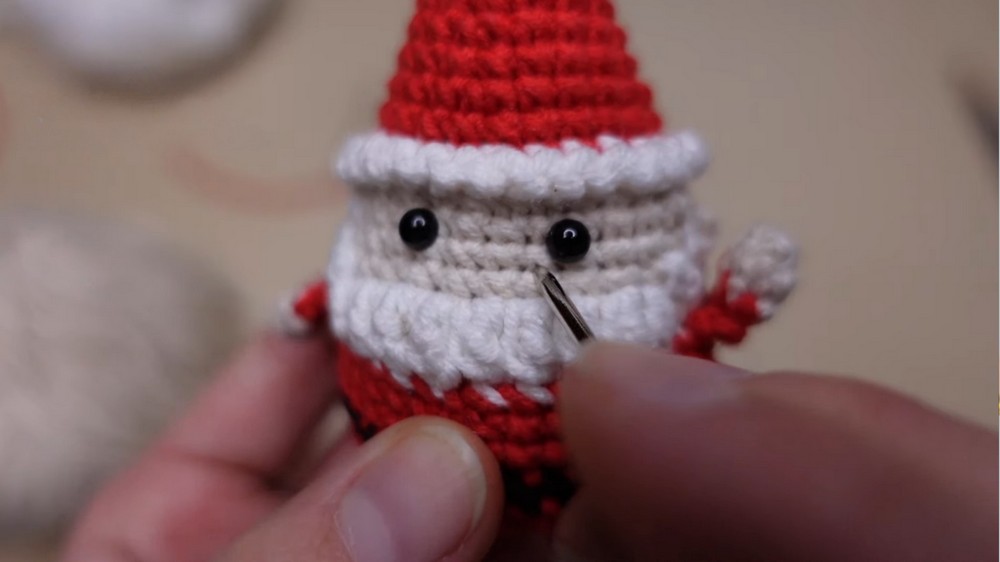
Belt Buckle:
- With yellow, embroider buckle over one stitch of black belt, centered between the two boots/legs.
Glue arms down: (optional)
- Place a tiny drop of fabric glue under the base of each arm.
- Press against body and pin in place until dry.
Weave in and trim all ends.
Conclusion
You have now completed a cute No Sew Mini Santa Amigurumi!
This creative, seamless amigurumi uses popcorn stitch texture for beard/boots and clever color changes for facial and clothing detail—all with no sewing of body parts. Enjoy this project as a festive ornament, keychain, or tiny gift.
Pattern Corrections
- If working with different yarn weights, adjust the hook as needed.
- If any round feels too tight (especially decreases around pom pom or boots), use a smaller hook for the fiddly rounds, or loosen your tension.
- Use invisible decreases for neatness unless otherwise preferred.
Tips
- Stuff firmly but do not overstuff, especially at the head and hat.
- Use stitch markers and count your stitches often for accuracy.
- When tying ears inside head, do not pull too tight or the chain may be pulled into the fabric.
- Embroider face details securely, and use seamless finish methods for a tidy look.
- For a quick project, leave arms loose; to display upright, glue arms in place.