
Eye-Catching Crochet Squid Game Pattern Perfect for Gifts
Catch playful vibes with the Free Crochet Squid Game Pattern, a charming amigurumi design perfect for gifts, décor, and fan collections.
Fans of unique amigurumi and pop culture will love the Free Crochet Squid Game Pattern, which transforms this iconic series into an adorable handmade figure. This pattern allows hobbyists and beginners alike to fashion a visually striking piece that reflects both personality and craftsmanship.
How to Crochet the Squid Game Pattern Step by Step

Versatile and Engaging Display
This squid-inspired crochet figure makes a perfect addition to themed collections, playful home décor, or as a charming gift. Its compact size and vibrant details offer a decorative appeal that draws attention on shelves or desks, while also serving as a conversation starter among fans and friends.
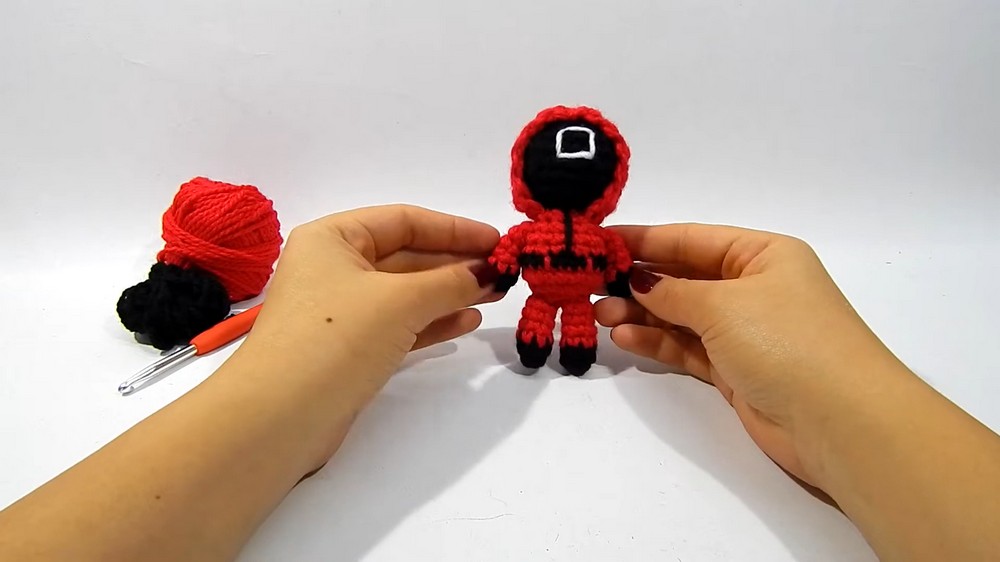
Working on this pattern enhances fine motor skills, encourages patience, and provides a satisfying creative outlet. The step-by-step instructions ensure the process is manageable for crocheters of varying skill levels, while the end result delivers a polished, impressive look that mirrors the beloved series character.
This Free Crochet Squid Game Pattern blends fun, functionality, and a touch of fandom flair, making it a must-try project for those who appreciate detailed amigurumi. Whether displayed, gifted, or cherished personally, it combines charm with a hands-on crafting experience.
Free Crochet Squid Game Pattern
Materials Required:
- Yarn:
- Red Yarn: Approximately 15 grams for the suit, arms, feet, and hood.
- Black Yarn: Approximately 10 grams for the head, accents, and details.
- White Yarn: A small amount for facial emblem embroidery (triangle, square, or circle).
- Crochet Hook: 3.5mm recommended.
- Stuffing: Synthetic fiberfill for the head, body, and feet.
- Stitch Marker: To mark the beginning of rounds (optional but helpful).
- Tapestry/Yarn Needle: For sewing parts together and creating embroidery details.
- Scissors.
- Keychain Ring: Optional for transforming the doll into a functional keychain.
Gauge
Gauge is not critical for this project since precise sizing isn’t necessary. However, aim for consistent tension to maintain a neat finish.
- Approximate gauge: 6 hdc stitches = 2 cm.
Finished Size
Once completed, the doll measures approximately 10-12 cm (4-5 inches) from head to toe.
Special Techniques Used
- Magic Ring: A method to start crochet in the round cleanly and tightly without gaps.
- Half Double Crochet (hdc): A versatile stitch used throughout the project for shaping.
- Increases: Adding stitches to expand the shape.
- Decreases: Combining stitches to create a taper or curve (invisible decreases recommended).
- Color Changes: Switching yarn colors neatly and seamlessly.
Pattern Instructions
Head (Worked in Black Yarn)
- Round 1: Create a magic ring. Ch 1 and work 6 hdc into the ring. Tighten the loop to close the ring. (6 stitches)
- Round 2: Work 2 hdc in each stitch around to increase (hdc increases). (12 stitches)
- Round 3: Alternate 1 hdc, 1 increase around (hdc in the first stitch, 2 hdc in the next). (18 stitches)
- Round 4: Alternate 2 hdc, 1 increase (hdc in the first two stitches, 2 hdc in the next stitch). (24 stitches)
- Rounds 5-6: Work 1 hdc into each stitch around. (24 stitches per round)
- Round 7: Begin decreasing: Alternate 2 hdc, 1 decrease (hdc in two stitches, decrease in the next stitch). (18 stitches)
- Round 8: Alternate 1 hdc, 1 decrease (hdc in the first stitch, decrease in the next stitch). (12 stitches)
- Round 9: Work 1 decrease in each stitch around. (6 stitches)
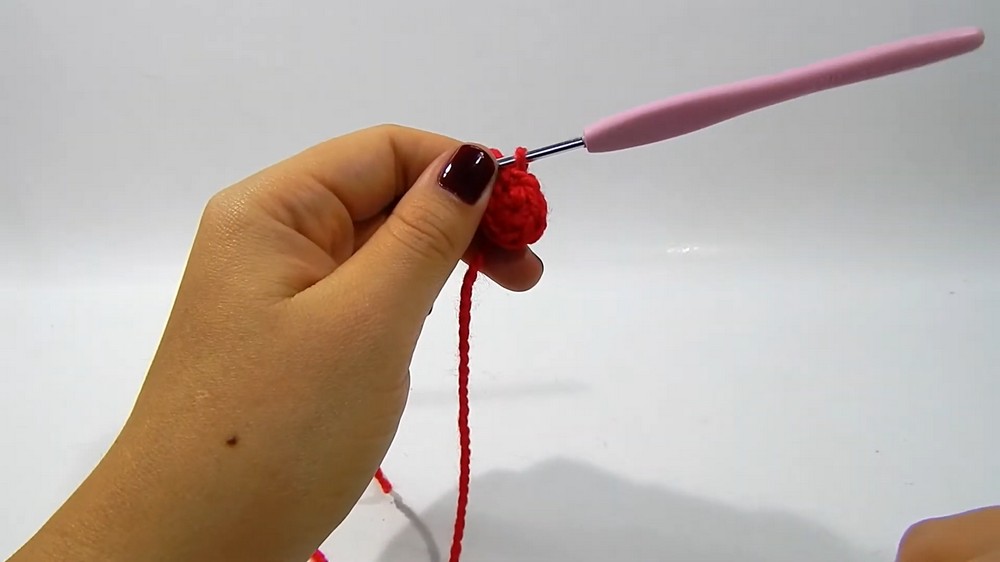
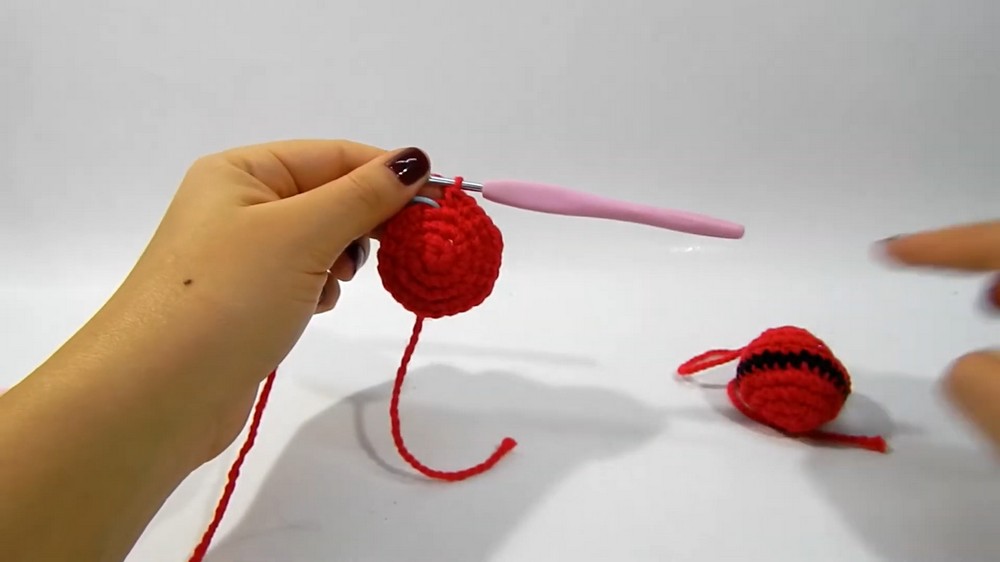
Stuff the head firmly with fiberfill before closing.
Fasten off, leaving a long tail for sewing.
Body (Worked in Red Yarn with Black Accent)
- Round 1: Create a magic ring. Ch 1, work 6 hdc into the ring. Tighten to close. (6 stitches)
- Round 2: Work 2 hdc in each stitch around. (12 stitches)
- Round 3: Alternate 1 hdc, 1 increase. (18 stitches)
- Round 4: Alternate 2 hdc, 1 increase. (24 stitches)
- Round 5: Switch to black yarn and work 1 hdc in each stitch around for a single color accent row. (24 stitches)
- Rounds 6-8: Switch back to red yarn and work 1 hdc in each stitch around. Stuff firmly. (24 stitches per round)
- Round 9: Begin decreasing: Alternate 2 hdc, 1 decrease. (18 stitches)
- Round 10: Alternate 1 hdc, 1 decrease. (12 stitches)
- Final Round: Decrease in every stitch around. (6 stitches)
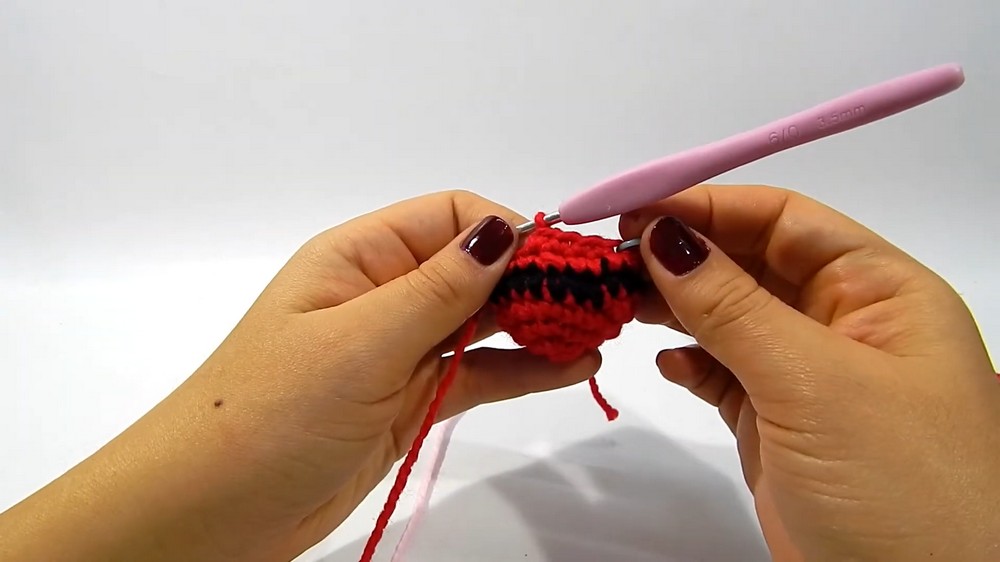
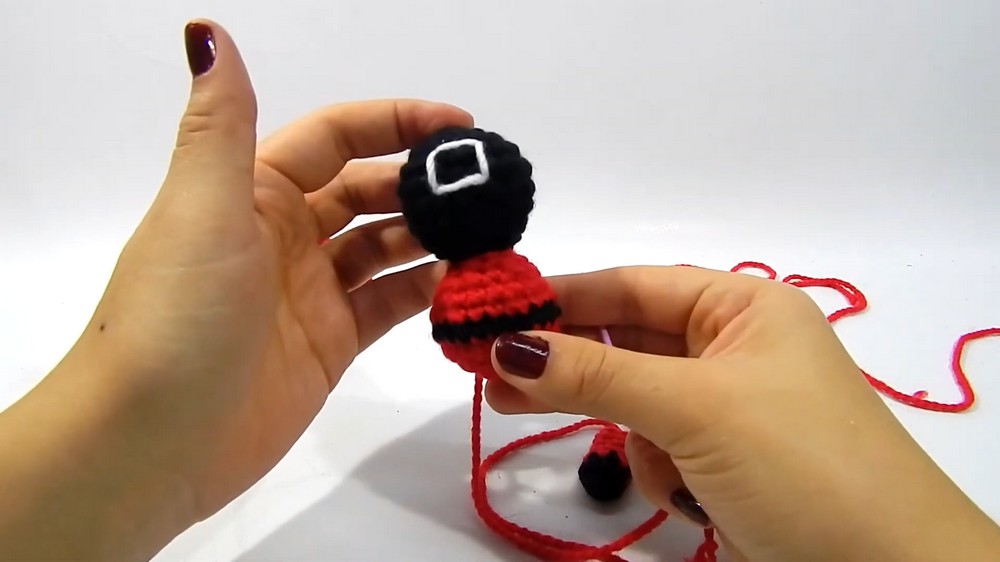
Fasten off, leaving a tail for sewing to the head.
Arms (Make 2)
- Round 1: Create a magic ring. Ch 1, work 6 hdc into the ring. Tighten to close. (6 stitches)
- Round 2-3: Work 1 hdc in each stitch around using black yarn. (6 stitches per round)
- Rounds 4-6: Switch to red yarn and work 1 hdc in each stitch around.
Lightly stuff the black sections. Leave the red portions unstuffed to make the arms flexible.
Fasten off, leaving a long tail for sewing.
Feet (Make 2)
- Round 1: Create a magic ring. Ch 1, work 6 hdc into the ring. Tighten to close. (6 stitches)
- Rounds 2-6: Work 1 hdc in each stitch around using red yarn.
Firmly stuff the feet with filling for a rounded shape.
Fasten off, leaving a long tail for sewing.
Hood (Worked in Red Yarn)
- Foundation Row: Ch 15, add 1 turning chain.
- Row 1: Starting in the second chain from the hook, work hdc in each stitch across. (15 stitches)
- Rows 2-11: Ch 1, turn, and work hdc across each row consistently.
Fold the piece in half and sew the short edges to form the hood. Fasten off, weave in ends, and turn it inside out to hide the seam.
Face Emblem
Using white yarn and a tapestry needle:
- Embroider a triangle, square, or circle onto the front of the doll’s face.
- Work with small, straight stitches, forming the design evenly.
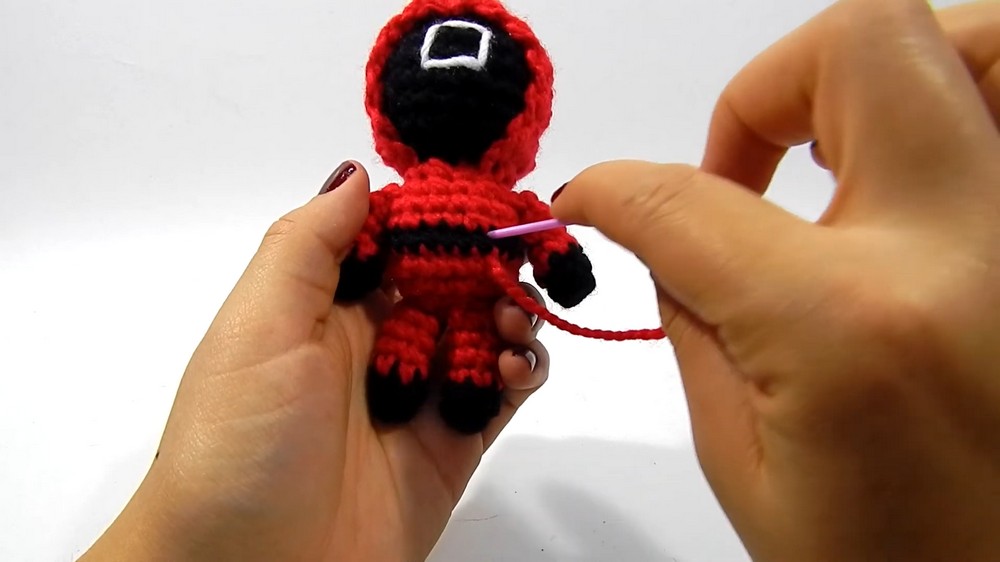
Assembly Instructions
- Attach the Head to the Body:
- Use the long tail from the body to sew the head securely onto the body. Align firmly and stitch around.
- Add Arms and Feet:
- Position the arms at either side of the body below the neck and sew them into place.
- Attach the feet at the bottom of the body.
- Attach the Hood:
- Slide the hood over the head and body. Sew along the edge to secure it.
- Add Detailing:
- Use red and black yarn to sew small striped accents on the body for additional detailing.
Customization Suggestions
- Alternate Colors: Create alternate dolls with different combinations to represent varied characters from the Squid Game.
- Keychain Addition: Attach a ring to the top for a functional keychain or bag charm.
- Size Variations: Use thinner or thicker yarns to create smaller or larger dolls.
Finishing Tips
- Tightly weave in all yarn ends and ensure all joined pieces are securely stitched to prevent unraveling.
- For stuffing, use minimal amounts to maintain the doll’s shape without distorting it.
- Handle embroidery details carefully to ensure clarity and neatness.
Conclusion and Final Remarks
The Squid Game-inspired mini amigurumi doll is a fantastic project for fans of the series! Its small, detailed design makes it ideal as a collectible or gift. The simple construction and creative elements, such as the hood and facial emblem, provide charm and character.
Some Important Points
Uses
The finished amigurumi piece is specifically designed to be a portable novelty item.
- Primary Use: A keychain (llaverito).
- Secondary Use: A small decorative item or collectible.
Materials:
- Yarn (3-4 mm thickness): The tutor uses yarn that is approximately 3 to 4 mm thick.
- Red: Approximately 15 grams (for the body, hood, and uniform details).
- Black: Approximately 10 grams (for the head/mask and limb details).
- White: A small piece for the embroidered face symbol (triangle, square, or circle).
- Crochet Hook: A 3.5 mm hook is used.
- Stuffing: Synthetic fiberfill (relleno sintético).
- Accessories and Tools:
- Key Ring/Hook: For attaching the keychain (argolla o colige).
- Tapestry Needle (Aguja Lanera): For sewing pieces and embroidering details.
- Stitch Marker and Scissors.
Special Features
The design incorporates several clever techniques to replicate the look of the Squid Game guard:
- Identical Sphere Pattern: Both the main head and the body (torso) are crocheted using the exact same pattern of increases and decreases, simplifying the creation process and ensuring consistent proportions.
- Hood Construction: The hood (capucha) is not crocheted in the round; instead, it's made from a large, flat, rectangular piece crocheted in rows, which is then folded and sewn to create a structured, realistic hood shape.
- Symbolic Embroidery: The iconic rank symbols (square, triangle, or circle) are added using simple white embroidery onto the center of the black head after it's finished.
- Partial Stuffing for Arms: The arms are deliberately only stuffed in the black hand section, leaving the red sleeve section unstuffed. This ensures the arms remain flat and hang naturally when sewn to the side of the body.
- Uniform Detailing: Realistic elements like the zipper and belt are added using simple straight-line embroidery stitches with red and black yarn across the front of the red torso.
Level of Difficulty
The project is suitable for an Intermediate Crocheter.
- Required Skills: Magic Ring, single crochet (SC), increases, and decreases.
- Intermediate Skills Used: Precise color changing mid-pattern (using slip stitch and cutting yarn for clean stripes on the body), crocheting structured flat pieces (hood), and detailed assembly (sewing spheres together and adding small embroidered lines).
Tutor's Suggestions
- Color Change Technique (Body): When making the color change from red to black and back to red for the torso, the best method is to slip stitch, cut the old color, and attach the new color to ensure a clean, sharp line between the red and black stripes.
- Head Color: For the solid black head, this color change technique is not necessary; you should simply continue working in a spiral for the rounds that are solid black.
- Hood Edges: When crocheting the flat piece for the hood, always ensure the last single crochet of every row is worked into the turning chain of the previous row. This is essential for creating perfectly straight edges that align cleanly when the piece is folded and sewn.
- Limb Filling: Remember to fill the feet completely to make them firm, but only fill the black "hand" part of the arm pieces, leaving the red sleeve loose so the arms dangle naturally.
Tip
When crocheting the hood in rows, ensure your edges are perfectly straight by consistently making the very last single crochet of each row into the turning chain you made at the start of the row. So, This simple technique prevents the edges from slanting inwards and results in a much cleaner fold for the final hood shape.
Conclusion
The Squid Game amigurumi keychain is a trendy and fun project that relies on clever construction techniques, such as using identical patterns for the head and body, and strategic partial stuffing for the arms. Following the detailed pattern and assembly guide, crocheters can create a recognizable and durable accessory to commemorate the popular series.