
Crochet Hello Kitty Cat Amigurumi Pattern with Unique Style
Learn to crochet your favorite Hello Kitty Cat with this easy-to-follow Amigurumi Pattern, creating adorable handmade toys that everyone will admire!
These cute creations are perfect as unique gifts, thoughtful keepsakes, or playful decorations that brighten up any space. The design captures the adorable essence of Hello Kitty, complete with detailed features such as her iconic bow, sweetly rounded ears, and expressive eyes. Either you’re looking to add a personal touch to your handmade collection or simply love experimenting with crochet, this pattern offers boundless possibilities for creativity.
Crochet Mini Plush Heart
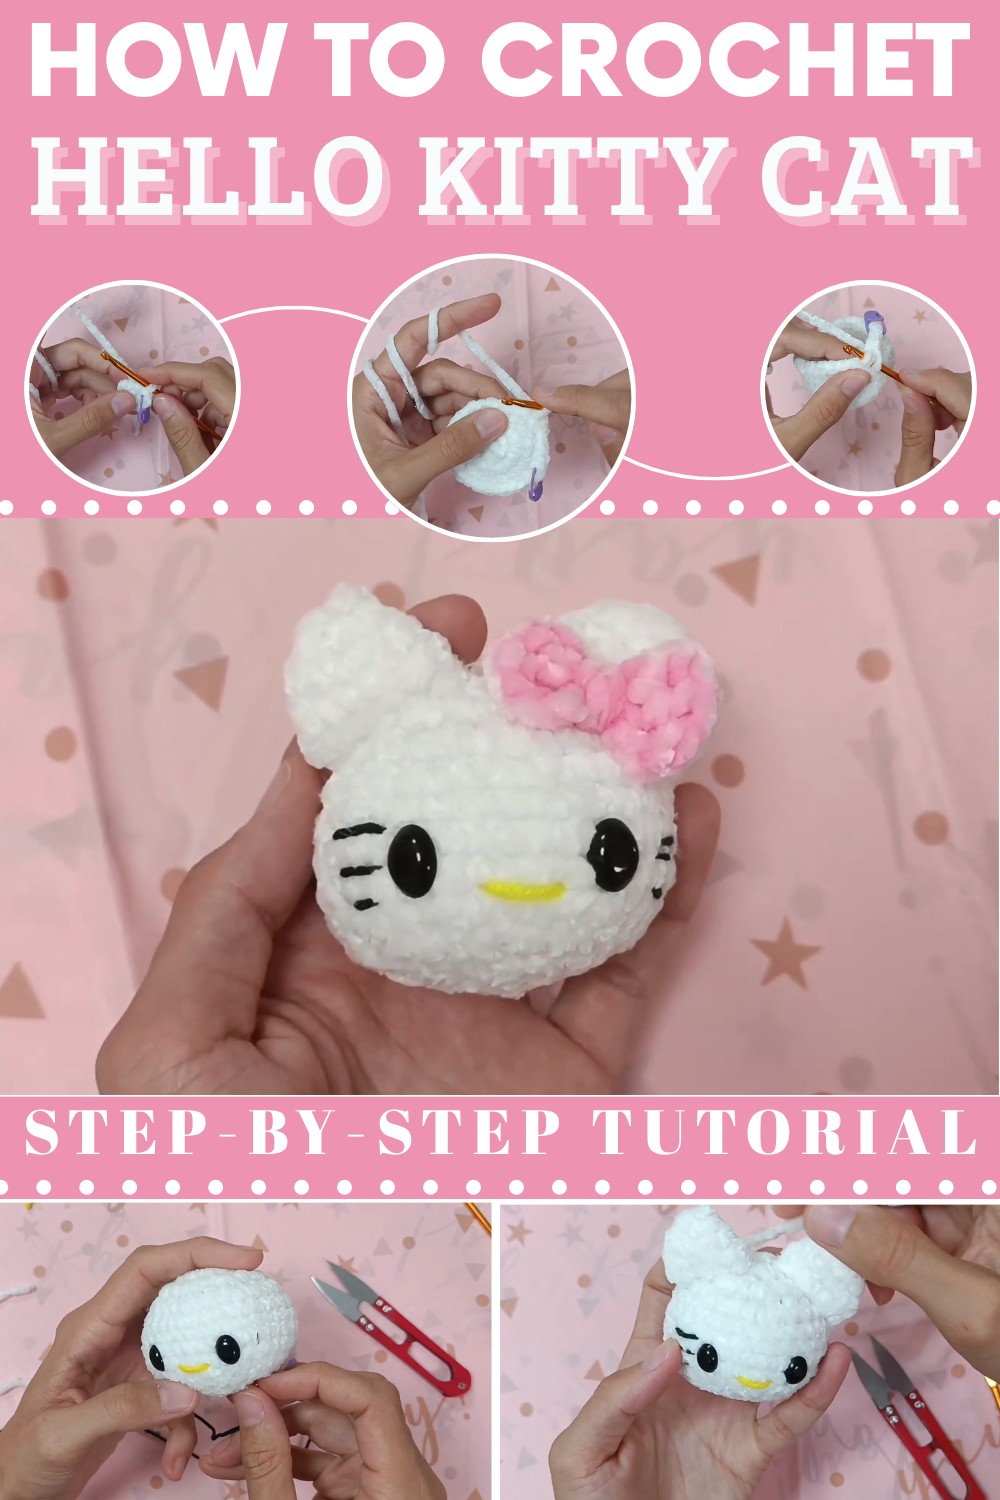
Hello Kitty Crochet Head Pattern
This tutorial guides you step-by-step on how to crochet a cute "Hello Kitty" head. The pattern is beginner-friendly and includes simple crochet techniques. You will learn how to create a plush Hello Kitty head, add features like eyes, nose, and a bow, and assemble the final project. With just a few materials and stitches, you’ll create a beautiful, handmade gift in no time!
Materials
To create your Hello Kitty head, you will need the following materials:
- 4 mm Crochet Hook
- Used for the entire project.
- White Yarn: Dolphin Baby yarn (or any plus other yarn — soft and comfortable for plush toys).
- Pink Yarn: For the bow (same type as white yarn for consistency).
- Safety Eyes: Two plastic black "noses," purchased from AliExpress (or use similar 6-8 mm safety eyes or alternatives).
- Black Yarn: Thick yarn for embroidering the whiskers. Cotton yarn works well.
- Yellow Yarn: Cotton yarn, used for embroidering the nose.
- Fiber Stuffing: For filling the plush head.
- Stitch Marker: Used to mark rows for counting stitches.
- Needle: For assembly and embroidering facial details (eyes, nose, whiskers).
- Scissors: For cutting yarn ends.
Abbreviations of Stitches
Below is the glossary of stitches and techniques mentioned:
- Ch: Chain stitch
- SC: Single Crochet
- INC: Increase (2 SC in the same stitch)
- DEC: Invisible Decrease (combining two stitches using front loops only)
- DC: Double Crochet
- Sl St: Slip Stitch
- Magic Circle/Ring: A method for starting crochet in rounds, forming a tightly adjustable loop.
- Front Loop Only (FLO): Working into the front loops of stitches for decreases and detailed shaping.
Step-by-Step Crochet Pattern
Hello Kitty Head
Round 1:
- Begin with a magic circle using white yarn.
- Crochet 8 Single Crochets (SC) into the magic circle.
- Pull the loop tight but not too tight.
- Place a Slip Stitch (Sl St) into the last stitch of the row to close the round.
You now have 8 stitches.
Round 2:
- Crochet 8 increases (2 SC in each stitch) to add volume.
- Example: SC into the first stitch, then SC into the same stitch again.
- Work this into each of the 8 stitches from Round 1.
- Place a slip stitch into the last stitch and mark it.
At the end of Round 2, you should have 16 stitches.

Round 3:
- Alternate 1 SC in the first stitch and 1 INC (2 SC in the same stitch) in the next stitch.
- Example: SC, INC, SC, INC... Repeat 8x.
- Place a slip stitch into the last stitch and mark it.
At the end of Round 3, you should have 24 stitches.

Round 4:
- Alternate 2 Single Crochets (SC) in the first two stitches and 1 INC in the third stitch.
- Example: SC, SC, INC, SC, SC, INC... Repeat 8x.
- Place a slip stitch into the last stitch and mark it.
At the end of Round 4, you should have 32 stitches.
Rounds 5-9: (Building the Shape of the Head)
- For Row 5, work 32 SC—1 SC in each stitch, all the way around.
- Repeat 32 SC per row for the next 4 rows, totaling five rows of 32 SC each.
- Example: Row 5, Row 6, Row 7, Row 8, and Row 9 are all 32 SC per row.
- After each row, place the stitch marker in the last stitch to track progress.
At the end of Round 9, the head’s structure is complete with 32 stitches.
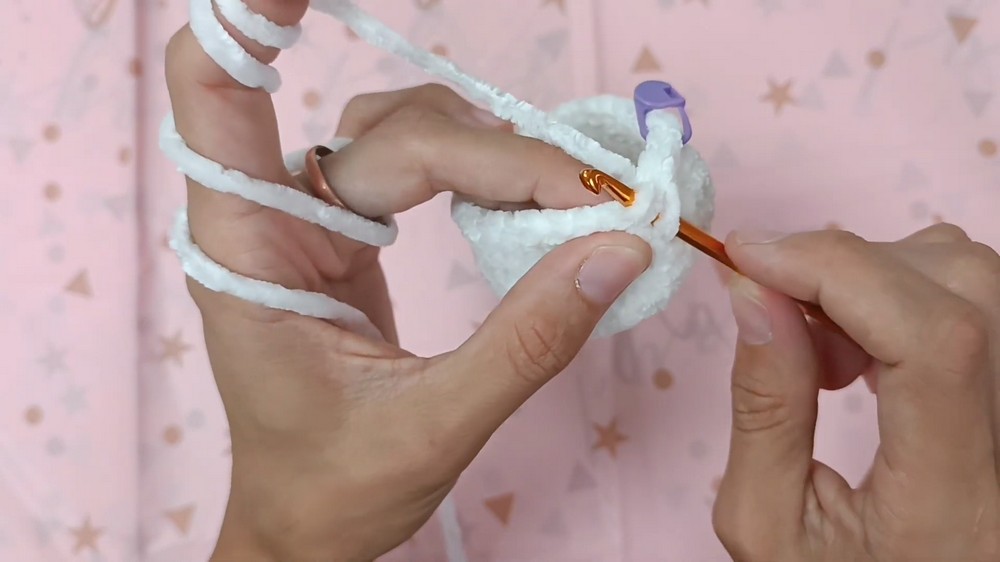
Row 10:
- Alternate 1 Single Crochet (SC) in the first stitch, 1 SC in the second stitch, and 1 DEC in the third for a total of 8 repeats (8 decreases).
- Example: SC, SC, DEC, SC, SC, DEC... Repeat 8x.
- Use the Invisible Decrease method (FLO) for smoother shaping.
At the end of Round 10, you should have 24 stitches.
Row 11:
- Alternate 1 SC in the first stitch and 1 DEC in the second stitch for 8 repeats (8 decreases).
- Example: SC, DEC, SC, DEC... Repeat 8x.
At the end of Row 11, you should have 16 stitches.
- Example: SC, DEC, SC, DEC... Repeat 8x.
- Lightly stuff the head with fiber filling to maintain shape but leave room for final stuffing later.
Row 12 (Final Row):
- Work 8 decreases (DEC all the way around).
- Place a slip stitch in the last stitch.
- Example: DEC, DEC, DEC... Repeat 8x.
At the end of Row 12, you should have 8 stitches left.
- Example: DEC, DEC, DEC... Repeat 8x.
- Cut the yarn, leaving a tail, and use a needle to sew through the front loops only of each stitch to close the hole tightly.
- Add the remaining filling fiber as needed before pulling tight and securing.
Ears
For each ear:
- Row 1: Create a magic circle, crochet 6 SC into the circle.
- Row 2: Work 1 SC in the first stitch, 1 INC in the second stitch. Repeat for a total of 3 repeats.
- Example: SC, INC, SC, INC... Repeat all around. You will now have 9 stitches.
- Row 3: Alternate 1 SC, 1 SC, 1 INC in the next stitch. Repeat for a total of 3 repeats. End with 12 stitches.
- Row 4: Work 1 SC in each stitch around (12 SC).
- Finish with a slip stitch, leaving a long tail for sewing.
- Repeat to make a second ear.
Assembly:
Use a needle to sew each ear onto the head. Position them symmetrically and firmly attach them by sewing the edges of the ear to the crocheted head.

Face Details (Eyes, Nose, Whiskers)
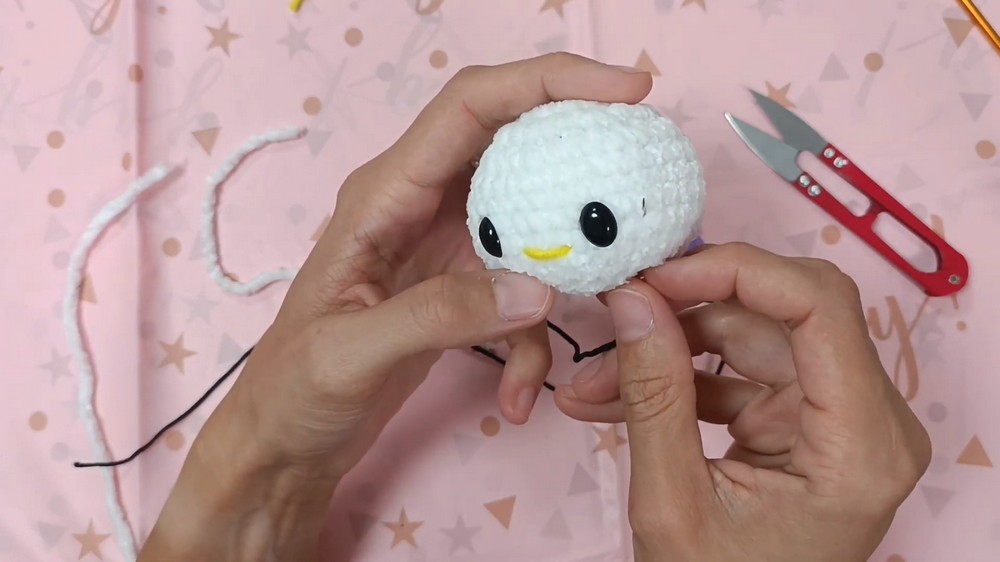
- Place the safety eyes between Rows 7 and 8, approximately 5 stitches apart. Insert and close securely with a click.
- Embroider the yellow nose using cotton yellow yarn. Position the nose between the eyes, counting two rows down; secure with your needle and hide the ends.
- Use black yarn to embroider whiskers. Start close to the eyes and make a small curve downward for each whisker. Add 2 whiskers per side.
Bow
- Start with a magic circle with pink yarn.
- Chain 3, then crochet 3 double crochets (DC) into the circle.
- Slip stitch into the magic circle to finish the first side.
- Repeat the pattern (Ch 3, 3 DC, Sl St) for the second side of the bow.
- Pull the magic ring tight, wrap yarn around the center of the bow a few times, and secure with stitches in the back.
- Sew the bow onto the head between one ear and the center.

Conclusion
Your adorable crocheted Hello Kitty head is now complete! This fun project is perfect for beginners and uses simple techniques like single crochet, invisible decreases, and basic embroidery. The process involves creating the head, adding facial features, ears, and an optional bow for a personalized touch. Use this pattern to create a thoughtful handmade gift or an addition to your collection.