
Fun Crochet Amigurumi Jack Santa Claus Free Pattern As A Christmas Gift
Dress up your holiday display with the Crochet Amigurumi Jack Santa Claus Free Pattern, a playful little character in a cheerful Santa outfit.
Want to add a little Christmas fun to your home without using the same holiday decorations every year? The Crochet Amigurumi Jack Santa Claus offers a fun way to give a familiar Christmas character a fresh and playful look. With its unusual expression and festive outfit, this little figure combines holiday cheer with a touch of spooky personality.
Spooky Crochet Amigurumi Jack Santa Claus Free Pattern In Holiday Style
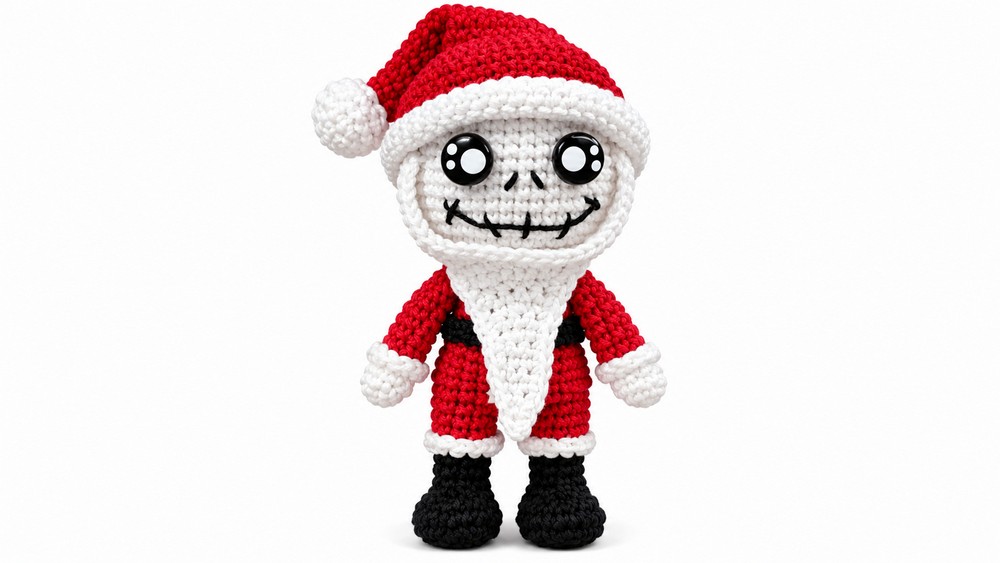
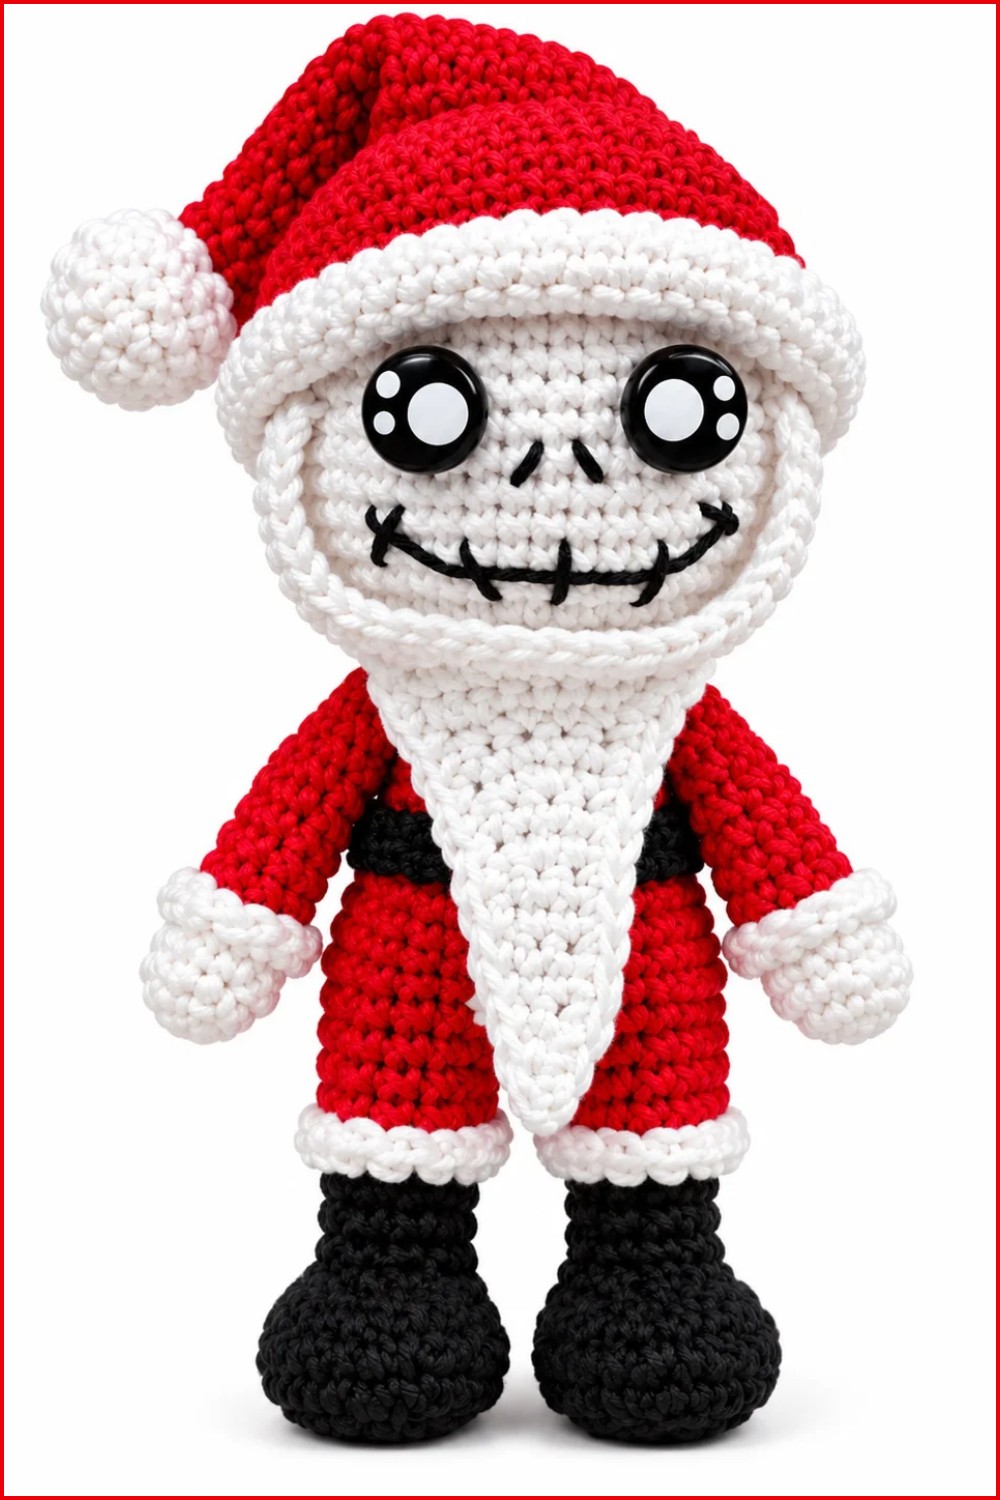
The most interesting part of this character is its Jack-inspired face. Large dark eyes, a wide stitched smile, and a pale head give it a striking appearance. The red Santa outfit adds a bright contrast, while the white trim and Christmas hat help complete its seasonal style. Its thin limbs and unusual body proportions give it a different look from traditional Santa figures.
Another nice feature is the combination of simple shapes and small decorative details. The head can be formed with crochet rounds, while careful stitch placement helps achieve the character's recognizable expression. Red, white, and black yarn can highlight the main parts, and gentle filling keeps the figure's shape neat.
This character is a fun choice for people who love The Nightmare Before Christmas and unusual holiday decorations. It can stand among Christmas ornaments, become part of a festive movie-themed display, or serve as a fun present for someone who likes Jack Skellington.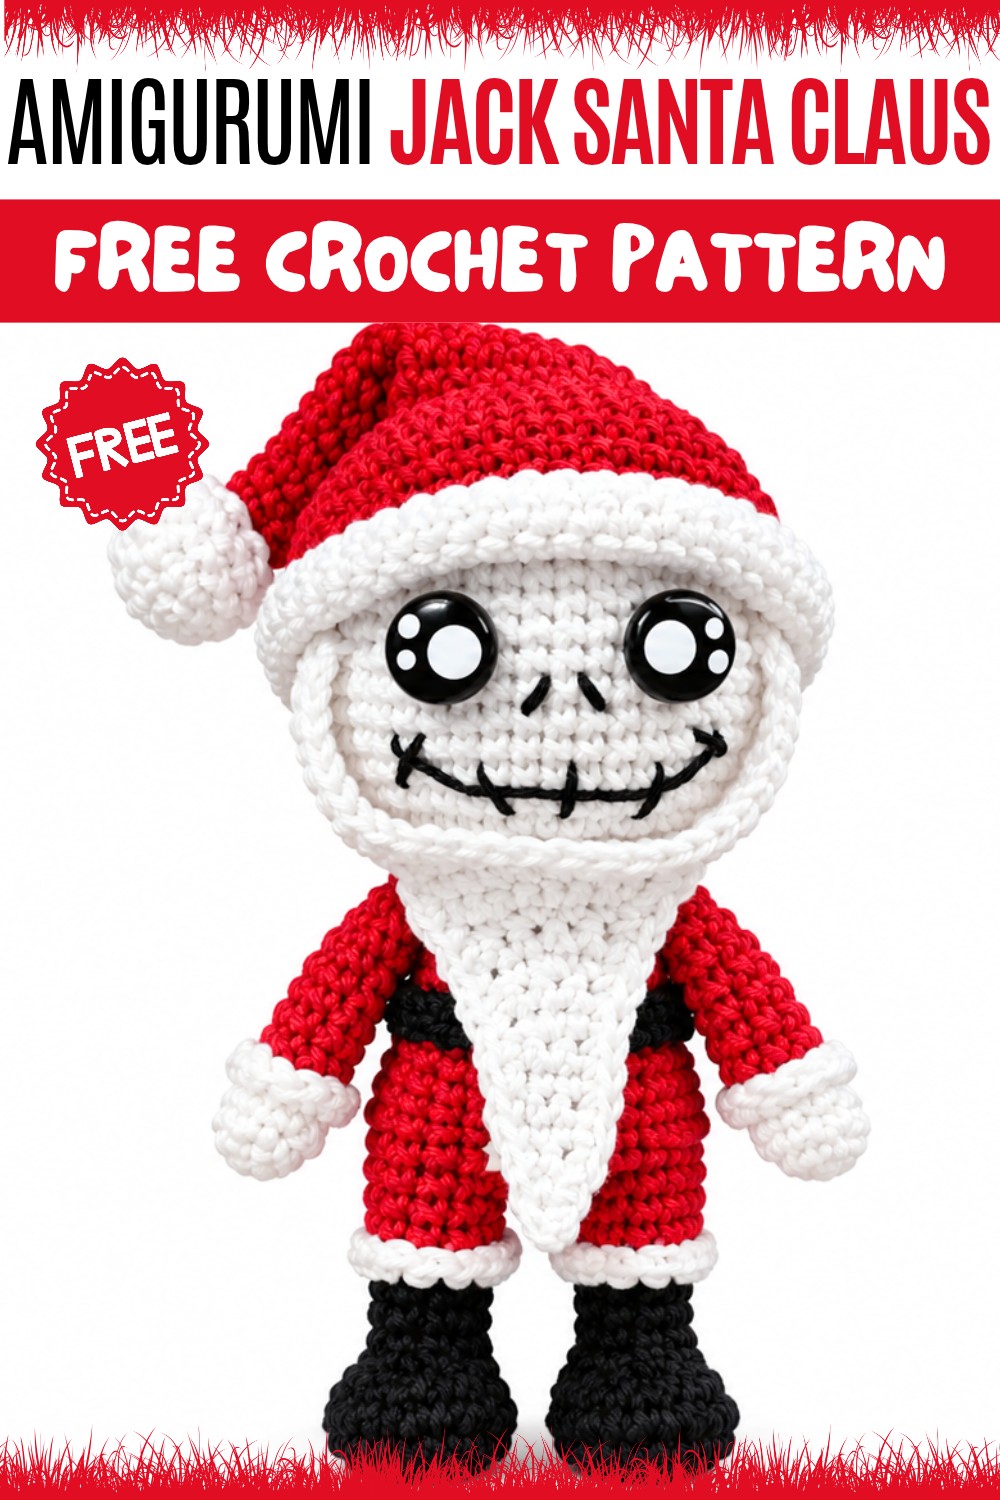
The mix of Christmas clothing and Jack's memorable face gives this amigurumi a look that feels both festive and unusual. It is a fun little project for adding personality to seasonal celebrations.
About the Pattern
Crafting a Jack Skellington amigurumi dressed as Santa Claus blends the iconic style of "The Nightmare Before Christmas" with the festive charm of holiday décor. This crochet pattern highlights sculpted shaping and careful details to authentically capture Jack’s elongated shape, expressive face, and signature Santa costume. Each element—from body proportions to facial embroidery and tailored accessories—is designed for a polished result, making this a project as rewarding as it is striking.
Pattern at a Glance
- Pattern Type: Amigurumi (Jack Skellington in Santa suit)
- Construction: Worked in the round, with separate pieces for arms, hat, beard, and accessories
- Key Features: Elongated limbs, expressive face, detailed costume elements
- Skill Focus: Seamless shaping, joining, colorwork, and basic embroidery
Important Notes
- Crochet uses US terms unless otherwise stated.
- Work in continuous spiral unless told otherwise.
- Use stitch markers to track round starts.
- Color changes are worked by finishing the stitch before the change with the new color.
- Safety eyes must be inserted before the head is fully closed.
- Stuff parts as you go for smooth shaping.
Difficulty Level
Intermediate – Suitable for crafters who have experience with continuous rounds, increases, decreases, color changes, and embroidery. Some small parts and detailed shaping require careful work.
Supplies Needed
- DK or worsted weight yarn in:
- White (body, head, beard, accessories)
- Red (Santa hat, suit)
- Black (facial embroidery, suit details)
- Crochet hook matching yarn size (typically 2.5–3.5mm)
- Pair of 6–8mm safety eyes
- Yarn needle
- Polyester stuffing
- Stitch markers
- Scissors
- Sewing pins
- Black sewing or embroidery thread
Size & Measurements
- Height: Approximately 18–20 cm (with hat, using DK yarn and a 2.5–3mm hook)
- Measurements may vary depending on yarn and tension
Gauge & Stitch Details
Gauge is not critical, but stitches should be firm and tight to retain stuffing.
Suggested reference: 6 sc x 6 rounds = 2.5 x 2.5 cm
Crochet Abbreviations
| Abbreviation | Meaning |
|---|---|
| sc | single crochet |
| inc | increase (2 sc in one stitch) |
| dec | decrease (sc two stitches together) |
| ch | chain |
| hdc | half-double crochet |
| dc | double crochet |
| dtr | double treble crochet |
| st(s) | stitch(es) |
| MR | magic ring |
| sl st | slip stitch |
Special Stitch Guide
- Magic Ring: Create a loop, crochet stitches inside, pull tight.
- Increase (inc): Work 2 sc in one stitch.
- Decrease (dec): Single crochet two stitches together.
- Color Change: Complete last loop of previous stitch with new color.
Complete Crochet Pattern
Arms (Make 2)
Round 1:
- Magic ring, 7 sc (7 sts)
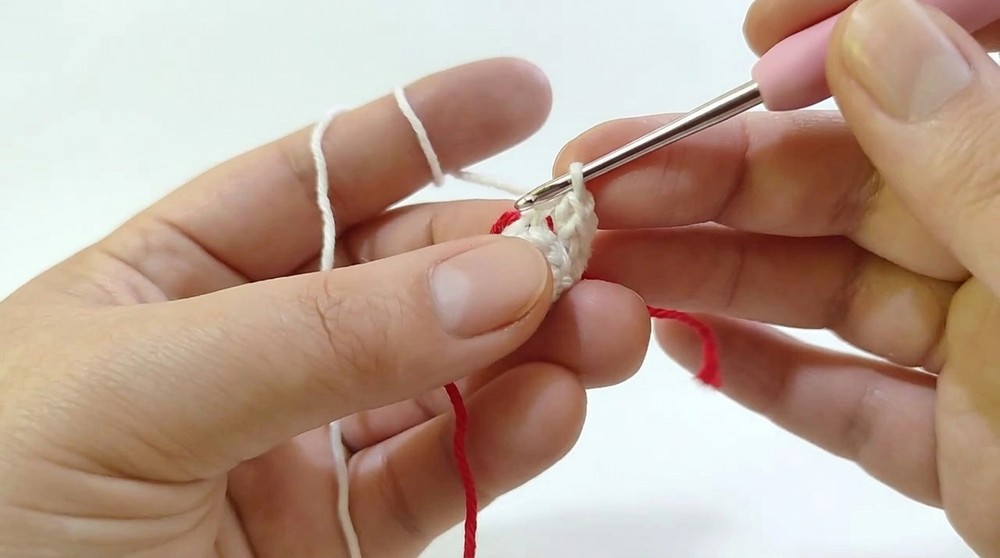
Rounds 2–7:
- sc in each st (7 sts per round)
Round 8:
- Change to white (for sleeve cuff), sc in each st
Rounds 9–12:
- Continue sc in each st (7 sts).
Fasten off, leaving tail for sewing. Lightly stuff the sleeves.
Body & Legs
Round 1:
- Magic ring, 6 sc (6 sts)
Round 2:
- 6 inc (12 sts)
Round 3:
- (1 sc, 1 inc) x6 (18 sts)
Rounds 4–5:
- sc in each st (18 sts)
Round 6:
- (1 sc, 1 dec) x6 (12 sts)
Round 7:
- (2 sc, 1 dec) x3 (9 sts)
Leg Formation:
- Divide for legs: With 9 sts, split into two legs of 4 and 5 sts. Work in rounds for each "leg" or as preferred, joining them with a ch 3.
- Work even in sc for a few rounds for each leg segment (refer to time 4:01–10:13 for specific shaping).
- Once the legs are as long as desired, join with a ch 3 bridge, and continue around all stitches to begin the body.

Body Shaping
Rounds 8–10:
- Work sc evenly around the joined legs and ch-3 bridge (stitch count will be approximately 14–18 sts; ensure even distribution).
Rounds 11–15:
- Increase evenly to reach 24 sts.
Rounds 16–20:
- Work sc in each st (24 sts per round)
Rounds 21–23:
- (2 sc, 1 dec) around (to reduce slightly; end with around 18–20 sts)
Rounds 24–26:
- Further decrease to about 12 sts to narrow for neck.
Head
Round 27:
- Increase evenly to 18 sts
Round 28:
- inc every 2nd st (24 sts)
Round 29:
- (3 sc, 1 inc) x6 (30 sts)
Round 30:
- (4 sc, 1 inc) x6 (36 sts)
Round 31:
- (5 sc, 1 inc) x6 (42 sts)
Rounds 32–35:
- Work sc in each st (42 sts per round)
- Insert safety eyes between rows 35–36, 7 sts apart.

Rounds 36–39:
- (5 sc, 1 dec) x6 (36 sts), (4 sc, 1 dec) x6 (30 sts), (3 sc, 1 dec) x6 (24 sts), (2 sc, 1 dec) x6 (18 sts)
Rounds 40–41:
- (1 sc, 1 dec) x6 (12 sts), then 6 dec to close.
- Add final stuffing before closing. Fasten off and hide tail inside.
Belt
- Ch 27, turn.
- Row 1: sc in 2nd ch from hook and across (26 sts)
- Fasten off. This will wrap and be stitched around the body.
Suit Tail
- First half: Ch 11
- Row 1: sc in 2nd ch, hdc in next, dc in next 2, tr in next, dtr in next 5 (or as preferred for shape; tail length/taper may be adjusted).
- Repeat for second half.
- Sew both parts together at the top to form a split suit tail.
Santa Hat
Round 1:
- MR, 6 sc (6 sts)
Round 2:
- (1 sc, 1 inc) x3 (9 sts)
Rounds 3–4:
- (2 sc, 1 inc) x3 (12 sts), then sc around
Continue increasing:
- (3 sc, 1 inc) x3 (15 sts), (4 sc, 1 inc) x3 (18 sts), up to (7 sc, 1 inc) x6 (48 sts)
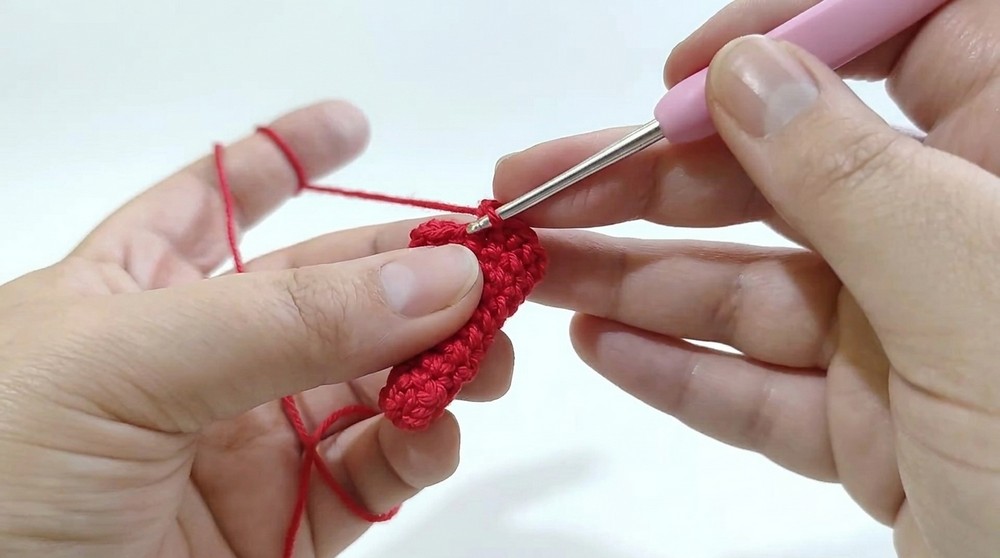
Switch to white (brim):
- 1–2 rounds sc in each st (48 sts each)
- Finish, leave a long tail for sewing, and lightly stuff the tip if desired.
Hat Pom-pom
Round 1:
- MR, 6 sc (6 sts)
Round 2:
- 6 inc (12 sts)
Round 3:
- (1 sc, 1 inc) x6 (18 sts)
Round 4:
- (1 sc, 1 dec) x6 (12 sts)
Finish off and close. Attach to tip of the Santa hat.
Beard
- Ch 2.
- Row 1: Sc in each (2 sts)
- Row 2: Inc in each (4)
- Row 3: (1 sc, inc) x2 (6)
- Continue in rows, increasing at edges, to desired size/shape (refer to 28:53–35:08).
- Form curved/pointed bottom and finish off; weave in ends.
Face Details
- With black thread, embroider nose (two vertical lines) and the smile with spaced vertical “scars.” Use sewing pins to map the face first for balance.
Assembly & Finished Size
- Belt: Position around Jack's waist; stitch or glue the ends neatly.
- Suit Tail: Attach at the back, below the belt.
- Arms: Sew to each side of body, aligning cuffs with the suit join.
- Beard: Secure to Jack’s chin, ensuring the narrower end rests just below mouth.
- Santa Hat: Place above eyes and secure with stitches.
- Pom-pom: Attach firmly to the tip of the hat.
- Finish any face embroidery or costume detail adjustments as needed.
- Final height is typically 18–20 cm, depending on materials and individual tension.
Conclusion
This Jack Skellington amigurumi pattern is designed to accurately capture the character’s unique form along with Santa’s classic outfit. Careful attention to proportion, colorwork, and sequential assembly ensures a finished character rich with visual interest and expressive detail. The blend of shaped limbs, tailored accessories, and thoughtful embroidery allows for both accuracy and personal flair, resulting in a memorable handcrafted holiday figure. The combination of clear structure and festive embellishments makes this project a rewarding addition to any amigurumi collection or seasonal display.