
Cute Crochet Cactus Free Pattern for Home Décor
The Crochet Cactus Free Pattern is a great project for beginners and intermediate crocheters who enjoy making small decorative items. Its compact size makes it easy to display in different spaces, while its simple style fits beautifully with a variety of home décor themes. This crochet cactus is also a wonderful option for gift baskets, or adding something fresh to your collection of crochet plants.
Throughout the project, you'll use basic crochet techniques that help improve your skills while keeping the process enjoyable and relaxing. Cotton yarn or acrylic yarn can be used in a range of colors to give your crochet cactus a personal touch. The project is easy to follow and offers a satisfying experience for anyone who enjoys making amigurumi and decorative crochet pieces.

Whether you love crochet plants, handmade decorations, or small amigurumi projects, the Crochet Cactus Pattern is a fun addition to your crochet list. Continue to the full crochet pattern and enjoy making a charming decoration that adds warmth, creativity, and a handmade touch to any space.

Crochet Cactus Pattern
In this pattern, you will learn how to crochet a charming amigurumi cactus with a textured body and matching pot. This project is beginner-friendly and uses simple stitches, making it perfect for those new to amigurumi or crochet in general. The cactus has a ribbed texture thanks to working single crochet stitches in the back loop only. The pot is created using rounds starting from a magic ring and featuring gradual increases to form a circular base. By following this tutorial, you will be able to make an adorable cactus that stands well on desks or shelves, ready to enhance your living space.
Notes
- Safety pins can be used as stitch markers to track rounds or stitches
- The choice of cotton yarn for the cactus body provides a natural matte look suitable for plants, while acrylic yarn for the pot adds sturdiness
- Toy stuffing shouldn’t be overstuffed to maintain a soft yet stable shape
- Working in the back loop only for the cactus body produces a ribbed texture mimicking cactus ridges
- Continuous rounds for the pot with no slip stitches between rounds keep stitches even and easier to work
- Use a blunt tapestry needle for sewing to avoid yarn splitting
- Hot glue can be applied carefully to fix the pot to the cactus, especially when gifting to avoid detachment
Skill Level
Beginner to Intermediate:
This pattern involves basic stitches such as chain (ch), single crochet (sc), and working in back loops only (BLO). You will also practice joining seams by sewing or slip stitching edges and creating rounds with a magic ring. No advanced shaping techniques are used, making it accessible for beginners while providing practice in consistent stitch tension.
Materials
- Green cotton yarn for cactus body (approx. 50–70 grams)
- Brown acrylic or poly yarn for pot (approx. 30–40 grams)
- 3.5 mm crochet hook
- Toy stuffing suitable for amigurumi projects
- Scrap yarn for extra stuffing support (optional)
- Yarn needle for sewing
- Stitch marker or safety pin (optional)
- Hot glue gun and glue sticks (optional, for assembly)
Measurements / Sizing
- Cactus body: approx. 4.5 inches wide and 3.5 inches tall rectangle before joining; when joined forms a tube approximately 4 inches wide and 5–6 inches tall after stuffing
- Pot base: approx. 2.5 inches diameter after 4 rounds, 1.25 inches tall after 8 rounds
- Overall cactus height: approx. 5–6 inches
Gauge & Stitch Pattern
- Gauge: Approximately 20 single crochet stitches and 16 rows = 4.5” × 3.5” using 3.5 mm hook and cotton yarn (varies by tension)
- Stitch pattern: Single crochet in back loop only (BLO) produces distinctive ribbed texture replicating cactus ridges
Stitch Abbreviations
- ch = chain
- sc = single crochet
- BLO = back loop only single crochet
- inc = increase (2 sc in one stitch)
- sl st = slip stitch
- st(s) = stitch(es)
Special Stitches
- Back Loop Only Single Crochet (BLO): When inserting the hook into the stitch, insert only under the back loop (the loop farthest from you), yarn over, pull through, then complete the single crochet. This results in horizontal ridges along the row.
- Magic Ring: A technique to begin crocheting in the round by creating a loop of yarn you crochet into, then pulling tight to eliminate any hole in the center of your work.
The Crochet Pattern
Cactus Body (Worked Flat in Rows)
Row 1:
- Chain 21.
- Starting from 2nd chain from hook, work 1 sc in each chain across; total 20 sc.
Row 2:
- Chain 1, turn your work.
- Work 1 sc in the back loop only (BLO) of each stitch across; total 20 sc.

Rows 3 to 16:
- Repeat Row 2 (chain 1, turn, 20 BLO sc) until you reach a total of 16 rows.
- Maintain consistent stitch tension to keep edges straight.
Joining Cactus Body Tube
Step 1:
- Fold your rectangular piece with the short edges aligned, right sides facing each other if your yarn has a clear right side.
Step 2:
Option A – Sewing:
- Thread a yarn needle with a long tail of the same green yarn.
- Starting at one end, insert needle through back loop of one side and front loop of the other side alternately to create a neat, flat seam.
- Continue sewing up to the other end but leave openings at top and bottom for stuffing.

Option B – Crocheting:
- Using the crochet hook and yarn, single crochet the two edges together by inserting hook through back loop on one edge and front loop on the other, then completing a sc stitch.
- Continue for full length.
- This method produces a textured seam.

- Use needle and yarn to close the bottom of the cactus tube by stitching in and out along the edge tightly until hole is fully closed.

Stuffing the Cactus Body
Step 1:
- Using toy stuffing, fill the tube firmly but not overly tight; leave a little give for a soft texture.
Step 2:
- Add scrap yarn or extra filling to reinforce structure as needed.
Step 3:
- Close the top opening by stitching as you did for the bottom; weave in yarn ends securely.
Pot Base (Worked in Continuous Rounds)
Round 1:
- Using brown yarn, make a magic ring.
- Chain 1 to start.
- Work 6 sc inside the ring.
- Pull the tail to close the ring tightly.
- Place stitch marker at the last stitch to mark rounds (optional).
Round 2:
- Work 2 sc in each stitch around; total 12 sc.
Round 3:
- 1 sc in next stitch, 2 sc in next stitch – repeat around; total 18 sc.
Round 4:
- 1 sc in each of next 2 stitches, 2 sc in next stitch – repeat around; total 24 sc.

Rounds 5 to 8:
- Work 1 sc in each stitch around (24 sc per round).
- These rounds build the height of the pot.
Step to Finish:
- Slip stitch (sl st) into the last stitch of Round 8.
- Fasten off, leaving a long tail for assembly.
Assembly
Step 1:
- Lightly stuff the pot with scrap yarn or toy stuffing to give shape.
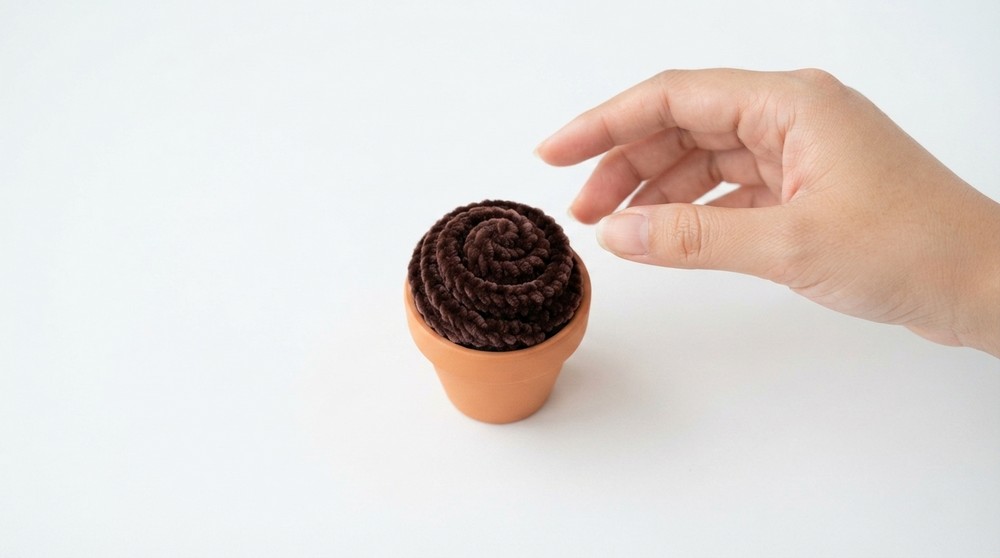
Step 2:
- Turn cactus body tube upright.
Step 3:
- Position pot base around cactus bottom.
Step 4:
- Attach pot to cactus either by sewing carefully or using hot glue.
- Hot glue gives a firm hold, especially suitable for gifting or display.

Finished Size
- The amigurumi cactus stands approximately 5-6 inches tall, about 4 inches wide in diameter.
- The pot diameter is roughly 2.5 inches with a height of 1.25 inches.
Conclusion
Congratulations on completing your amigurumi cactus. This pattern combines easy-to-master stitches with textured effects to deliver a charming project suitable for all skill levels. With simple assembly techniques and versatile materials, you can create charming home décor or gifts customized with flower embellishments or color changes. As you refine your crochet skills, try altering stitch counts or height for different cactus sizes. Thank you for following this pattern Happy hooking.
Quick Overview of Pattern
- Crochet a rectangular cactus body, 20 stitches wide and 16 rows high, working single crochet stitches in the back loop only (BLO)
- Join the two short edges to form a tube shape
- Stuff the cactus tube with toy stuffing and scrap yarn for firmness
- Close the bottom and top edges securely with needle and yarn
- Crochet a small pot starting with a magic ring and gradually increasing stitches over 4 rounds
- Work 4 additional rounds of single crochet for pot height, maintaining stitch count
- Attach the pot to the cactus base using sewing or hot glue
- Optional: Add flower embellishments or decorations
