
Easy Santa Claus Amigurumi Crochet Pattern – Free
Bring festive joy to your holiday season with this free crochet SANTA CLAUS amigurumi pattern, perfect for creating handmade gifts and cheerful decor.
There's something truly magical about handmade holiday decorations, and this free crochet SANTA CLAUS AMIGURUMI pattern captures that festive spirit perfectly. This charming little doll showcases Santa’s classic look, complete with his fluffy white beard, jolly red suit, and twinkling eyes. Its compact, rounded shape and soft texture make it perfect for cozy holiday displays or as a thoughtful, handcrocheted gift.
Crochet Santa Claus Toy – Free & Easy Amigurumi Pattern

Ideal for crocheters who have a bit of amigurumi experience, this project isn’t overly complicated but offers just enough detail to keep things interesting. Typically, the finished piece measures around 6 to 8 inches tall, though you can easily adjust the size by using a different hook or yarn thickness. The construction mainly involves working in continuous rounds with simple stitches, along with some color changes and carefully placed embroidery to bring Santa’s features to life. Using stitch markers and stuffing firmly will help maintain the shape and provide a neat, sturdy finish.

This design grew out of a love for the warmth and joy that the holiday season brings, aiming to create a cuddly character that spreads smiles. I recommend using a soft, worsted weight acrylic or cotton blend yarn since it highlights the tight stitches nicely and stands up well to handling year after year. These amigurumis make wonderful gifts, festive ornaments, or charming stocking stuffers—plus, they invite you to add your own creative touches, like a tiny sack of toys or embroidered rosy cheeks, making each Santa truly unique.

Amigurumi Santa Claus – Step-by-Step Crochet Pattern
This detailed step-by-step pattern guides you through creating an adorable and festive amigurumi Santa Claus (V2, Big Version). The project is seamless, working continuously in the round using single crochet, with the body, head, and limbs integrated. Accessories like Santa's suit, belt, hat, mustache, and boots are made and attached for an authentic look. The resulting plush is perfect as a centerpiece for Christmas or as a heartfelt handmade gift.
Pattern Notes
- All rounds are worked as continuous spirals without joining unless otherwise stated. Use a stitch marker or safety pin at the beginning/end of each round.
- Instructions include color changes and working in front/back loop when required. Always change yarn by pulling through the new color in the last pull-through of the prior stitch.
- Use invisible decrease unless otherwise indicated for a neater finish.
- Stuff pieces firmly as you go.
- Accessories such as the mustache, beard, and glasses are hand sewn or glued on at the end.
Skill Level
Adventurous Beginner to Intermediate.
You’ll use single crochet, slip stitch, chain, increases/decreases, and basic sewing for assembly. Some experience with color changes and working in loops is helpful.
Materials
- Red acrylic yarn
- Light pink acrylic yarn (or skin color)
- Black acrylic yarn
- White cotton or acrylic yarn (standard or fur/textured types for mustache/beard)
- 3mm crochet hook
- Small white pom-poms for hat
- Small safety eyes
- Doll glasses (craft/fake)
- Yarn needle
- Scissors
- Toy stuffing
- Stitch marker or safety pin
- (Optional: glue gun for gluing on accessories)
Measurements / Sizing
- Finished size: approx. 24–28 cm (9.5–11 in), depending on yarn and tension.
- Schematic: Chubby, cuddly Santa with big beard, removable glasses, and classic suit.
Gauge
Not critical for amigurumi, but for reference:
10 sc x 10 rows = 4 x 4 cm using 3 mm hook with worsted yarn.
Stitch Abbreviations
- sc = single crochet
- inc = increase (2 sc in next stitch)
- dec = decrease (invisible decrease)
- MR = magic ring
- ch = chain
- sl st = slip stitch
- hdc = half double crochet
- dc = double crochet
- FO = fasten off
Special Stitches
- Invisible Decrease (dec): Insert hook in front loops of next two stitches, yarn over, pull up a loop, yarn over, pull through both loops.
The Crochet Pattern
Head & Upper Body
With light pink (skin tone) yarn:
- MR, ch 1, 6 sc into ring. (6)
- Increase in each st around (12)
- (Sc in next st, inc) around (18)
- (Sc in next 2, inc) around (24)
- (Sc in next 3, inc) around (30)
- (Sc in next 4, inc) around (36)
- (Sc in next 5, inc) around (42)
- (Sc in next 6, inc) around (48)
- (Sc in next 7, inc) around (54)
- (Sc in next 8, inc) around (60)

Work even rounds:
11–20. Sc in each st around (60 sts per round, 10 rounds)
Head shaping (decreasing):
- (Sc in 8, dec) around (54)
- (Sc in 7, dec) around (48)
- (Sc in 6, dec) around (42)
- (Sc in 5, dec) around (36)
- (Sc in 4, dec) around (30)
- (Sc in 3, dec) around (24)
- (Sc in 2, dec) around (18)
- Stuff the head very firmly here.
- Sc in each st around (18)
Change to red yarn for Santa’s suit/body (switch in last st of round 28):
- Sc in each st around (18)
- (Sc in 2, inc) around (24)
- (Sc in 3, inc) around (30)
- (Sc in 4, inc) around (36)
- (Sc in 5, inc) around (42)
- (Sc in 6, inc) around (48)
- (Sc in 7, inc) around (54)
- (Sc in 8, inc) around (60)
- (Sc in 9, inc) around (66)
- (Sc in 10, inc) around (72)
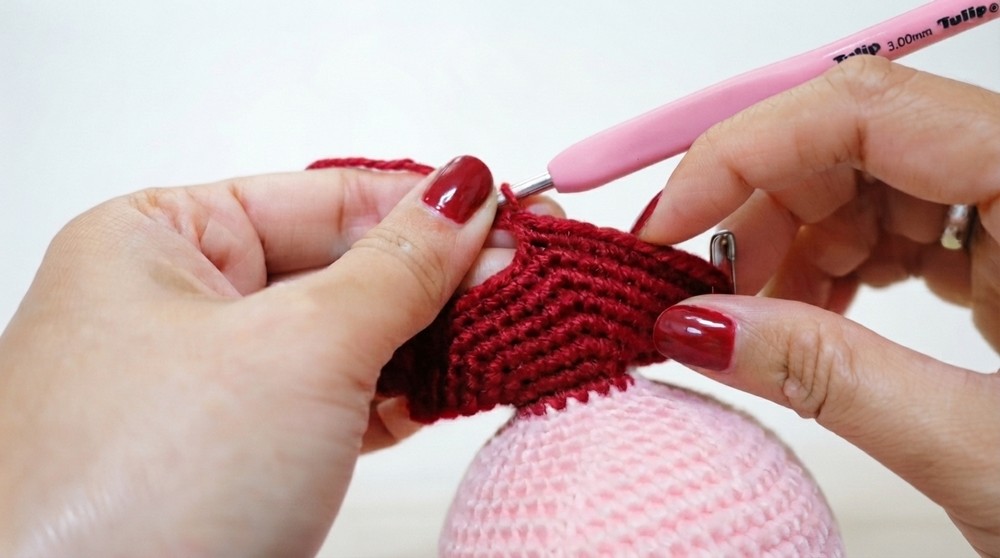

Arm Partition & Torso
- Divide for arms: Flatten the top edge. Use stitch markers to mark two sets of 16 stitches on either side for arms. The 40 stitches in the center bottom are used for the torso.
- Torso:
- Round 1: Sc in 40 torso sts. Place your marker.
- Rounds 2–9: Sc in each st around (40 sts/round, 9 rounds total).
- Round 10: Sc in each st back loop only (for shirt band; 40 sts). Stuff torso after this round.


Leg Partition & Legs (Make 2)
- Divide the 40 sts evenly (20 per leg).
- For each leg:
- Rounds 1–17: Sc in each of the 20 sts (17 rounds).
- Stuff firmly as you go.
- Sew closed using in/out stitches with yarn needle.
Santa’s boots are made separately (see assembly).
Arms (Make 2)
With red yarn:
- Attach to first arm partition stitch. Ch 1.
- Round 1: Sc in each of 16 arm sts.
- Rounds 2–12: Sc around (16 sts/round; 12 rounds in total).
- Round 13: Sc in each st back loop only (16).
- Change to light pink. Rounds 14–15: Sc in each st around (16).
- Stuff lightly.
- FO, sew closed in/out as legs.
Sleeve Cuffs: With white yarn, join to BLO round of arm, work 1 hdc in each front loop around. FO.
Santa’s Shirt Trim (Bottom Hem)
At the torso’s back loop round, join red yarn in the first front loop, and:
- Round 1: Work sc in each front loop around.
- Round 2: Sc in each st around (both loops).
- Round 3: Switch to white yarn (fuzzy optional) and work hdc in each st around, FO, and weave in ends.
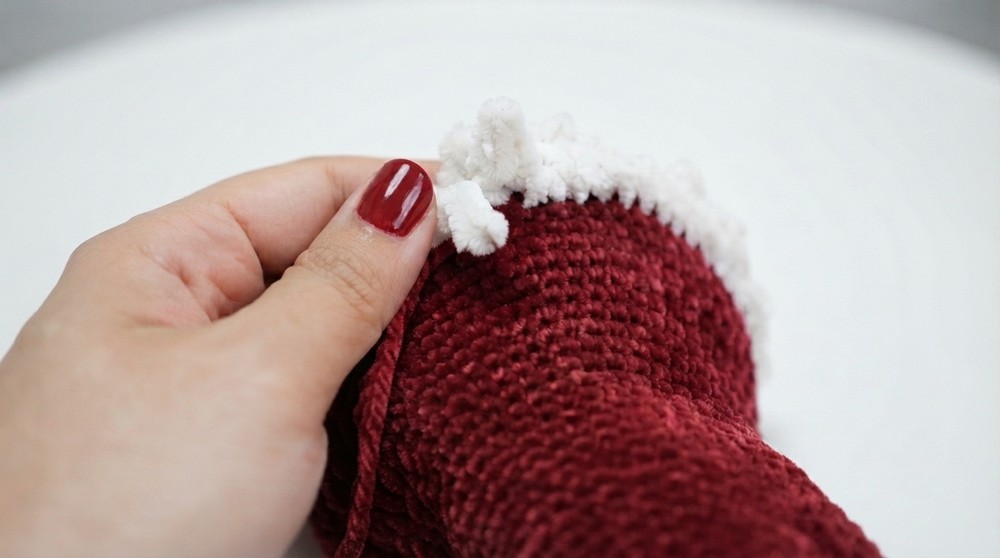
Santa’s Belt
With black yarn:
- Ch 41.
- Row 1: Sc in second ch from hook and across. (40 sc)
- FO.
- Wrap around Santa’s waist, sew ends together, or sew to body as desired.
Santa’s Boots
With black yarn:
- Ch 21. Row 1: Sc in 2nd ch from hook and across (20).
- Rows 2–5: Sc across (20).
- FO. Wrap around the leg bottom, sew edges together, and to the ankle/lower leg as needed.
Santa’s Hat
With red yarn:
- MR, ch 1, 6 sc into ring (6)
- Round 2: Inc in each st (12)
3–4. Sc around (12, 2 rounds) - (Sc, inc) around (18)
6–8. Sc around (18, 3 rounds) - (Sc in 2, inc) around (24)
10–13. Sc around (24, 4 rounds) - (Sc in 3, inc) around (30)
15–19. Sc around (30, 5 rounds) - (Sc in 4, inc) around (36)
21–26. Sc around (36, 6 rounds) - (Sc in 5, inc) around (42)
- Sc around (1 round)
- (Sc in 6, inc) around (48)
- Sc around (1 round)
- (Sc in 7, inc) around (54)
- Sc around (1 round)
- (Sc in 8, inc) around (60)
34–37. Sc around (up to 10 rounds, as desired for height)
- You may add or subtract rounds to preference.
Fur Rim of Hat: Switch to white yarn, hdc in each st around. FO, weave in tails. Attach pom-pom at tip.
Santa’s Mustache/Beard
- With white textured (fur or thick) yarn and 6 mm hook:
- Ch 26.
- Row 1: Dc in fourth ch from hook and each ch across (counts as 24 dc).
- Row 2: Ch 3, turn, dc in each st across (24).
- FO.
- Skip 7 sts, rejoin yarn, sc in next 2 sts, dc in next 6 sts, sc in last 2 sts, FO.
- This shapes the mustache; trim ends. Sew to face under the nose.
Santa’s Glasses
- Use a purchased set of small doll glasses, or craft from gold wire as desired.
Assembly & Finished Size (Bulleted)
- Firmly stuff all parts as you go.
- Sew arms onto shoulder openings.
- Use the black boot pieces to finish feet, whipstitch closed and secure to legs.
- Sew belt around Santa’s waist, secure ends or glue.
- Attach hat to head, tilting slightly to one side. Sew around, securing well.
- Glue or sew white pom-pom to end of hat.
- Position and sew mustache/beard beneath nose.
- Insert and secure safety eyes, above mustache and spaced evenly.
- Add doll glasses on face and secure gently with glue or thread.
- Weave in and trim all yarn tails.
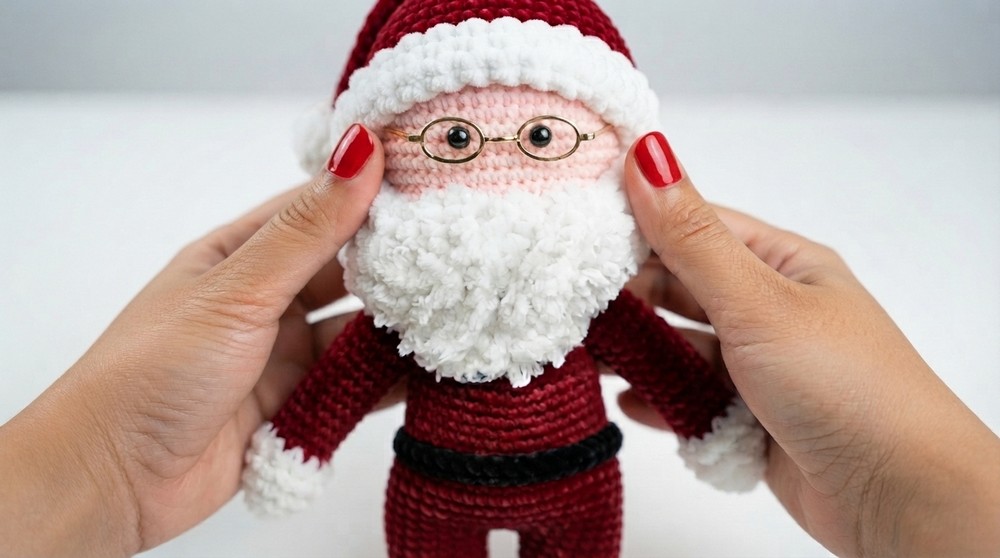
Quick Pattern Overview for Beginners
- Work head and body in a single piece, changing colors as instructed.
- Increase, then decrease for head shaping; begin body with red; stuff as you go.
- Divide for arms and legs, crocheting these in the round directly on the main piece.
- Add boots and belt after legs are done.
- Crochet arms and sleeves, change to skin tone for hands.
- Create hat and add white fur rim and pom-pom.
- Stitch mustache/beard, sew hat to head, and secure all parts.
- Attach safety eyes and glasses. All details are simple shapes and easily assembled!